
🤍WELCOME HERE🤍
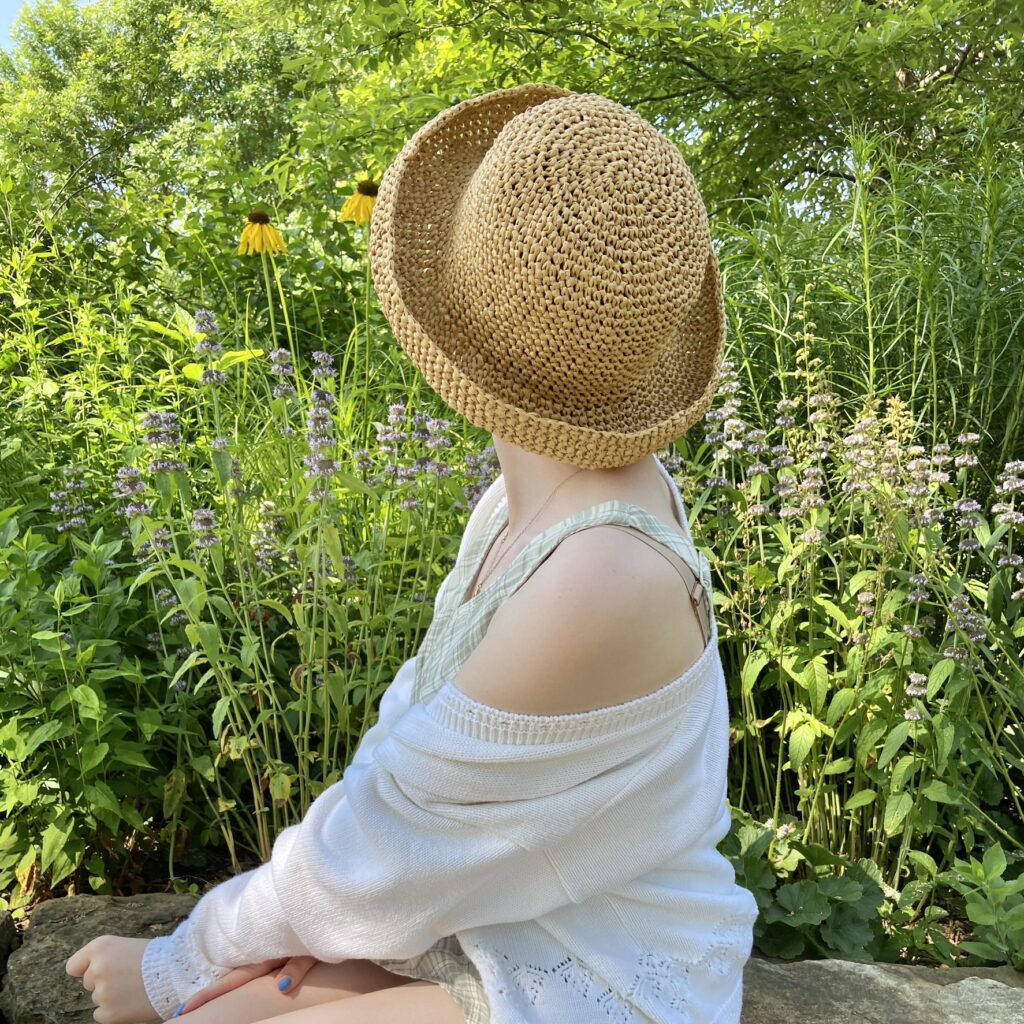
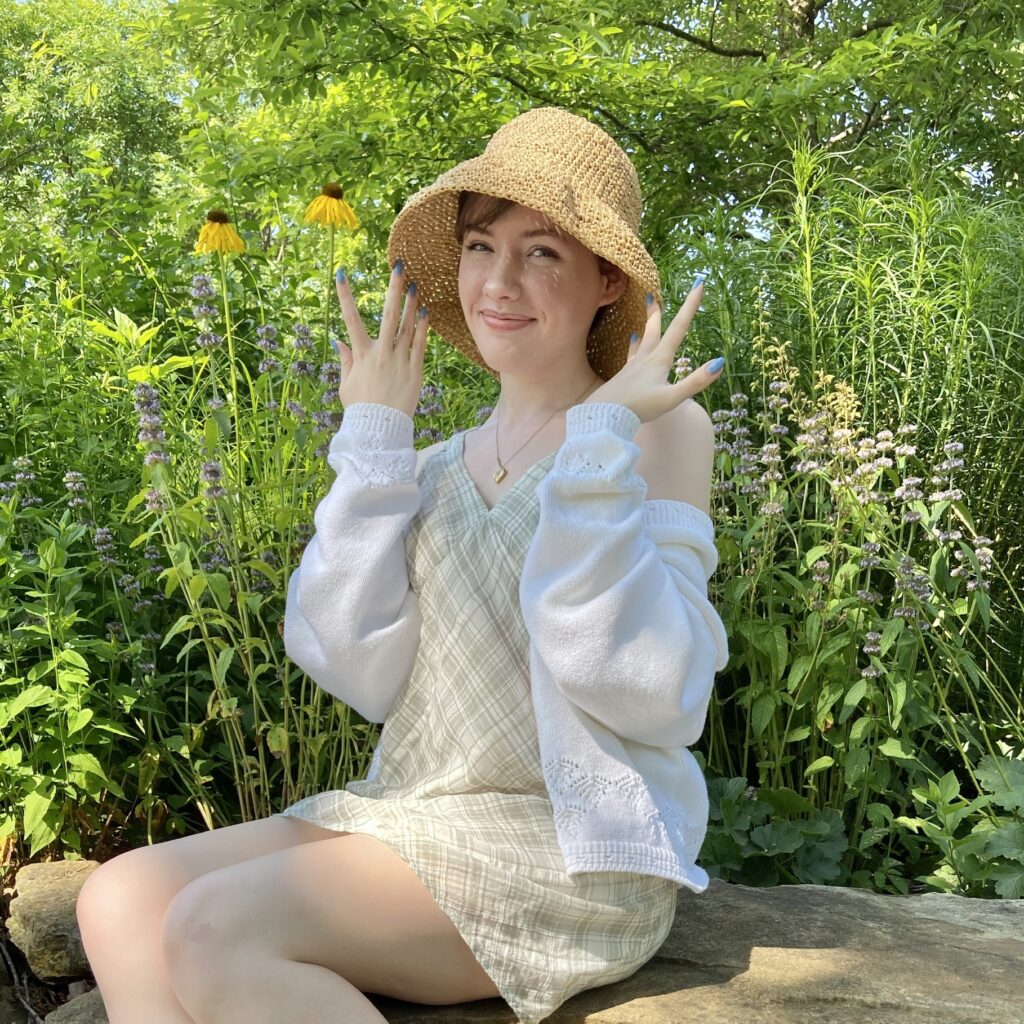
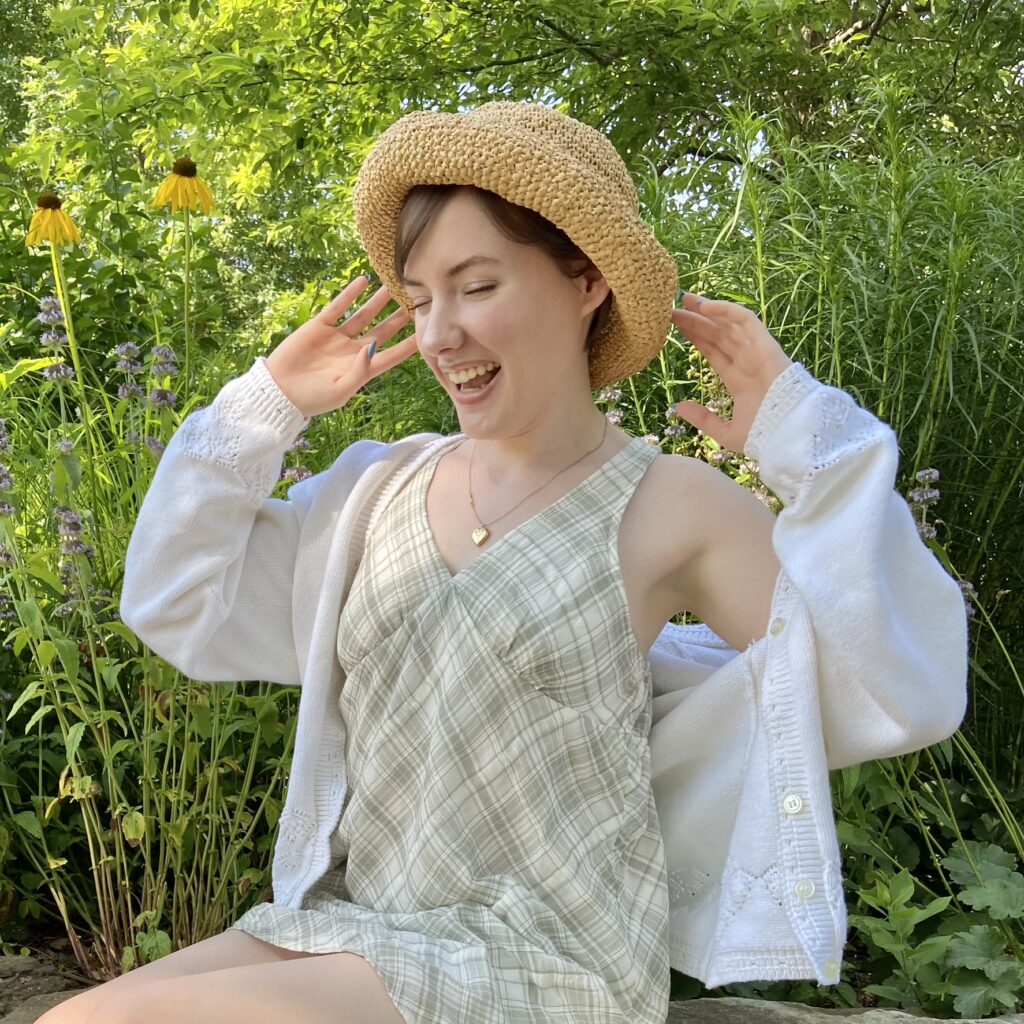
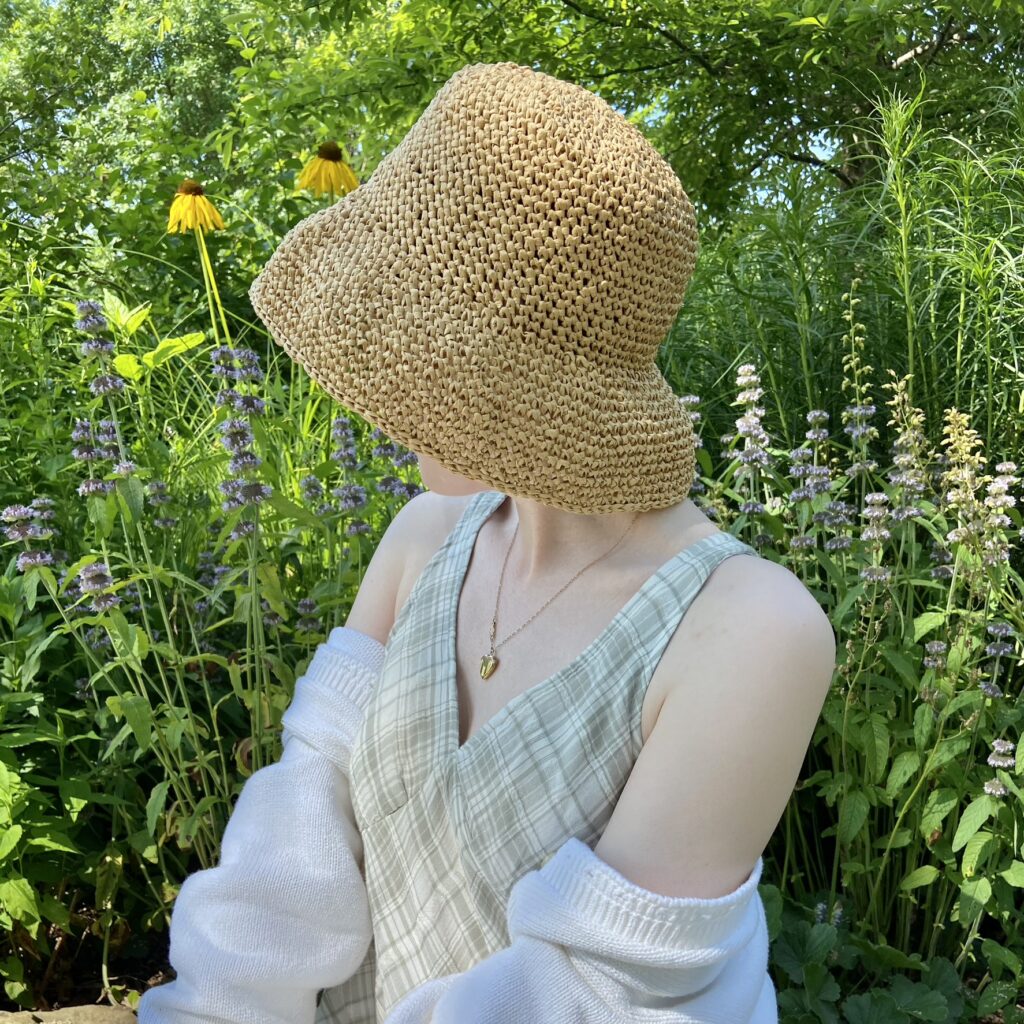
Hi there! In todays pattern, I will be share a cute and overall simple little Sun Hat design I like the call the ☀Millie Belle Hat☀ (named after one of my darling nieces 💕)
This post may contains affiliate links.
When I tell you that I have been wearing this hat on repeat all Spring, I have!
And I definitely will be continuing to wear it non-stop all Summer long!
This hat really checks all the boxes for me, with it not being too big or floppy (not that there anything wrong with a nice big, floppy hat moment), but also not having such a narrow brim that there is no sun protection.
Plus, it can actually be worn 2 ways! So you have a bit of control on how much coverage you get and how you want to wear the hat.
With my 10+ years of crocheting and making various kinds of hats, I’ve learned a lot of good techniques from all over (from different patterns and tutorials) on how to create a nice domed hat, so that there will be no increase lines that will make your hat all funky and lumpy looking (if you know you know).
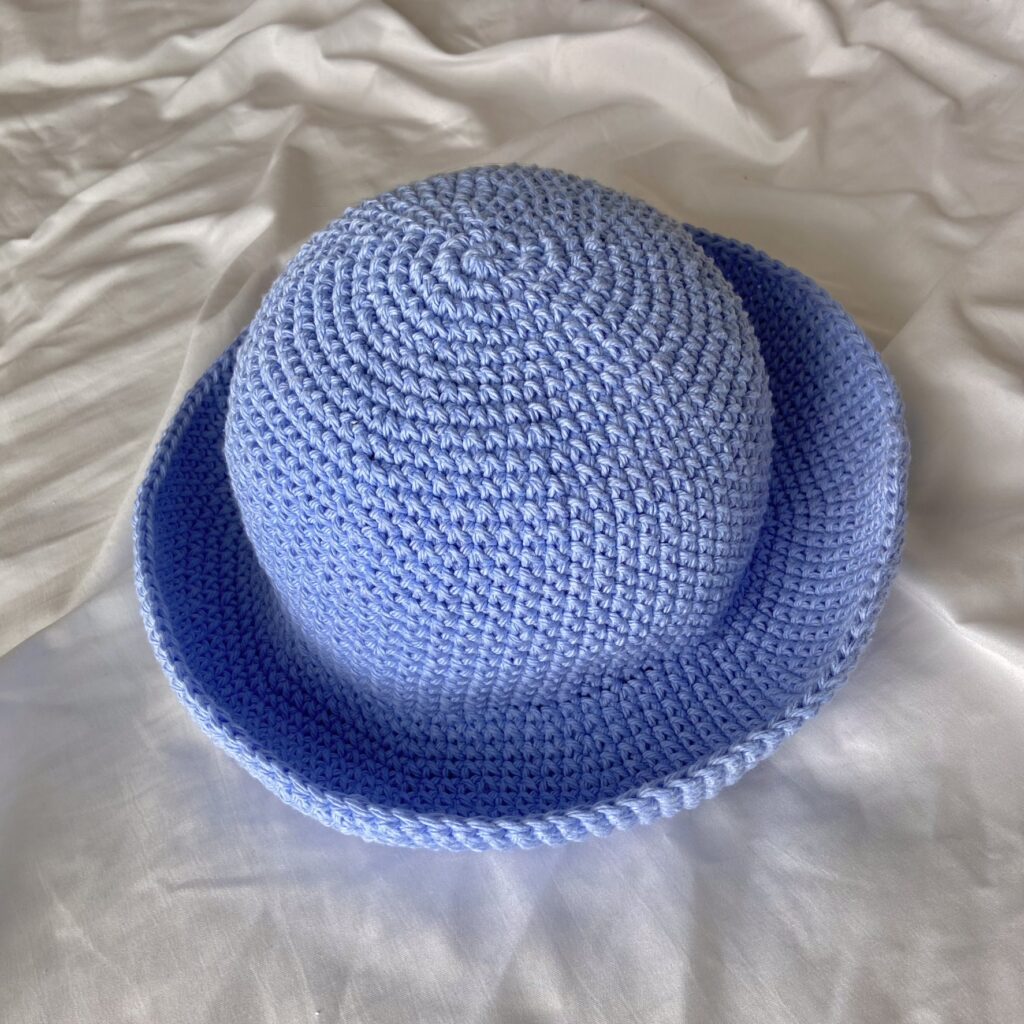
UPDATE: This pattern CAN be used with something other than Raffia Yarn! I tested and found that the closet match to the raffia yarn I used is Sugar ‘n Cream cotton yarn.
UPDATE #2: There now is 2 sizes! I’ve been receiving lots of feed back that the hat is too small for some, so I now added an extended size!
SO, without further ado, LET’S GET STARTED!
MATERIALS
Raffia Yarn – Approximately 78 grams
OR Cotton Yarn – “Sugar ‘n Cream” cotton yarn works the most similar to raffia yarn
Stitch Markers – my favorite!
MEASUREMENTS
Gauge: 4″x4″ square = 14 single crochet stitches wide x 14 single crochet rows tall.
Size 1 fits heads 23″ inches and smaller
Size 2 fits heads 24″ inches and larger
STITCHES + ABBREVIATIONS
Ch = Chain
St(s) = Stitch(es)
Sc = Single Crochet
Inc = Increase (work 2 single crochets into the same stitch)
Rep = Repeat
Rnd = Round
Sc flo = Single Crochet in the Front Loop Only
Sl St = Slip Stitch
PATTERN NOTES
*This Pattern follows US crochet terms
*Number of stitches indicated between “<>”. E.g. “<64 stitches total>“
The Millie Belle Hat Pattern
Top of Hat
Create a Magic Ring.
Work 8 sc into the Magic Ring. <8 sts total>
Rnd 1: Work 1 sc increase into each st until the end of the rnd. <16 sts total>
Rnd 2: *Work 1 sc into the next st, work 1 inc into the next st, *rep 7 more times/until the end of the rnd. <24 sts total>
Rnd 3: *Work 1 sc into the next 2 sts, work 1 inc into the next st, *rep 7 more times. <32 sts total>
Rnd 4: Work 1 sc into each st until the end of the rnd. <32 sts total>
Rnd 5: *Work 1 inc into the next st, work 1 sc into the next 3 sts, *rep 7 more times. <40 sts total>
I know the next several increase rounds are not your “typical” increase rounds, and that is because we really want to offset all of the increases so the main part of our hat comes out with a nice dome shape.
Rnd 6: Work 1 sc into the next 2 sts, work 1 inc into the next, *work 1 sc into the next 4 sts, work 1 inc into the next, *repeat 6 more times. Work 1 sc into the last 2 sts. <48 sts total>
Rnd 7: Work 1 sc into the next 4 sts, work 1 inc into the next, *work 1 sc into the next 5 sts, work 1 inc into the next, *rep 6 more times. Work 1 sc into the last st. <56 sts total>
Rnd 8: *Work 1 sc into the the next 6 sts, work 1 inc into the next, *rep 7 more times. <64 sts total>
Rnd 9: Work 1 sc into each st unto the end of the rnd. <64 sts total>
Rnd 10: *Work 1 inc into the next st, work 1 sc into the next 7 sts. *rep 7 more times. <72 sts total>
Stop here for Size 1 (if your heads measures 23″ inches or smaller).
Increase rounds for Size 2 (if head measures 24″ and larger):
Rnd 11: Work 1 sc into the next 2 sts, work 1 inc into the next, *work 1 sc into the next 8 sts, work 1 inc into the next, *repeat 7 more times. Work 1 sc into the remaining 6 sts. <80 sts total>
Rnd 12-13: Work 1 sc into each st until the end of the round. <80 sts total>
Rnd 14: Work 1 sc into the next 4 sts, work 1 inc into the next, *work 1 sc into the next 9 sts, work 1 inc into the next, *repeat 7 more times. Work 1 sc into the remaining 5 sts. <88 sts total>
Rnd 15: Work 1 inc into the next st, work 1 sc into the next 10 sts, *repeat 7 more times. <96 sts total>
Rnds 11-25 (size 1)/Rnds 16-34 (size 2): Work 1 sc into each st until the end of the rnd. <72 sts total (size 1)/96 sts total (size 2)>
Brim of Hat
NOTE: The brim round numbers are changed due to this pattern being updated with 2 sizes now available. If you are following along with the video tutorial know that in the video, brim “rounds 26-39” are the same as “rounds 1-14” in this written pattern. Pattern and number of rounds are still the same as in the video, I just rewrote the numbers to help accommodate and better make sense for both sizes.
(This note can be discarded if you are not following along with the video tutorial.)
Rnd 1: working in the flo (front loop only), work 1 sc into the next 2 sts, work 1 inc into the next, *work 1 sc into the next 3 sts, work 1 inc into the next, *rep 16 more times (for size 1)/rep 23 more times (for size 2). Work 1 sc into the last st (or 1 sc into the last 3 sts for size 2) <90 sts total/122 sts total>
If you are having trouble and need further help, check out my Video Tutorial for this pattern.
Rnd 2: Work 1 sc into each st until the end of the rnd. <90 sts total/122 sts total>
Rnd 3: *Work 1 sc into the next 8 sts, work 1 inc into the next, *rep 9 more times/rep 12 more times (for size 2). For size 2, work 1 sc into the last 5 sts <100 sts total/135 sts total>
Rnd 4: Work 1 sc into each st until the end of the rnd. <100 sts total/135 sts total>
Rnd 5: *Work 1 sc into the next 9 sts, work 1 inc into the next, *rep 9 more times/rep 12 more times (for size 2). For size 2, work 1 sc into the last 5 sts. <110 sts total/148 sts total>
Rnd 6: Work 1 sc into each st until the end of the rnd. <110 sts total/148 sts total>
Rnd 7: *Work 1 inc into the next st, work 1 sc into the next 10 sts, *rep 9 more times/rep 12 more times (for size 2). For size 2, work 1 sc into the last 5 sts. <120 sts total/161 sts total>
Rnds 8-13: Work 1 sc into each st until the end of the rnd. <120 sts total/161 sts total>
Rnd 14: Work 1 sl st into each st until the end of the rnd. <120 sts total/161 sts total>
You can watch my Video Tutorial Here to see more of what this process looks like.
Fasten Off.
Weave in all your ends and…
YOU’RE DONE!
If you recreate the “Millie Belle Hat“, please tag or DM @hayhaycrochet on Instagram or TikTok so I can see, like and share!
Happy Crocheting~!
It looks as if you’re missing the last two single crochet in the directions on round six. Would you be so kind as to update it for the next crochers coming behind me? 🙂
Could I make this with cotton yarn?
Hello! This pattern will work great with Sugar ‘n cream cotton yarn or something similar!
Wow another incredible make!
Love this hat! Perfect shape!
Do you think I can use cotton, 3-DK yarn? Maybe double strands?
Thanks!
HI! This pattern will work great with Sugar ‘n cream cotton yarn or something similar!
Hello! I tested and this pattern will work great with Sugar ‘n cream cotton yarn or something similar!
ooo! can’t wait to make it!