![]() WELCOME HERE
WELCOME HERE ![]()
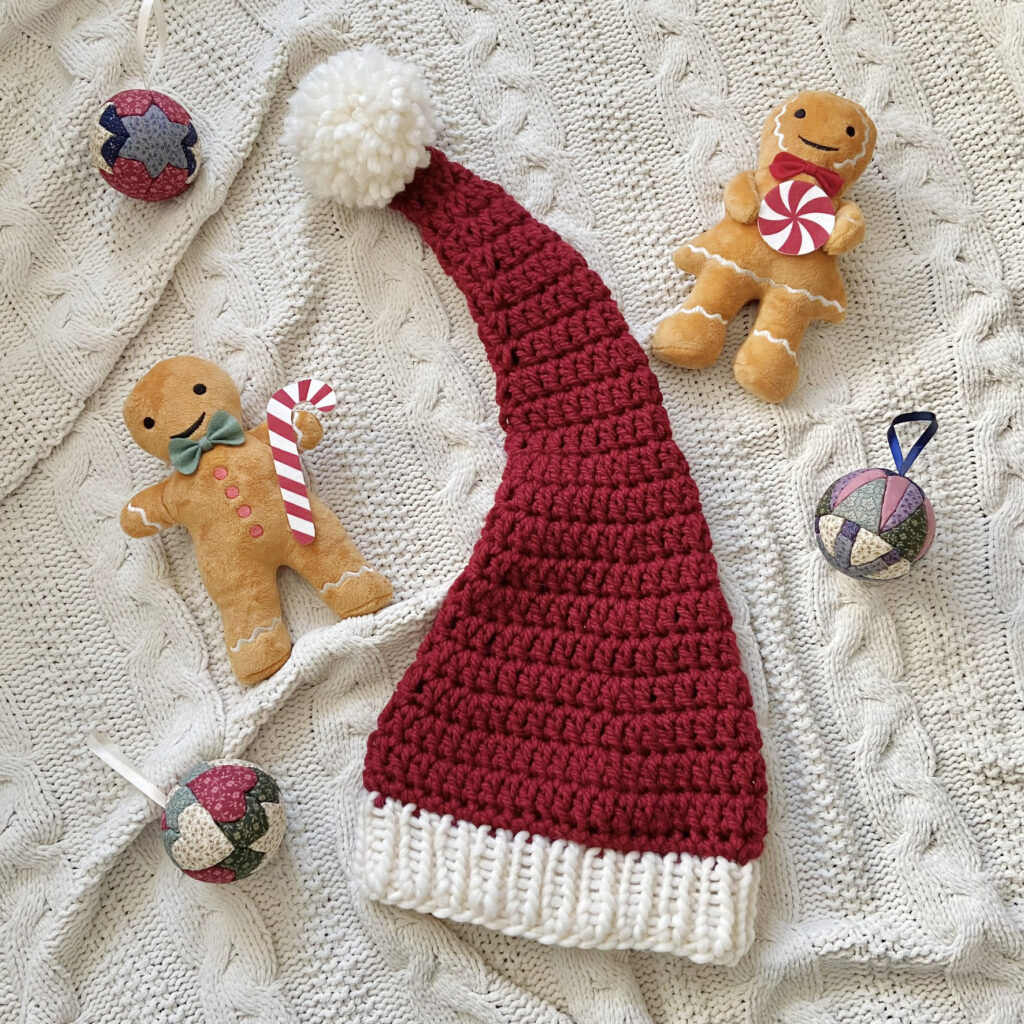
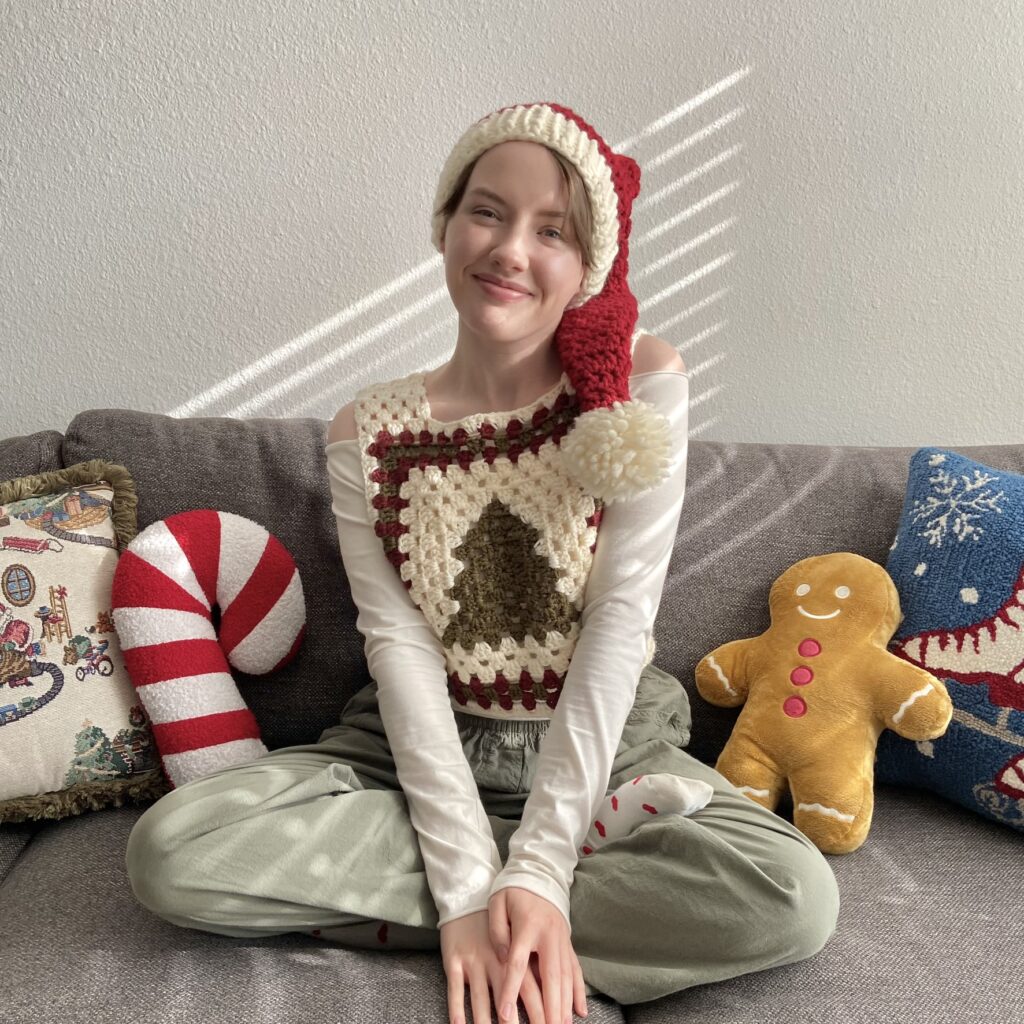
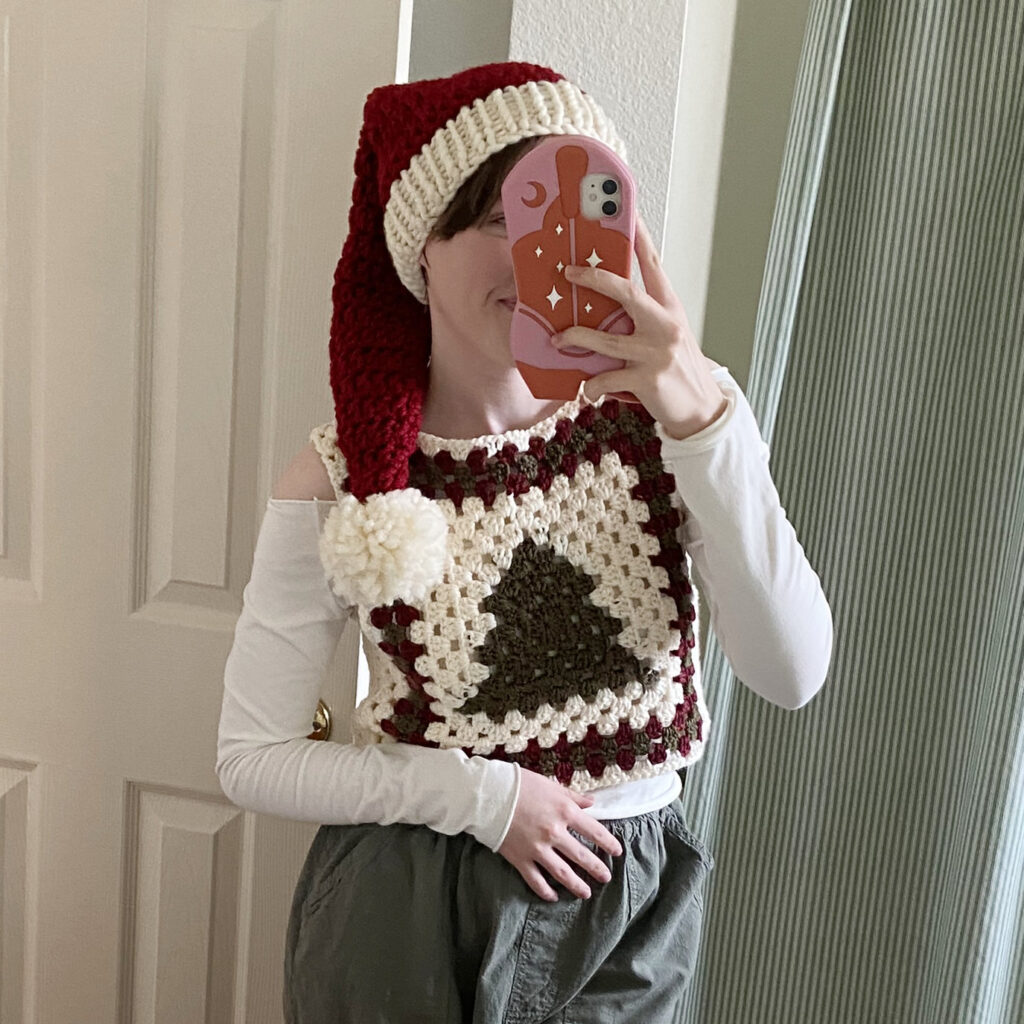
Hello there! I’m so excited because in today’s pattern we’re getting into the holiday spirit and are going to create a chunky and QUICK Santa hat! I like to call it the “Cozy St. Nick Hat”
This post may contain affiliate links.
Since we are using chunky yarn, this hat works up fast! I made mine in a little less than 3 hours! But depending on your skill level and speed, you can make it in anywhere from 2-5 hours!
For my hat I used 1×1 knit ribbing, but if you do not know how to knit I have written out an alternate crochet ribbing pattern, so no worries at all!
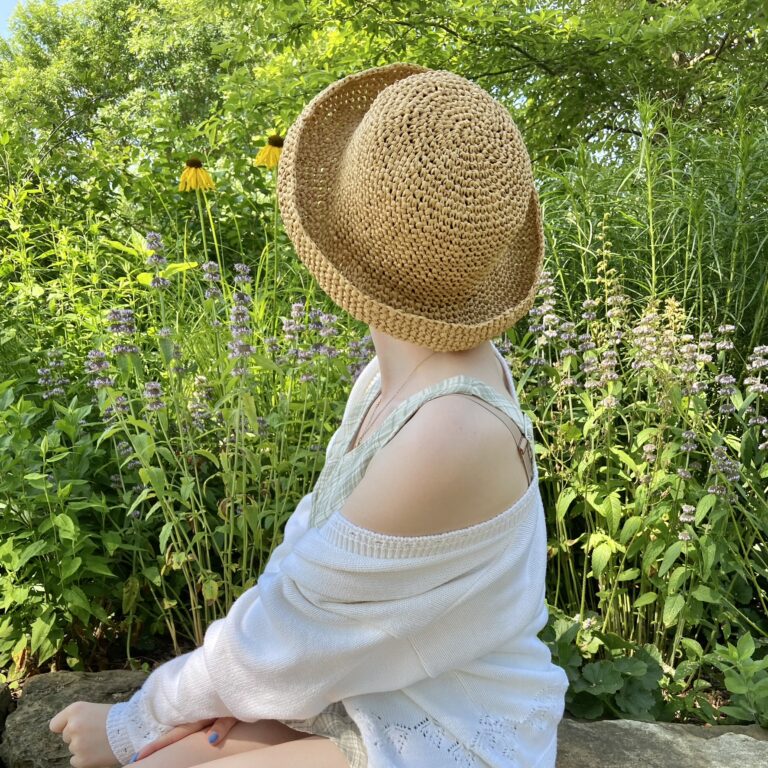
ALSO, if you like the Christmas Tree Granny Square Vest I’m wearing in the photo above, you can find it here on my Blog! 👀🎄✨
SO, without further ado, LET’S GET STARTED!
MATERIALS
Chunky Weight 5 Yarn – You only need 1 skein, but on amazon all I could find was a three pack. You can also get this yarn at Joann and Michaels
8.0mm Knitting Needles OR 8.0mm Crochet Hook – It all depends on what ribbing you plan on doing. Get needles if your knitting it and a hook if your crocheting it.
Scissors (nice and SHARP)
Darning Needle (my FAVES!! make seaming and weaving in ends so much easier because of the bent tip)
STITCHES + ABBREVIATIONS
Ch = Chain
St(s) = Stitch(es)
Dc = Double Crochet
Sc = Single Crochet
Inc = Increase
Sl st = Slip Stitch
PATTERN NOTES
*This pattern follows US crochet/knit terms
*EVERY round begins with a chain 2. The chain 2 ALWAYS counts as a stitch.
*I will not be mentioning the chain 2 at the beginning of each round, but know you ALWAYS start each round with a chain 2 and it ALWAYS counts as one of the stitches in the final stitch count.
*Number of stitches indicated between “<>”. E.g. “<30 stitches total>“.
Video Tutorials for methods
I use throughout this pattern!
Pick up knit stitches on crochet
Cozy St. Nick Hat Pattern
NOTE (as also stated above): EVERY round begins with a chain 2. The chain 2 ALWAYS counts as a stitch. I will not be mentioning the chain 2 at the beginning of each round, but know you ALWAYS start each round with a chain 2 and it ALWAYS counts as one of the stitches in the final stitch count.
With your red yarn (or whatever color you choose for your hat) and US 13/9.0mm create a Magic Ring and work 8 dc into the ring (your chain 2 COUNTS as one of the 8 dc. The chain 2 ALWAYS counts as a st in this pattern), Sl st into the first st in the ring.
NOTE: You will be slip stitching into the first stitch of the round, which is the chain 2, so sl st into the top chain of that chain 2/stitch.
Rnd 1: Work 1 dc into each st until the end of the rnd, sl st into the first st of the rnd. <8>
The chain 2 is referred to as a normal stitch in this pattern and not a “ch 2“
Rnd 2: Work 1 dc into each st until the end of the rnd, sl st into the first st of the rnd. <8>
Rnd 3: Work 1 inc into the first st (the ch 2 counts as one of the dc in the increase. just work another dc into the same st you chained from), work 1 dc into the next st, *work 1 inc into the next st, work 1 dc into the next st, *rep 2 more times. Sl st into the first st of the rnd. <12>
Rnd 4-5: Work 1 dc into each st until the end of the rnd. <12>
Rnd 6: Work 1 inc into the first st, work 1 dc into the next 3 sts, *work 1 inc into the next st, work 1 dc into the next 3 sts, *rep 1 more times. Sl st into the first st of the rnd. <15>
Rnd 7-8: Work 1 dc into each st until the end of the rnd. Sl st into the first st of the rnd. <15>
Rnd 9: Work 1 inc into the first st, *work 1 dc into the next 5 sts, work 1 inc into the next st, *rep 1 more time. Work 1 dc into each of the last 2 remaining sts. Sl st into the first st of the rnd. <18>
Rnd 10-11: Work 1 dc into each st until the end of the rnd. Sl st into the first st of the rnd. <18>
Rnd 12: *Work 1 dc into the next 3 sts, work 1 inc into the next st, *rep 3 more times. Work 1 dc into each of the last 2 remaining sts. Sl st into the first st of the rnd. <22>
Rnd 13: Work 1 dc into each st until the end of the rnd. Sl st into the first st of the rnd. <22>
Rnd 14: *Work 1 dc into the next 4 sts, work 1 inc into the next st, *rep 3 more times. Work 1 dc into each of the last 2 remaining sts. Sl st into the first st of the rnd. <26>
Rnd 15: Work 1 dc into each st until the end of the rnd. Sl st into the first st of the rnd. <26>
Rnd 16: *Work 1 dc into the next 5 sts, work 1 inc into the next st, *rep 3 more times. Work 1 dc into each of the last 2 remaining sts. Sl st into the first st of the rnd. <30>
Rnd 17: Work 1 dc into each st until the end of the rnd. Sl st into the first st of the rnd. <30>
Rnd 18: *Work 1 dc into the next 6 sts, work 1 inc into the next st, *rep 3 more times. Work 1 dc into each of the last 2 remaining sts. Sl st into the first st of the rnd. <34>
Rnd 19: Work 1 inc into the first st, *work 1 dc into the next 7 sts, work 1 inc into the next st, *rep 3 more times. Work 1 dc into the last remaining st. Sl st into the first st of the rnd. <39>
Rnd 20: *Work 1 dc into the next 8 sts, work 1 inc into the next st, *rep 3 more times. Work 1 dc into each of the last 3 remaining sts. Sl st into the first st of the rnd. <43>
Rnd 21: Work 1 dc into each st until the end of the rnd. Sl st into the first st of the rnd. <43>
Fasten off.
For men’s size
If you are a male/making this for a male, you will follow the pattern exactly the same up until Round 21.
Rnd 21 (for larger size): *Work 1 dc into the next 9 sts, work 1 inc into the next st, *rep 3 more times. Work 1 dc into each of the last 3 remaining sts. Sl st into the first st of the rnd. <47>
Fasten off.
Ribbing
There are 2 options for the ribbing. For my Santa hat I did 1×1 knit ribbing. But if you do not know how to knit, you can simply do single crochet ribbing.
Knit Ribbing (tutorial linked above): With your white yarn (or whatever color you choose for your ribbing) and US 11/8.00mm needles…
Cast on 44 sts. Place a ‘Beginning of Round’ stich marker so you know where the first stitch is. Work 1×1 knit ribbing until you have 7 rows. Bind off loosely in rib pattern.
Fasten off.
Single Crochet Ribbing (tutorial linked above): With your white yarn (or whatever color you choose for your ribbing) and US L/8.0mm crochet hook…
Ch 9, sc into the 2nd ch from the hook, sc in remaining 7 ch, work 2 sl sts into 2 of the sc from the previous round, turn your work, skipping the sl sts you just made and *sc blo into the next 8 sts, turn your work, ch 1 and sc blo in to next 8 sts, work 2 sl sts into 2 of the sc from the previous round, turn your work, *repeat this until you have no more sc from the previous round to work your ribbing in.
Fasten off and leave a fairly long tail to sew both ends of your ribbing together.
I use the “whip stitch” to seam together ribbing usually, but you can use whatever seaming method you want.
PomPom
Here’s a tutorial here on how to make a cute and chunky pompom: Pompom tutorial
Weave in all your ends and…
YOU’RE DONE!
If you recreate the “Cozy St. Nick Hat”, please tag or DM @hayhaycrochet on Instagram so I can see, like and share!
Happy Holidays and Happy Crocheting~!