
🤍 WELCOME HERE 🤍
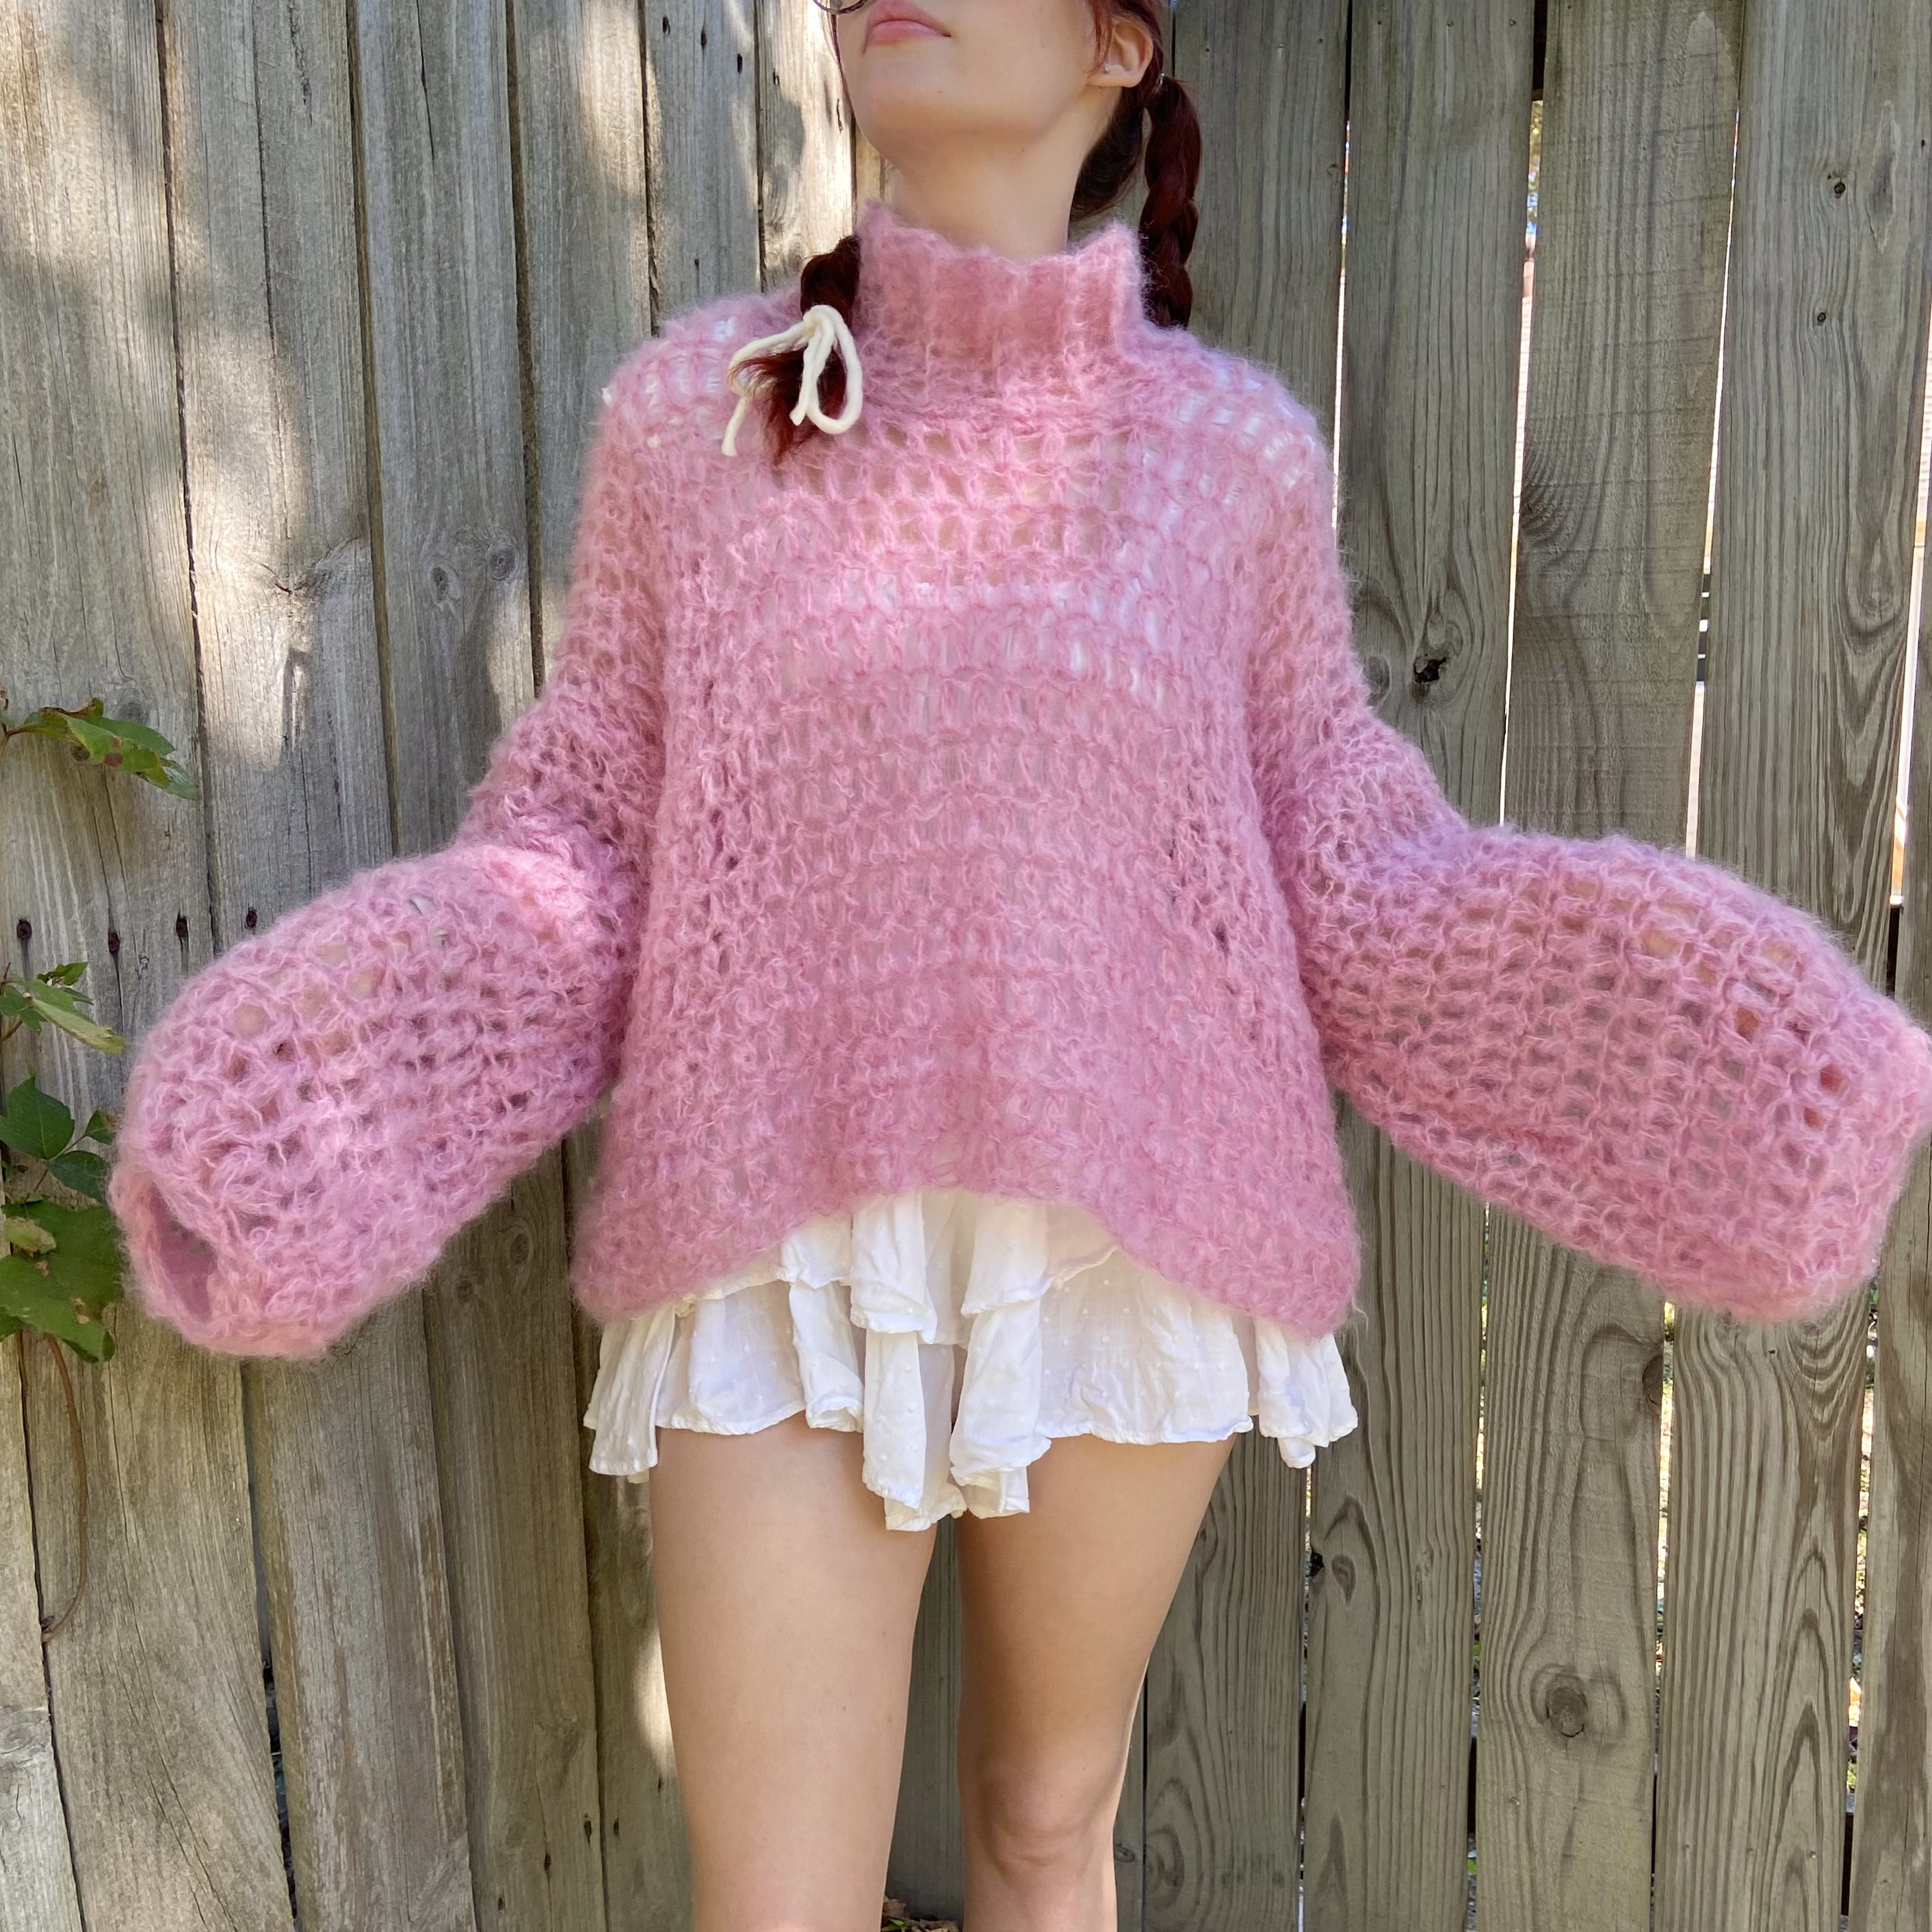
Long time, no pattern! Today I’m coming at your with this super customizable, super cozy sweater, “The Fairy Floss Sweater” 🧚♀️✨💖
This post may contain affiliate links.
This sweater is really fun because it can be made in ANY yarn and hook and ANY size!
If you don’t like the “open knit” look of this design then NO PROBLEM! Because you can switch things up and use a Half Double Crochet or even a Single Crochet with a smaller hook, its really up to you! I personally like the look of the Double Crochet + 15mm Hook combo because I feel it gives this garment an airy, easy-breezy look.
Going for a more fitted or even more oversized look? EASY PEASY!
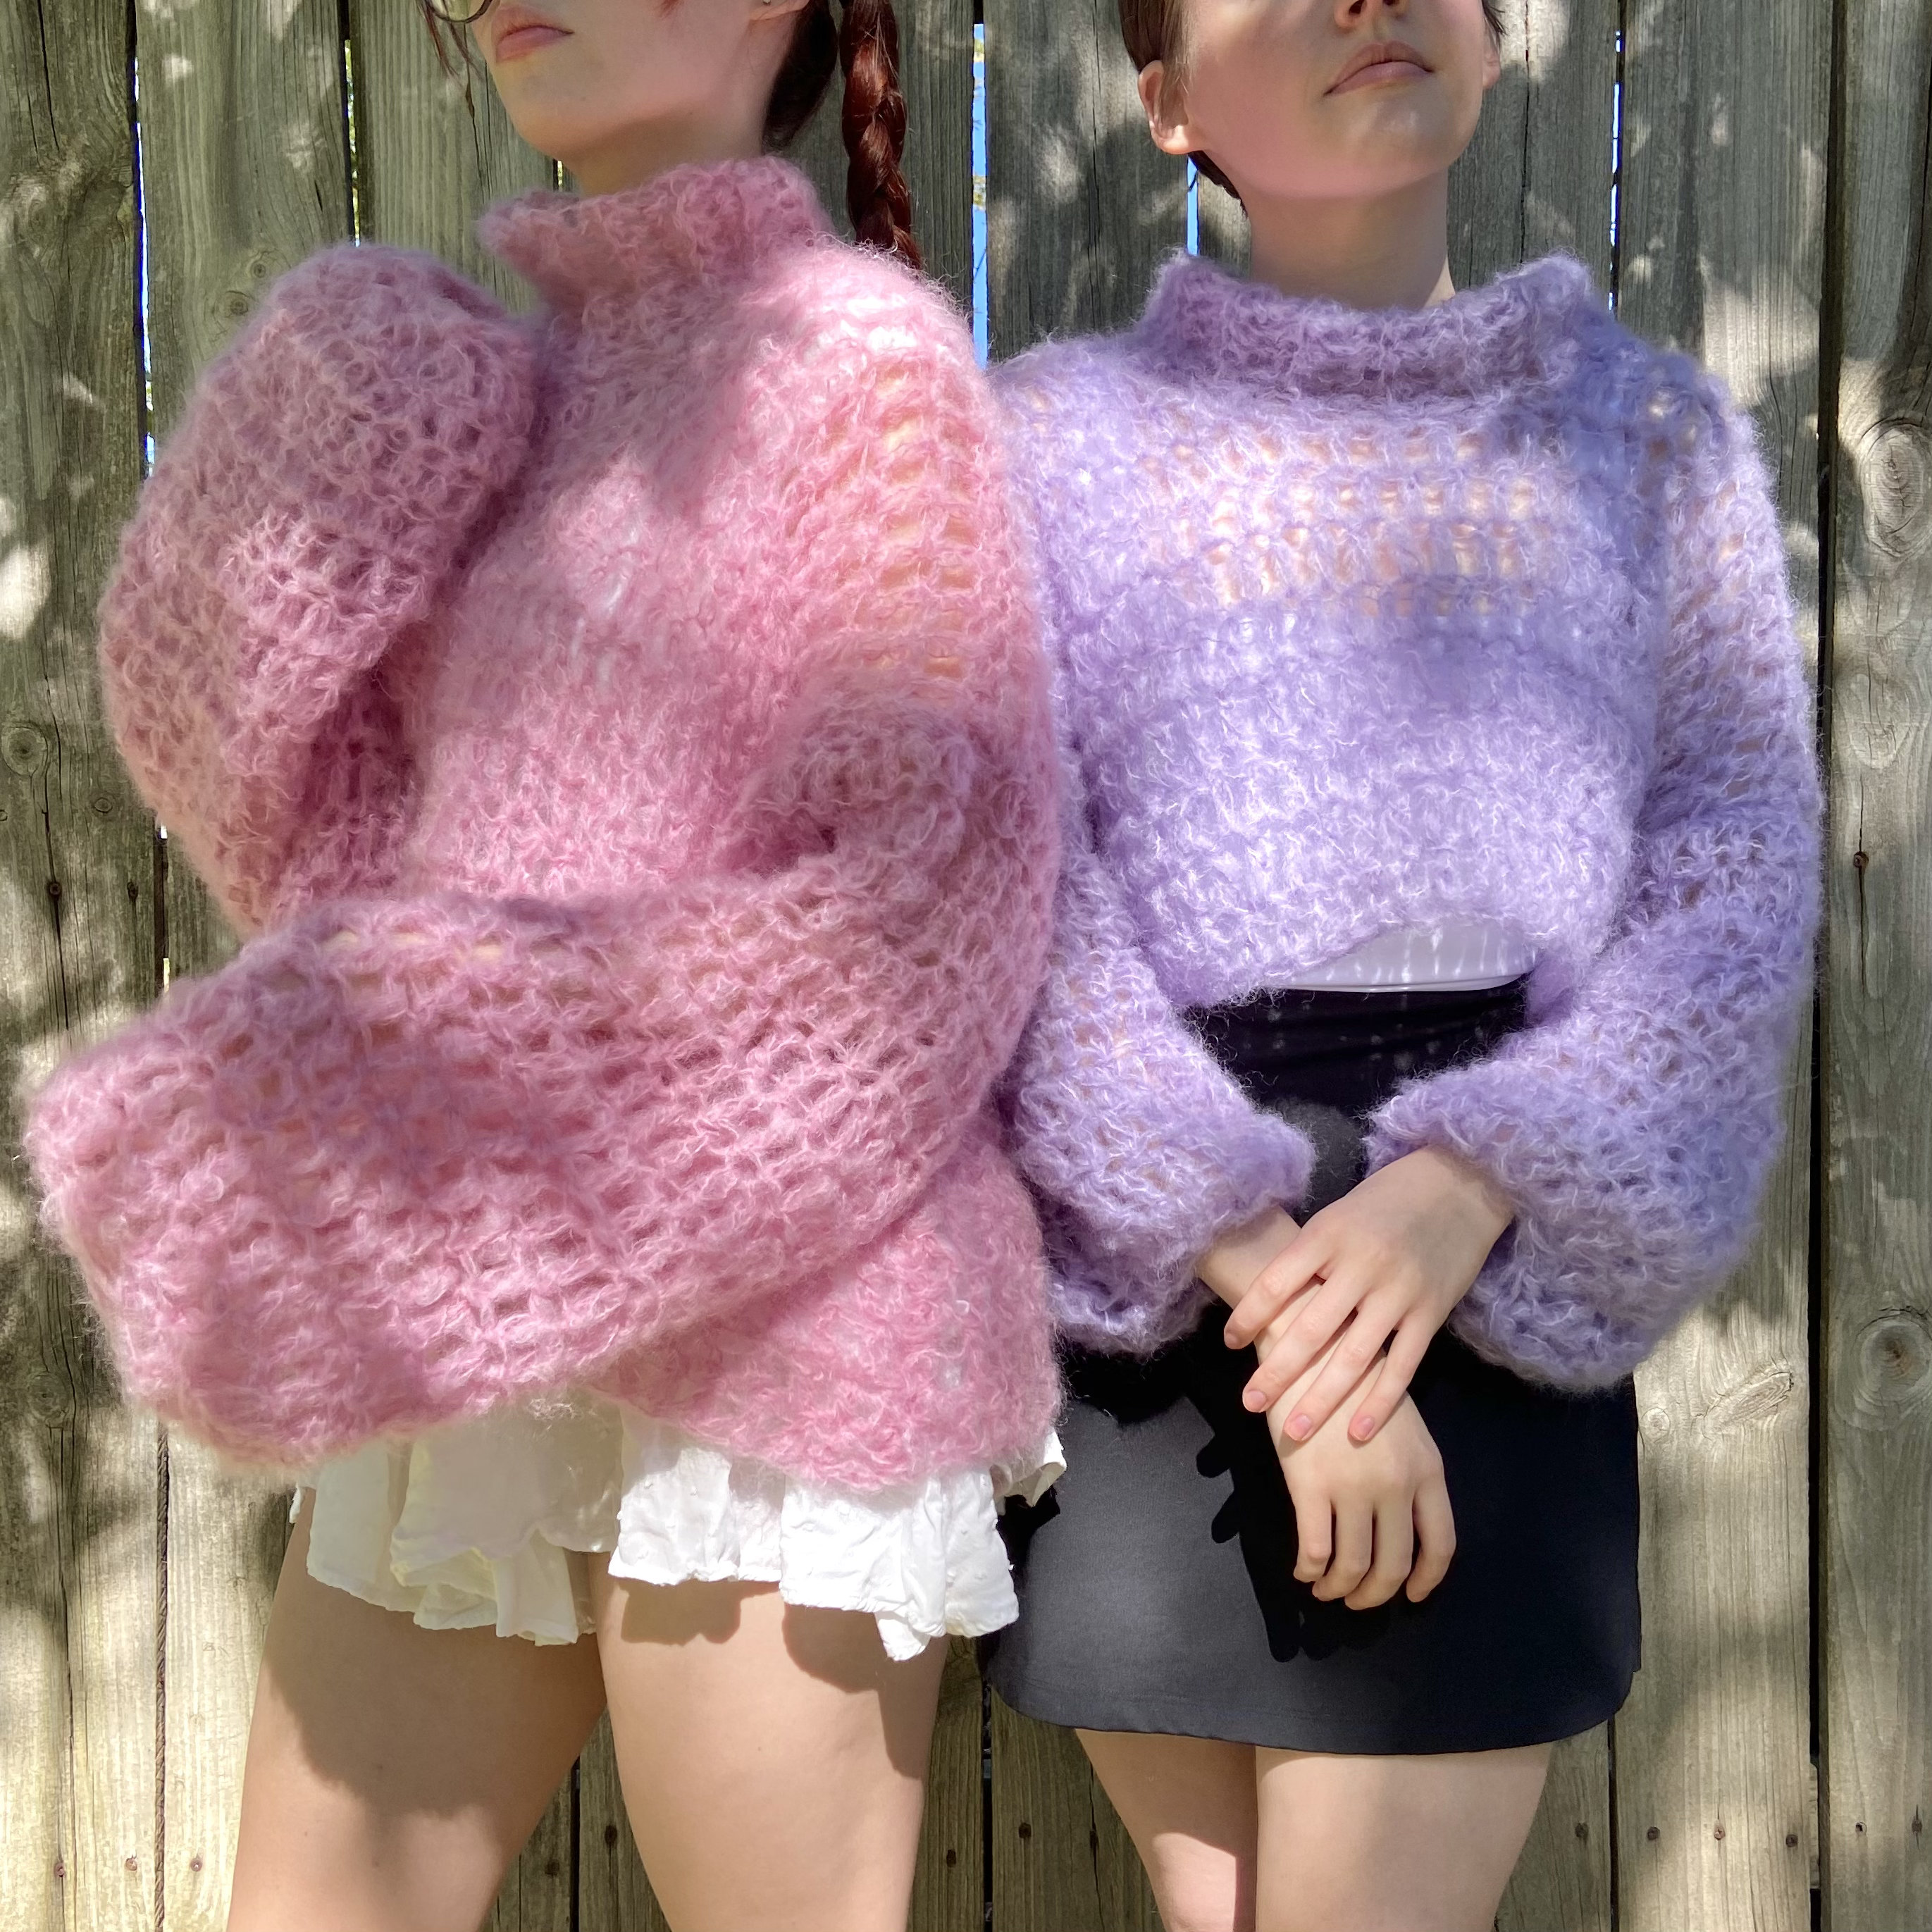
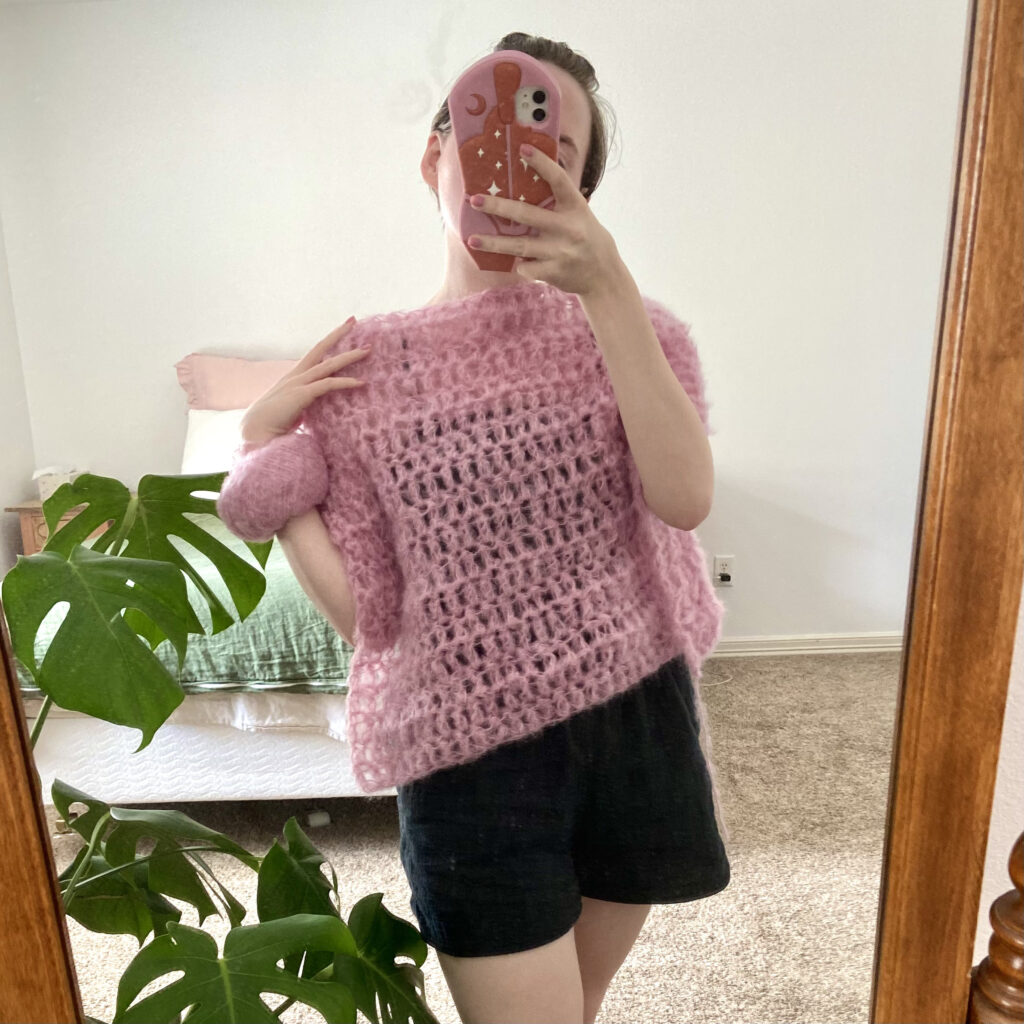
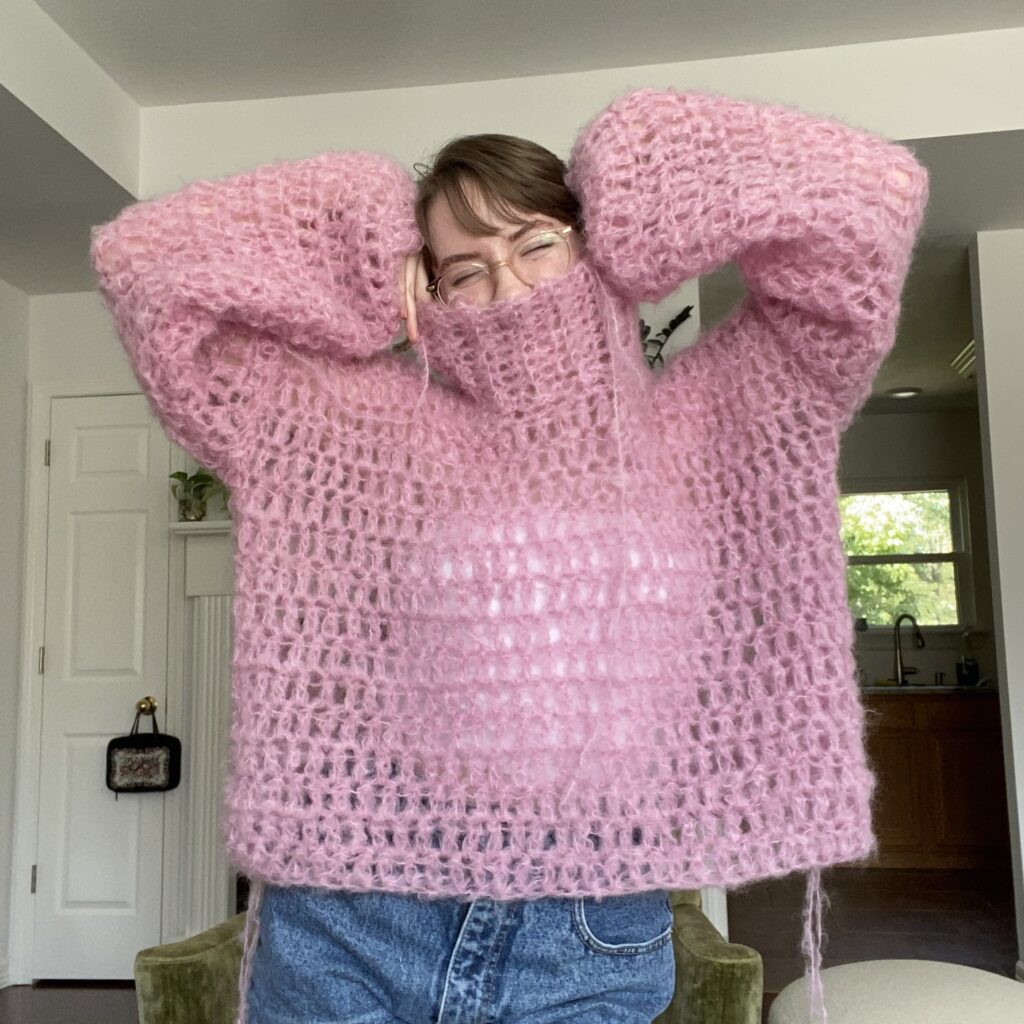
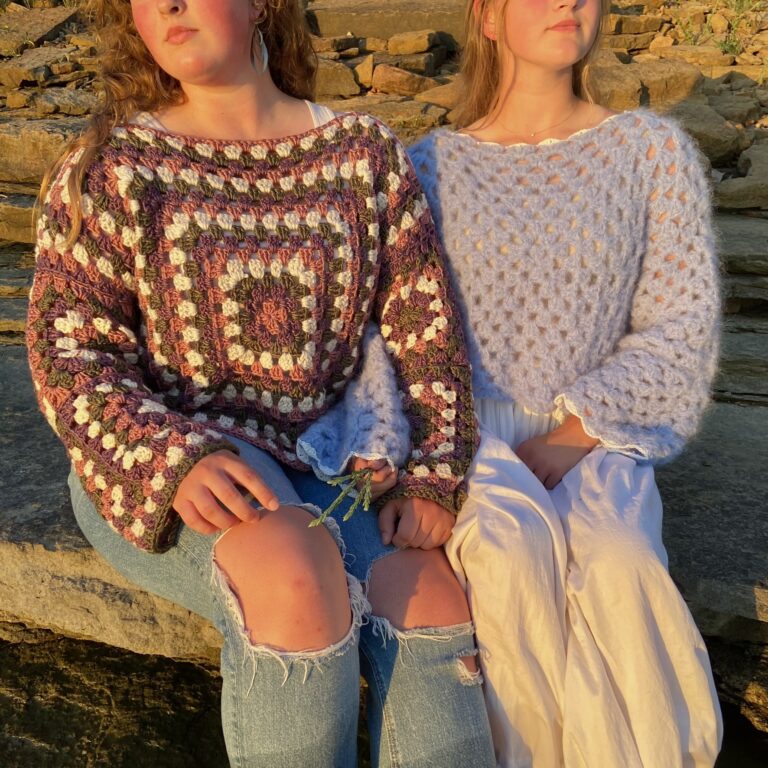
As you might have noticed from the photo above is that I made 2 versions of this sweater! One a cropped version with shorter sleeves and a folded ribbed collar (the purple one 💜) and one much more oversized with longer sleeves and a turtleneck (the pink one 💖).
You can really play around with the size, you can make it as big or as small, as long or as short as you want! Its up to you and your preferences!
SO, without further ado, LET’S GET STARTED!
MATERIALS
YARN:
YOU can use ANY yarn you like because this sweater is so very customizable. BUT, if you want a sweater most similar to mine, I used 4 & 1/2 skeins/approx. 230g for the Pink Sweater (the longer version) and 3 & 1/3 skeins/approx. 173g for the Purple Sweater (the cropped version)
Yarn I Used
Similar (cheaper) Alternative
HOOK:
AGAIN, you can use whatever crochet hook you desire. I used a very large hook, but if you are not into the “mesh-y” look, you can totally size down!
Crochet Hook I used (15.mm)
Scissors (nice and SHARP)
Darning Needle (my FAVES!! make seaming and weaving in ends so much easier because of the bent tip)
Stitch markers (The best! They stay in place, so you don’t have to worry about them falling out.)
STITCHES + ABBREVIATIONS:
Ch = Chain
FDC = Foundation Double Crochet (how-to video linked below)
FTC = Foundation Turning Chain
St(s) = Stitch(es)
Dc = Double Crochet
Dc2tog = Double Crochet 2 (stitches) Together/Double Crochet Decrease
Hdc = Half Double Crochet
Hdc2tog = Half Double Crochet 2 (stitches) Together/Half Double Crochet Decrease
Sl st = Slip Stitch
Sk st = Skip a stitch
PATTERN NOTES
*This Pattern follows US crochet terms.
*The size of the sweater I am making is very oversized for me. I’m a size XS/S and the sweater is approx. a size L/XL. SO, if you are my size or even a size or so up, this sweater should fit you just fine (depending on the look you’re going for e.g. oversized or fitted).
*This Pattern can be made into ANY size, but with that being said, I cannot give approx. yardage/grams that you will need because it is completely customizable to YOU and how short, wide, etc you want it.
*In the Video Tutorial made in companion with this written pattern, instead of working a “Ch 2” after I turn my work, I work a “Foundation Turning Chain” (method linked below) because it like how it makes the edges of my work look straighter and cleaner. BUT, with that being said, you DO NOT have to do this, its just personal preference. A chain 2 will work just fine!
*If you are working a “Chain 2” after you turn your work each row, it DOES NOT count as your first stitch in this pattern.
*If you are working a “Foundation Turning Chain” (method linked below) after you turn your work each row, it DOES count as your first stitch.
Video Tutorials for methods
I use throughout this pattern!
Foundation Double Crochet (I like to use this in place of a chain, but you do not have to do this, its just personal preference.)
Foundation Turning Chain (I used this in place of a Ch 2, you do not have to do this, its just personal preference.)
Single Crochet Seaming You can seam your panels together however you want, but I used Single Crochet (video linked shows how to slip stitch seam AND single crochet seam, again I used SINGLE CROCHET)
The Cotton Candy Sweater Pattern
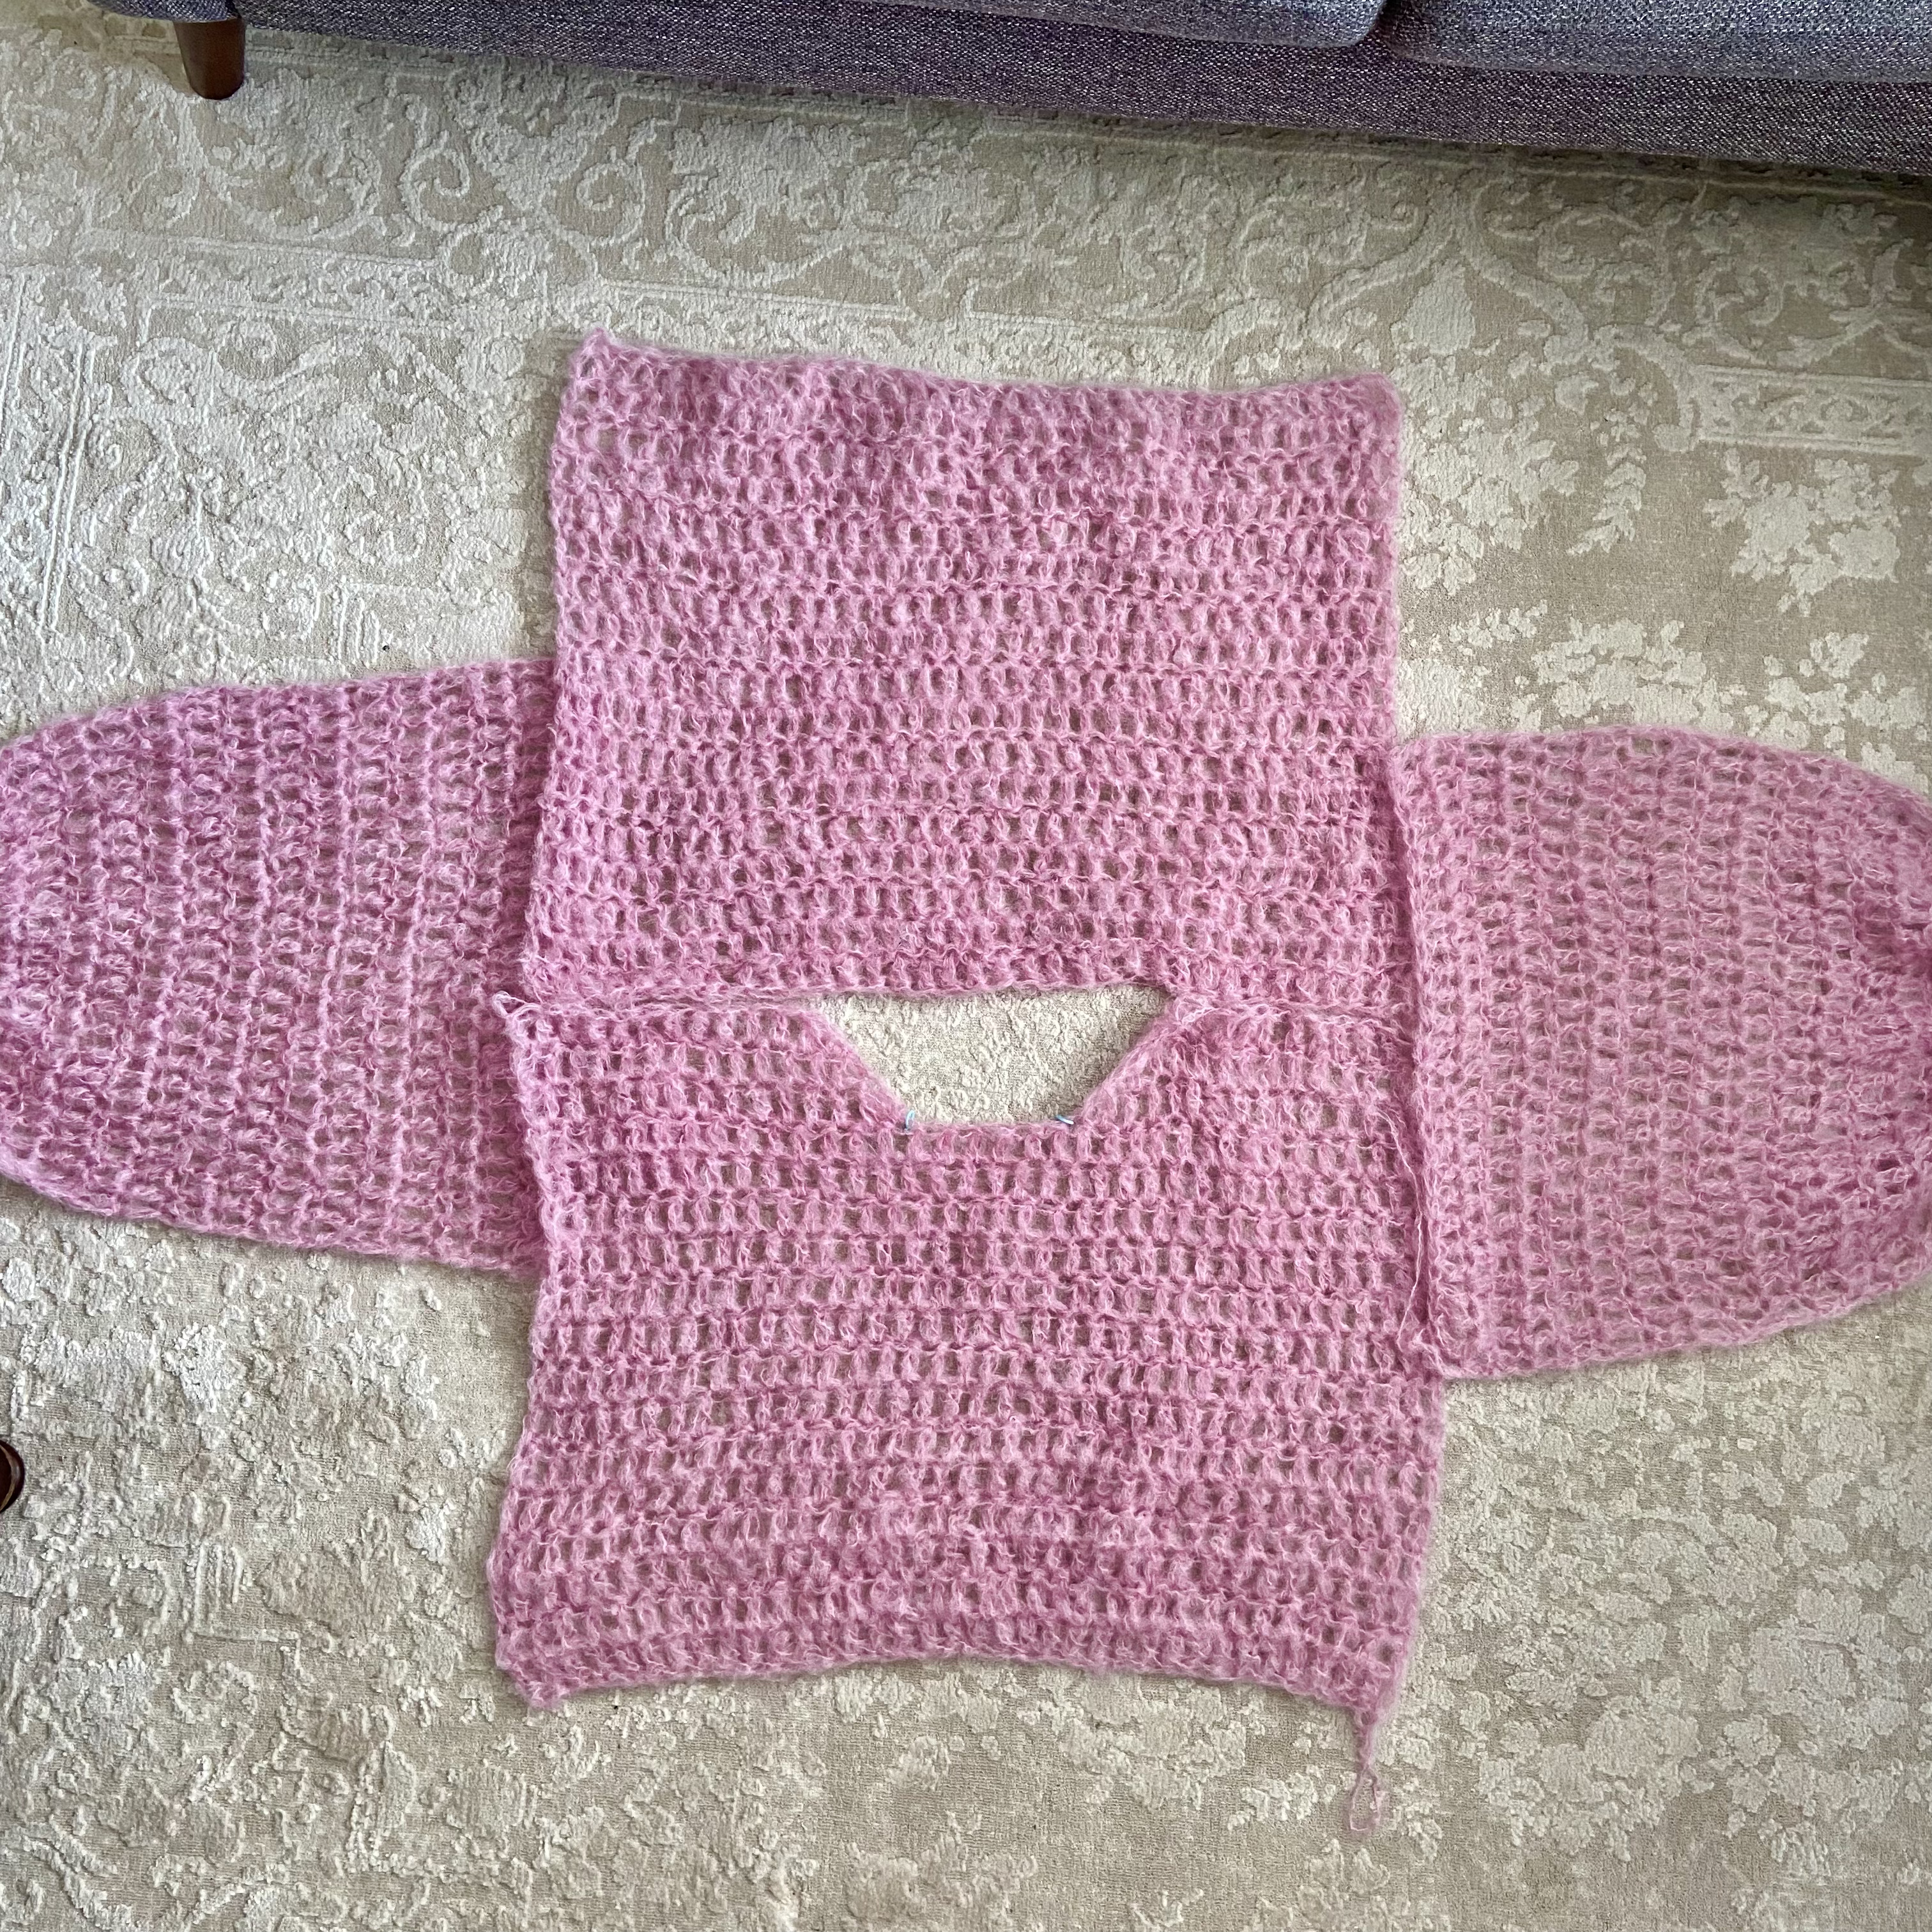
Back Panel
Row 1: Ch/Foundation DC (method linked above) as wide as you want for the drop of your shoulder (refer to the picture down below).
If you are working a chain, after you have your chain as long as you desire, ch 2 and then work 1 dc into the 3rd ch from the hook (the ch 2 NEVER counts as a stitch in this pattern) and then work 1 dc into each ch until the end of the ch.
NOTE: I FDC a total of 35 stitches, but that number may be different for you depending on the yarn, hook and size you are making.
Row 2: Turn your work and ch 2/Work a Foundation Turning Chain (method linked above), work 1 dc into each st until the end of the row.
NOTE: If you are chaining 2, then the first stitch you will be working in is the very first stitch of the row, the same stitch you chained from (again, the ch 2 DOES NOT count as a stitch of the row).
If you are working a FTC, then this DOES count as your first stitch of the row.
Row 3: Repeat Row 2 until you have as many rows as you want for the length of your sweater. You can can roughly see how long it will be by holding it up to you when you have made as many rows as you think you may want, and then you can leave it as is, take out or add many rows as you see fit! (yes, I know that this is the back panel, but holding it up to your front will work just fine to determine the length)
NOTE: I crocheted a total of 17 rows/20″ inches long for the pink sweaters back + front panels, and 11 rows/13″ inches long for the purple sweaters back + front panels.
See my Video Tutorial if you are having trouble!
Fasten off after you have reached the desired length for your panel.
Front Panel
Row 1: Ch/FDC as many chains/sts as you did for the back panel.
You will be making the front panel almost the same as the back panel, EXCEPT you will be crocheting 3 rows less (if you are using the same yarn, hook, gauge as me) or approx. 3″ inches less than you worked for the back panel.
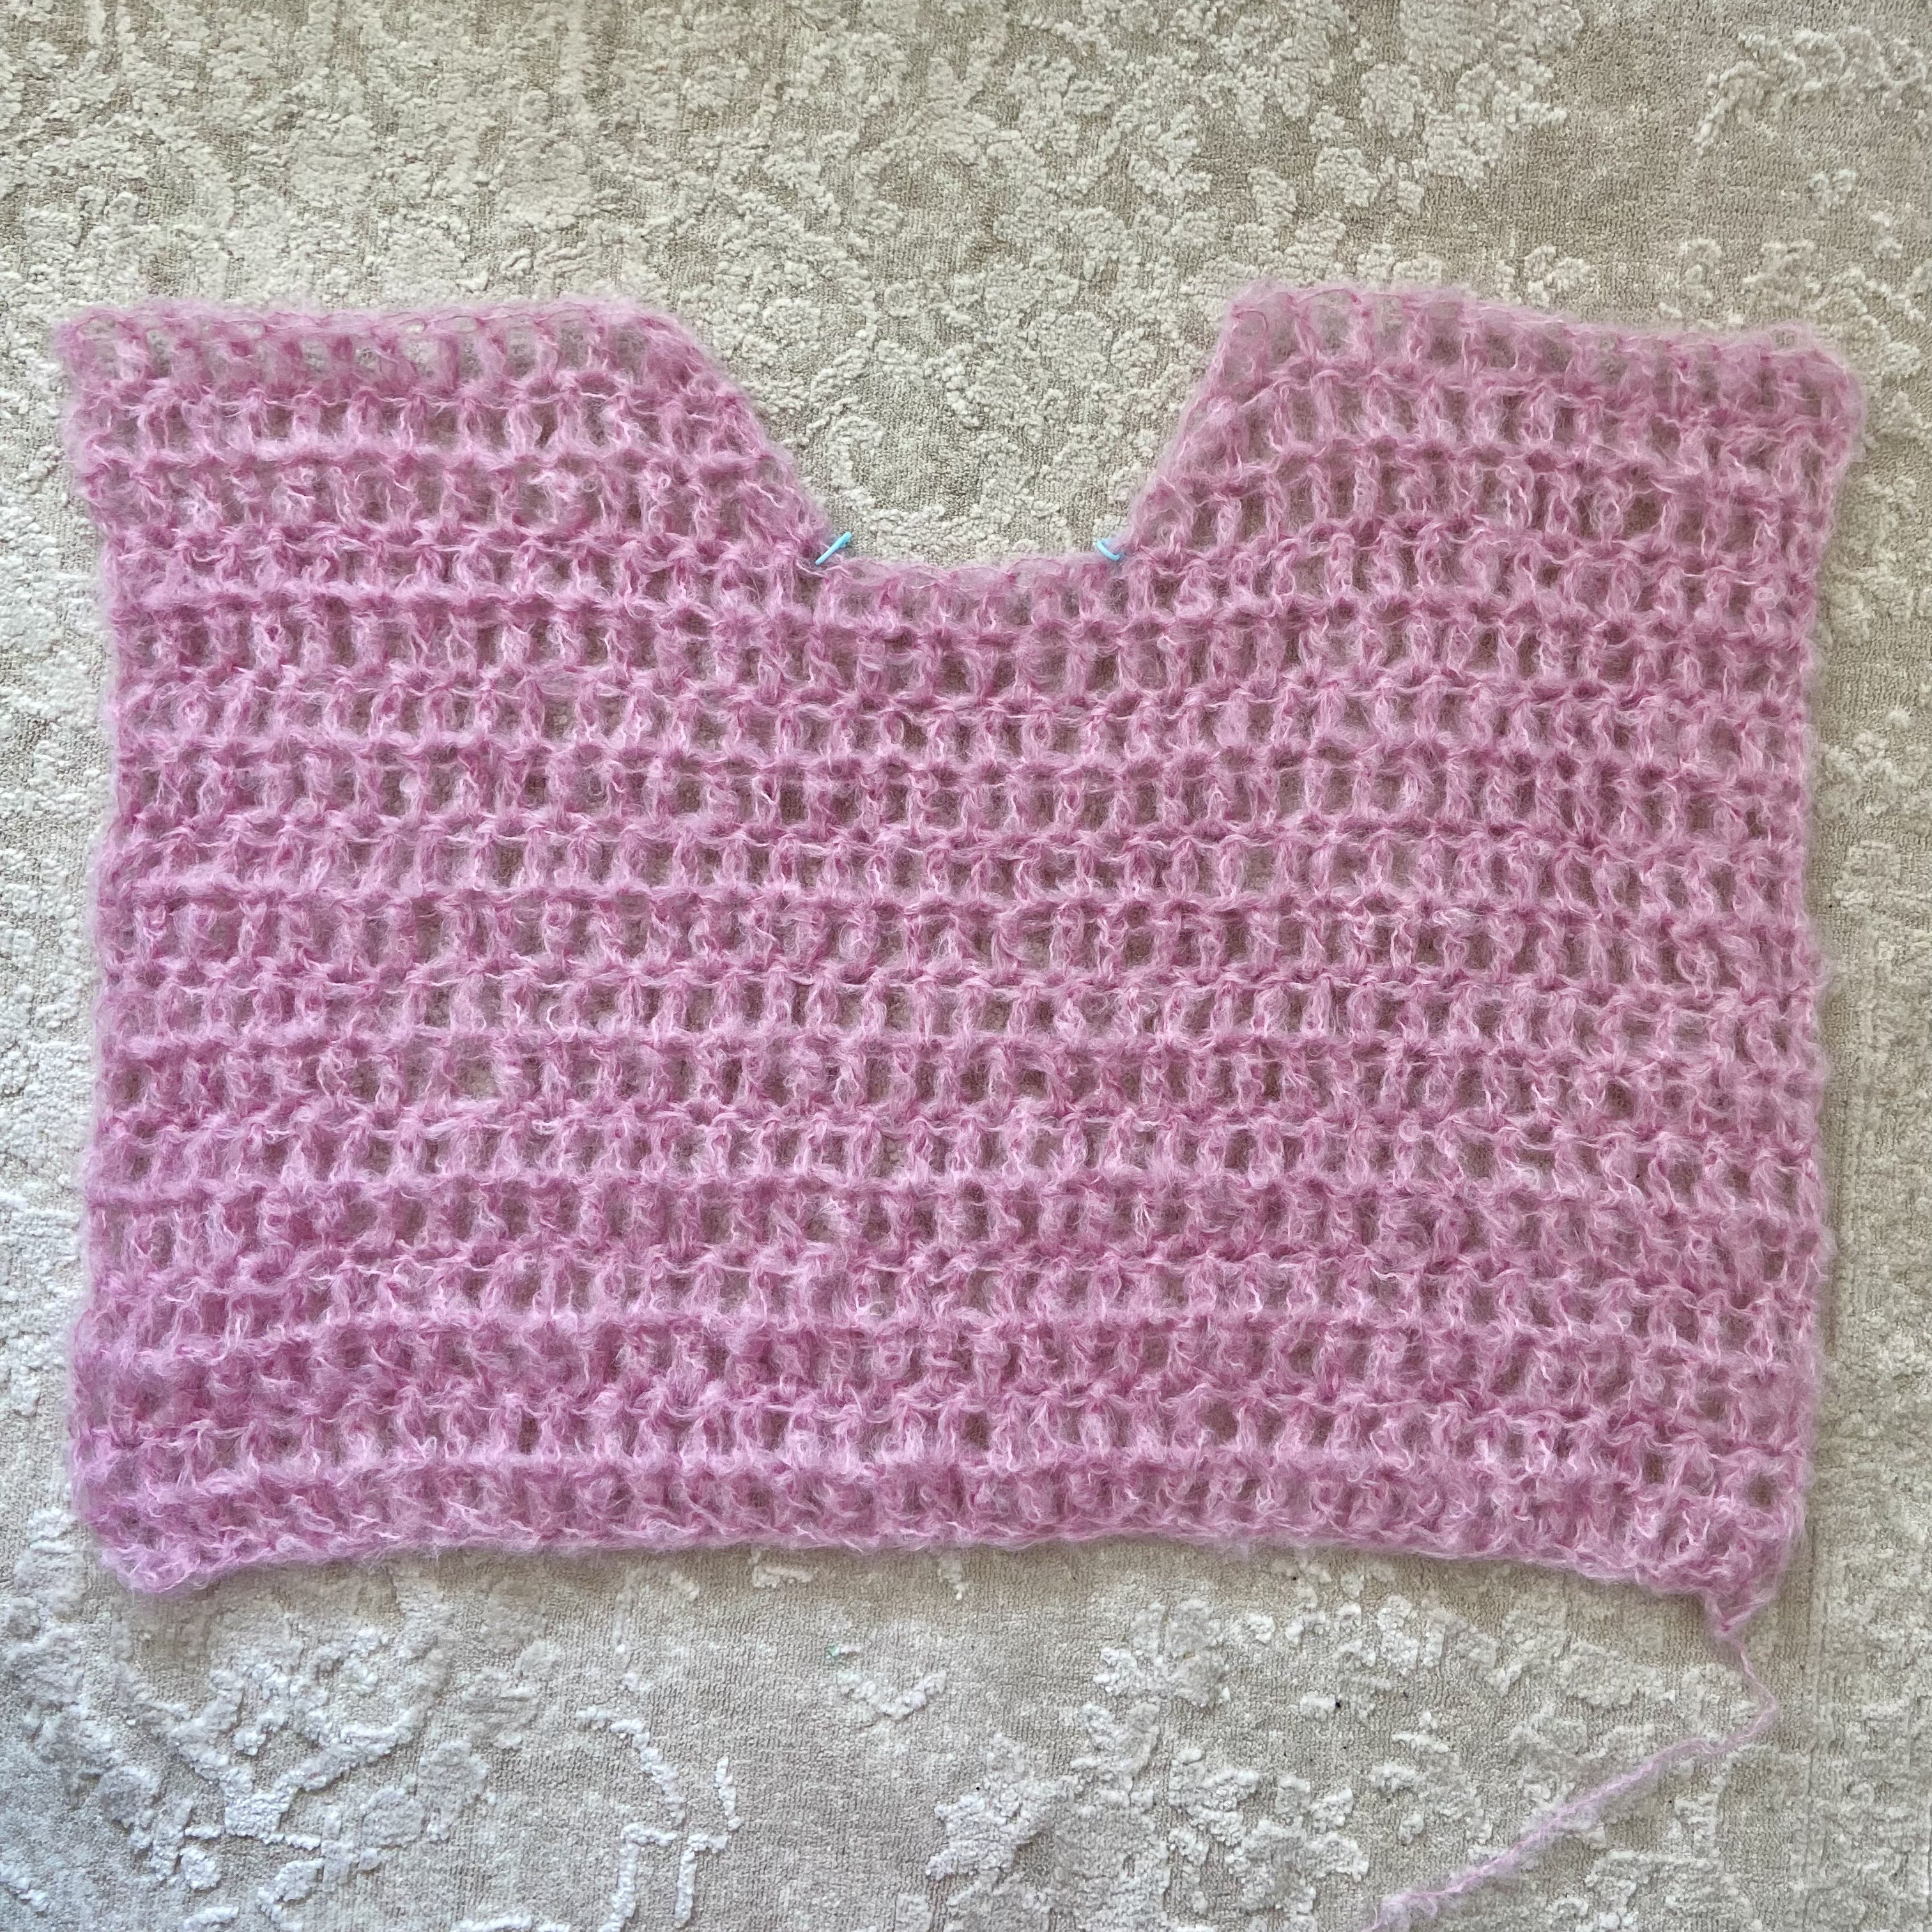
Shoulders
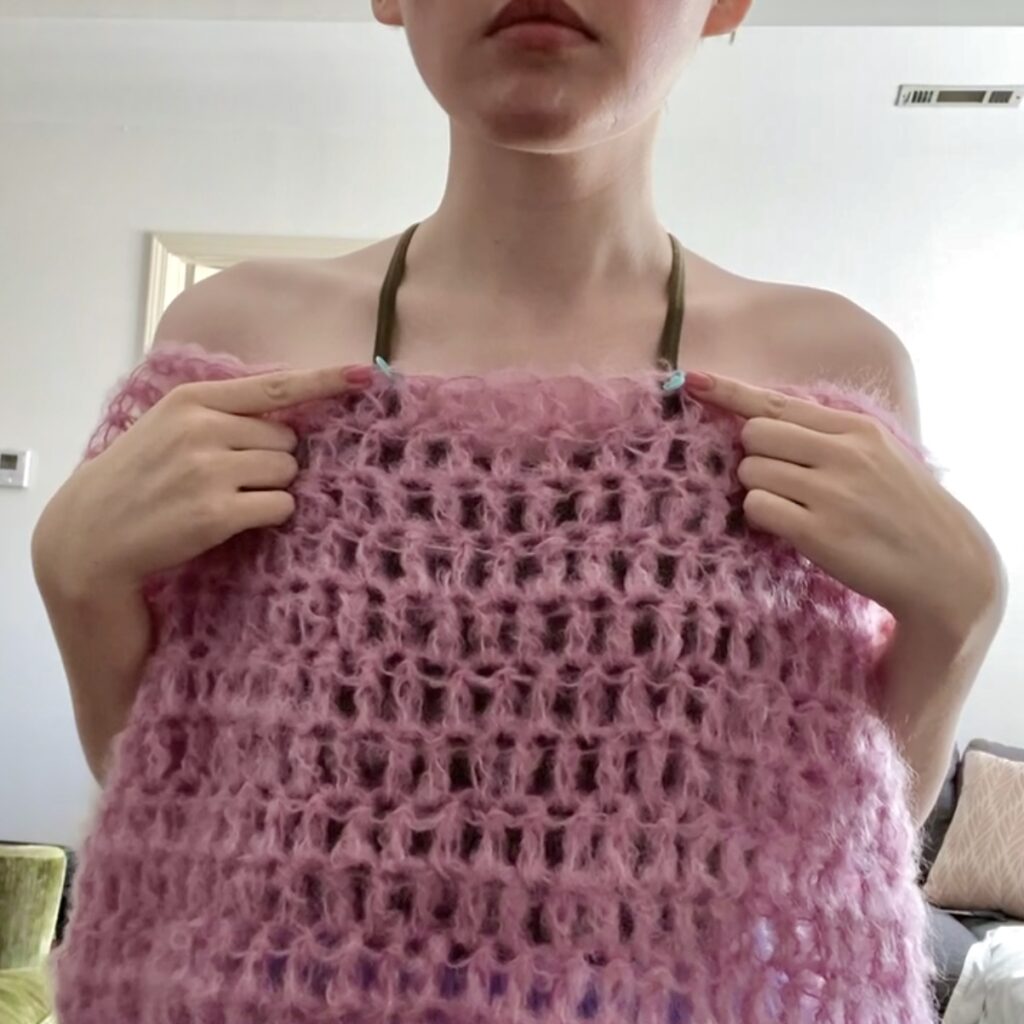
Hold your panel up to you, and then with stitch markers, roughly map out where you want your neck hole/shoulders to be. (refer to the picture below).
I have 35 stitches total. I left 5 sts (approx. 5″ inches) in middle for my neck hole and then 15 sts on either side for my shoulders.
First Shoulder
NOTE: The first decrease row for the first shoulder will have the decrease worked at the end of the row/in the last 2 sts
For the next 3 rows/3″ inches: Turn your work and ch 2/FTC, work 1 dc into each st UNTIL you come to the last 2/first 2 sts nearest to the neck hole, dc2tog/dc dec the last 2/first 2 sts.
Depending which side of your work you’re on, you will ALWAYS be decreasing at the beginning or the ending of each row. So you will ALWAYS be decreasing either the first 2 or the last 2 stitches (you will only be decreasing on the side nearest to the neck hole).
NOTE: With each decrease row, you should only be decreasing by 1 stitch.
After you finish with the first shoulder, fasten off.
See my Video Tutorial Here if you are needing more visual help!
Second Shoulder
Starting on the other side of your neck hole, attach your yarn to the stitch nearest to the neck hole.
NOTE: The first decrease row for the second shoulder will have the decrease worked at the beginning of the row/in the first 2 sts.
For the next 3 rows/3″ inches: Turn your work and ch 2/FTC, work 1 dc into each st UNTIL you come to the last 2/first 2 sts nearest to the neck hole, dc2tog/dc dec the last 2/first 2 sts.
After you finish with the second shoulder, fasten off.
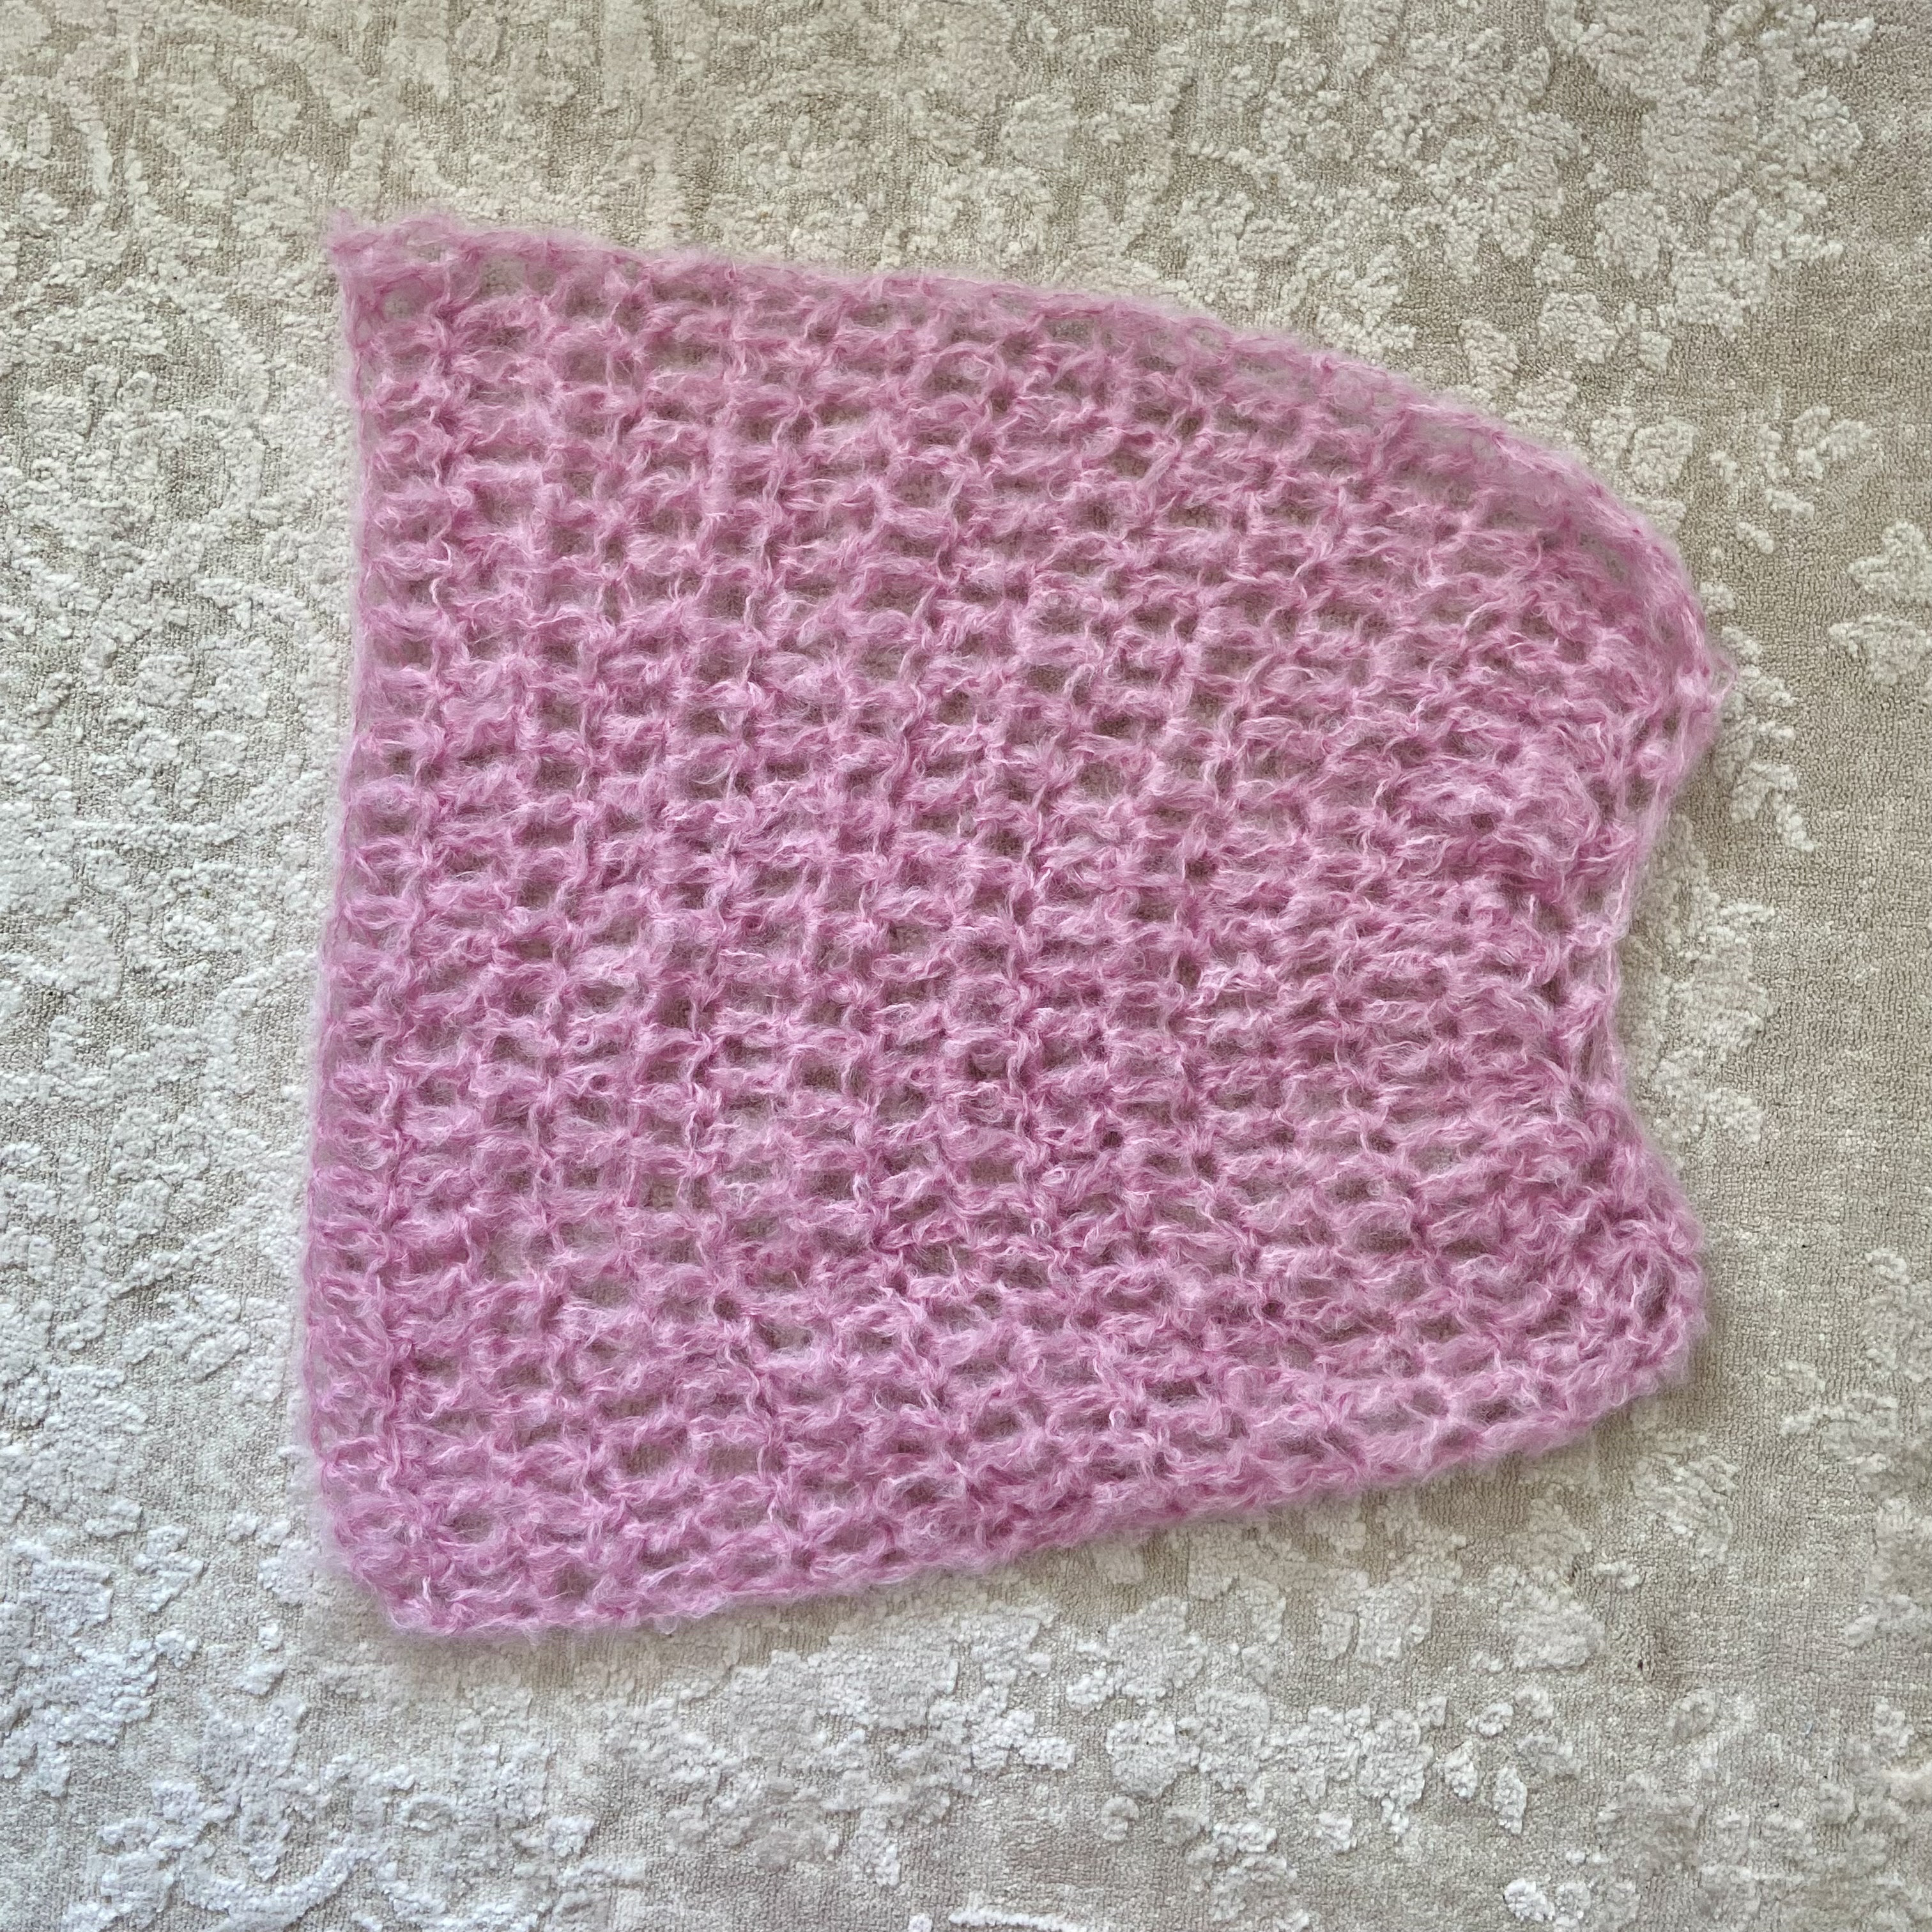
Sleeves
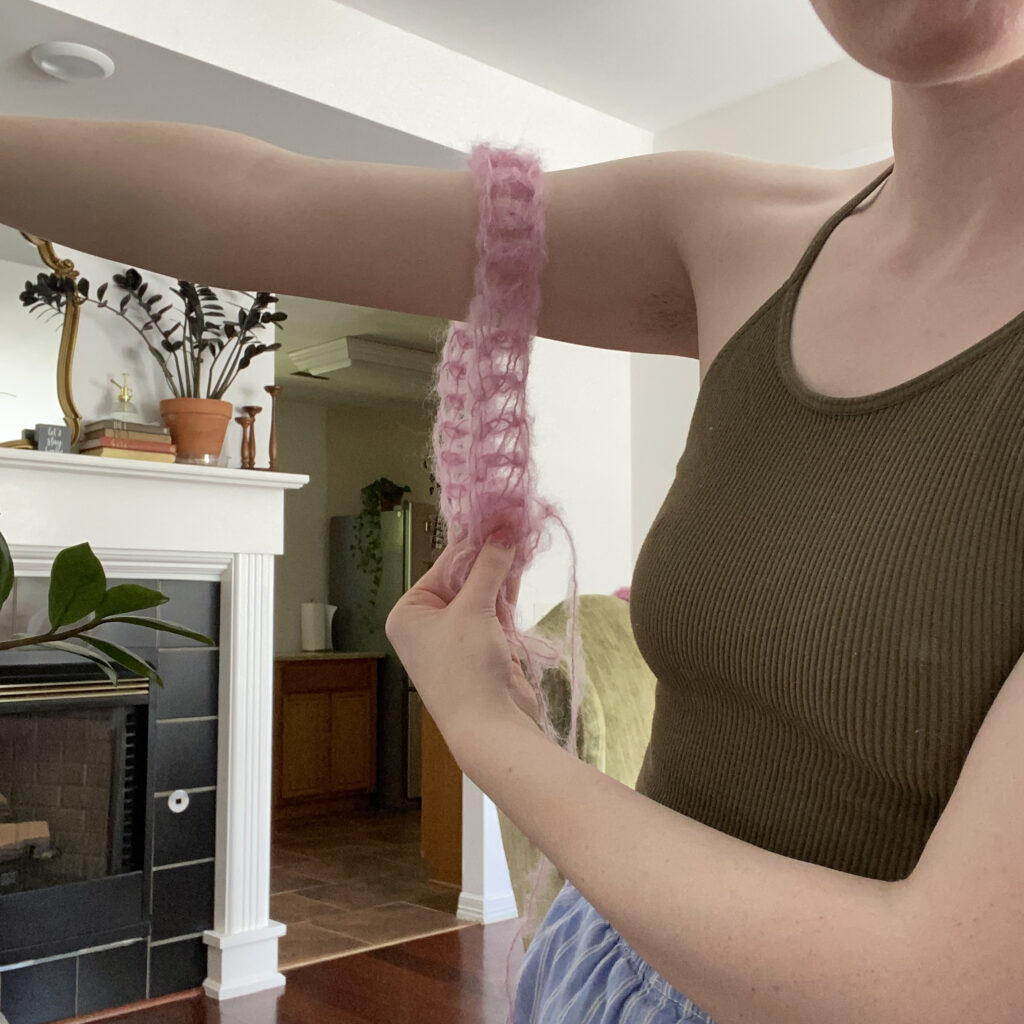
Row 1: Ch/FDC as many chains/sts as wide as you want for the width of your sleeves.
This can really be as wide or as narrow (but not too tight, because you don’t want it to be uncomfortable) as you want it to be (refer to the picture below).
I worked a total of 25 stitches. This is nice, big and flowy for me, as I am going for a more oversized look.
NOTE: Keep in mind where your sleeve will start so you can determine how long to make it. You can guesstimate this pretty well by seeing where the drop of shoulder is from one of your front/back panels.
I know mine will start around the middle of my upper arm.
Now from here, you have 2 options for the sleeves.
Option 1 (wide, bell-like sleeve): Crochet as many rows as you want for the length of your sleeve, for a nice and wide, flowy sleeve, OR
Option 2 (balloon sleeve): Crochet as many rows as you want until you are about 1″ inch shy of where you want to stop for the length of your sleeve and then follow the next 2 rows…
I worked 14 rows for my pink sweater and 9 rows for my purple sweater before working the next 2 decrease rows. (16 rows/19″ inches total per pink sleeve and 11 rows/13″ inches total per purple sleeve)
Decrease Row 1: Turn your work and ch 2/FTC, and then Dc2tog/Dc Dec in each stitch until the end of the row.
NOTE: If you sleeve is a lot more narrow than mine, making this many decreases may make the hand opening too small. If this is the case, work less decreases by alternating between a decrease and a normal dc every few stitches
Decrease Row 2: Turn your work and ch 1, *work 1 hdc, then hdc2tog/hdc dec, *repeat alternating between a normal hdc and a hdc dec until the end of the row.
NOTE: If your sleeve is decreased enough and will be too tight if you dec more, then work normal hdc and no hdc decreases for “Decrease Row 2”.
Fasten off.
Repeat for second sleeve.
NOW, its time to seam all your panels together. You can use whatever seaming method you like, but I used single crochet to seam mine (linked above, under “Video Tutorials for methods
I use throughout this pattern!“).
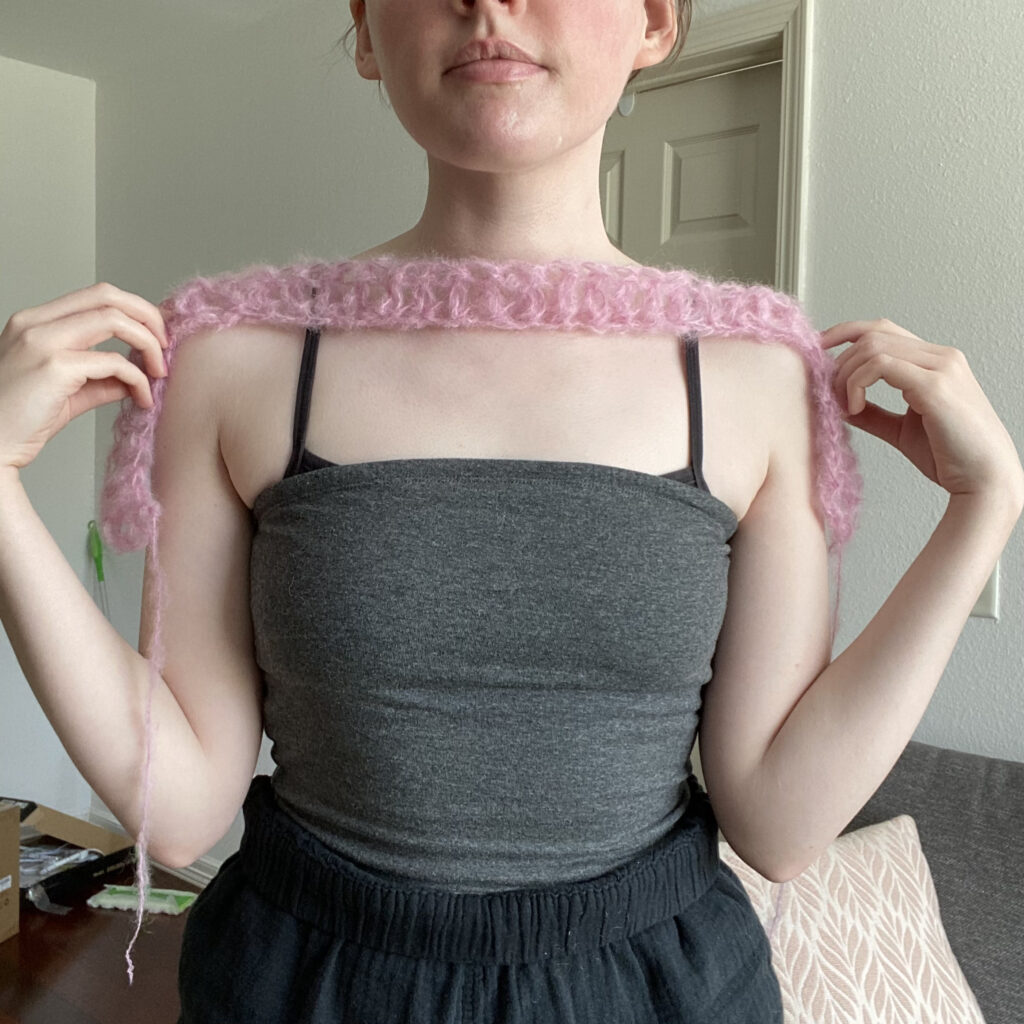
Turtleneck Ribbing
Attach yarn into any of the stitches around the neck hole and ch 1.
Work a round of sc evenly around the neck hole (this will make it easier for working your ribbing). When you come to the sides of the dc posts, work 2 sc into the side of each dc post (e.g. if you have to work into the sides of the next 3 dc, work 2 sc into each dc post for a total of 6 sc across those 3 dc.)
Sl st into the first sc of that round.
NOTE: You can make your ribbing as tall or short as you want it. Mine is going to be 8 sts/4″ inches wide (folds to a mock neck of about 2″ inches wide).
Ribbing: Ch 9, sc into the 2nd ch from the hook, sc in remaining 7 ch, work 2 sl sts into 2 of the sc from the previous round, turn your work, skipping the sl sts you just made and *sc blo into the next 8 sts, turn your work, ch 1 and sc blo in to next 8 sts, work 2 sl sts into 2 of the sc from the previous round, turn your work, *repeat this until you have no more sc from the previous round to work your ribbing in.
Fasten off and leave a fairly long tail to sew both ends of your ribbing together.
I used the “whip stitch” to seam the ribbing together, but you can use whatever seaming method you want.
Weave in all your ends and…
YOU’RE DONE!
If you recreate “The Fairy Floss Sweater”, please tag or DM @hayhaycrochet on Instagram so I can see, like and share!
Happy Crocheting~!
I perhaps shall simply keep silent