
🤍WELCOME HERE🤍
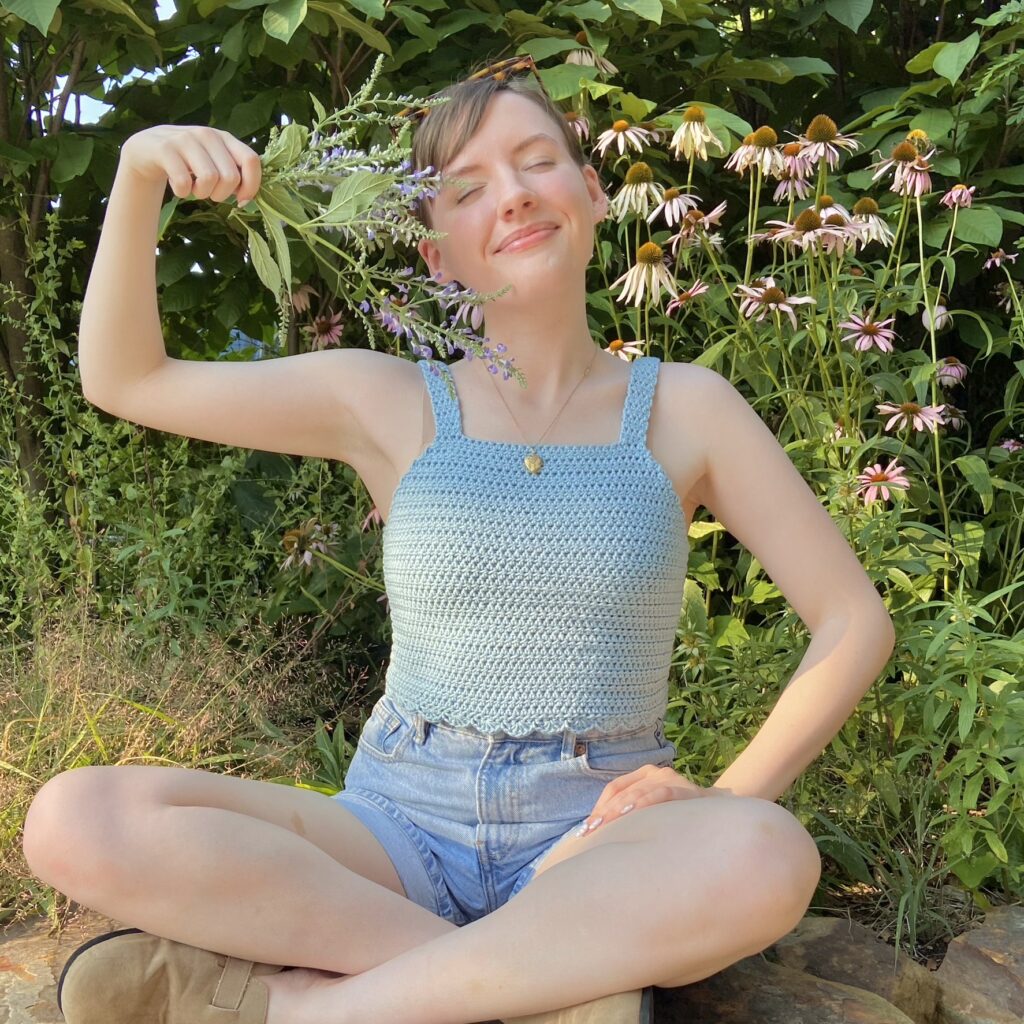
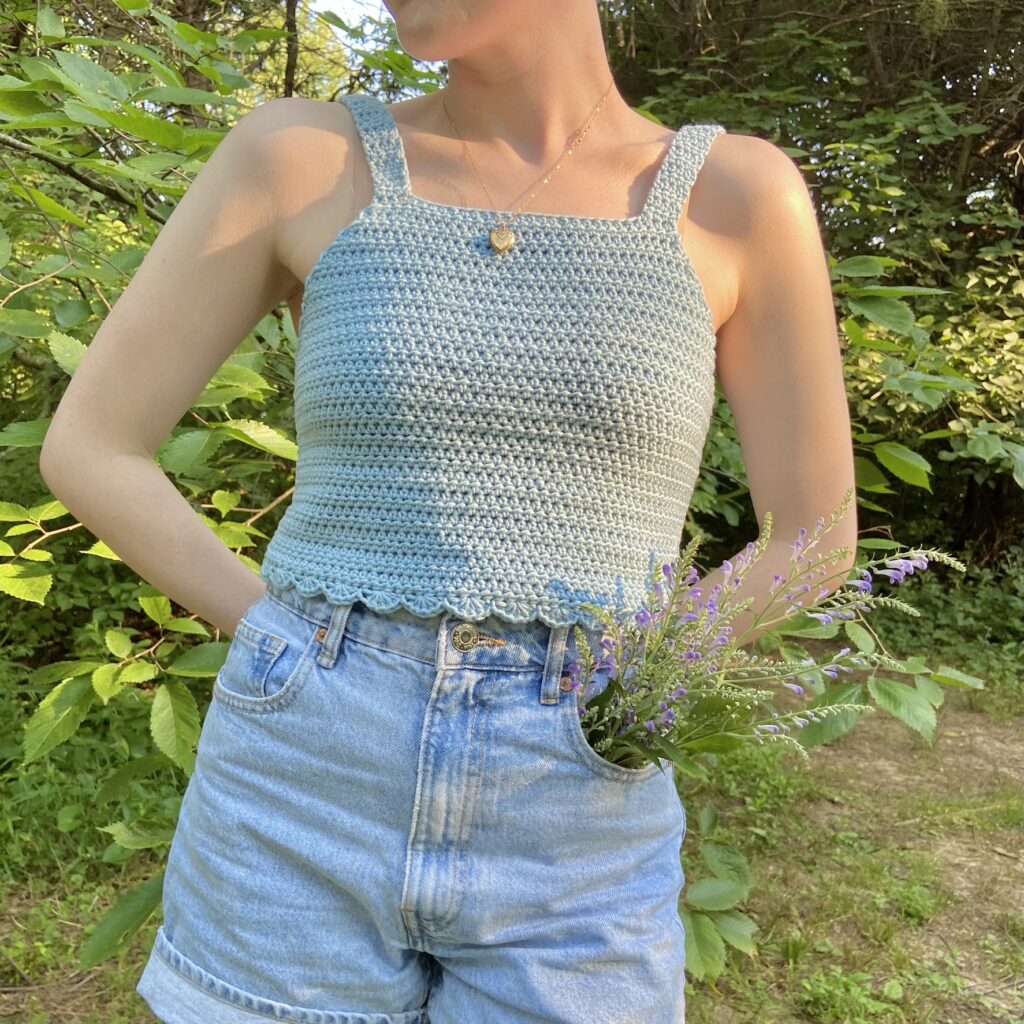
In today’s pattern, I am going to share how to recreate your very own “Renea Top” (named after one of my besties/sisters)!💕
This post may contains affiliate links.
This sweet and simple crochet tank top WAS actually going to be the very first pattern I ever released on “Hayhay Crochet”, but I was scared that it wasn’t good enough and that the instructions were not clear, which was a valid fear, because almost 2 years later coming back around to this pattern, there was LOTS of editing to be done to insure this pattern would even work out! 😂
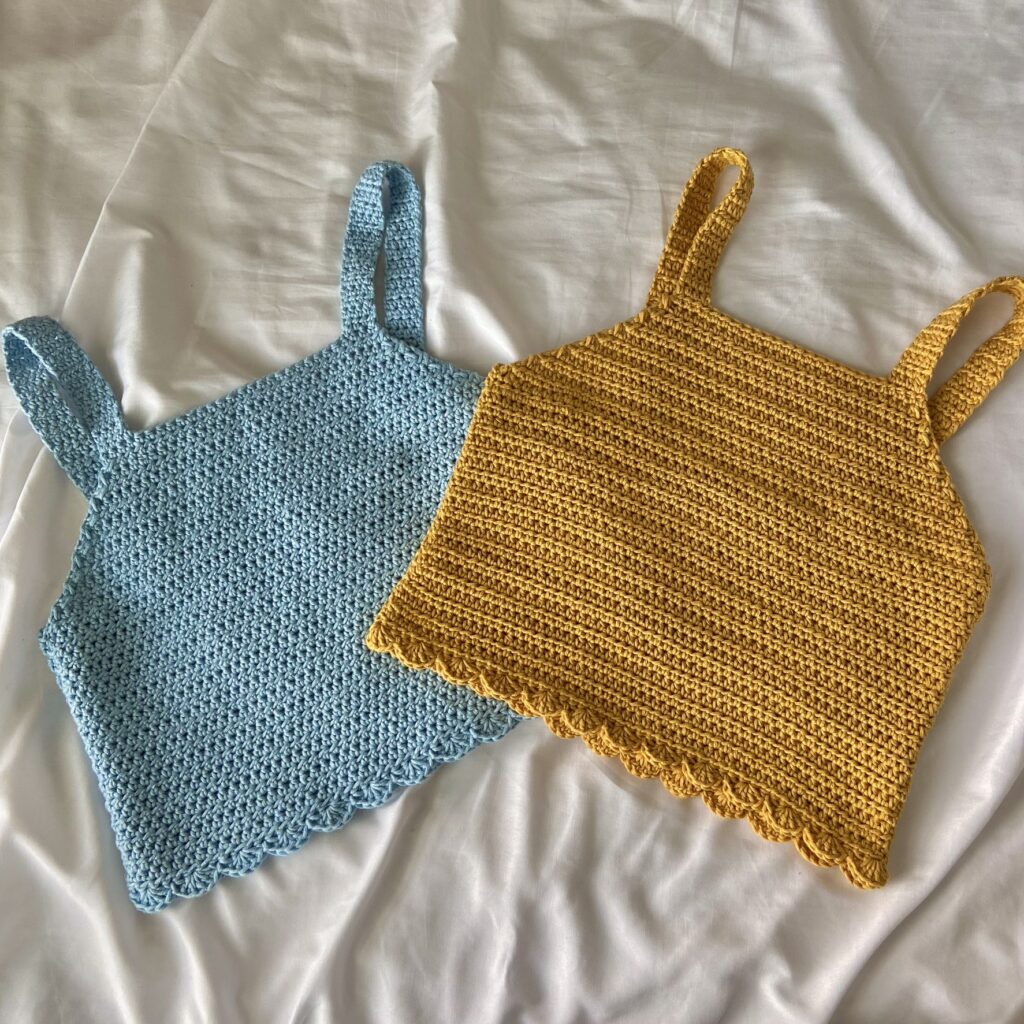
This top is fairly customizable with how long or short you can make your top and straps, and your top can be made with or without the scallop detailing.
SO, without further ado, LET’S GET STARTED!
Level: Easy
MATERIALS
DK/Light Worsted (3) Yarn
Number of skeins: 2 (2, 2, 3, 3, 3, 4, 4)
Gauge: 4” x 4” square = 16 hdc sts wide x 14 hdc rows tall (measurements taken laid flat and not stretched)
PATTERN NOTES
*Pattern follow size XS (S, M, L, XL, 2XL, 3XL, 4XL)
E.g. “Hdc 49 (53, 61, 65, 73, 77, 85, 89) ” means Hdc 49 for XS, 53 for S, 61 for M, 65 for L, 73 for XL, 77 for 2XL, 85 for 3XL, 89 for 4XL.
If there is only one number, it applies to ALL sizes
*The pattern follows US crochet terms.
*Turning ch 1 does NOT count as a stitch in this pattern
STITCHES + ABBREVIATIONS:
Ch = Chain
Fhdc = Foundation Half Double Crochet (how to linked here)
St(s) = Stitch(es)
Hdc = Half Double Crochet
Hdc2tog = Half Double Crochet 2 (stitches) Together/Half Double Crochet Decrease
Sl st = Slip Stitch
Sk st = Skip a stitch
Dc = Double Crochet
The Renea Top Pattern
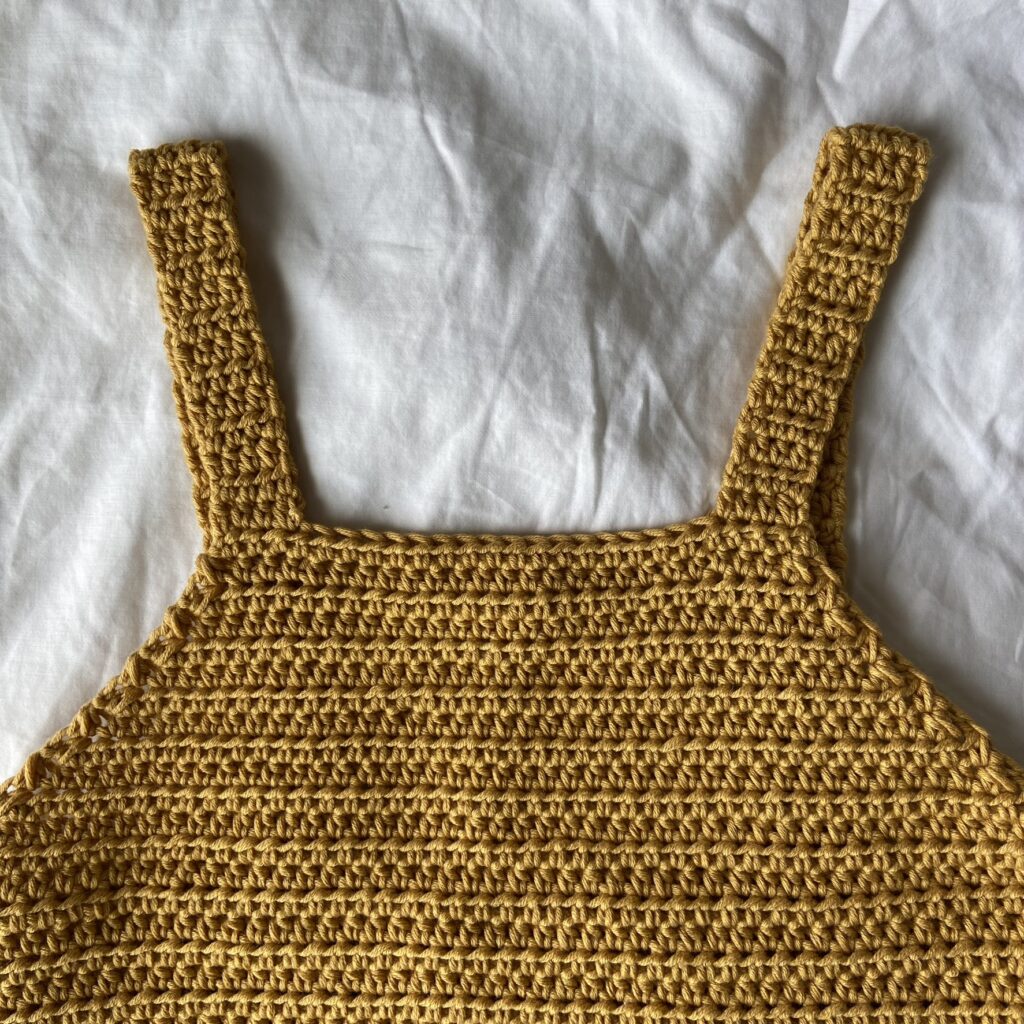
Front Panel
Row 1: Fhdc 49 (53, 61, 65, 73, 77, 85, 89). (how to linked)
(Or you can just chain 50 (54, 62, 66, 74, 78, 86, 90), work a hdc into the 2nd chain from the hook and then work 1 hdc into each chain until the end of the chain.)
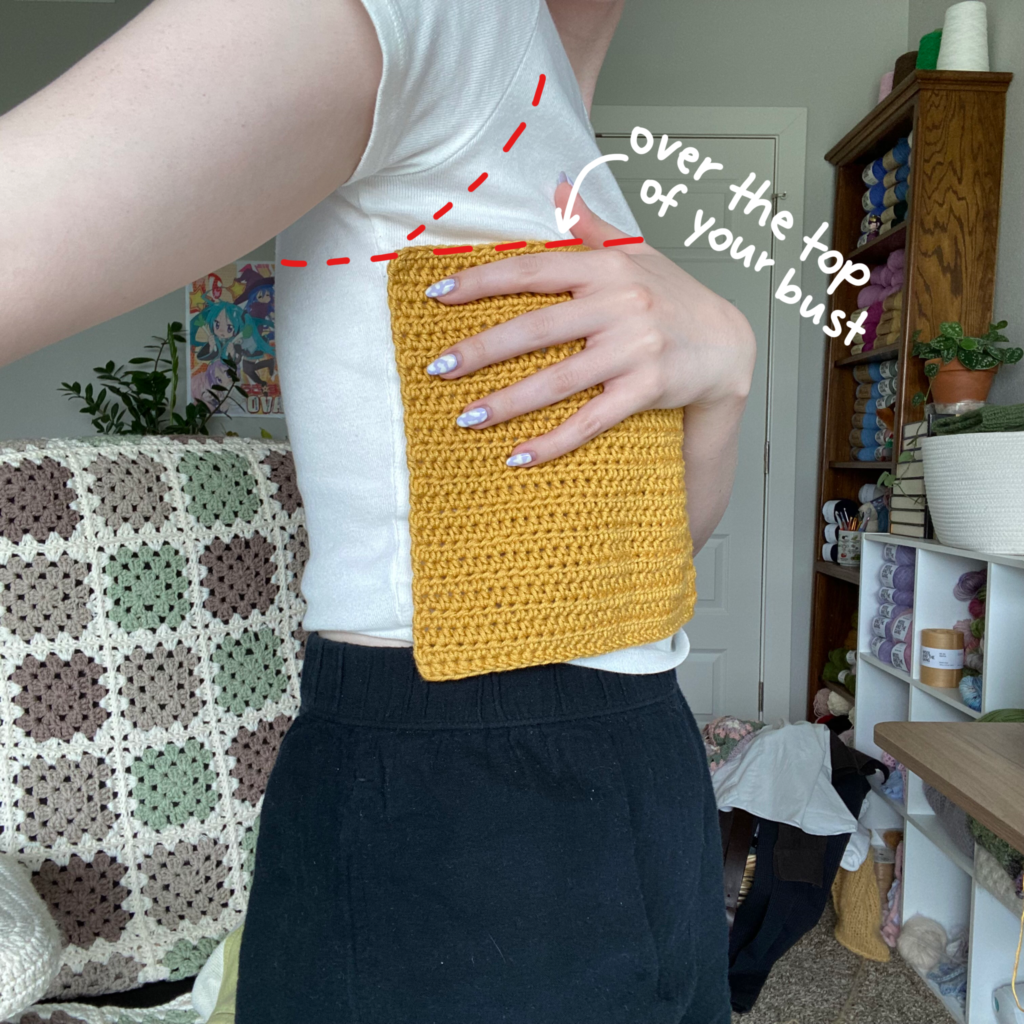
NOTE: if it seems that the top may not be wide enough for the size you are making, crochet your foundation chain as wide as you need it for it to cover over the front of your bust and reach on either side of the middle of your sides/right under and in the middle of your armpits. MAKE SURE your chain is done in multiples of 4’s if you are wanting the scallop edging at the bottom of your top.
Row 2: Turn your work and ch 1. Work 1 hdc into each hdc st until the end of the row <49 (53, 61, 65, 73, 77, 85, 89) sts total>
Repeat row 2 through row 26 (28, 31, 33, 36, 39, 43, 47)
(OR you can make your top LONGER or SHORTER if you would like to work more or less rows. Refer to the picture below on how you show hold the top over bust and under your armpits to judge approximately how long your top will be when you are done.)
Row 27 (29, 32, 34, 37, 40, 44, 48) (or whatever row you might be on if you worked more or less rows): Turn your work and ch 1. Hdc2tog first 2 sts, work 1 hdc into each st until there are 2 sts remaining. Hdc2tog last 2 sts. <47 (51, 59, 63, 71, 75, 83, 87) sts total>
NOTE: if you made a custom size with the ‘measure over your bust method’, continue to decrease using the instructions for whatever size you typically wear.
Rep row 27 (29, 32, 34, 37, 40, 44, 48) through row 39 (41, 46, 48, 53, 56, 62, 66)
For Size XS (S)
Row 40 (42): Turn your work and ch 1. Hdc in each st until the end of the row.
For Size M (L)
Rows 47-48 (49-50): Turn your work and ch 1. Hdc in each st until the end of the row.
For Size XL (2XL)
Rows 54-56 (57-59): Turn your work and ch 1. Hdc in each st until the end of the row.
For Size 3XL (4XL)
Rows 63-66 (67-70): Turn your work and ch 1. Hdc in each st until the end of the row.
Fasten off.
Back Panel
Row 1: Fhdc 49 (53, 61, 65, 73, 77, 85, 89)
(Or you can just chain the same way you did if you chained for the front panel)
NOTE: OR chain as many as you worked for the front of your top if you made a custom size using the ‘measure over your bust method’.
Row 2: Turn your work and ch 1. Work 1 hdc into each hdc st until the end of the row <49 (53, 61, 65, 73, 77, 85, 89) sts total>
Repeat row 2 through row 26 (28, 31, 33, 36, 39, 43, 47)
(OR how ever many rows you worked for your front panel BEFORE the decrease rows.)
Fasten off.
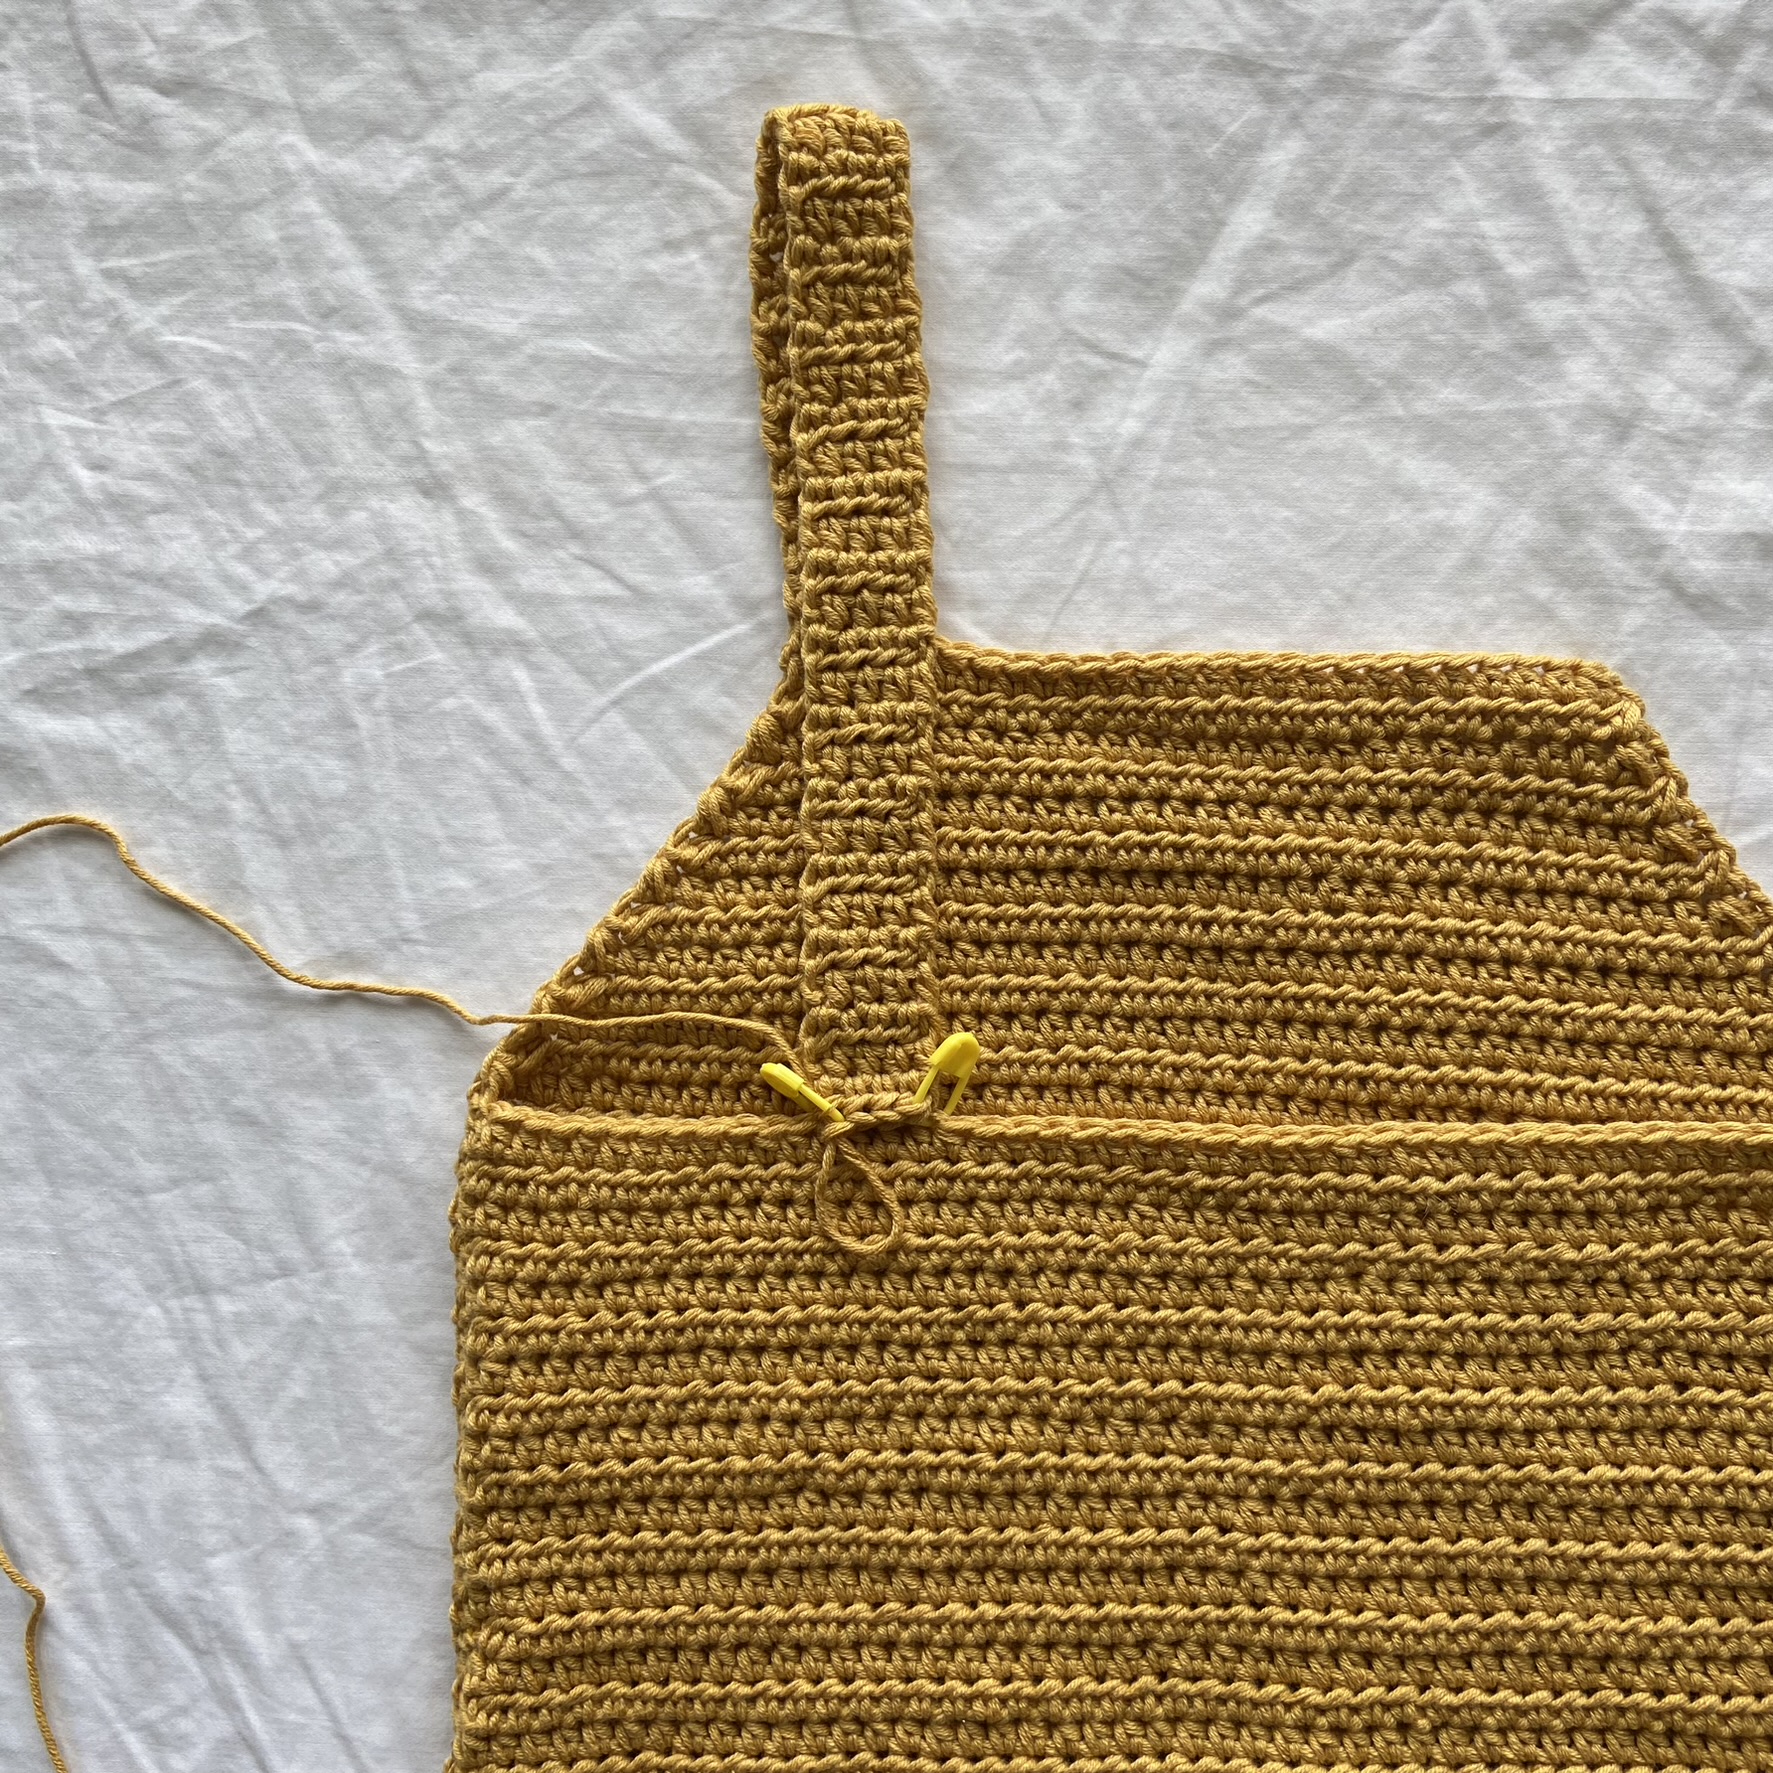
Sew your front and back panels together by using the “whip stitch” (video tutorial linked)
See MY VIDEO TUTORIAL on how I lined them up.
Straps
Row 1: Attach yarn. Ch 1 and then work a hdc into the same stitch you attached your yarn to your work, work 1 hdc into the next 3 sts.
Row 2: Turn your work and ch 1. Work 1 hdc into each st until the end of the row.
Repeat row 2 through row 40 (45, 50, 55, 60, 65, 70, 75)
*I recommend, since all bodies are different, making the straps however long or short you need to fit YOU. Crochet straps to recommended OR desired row length, use stitch markers/safety pins and pin in place on the back panel OR temporarily sew it in place and try on the top to make sure it is a good length for you.

Repeat for the second strap.
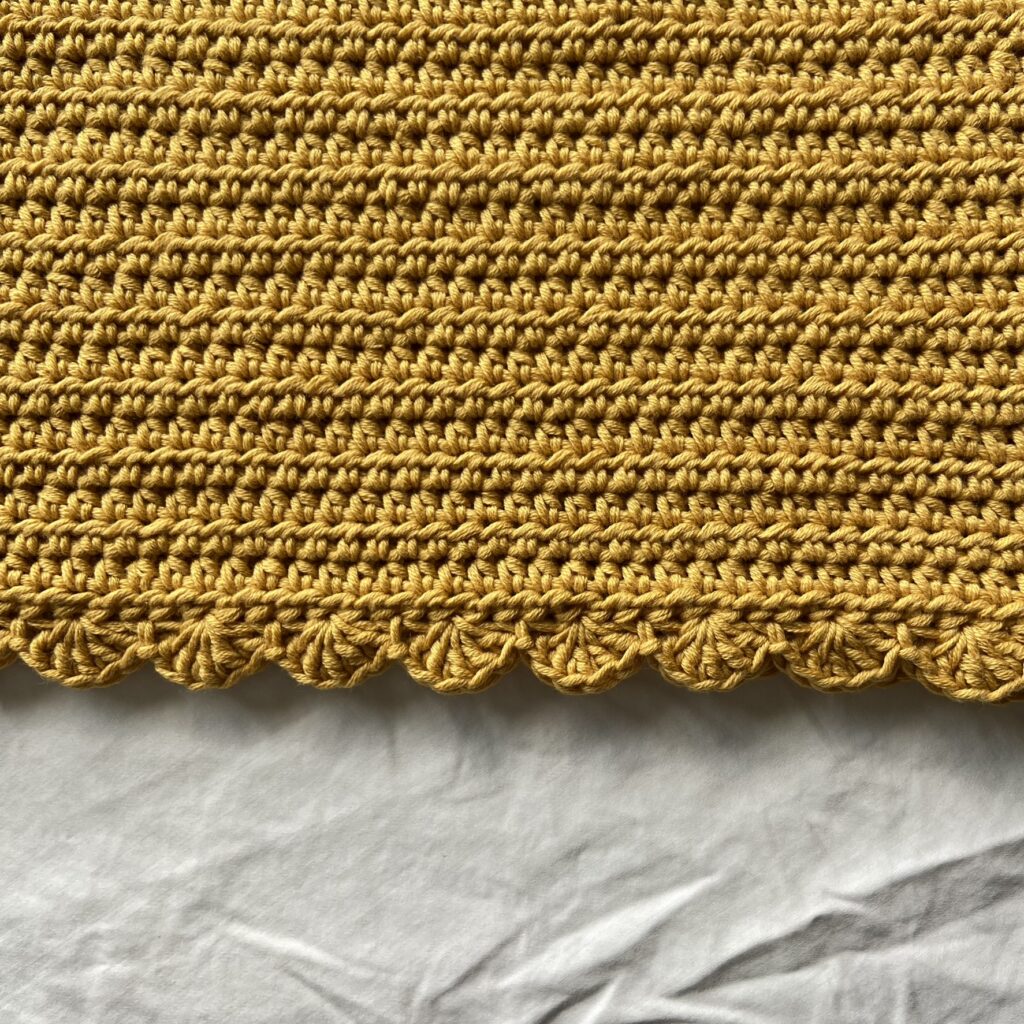
Scallop Edging
This is optional, you do not have to add the scallop edging, but if you are interested in it, here’s how you do it!
Row 1: Attach yarn. Ch 1 and then work a sl st into the same stitch you attached your yarn to your work, sk st, work 5 dc into the next st, sk st, *work a sl st into the next st, sk st, work 5 dc into the next, sk st, *repeat this sequence until the end of the row. You should be ending with a sl st, you will be sl stitching into the very same st where you attached your yarn, chained and worked your first sl st.
Check out my VIDEO TUTORIAL HERE if you need more help visually!
Fasten off…
Weave in all your ends and…
YOU’RE DONE!
If you recreate the “The Renea Top”, please tag or DM @hayhaycrochet on Instagram so I can see, like and share!
Happy Crocheting~!
I have a slight problem I’m thinking of making this but I’m worried Abt it not fitting well and I have to restart everything and also how do I add bra pads to it
This pattern is lovely but I think there’s a problem with sizes. My size is normally XS or S but with your pattern I’m taking XL ! I’m very surprised…
Hi Cinname,
I was having the same issue as you (the S wasn’t big enough). I messaged Heather on Instagram and she said to add stitches to the existing amount written in the pattern, increasing in multiples of 4 (to accomodate the scalloped edge) until you reach half your bust measurement (i.e. instead of 53 FHDC for a S, I’ve added 16 FHDC and ended up with 69 FHDC).
Based on your comment, I think you’ve made your top already, but hopefully this will help someone else!
Definitely making this to go with my cardigan I made from your other pattern.
it’s lovely!!