🤍WELCOME HERE🤍
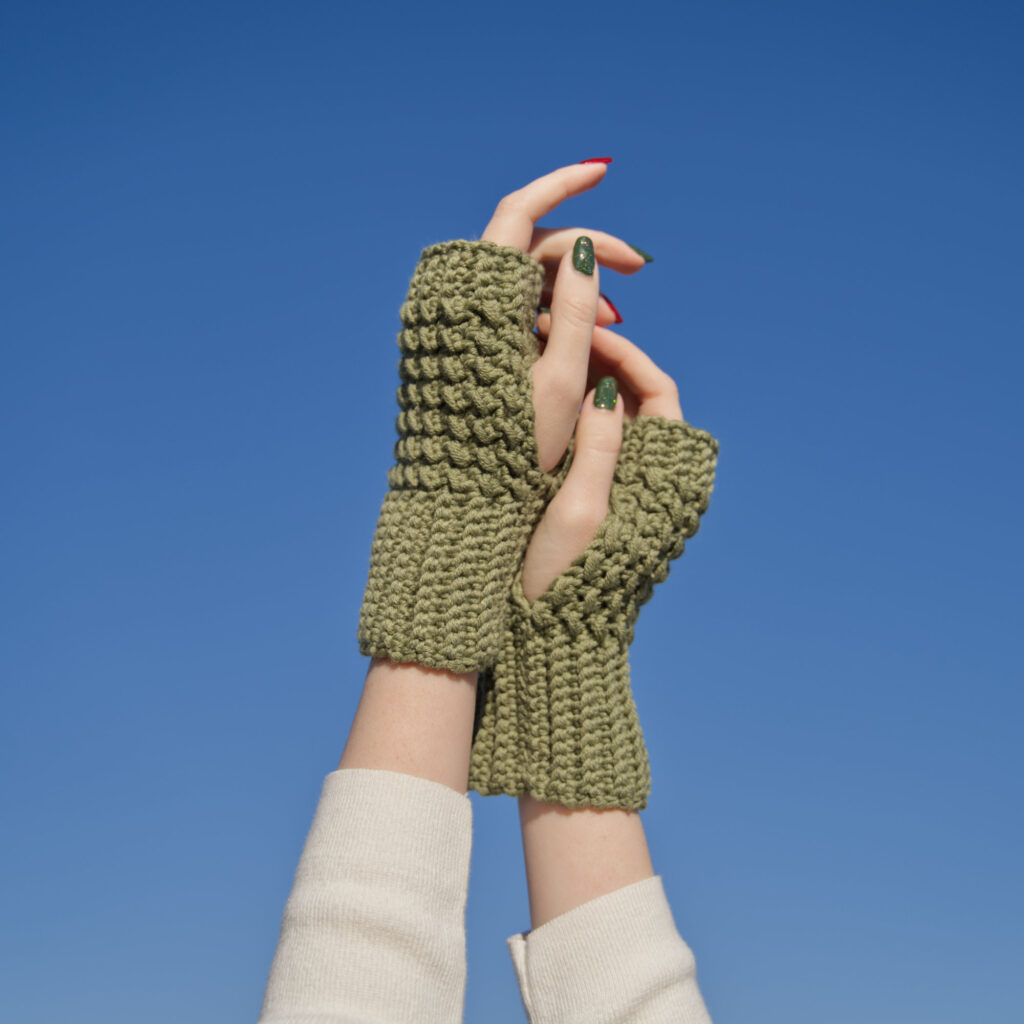
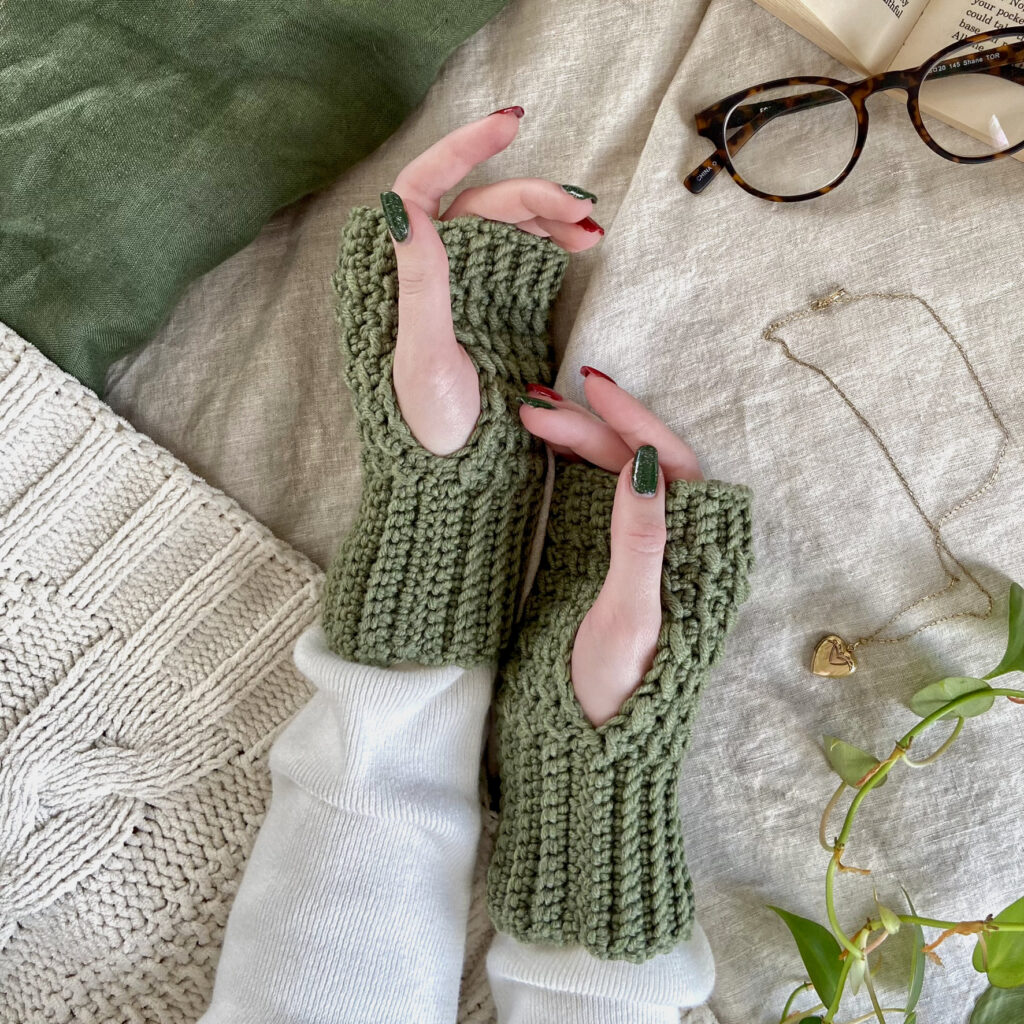
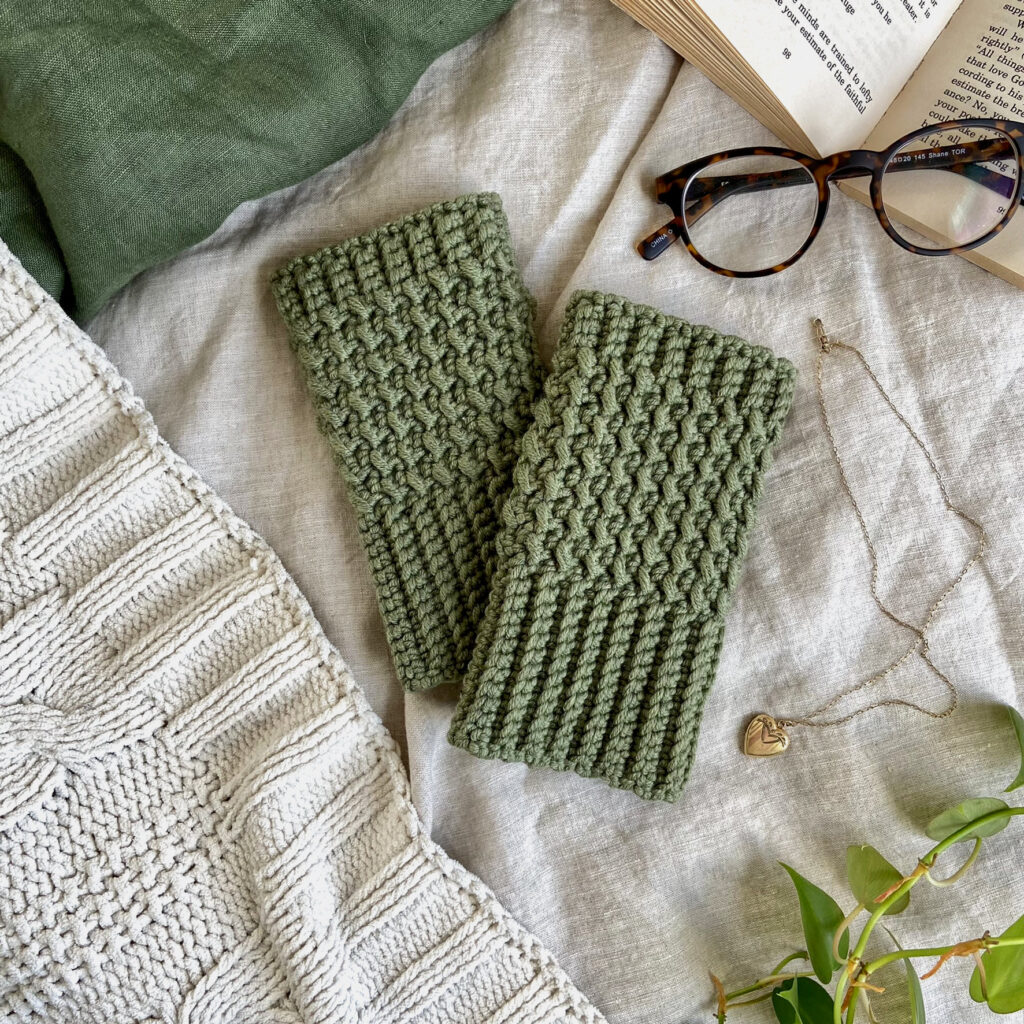
Hello there! In this pattern, I am going to show you how to make these fun, easy and QUICK accessory I like to call “The Brookie Gloves”!
This post may contains affiliate links.
They are a very simple design, made up of single crochet ribbing and the “even moss stitch“. This combination of stitches help add a lot of texture to these fingerless gloves and I am totally here for it! 💕
I actually came up with this design back in 2016! It was the first little pattern I have ever wrote out for myself! I thought about these gloves earlier this year and wondered if I still had the notebook I wrote this pattern in so long ago, lo and behold, I found it!
With some editing to the pattern (that was not well written at all at the time 😳), I believe it is now ready to share with all of YOU! 💖
SO, without further ado, LET’S GET STARTED!
MATERIALS
Worsted Weight (4) Yarn – Approximately 72 grams
MEASUREMENTS
Gauge: 4″x4″ square = 18 even moss stitches wide x 22 even moss stitch rows tall
Unsown glove: 7″ wide x 6 1/4″ tall*
*you glove width may differ depending how wide you need for your glove to comfortably wrap around the palm of your hand. 7″ is the perfect width I need to wrap the glove around my palm.
STITCHES + ABBREVIATIONS
Ch = Chain
St(s) = Stitch(es)
Sc = Single Crochet
Sc blo = Single Crochet in the Back Loop Only
Hdc = Half Double Crochet
Sl St = Slip Stitch
Even Moss Stitch = Alternate between working a sl st in one stitch and then a hdc in the next over an even amount of stitches. ALWAYS start with a sl st and ALWAYS end on a hdc each time you come upon the “even moss stitch” portion of the pattern.
PATTERN NOTES
*This Pattern follows US crochet terms.
*Turning Ch 1 DOES NOT count as a stitch.
*Always work a normal sc into the first and last stitch of EVERY row.
The Brookie Gloves
Ch 31
Row 1: Work 1 sc into the second ch from the hook. Work 1 sc into the next 3 ch, work the even moss stitch* for 14 ch, work 1 sc into the next 12 ch.
*For the “Even Moss Stitch”, alternate between working a sl st in one stitch and then a hdc in the next over an even amount of stitches. ALWAYS start with a sl st and ALWAYS end on a hdc each time you come upon the “even moss stitch” portion of the pattern.
Row 2: Ch 1, turn your work. Work 1 sc into the first st, work 1 sc blo into the next 11 sts, work the even moss stitch for the next 14 sts, work 1 sc blo into the next 3 sts, work 1 sc into the last st.
If you need a little more help visually, you can find the Video Tutorial Here
Row 3: Ch 1, turn your work. Work 1 sc into the first st, work 1 sc blo into the next 3 sts, work the even moss stitch for the next 14 sts, work 1 sc blo into the next 11 sts, work 1 sc into the last st.
Rows 4-34: Repeat rows 2 and 3. You can work more or less rows depending how many rows you need for the glove to wrap around the palm of your hand.
Fasten off.
Check out my YouTube Video for this pattern if you need a little more help!
Seaming
Once you have your glove the width you need for it to wrap around the palm of your hand, its time for you seam that baby up!
Essentially, all you need to do is leave a hole in approximately the middle-ish of your glove for you thumb to go through.
How I seamed my glove is…
Seam 8 stitches together from the top of your glove and then seam 14 stitches up from the bottom of your glove.*
*Of course, you can always seam more or less stitches together depending one whatever is most comfortable for YOUR thumb.
You can watch my Video Tutorial Here to see more of what this process looks like.
Weave in all your ends and…
YOU’RE DONE!
If you recreate “The Brookie Gloves“, please tag or DM @hayhaycrochet on Instagram or TikTok so I can see, like and share!
Happy Crocheting~!