
🤍WELCOME HERE🤍
This post may contain affiliate links.
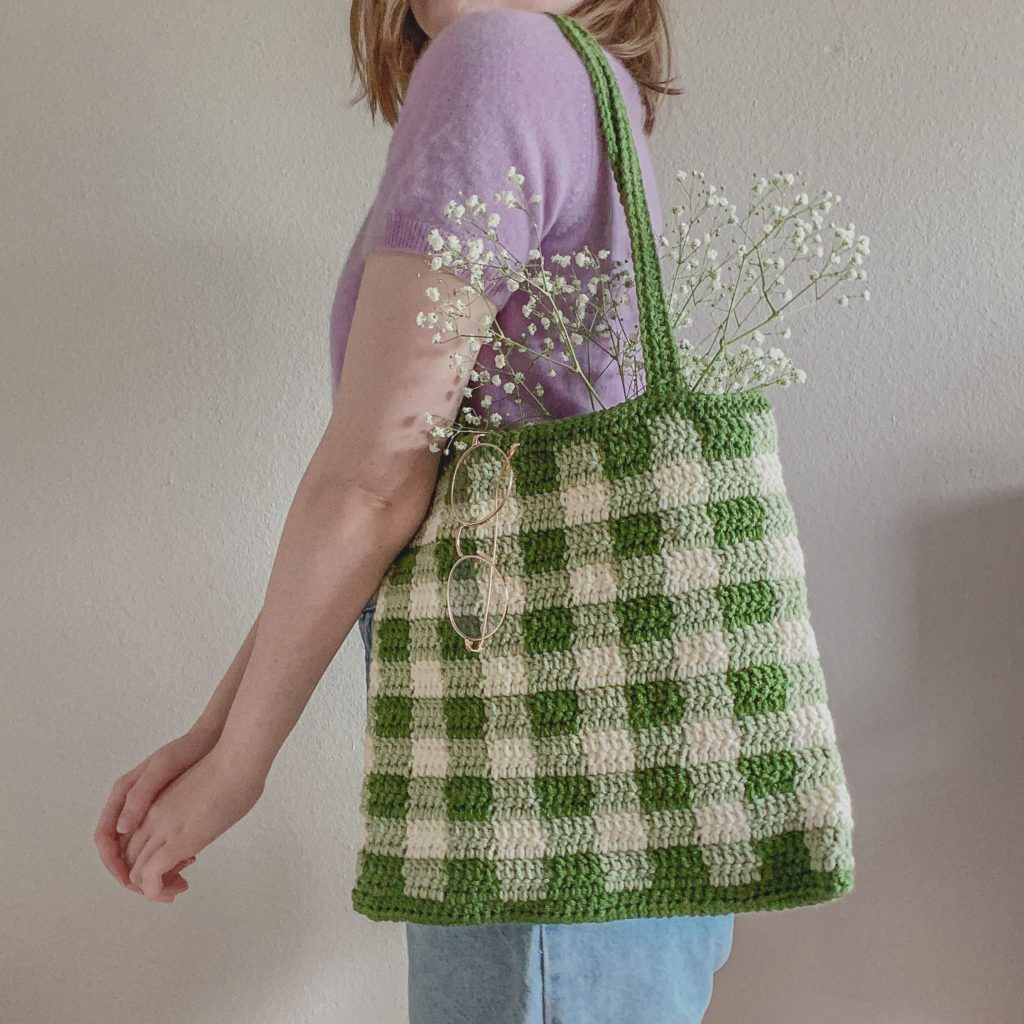
Hello there! Today I am sharing a pattern A LOT of people have been waiting on for quite sometime now (since I showed on my social media that I was working on it back in early September) and its the Fall Picnic Tote Bag Pattern!
I get several comments and DM’s a week from people asking for a tutorial or when it’s going to be out and I am very happy to finally share it with y’all!
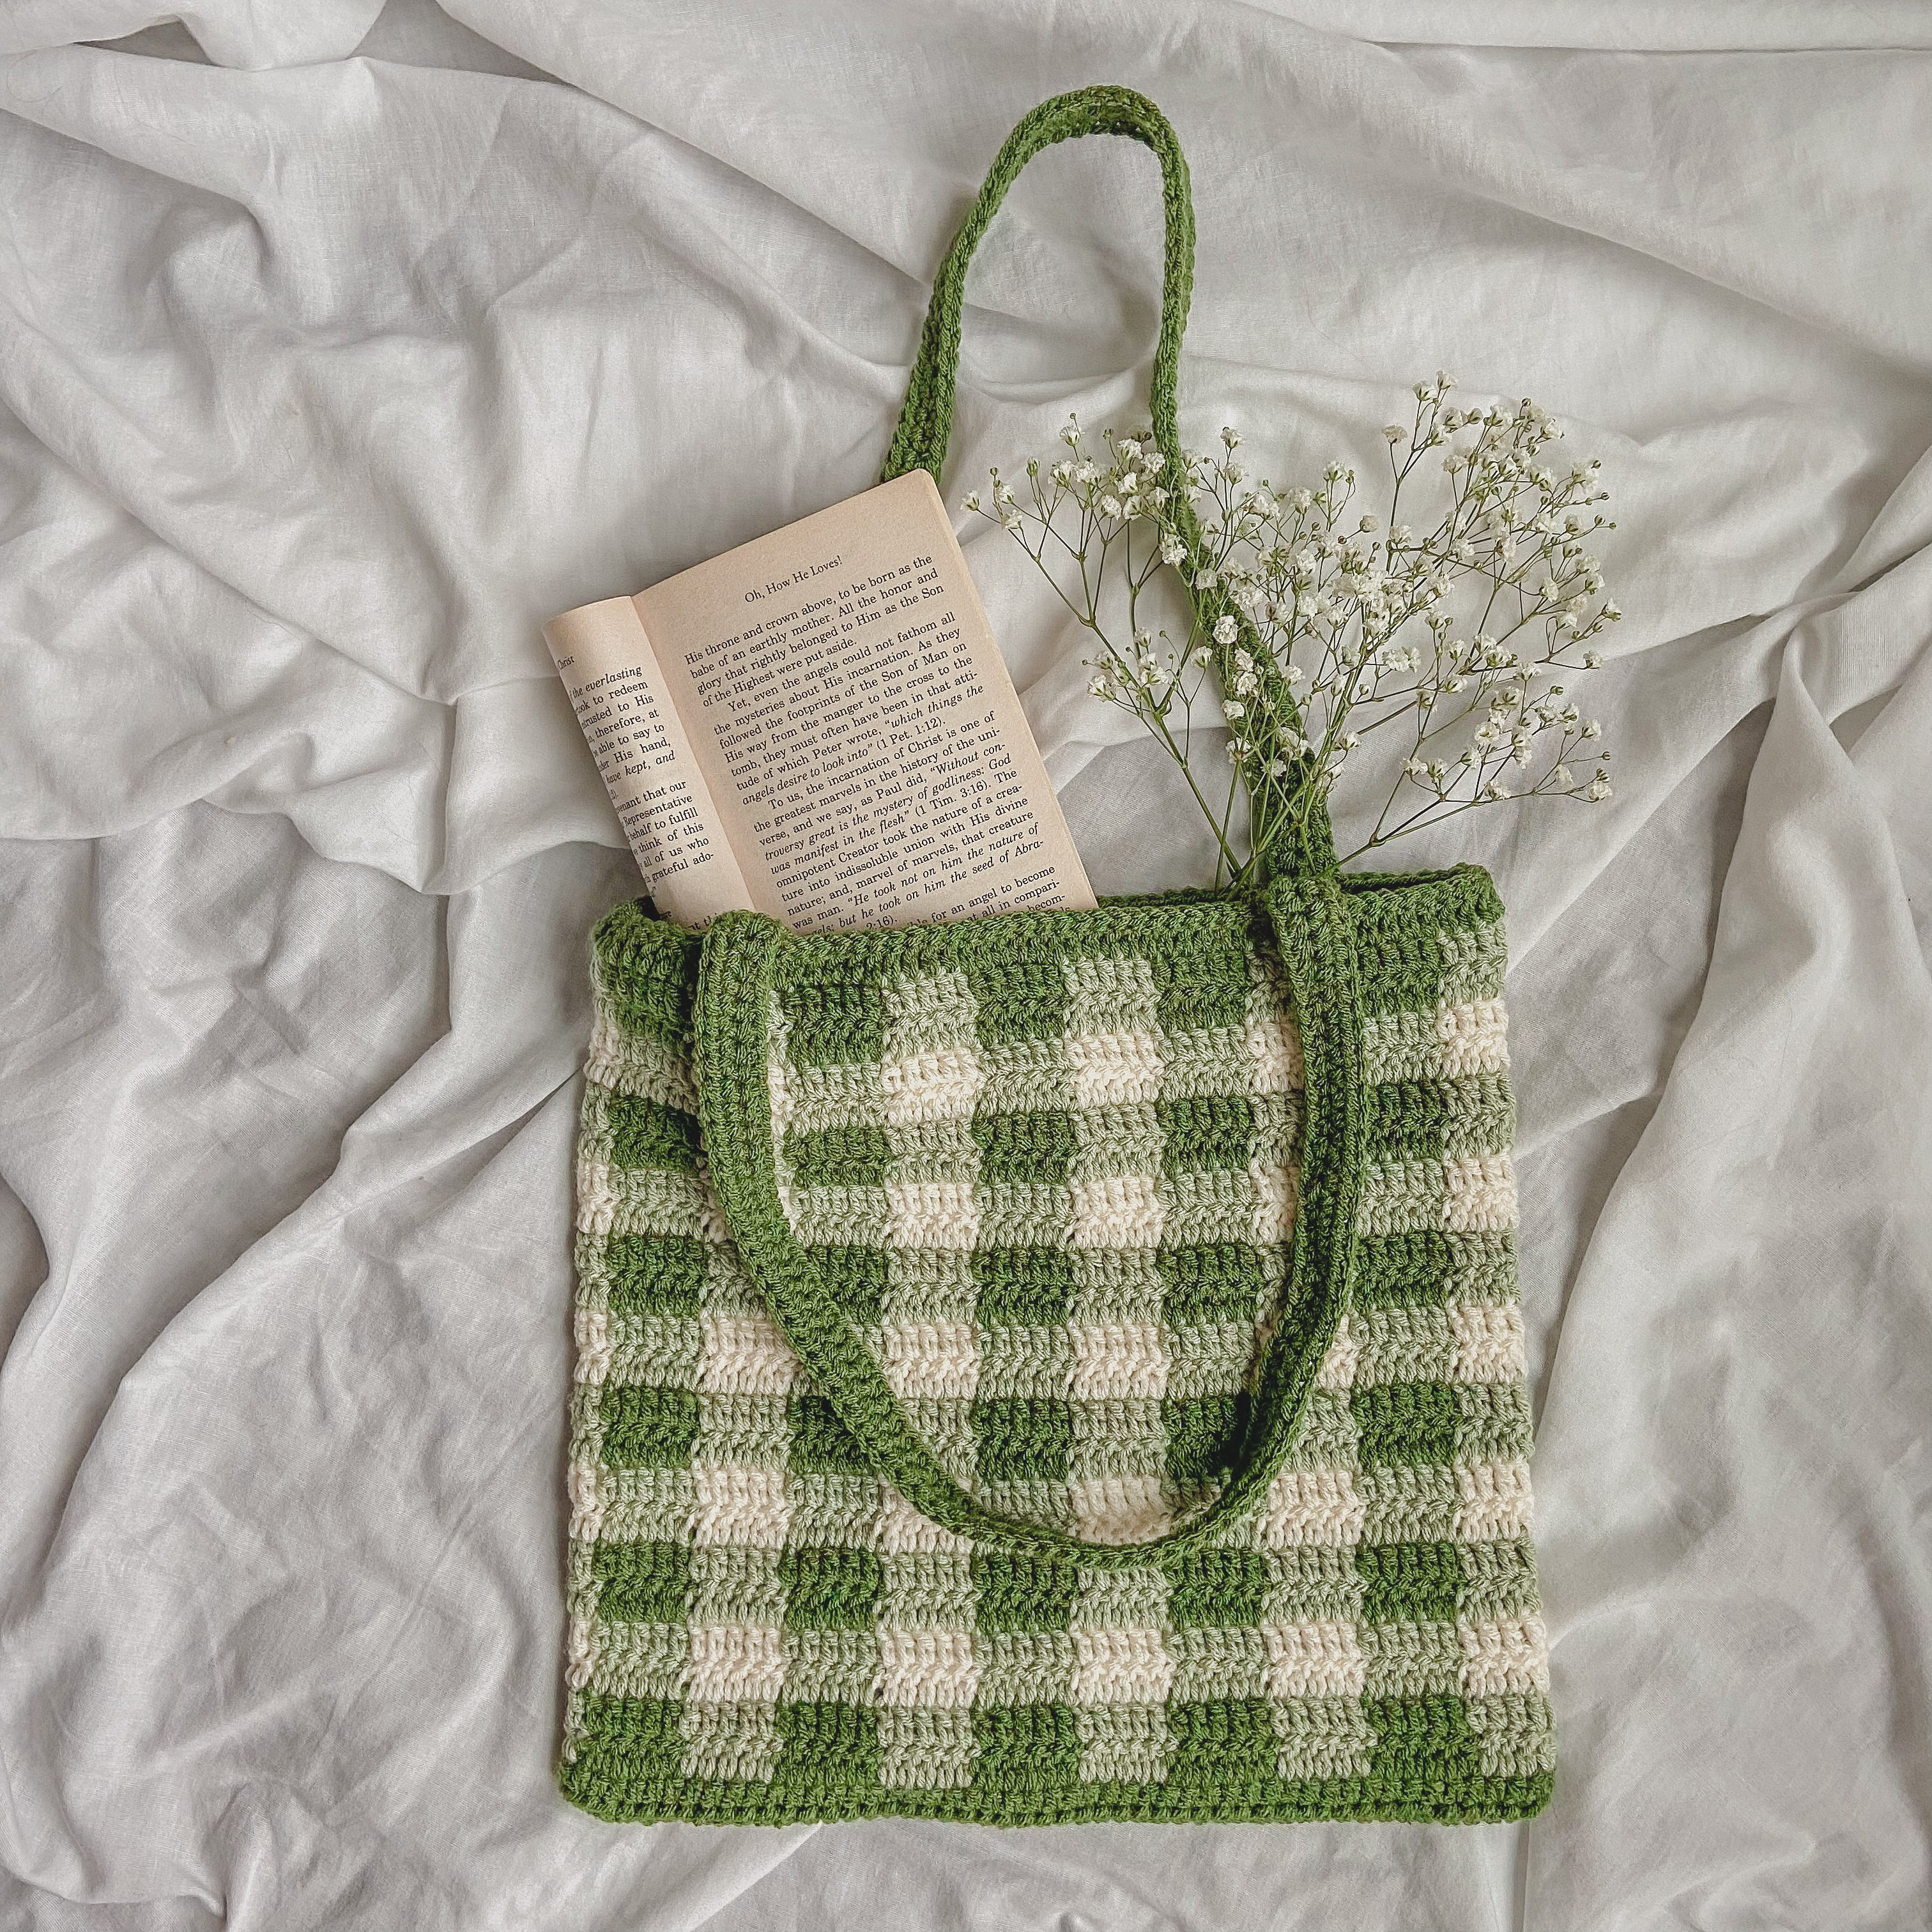
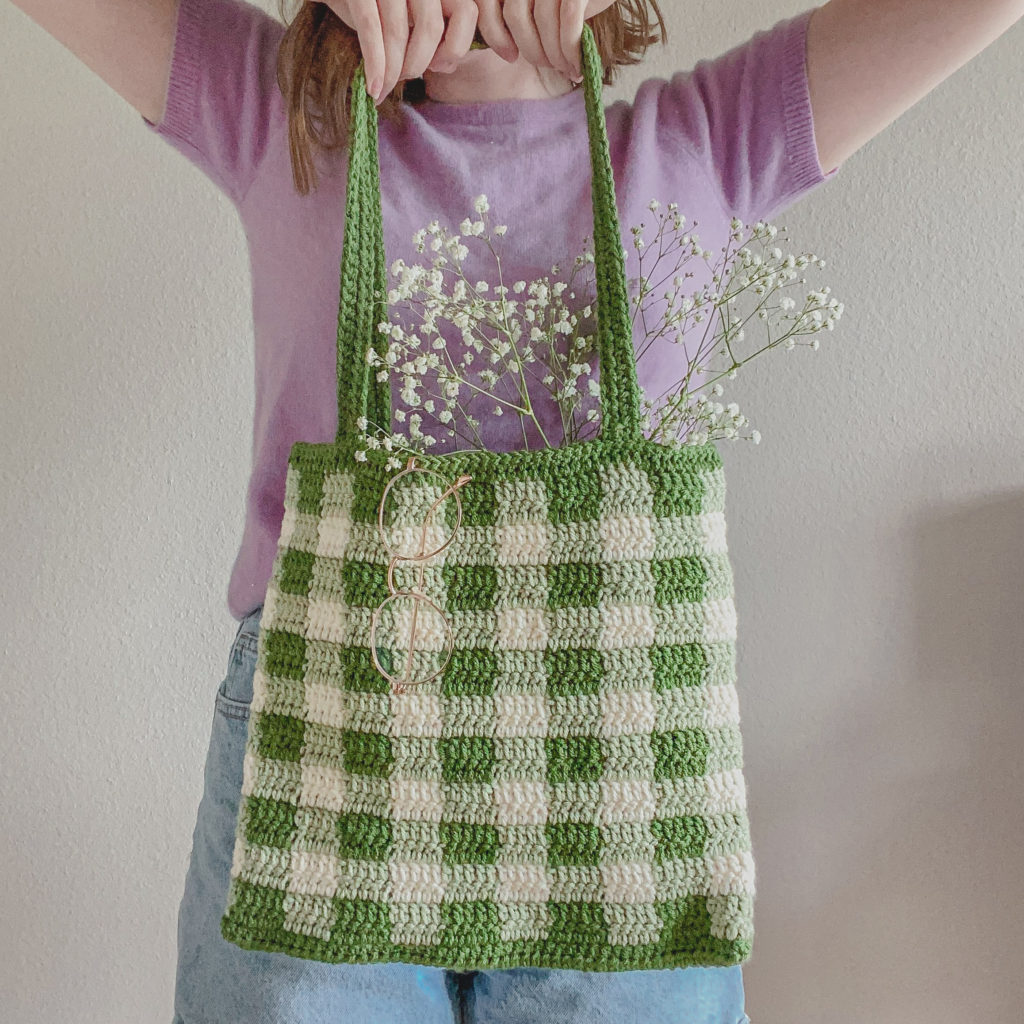
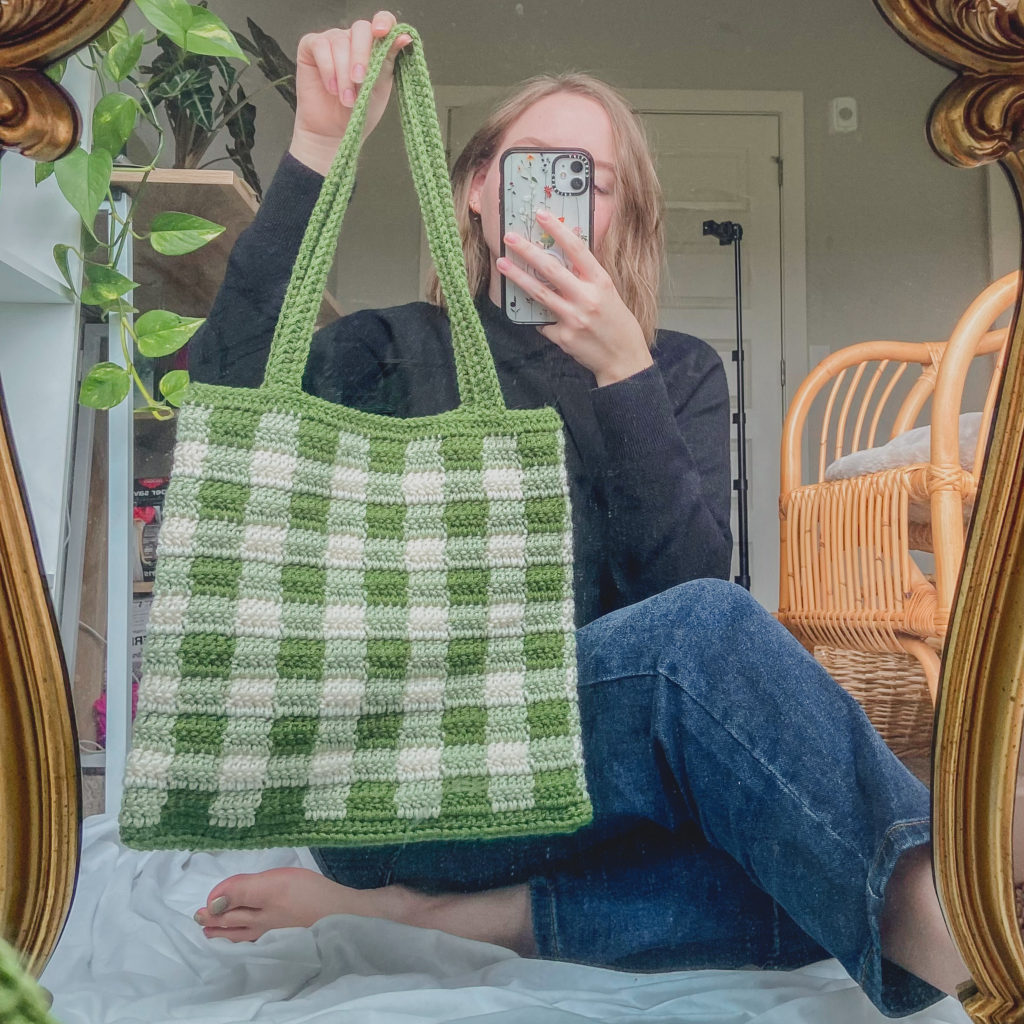
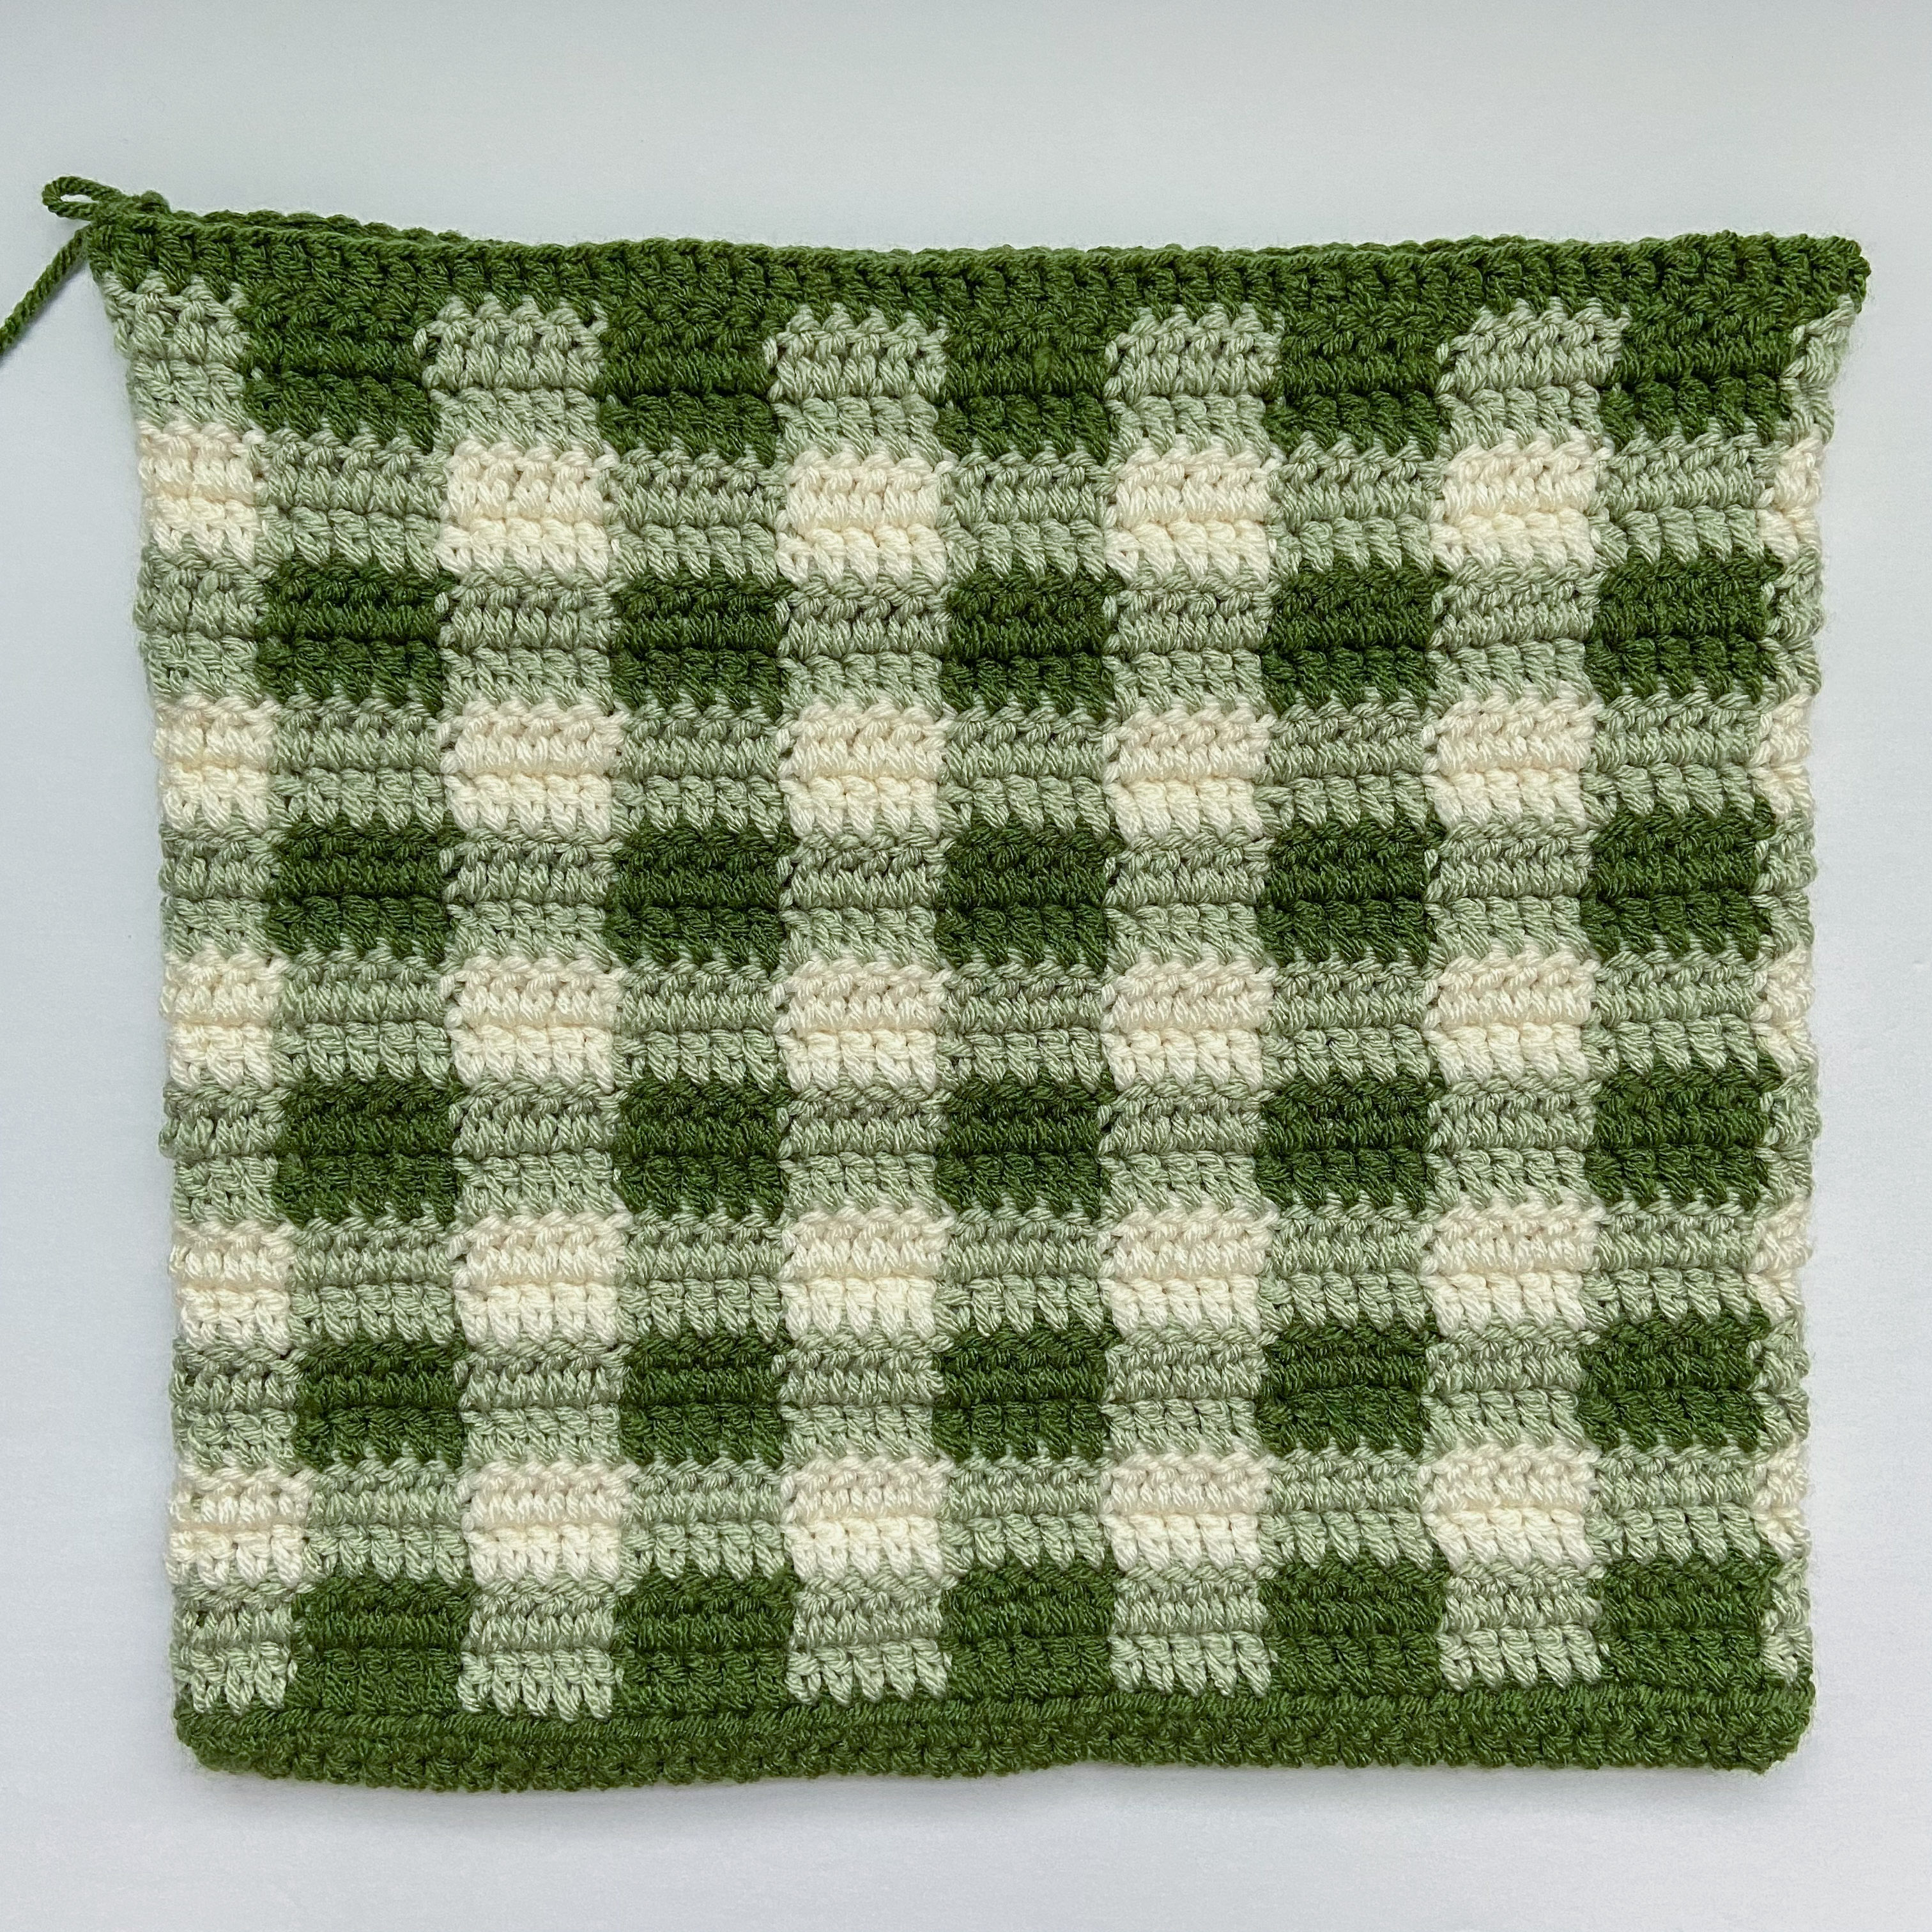
I think gingham is one of the cutest patterns EVER 😍 and I feel that is pretty much perfect for ANY season.
I’m low-key obsessed with how this tote came out, it’s just so darling, I need to make it in every color ❤️🧡💛💚💙💜🖤🤎. Since finishing this bag, I have used it many times, and I’m surprised with how many of my outfits it pairs well with.
NOW, enough chit-chat, let’s get started!
MATERIALS
Worsted/Medium Weight (4) Yarn:
Kale – Color A
Sage – Color B
Ivory – Color C
4.5mm Crochet Hook (my FAVORITE crochet hooks!)
Stitch Marker (I personally don’t use a stitch marker for this pattern, but if you lose track of where you started easily or you’re a beginner, stitch markers are very helpful.)
Gauge: 4″ square = 8 stitches wide x 8 rows tall (in double crochet)
STITCHES + ABBREVIATIONS
Ch = Chain
St(s) = Stitch(es)
Sl st = Slip stitch
Hdc = Half Double Crochet
Dc = Double Crochet
Rep = Repeat
MEASUREMENTS
Body of bag measures at 12 inches x 12 inches
PATTERN NOTES
*This pattern uses US crochet terms.
*Turning ch 1 does NOT count as a stitch in this pattern.
*Number of stitches indicated between <>
FALL PICNIC TOTE BAG PATTERN
Body of Bag
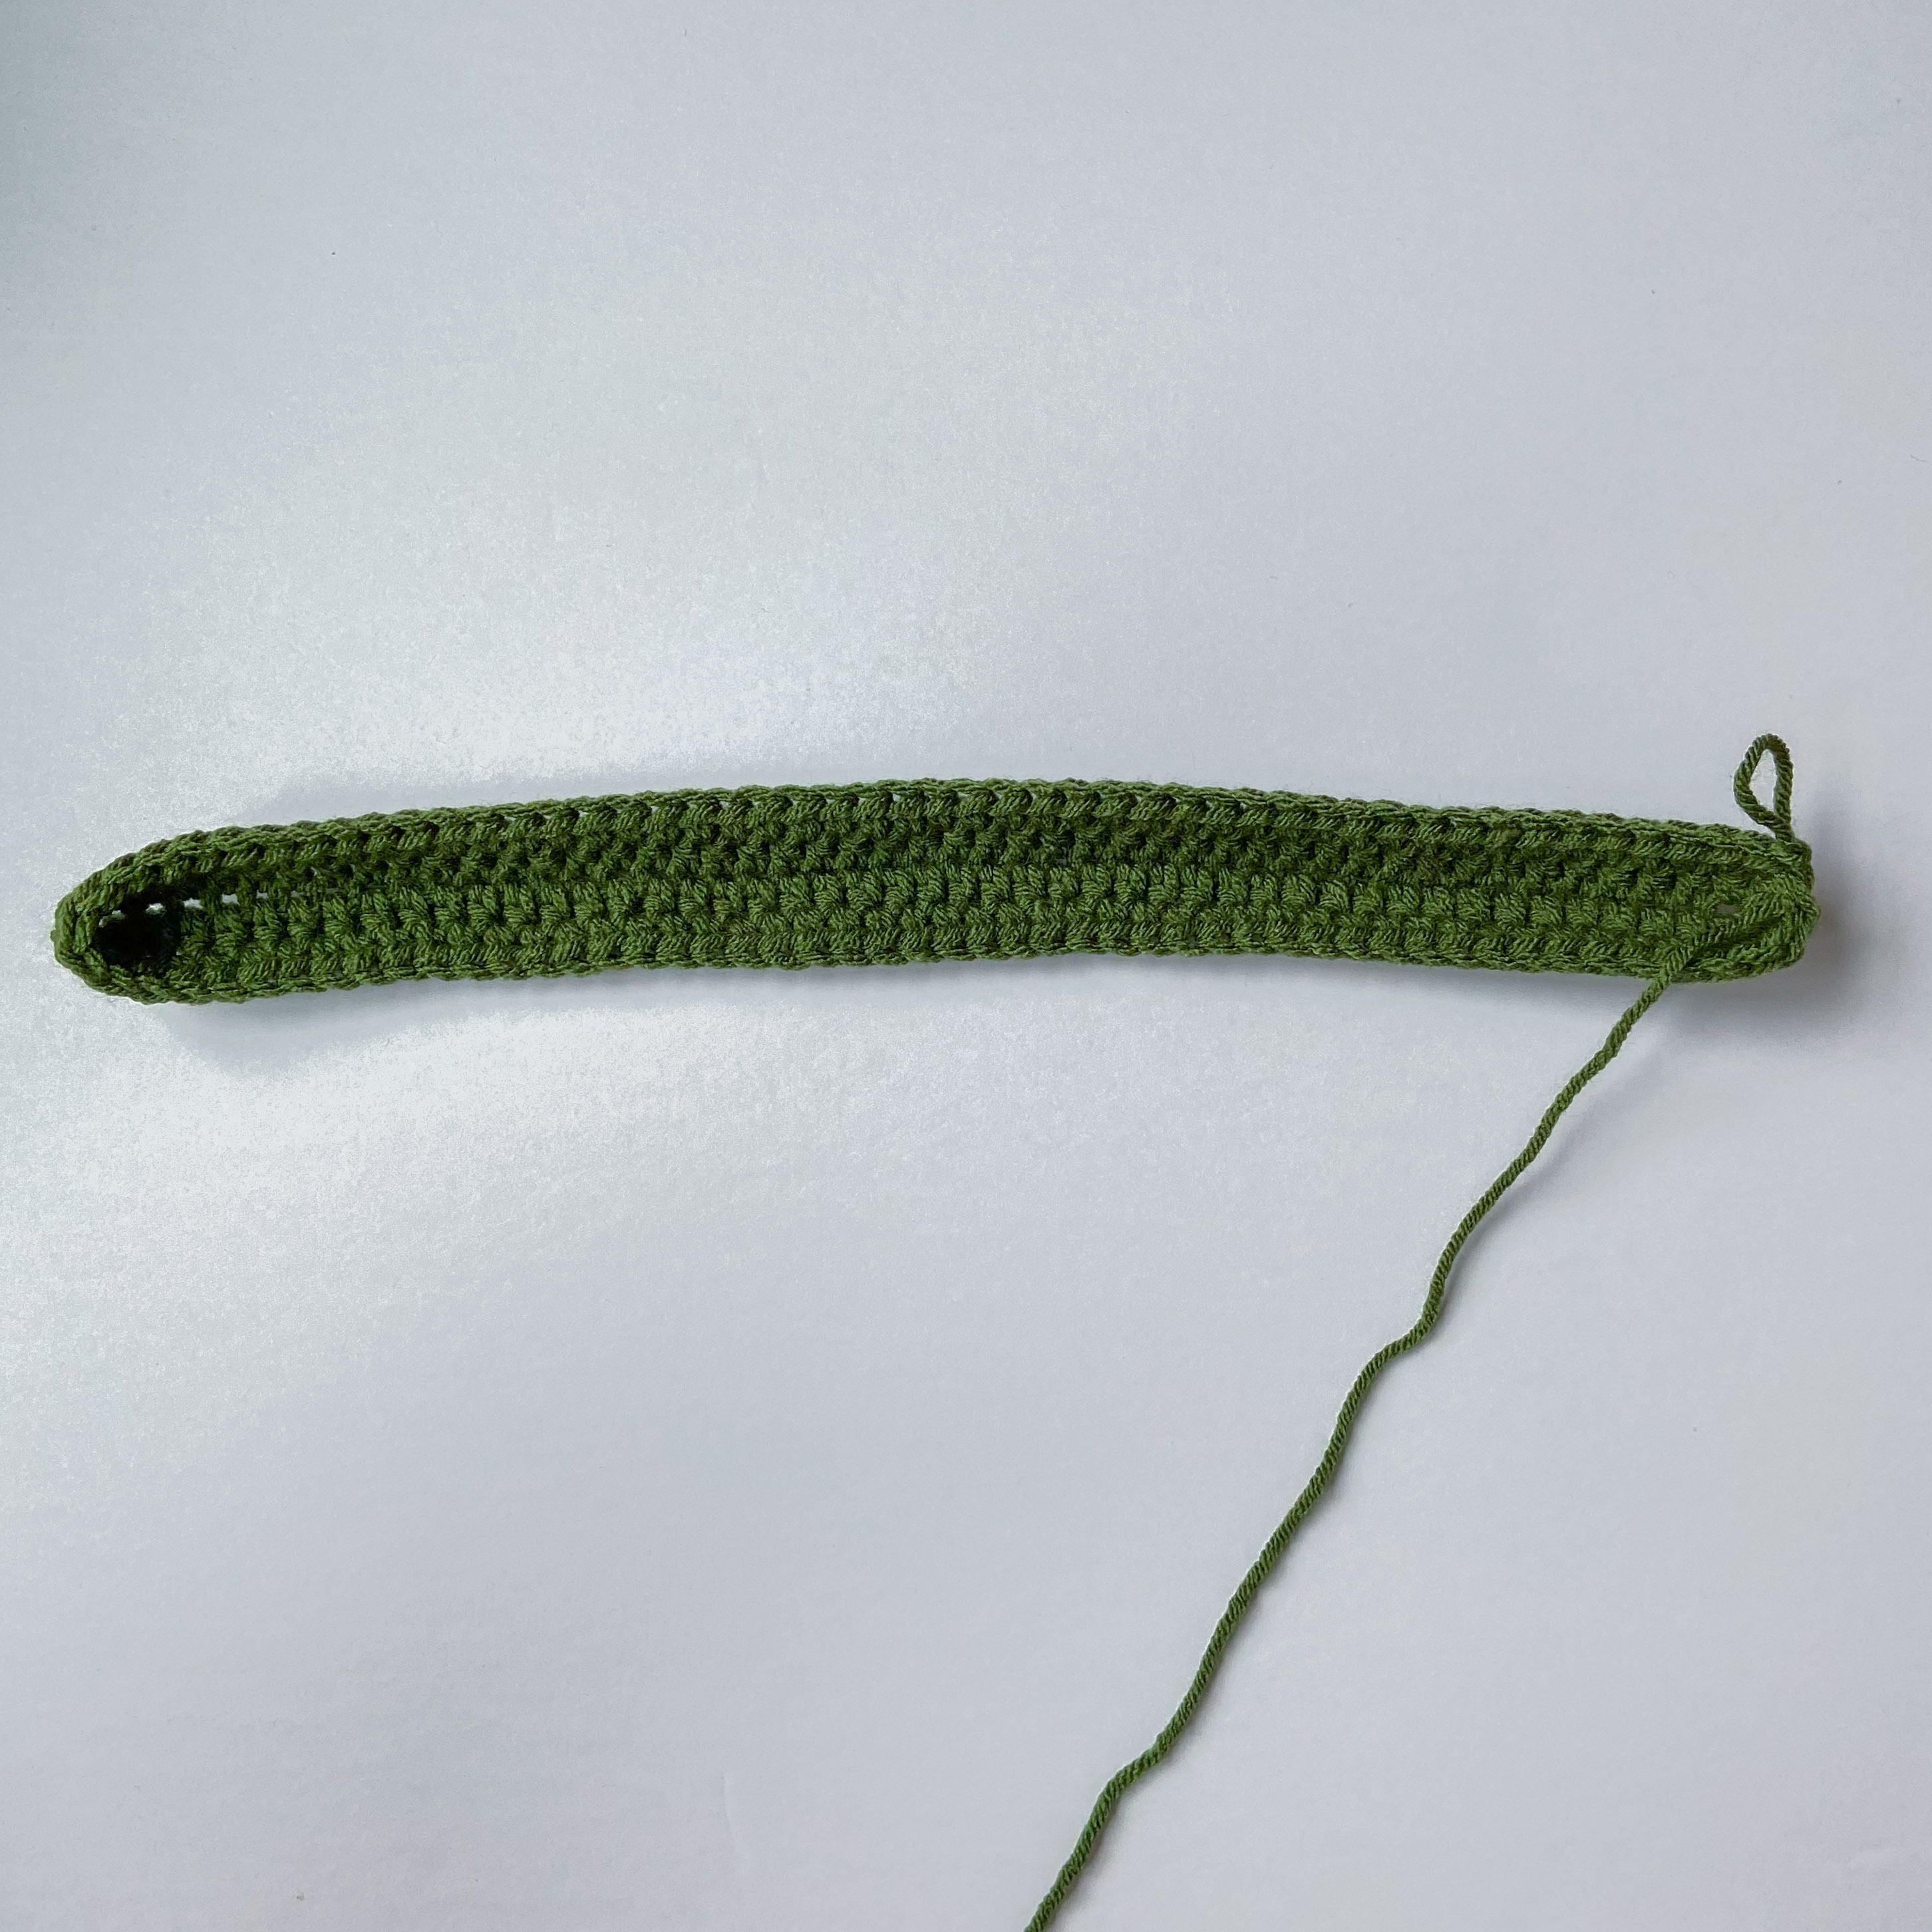
Ch 48
Round 1: With color A hdc in the 2nd ch from the hook, hdc in each ch until you have 1 ch left, when you come to last ch, work 5 hdc into that one ch, (now you will be working on the other side of your chain) hdc each ch until you have 1 ch left, work 4 hdc into that last ch. Sl st into first hdc of the round. <100>
You can use a stitch marker to help you keep track of where you started each row.
Round 2: Ch 1, turn your work, hdc in each st until the end of the round. Sl st into the first hdc of the round. <100>
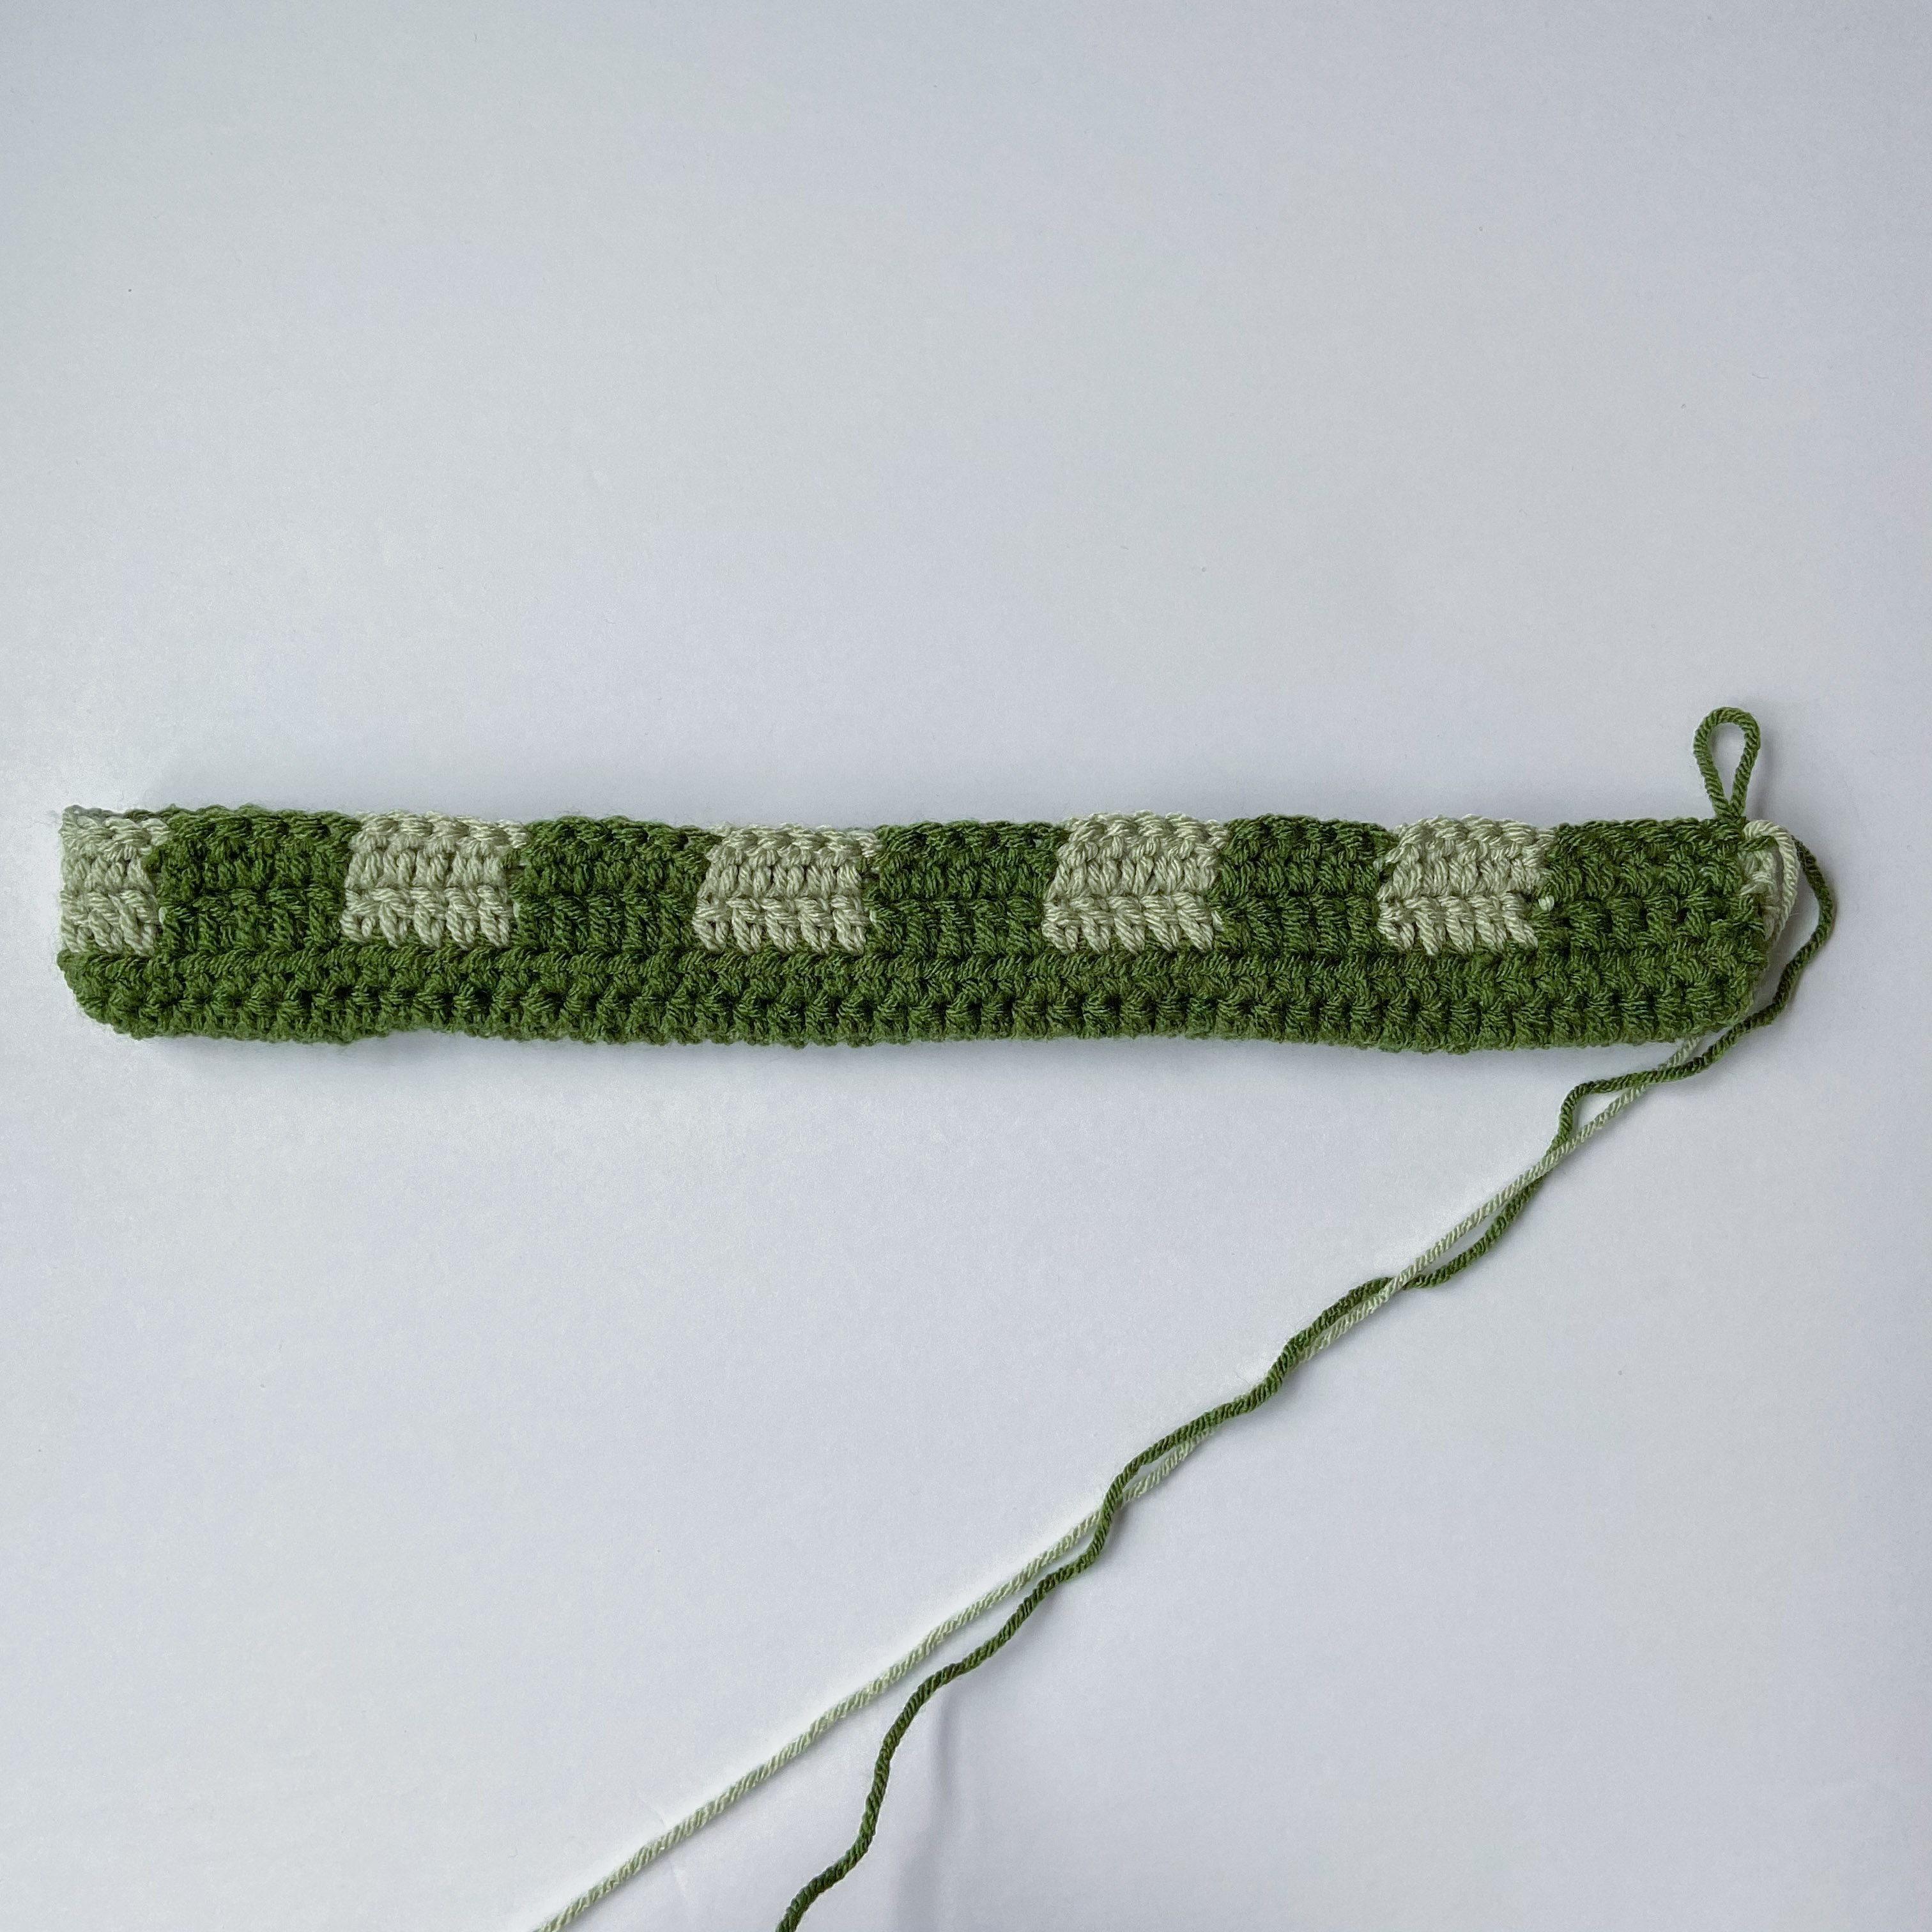
Round 3: Ch 2, turn your work, *dc 5 and before you finish your 5th dc pick up color B and pull through the last 2 loops on your hook, dc 5 and before you finish your 5th pick up color A and pull through the last 2 loops on your hook, *rep until the end of the round. Sl st into the first dc of the round. <100>
You will repeat alternating yarn colors every 5 sts
Also, when switching colors, DO NOT cut yarn, but instead crochet over the yarn color you’re not using at the moment by laying it across the sts as you work. If you need more of a visual, you can watch my video tutorial here.
Round 4: Ch 2, turn your work, *dc 5 and before you finish your 5th dc pick up color A and pull through the last 2 loops on your hook, dc 5 and before you finish your 5th dc pick up color B and pull through the last 2 loops on your hook, *rep until the end of the round. Sl st into the first dc of the round.
Round 5: Ch 2 with color B and turn your work, *dc 5 and before your finish your 5th dc pick up color C and pull through the last 2 loops on your hook, dc 5 and before you finish your 5th dc pick up color B and pull through the last 2 loops on your hook, *rep until the end of the round. Sl st into the first dc of the round. <100>
Round 6: Ch 2, turn your work, *dc 5 and before you finish your 5th dc pick up color B and pull through the last 2 loops on your hook, dc 5 and before you finish your 5th dc pick up color C and pull through the last 2 loops on your hook, *rep until the end of the round. Sl st into the first dc of the round. <100>
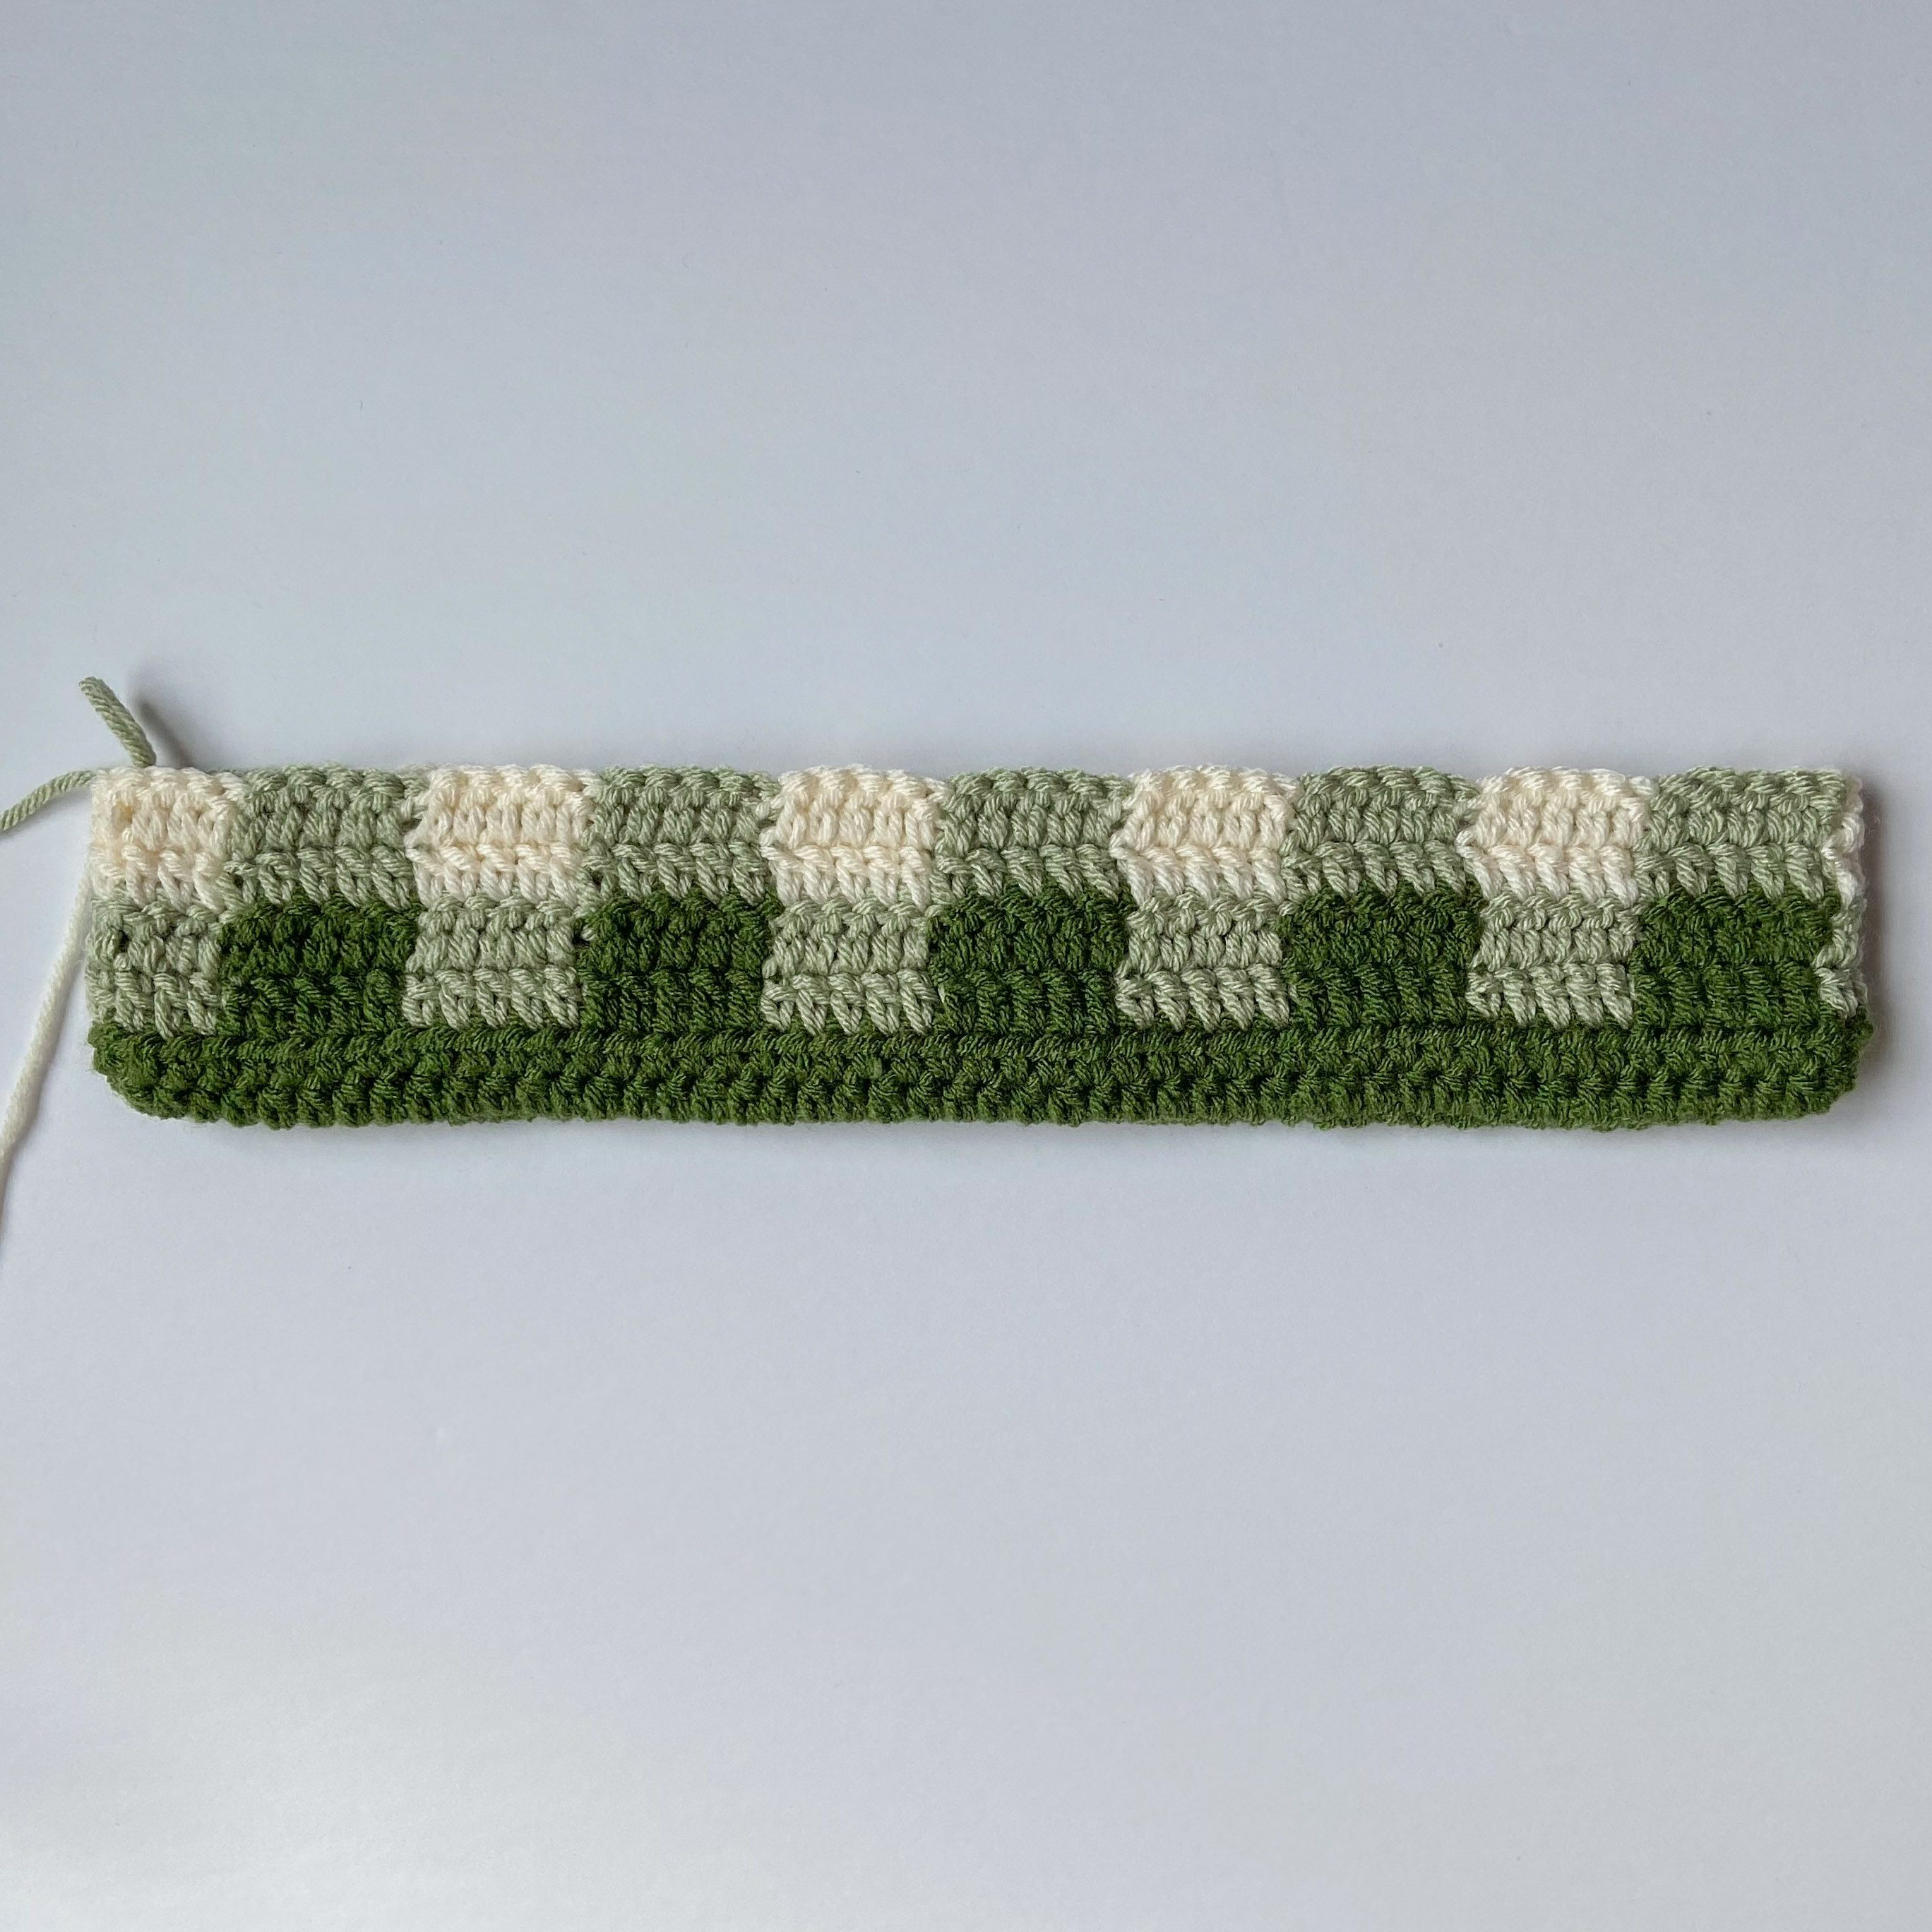
Repeat rounds 3-6 until round 24
If you are having trouble, maybe my video tutorial can help!
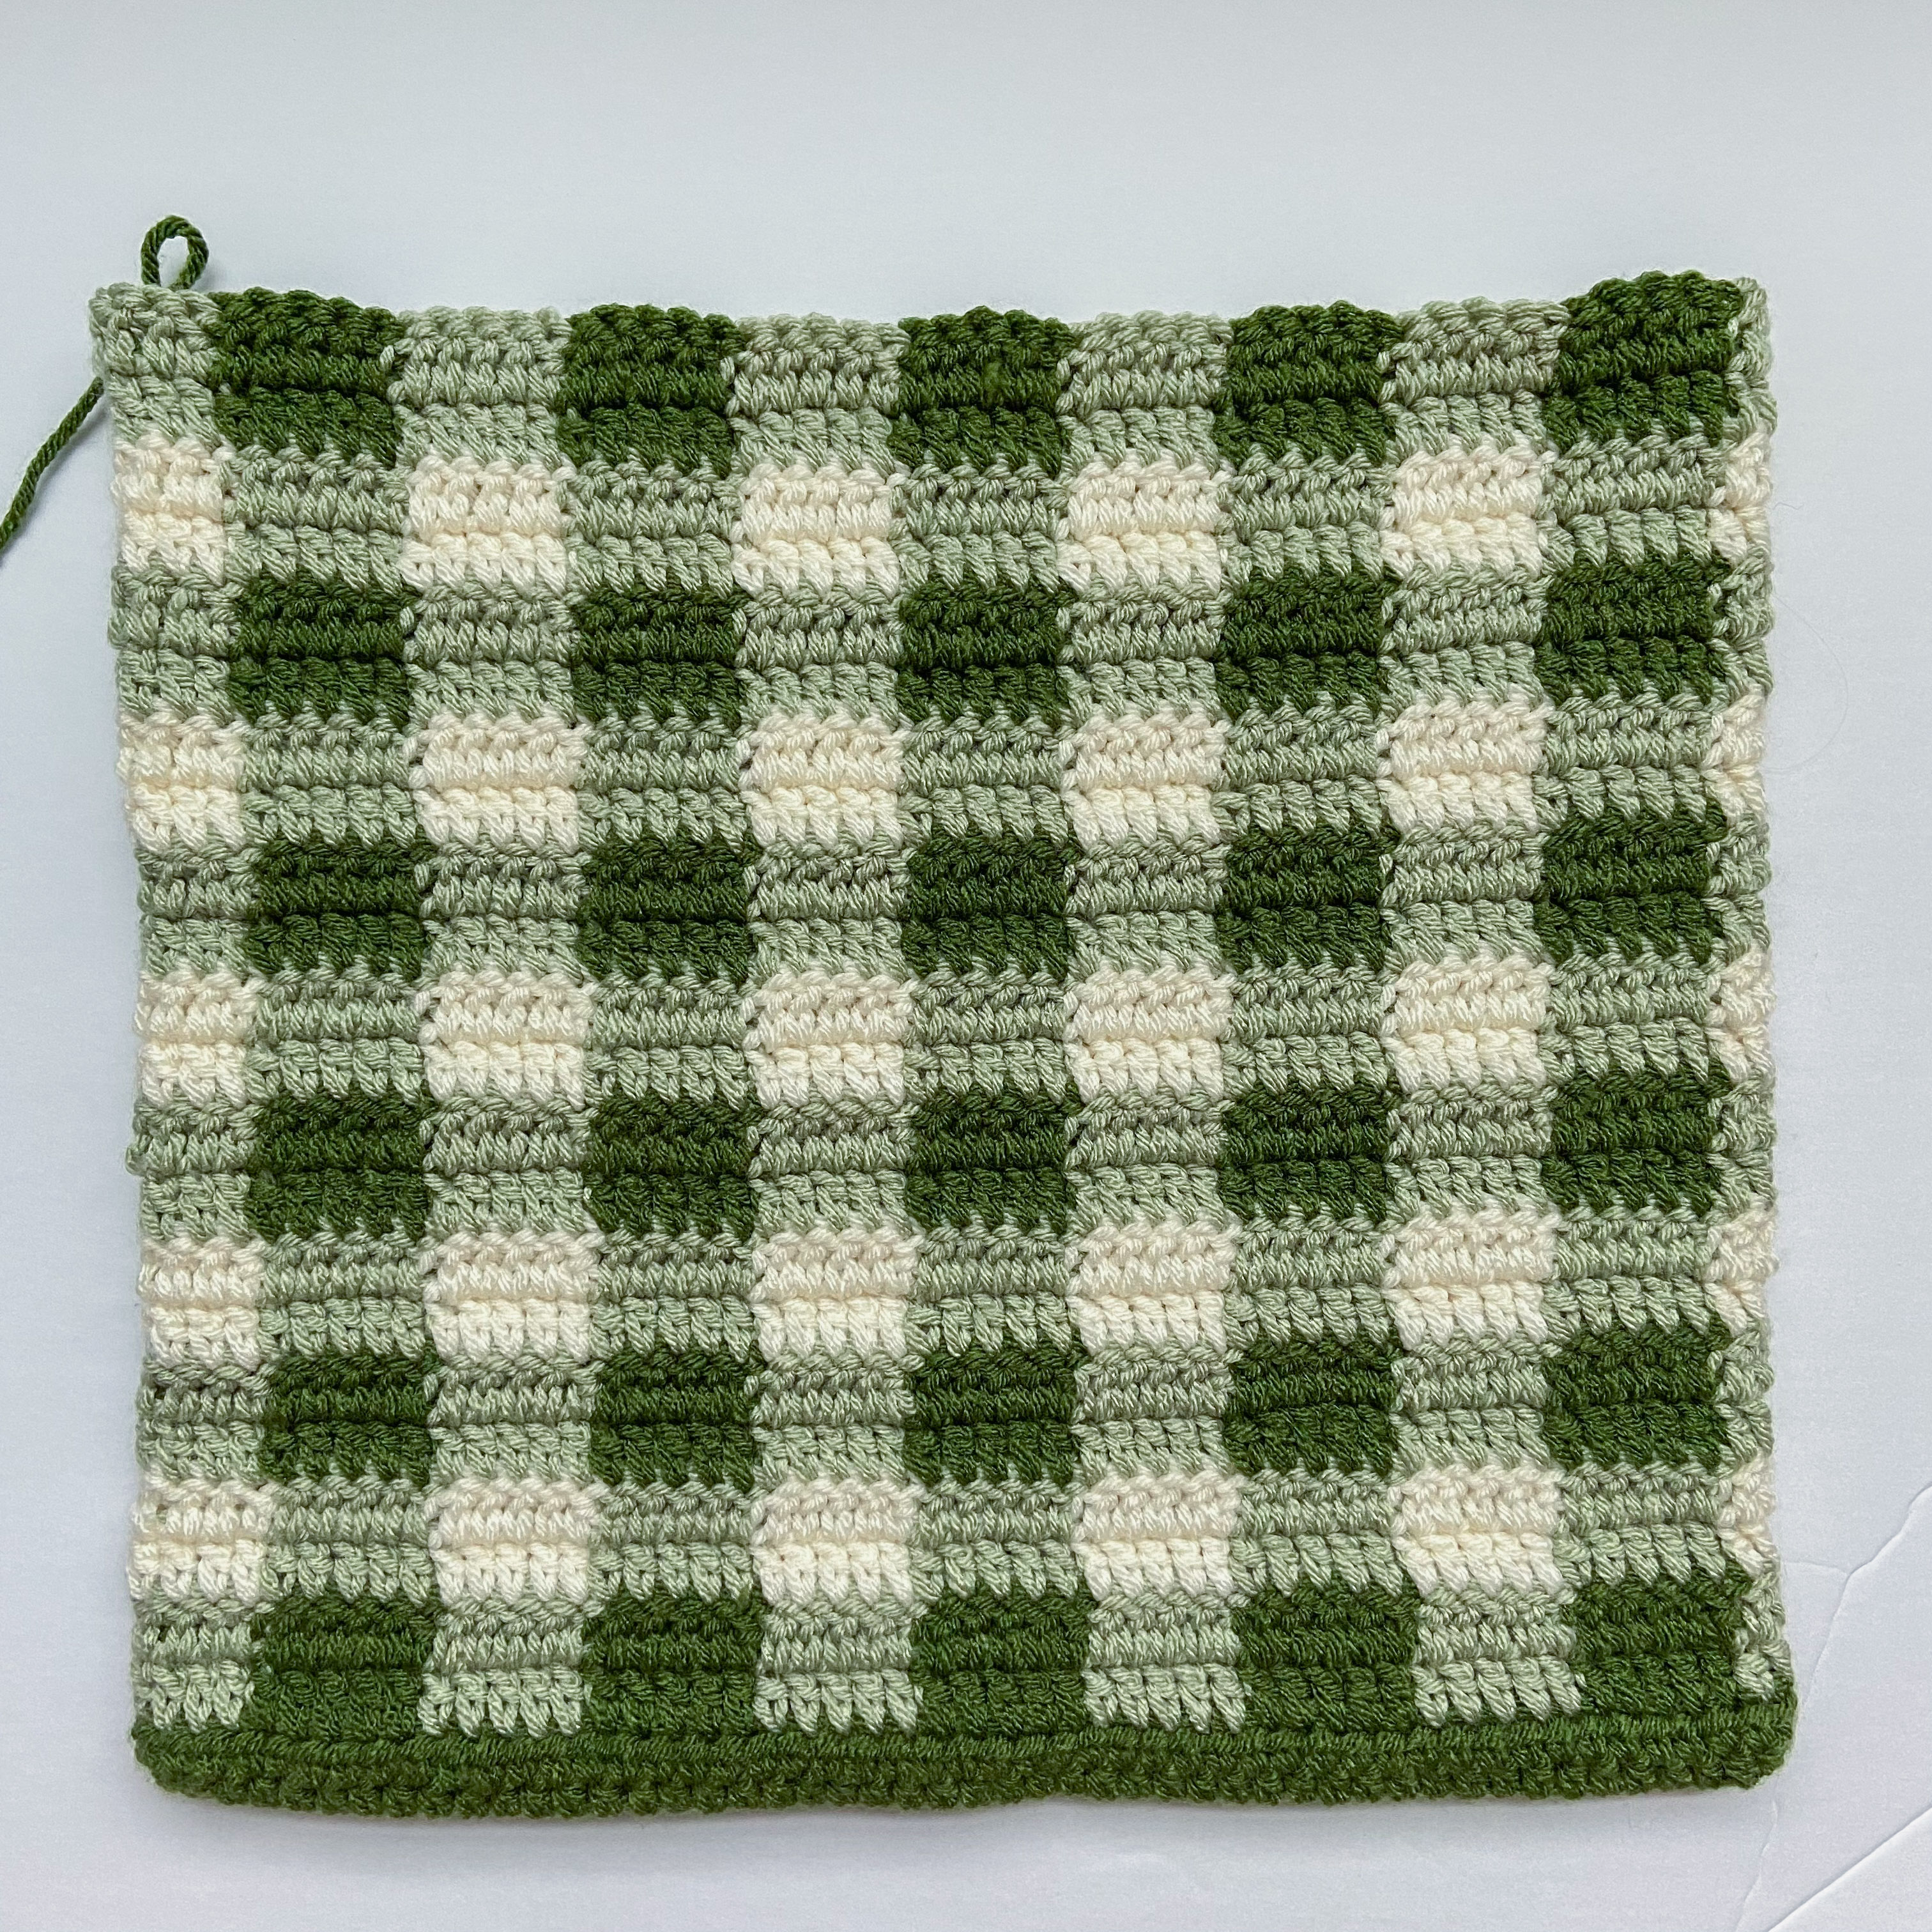
Round 25: With color A ch 2, turn your work, dc in each st until the end of the round. Sl st into the first dc of the round. <100>
Round 26: Ch 1, sl st in each st until the end of the round. Sl st into the first sl st of the round. <100>

Also, in the pictures you might be able to tell, I turned my bag inside out because I liked the way it looked better, but it doesn’t make much of a difference so either side is fine!
Fasten off.
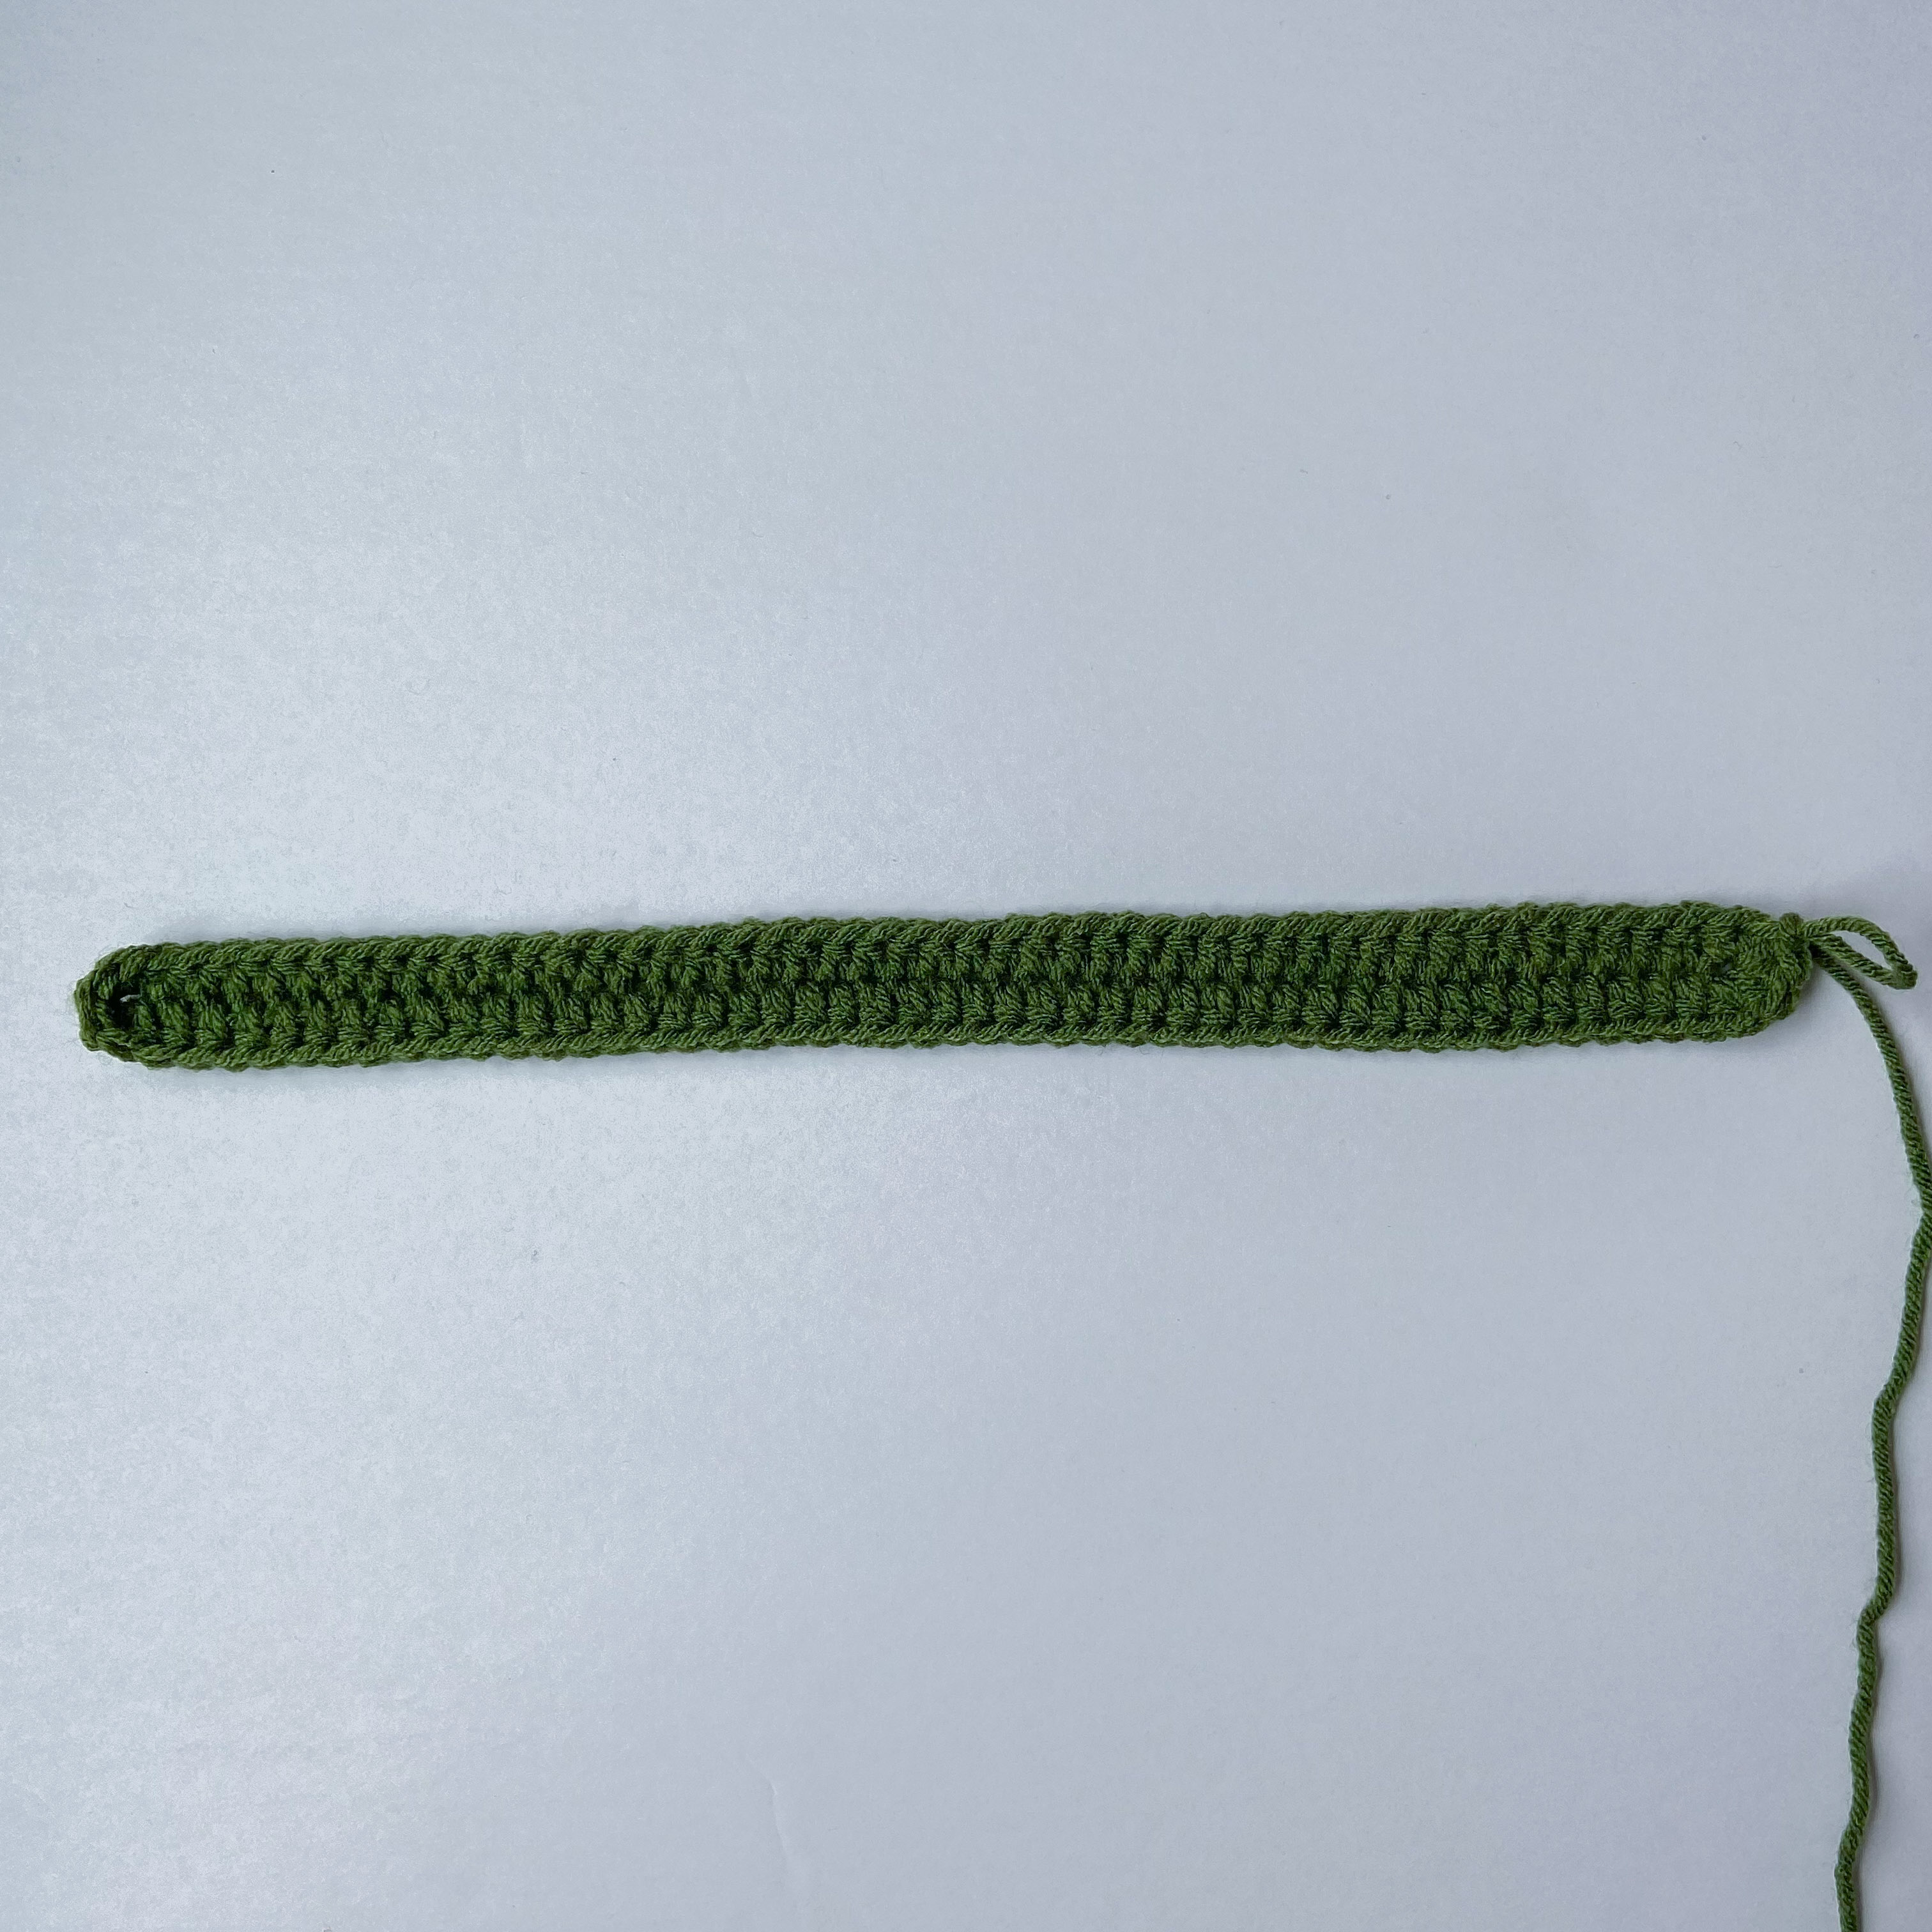
Straps
Ch 81
Round 1: Hdc in the 2nd ch from the hook, hdc in each ch until the end of the chain. <80>
Round 2: Ch 1, hdc in each st until the end of the row. <80>
Fasten off. Repeat for the second strap.
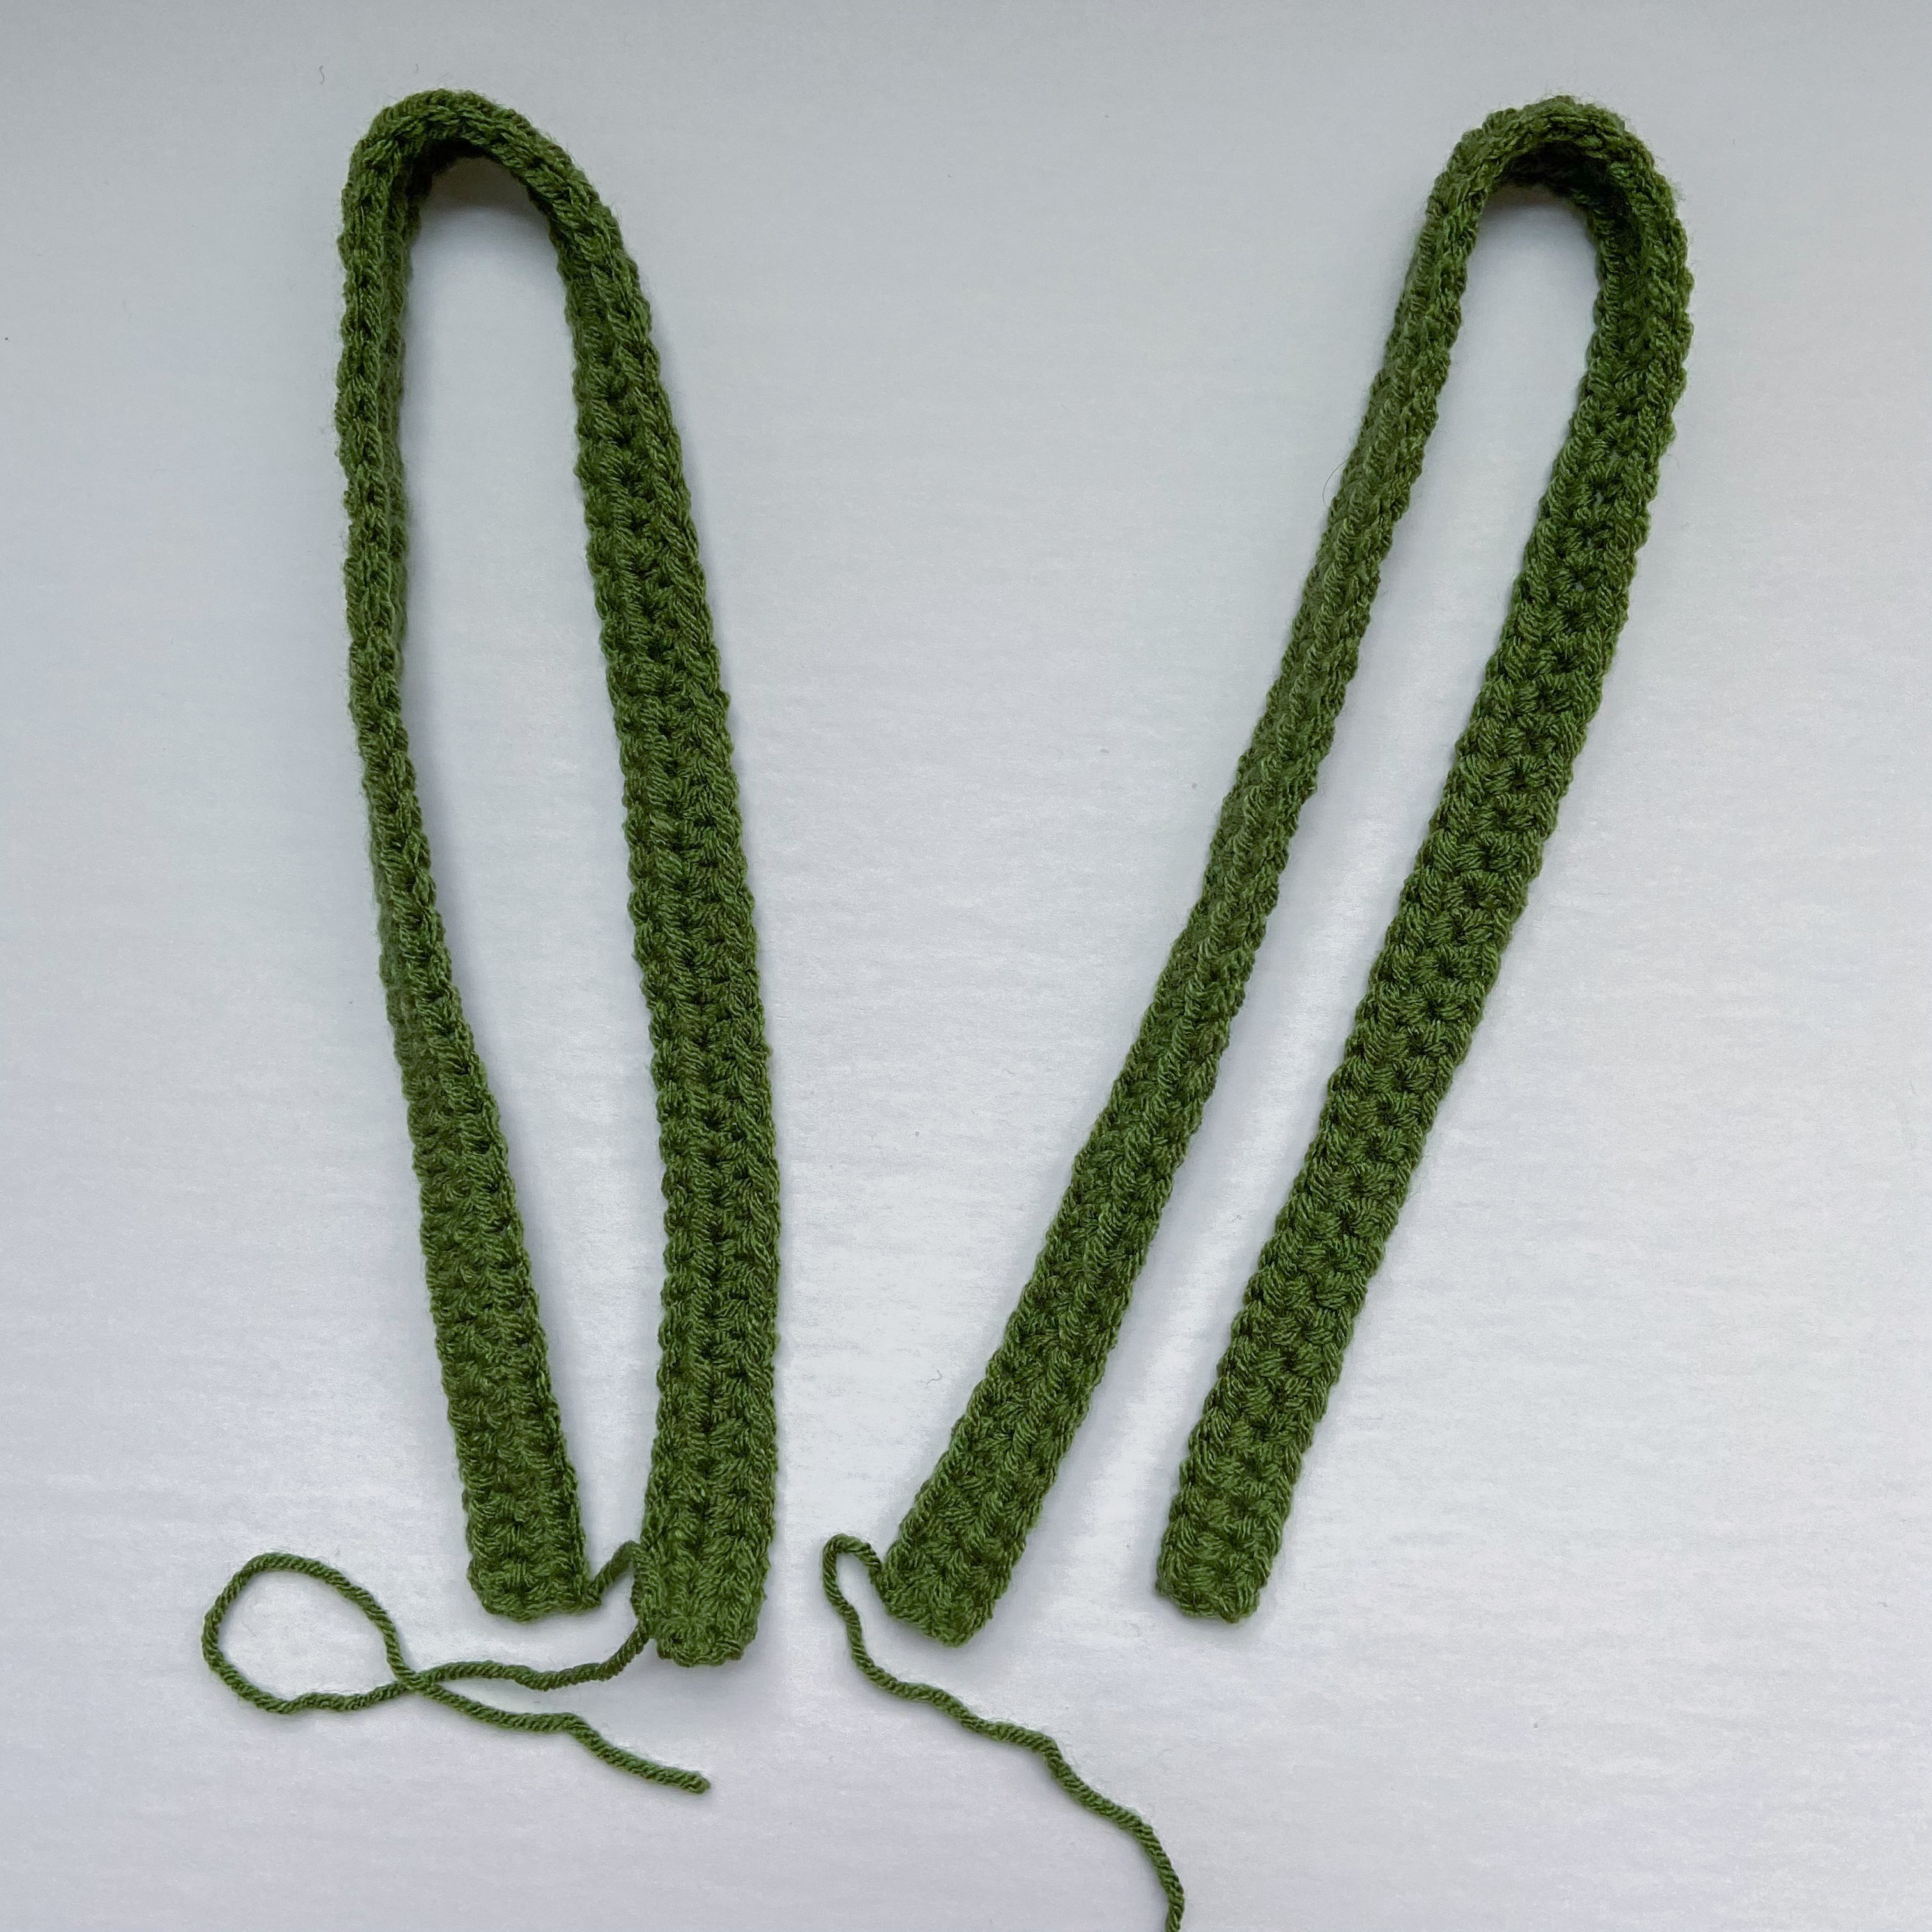

Sew straps to the bag, weave in your ends and you’re done!
If you recreate this tote bag, please tag or DM me @hayhaycrochet on Instagram or TikTok so I can see, like and share!
Happy Crocheting~!
Hi, thanks for the pattern! Could explain how you sewed on the straps please?
Hi, I was just wondering if I can make these using your patterns and sell them in my shop and credit the pattern to you? It’s okay if I can’t, I just wanted your permission before doing so 💕
Yes, I’m totally fine with it, as long as I am credited for the pattern <3
Hi, I am a beginner! Why do we need to turn after each round, rather than continuing in the same direction?
I tried just continuing instead of turning each round with this patten, but it offset the blocks for the gingham slightly and I found it looks better and they set on top of each other much cleaner if you turn each round.
Hi! Sorry if this is a dumb question, but I’m a newbie to crocheting. How many should I chain at the start if I want to make this bag one, two, three, or more square(s) wider?
Since each gingham square is 5 stitches wide, increase your chain by 5’s
Thank you! And also thank you for this lovely easy-to-follow tutorial and your kindness for sharing!
I tried this pattern and absolutely loved how my bag turned out!! I’ve made another one but smaller and it also turned out amazingly. On my third bag this week😅 thank you for this pattern!! xx
I’m so glad you like the pattern!❤️
This is soooooooooo pretty!! Thank you so much for sharing, you are super talented 🥰
I’m happy you like the pattern! Thank you ❤️!
Hello !! Just asking , how much yarn do you use ?
I used about half of each of the 3 skeins used and linked in this pattern! Each skein has 232 yards in it.