
🤍WELCOME HERE🤍
This post may contain affiliate links.
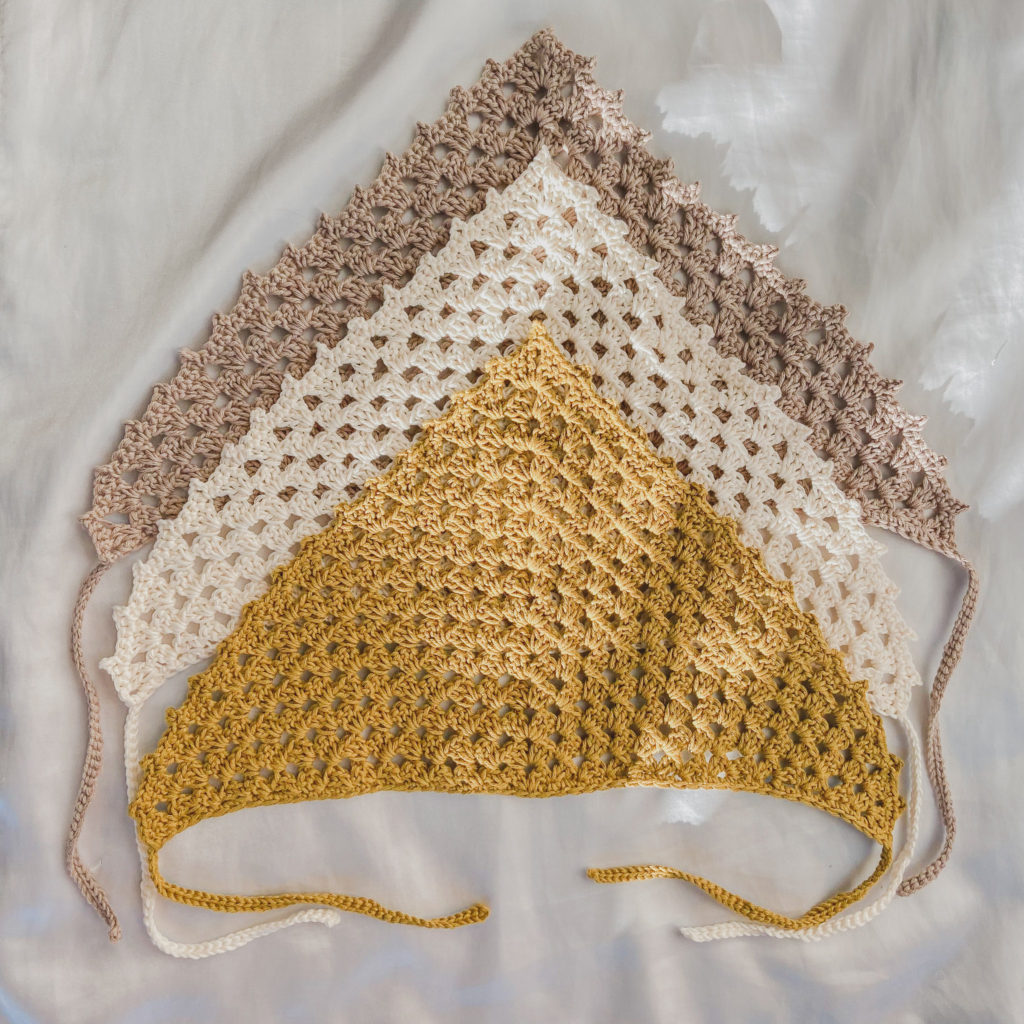
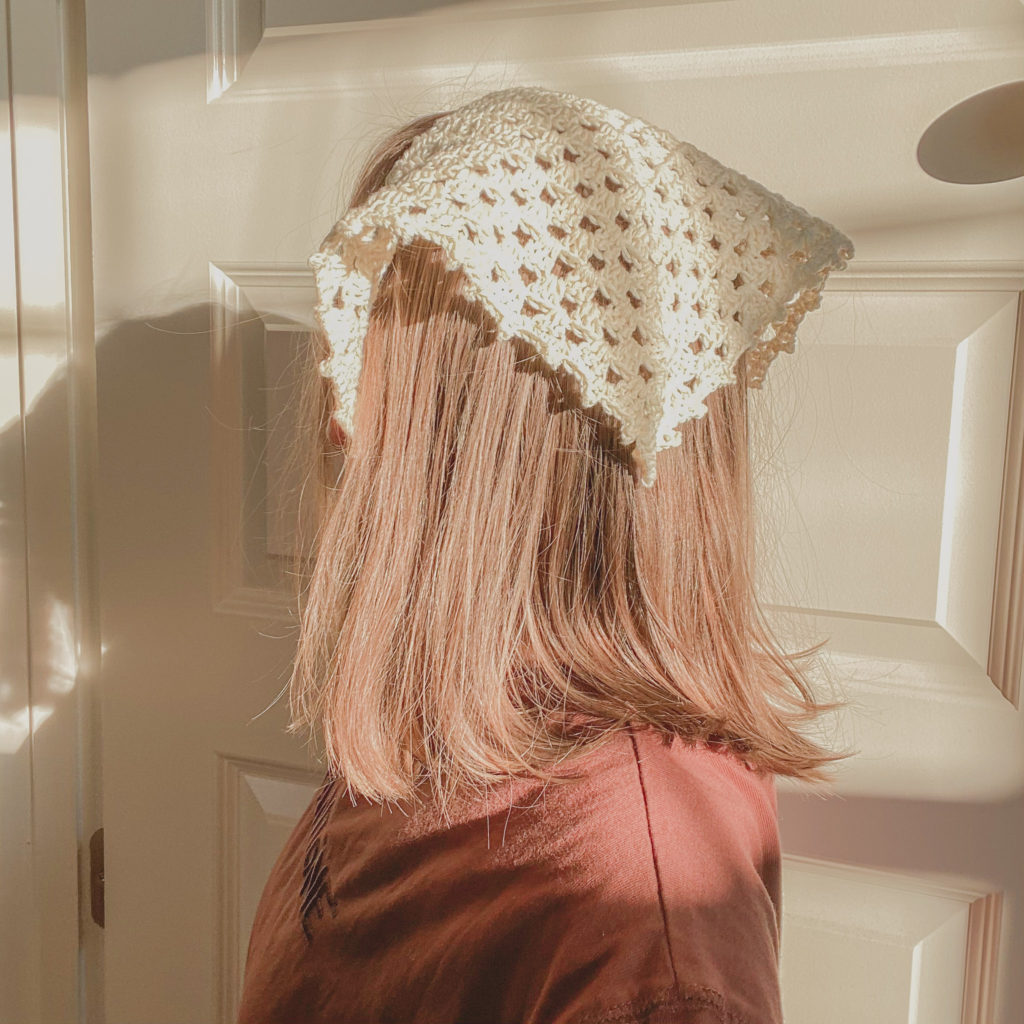
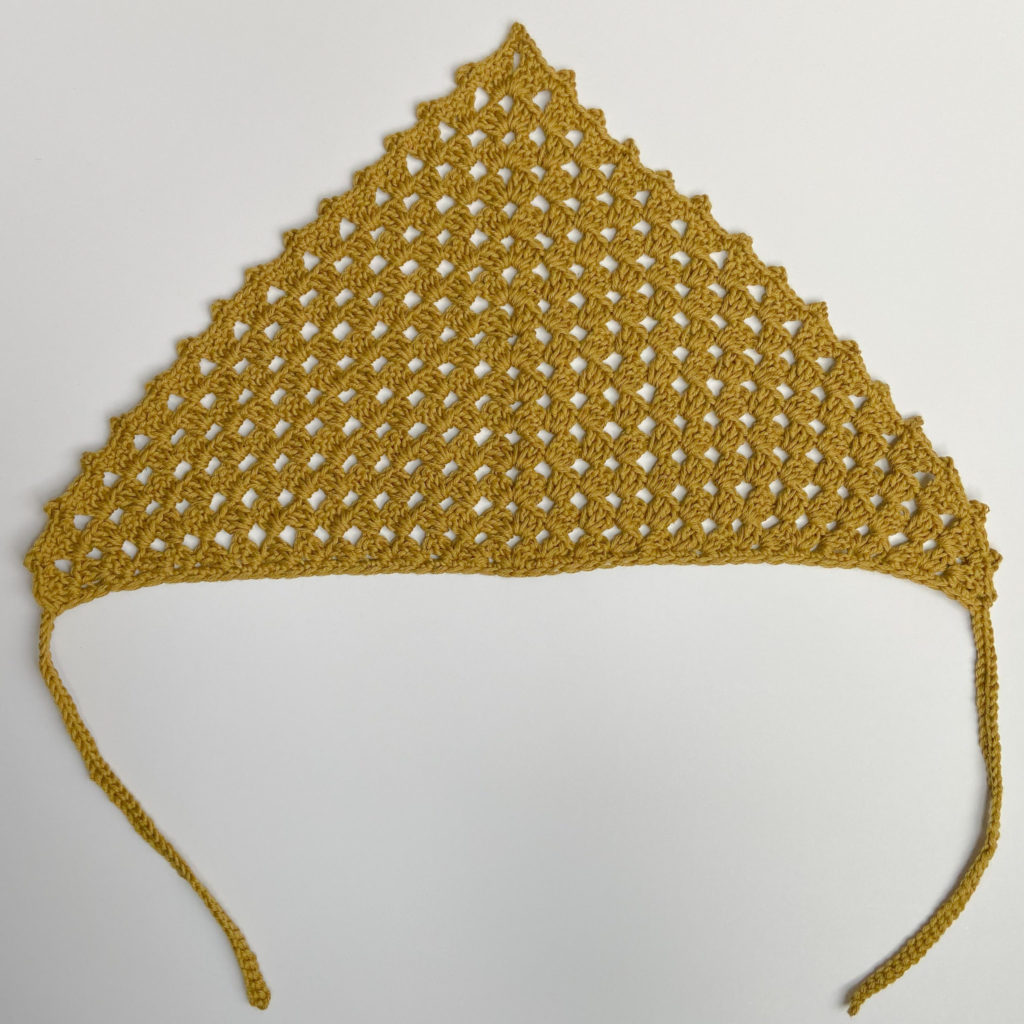
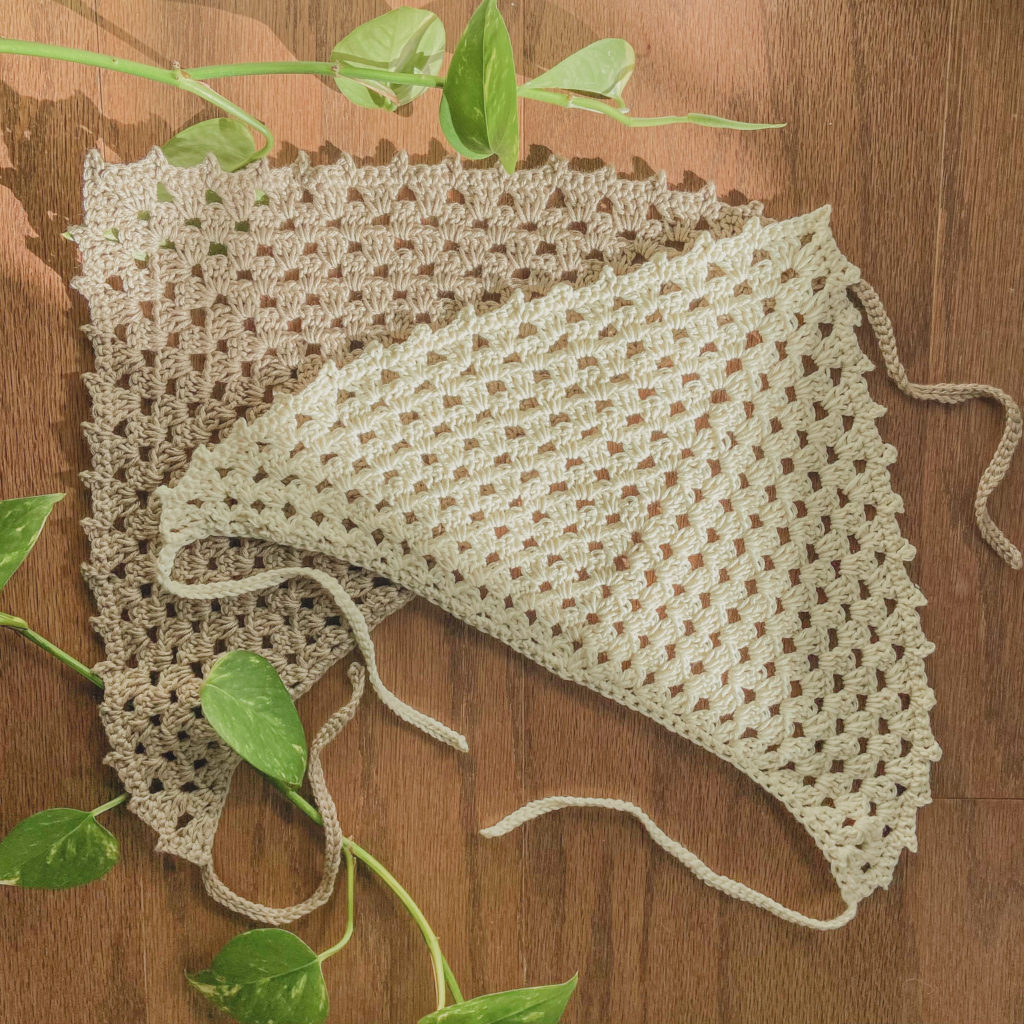
Hello there! In today’s pattern tutorial, I will be sharing how to make this sweet and delicate crochet bandana that I’m calling the “Autumn Breeze Bandana” It’s very simple and easy to follow, perfect for beginners!
I have also made video tutorial for this bandana over on my YouTube Channel for my visual learners out there!
I have noticed since the start of fall, crochet bandana’s have got pretty popular again! But I wasn’t planning to make pattern for it because I felt there were plenty out there. But I then noticed that the bandana’s I have made for myself were slightly different from the majority of ones you can find out there and that is I make mine with a Light (3) Yarn or a Fine (2) Yarn which I feel looks better (in my personal opinion) and drapes nicely around the head.
So I asked on my Instagram stories if y’all would want a pattern made with the Fine Yarn I was using and was surprised that several hundred people said YES! So, here is THAT pattern!
NOW, without further ado, let’s get started!
MATERIALS
STITCHES + ABBREVATIONS
Ch = Chain
St(s) = Stitch(es)
Sc = Single Crochet
Dc = Double Crochet
Sl st = Slip Stitch
MEASUREMENTS
Gauge: 4″ x 4″ square = 6 dc clusters wide x 6 dc clusters tall
8 inches tall x 13 inches wide (not counting straps)
PATTERN NOTES
*This Pattern uses US crochet terms
*Turning chain 3 DOES count as a stitch!
AUTUMN BREEZE BANDANA
PATTERN
Create a Magic Ring.
Row 1: Ch 3 (the first ch 3 of every row counts as a double crochet stitch), work 2 dc into the ring, ch 3, work 3 more dc into the ring. close your magic ring.
Row 2: Turn your work. Ch 3, work 2 dc into first st, ch 1, work 3 dc in top corner ch space, ch 3, work 3 dc in same top corner ch space, ch 1, work 3 dc in last st of the row.
Row 3: Turn your work. Ch 3, work 2 dc into first st, ch 1, work 3 dc in ch space, ch 1, work 3 dc in top corner ch space, ch 3, work 3 dc in same top corner ch space, ch 1, work 3 dc into ch space, ch 1, work 3 dc into last st of the row.
Row 4: Turn your work. Ch 3, work 2 dc into first st, ch 1, work 3 dc into ch space, ch 1, work 3 dc into ch space, ch 1, work 3 dc into top corner ch space, ch 3, work 3 dc into same top corner ch space, ch 1, work 3 dc into ch space, ch 1, work 3 dc into ch space, ch 1, work 3 dc into last st of the row.
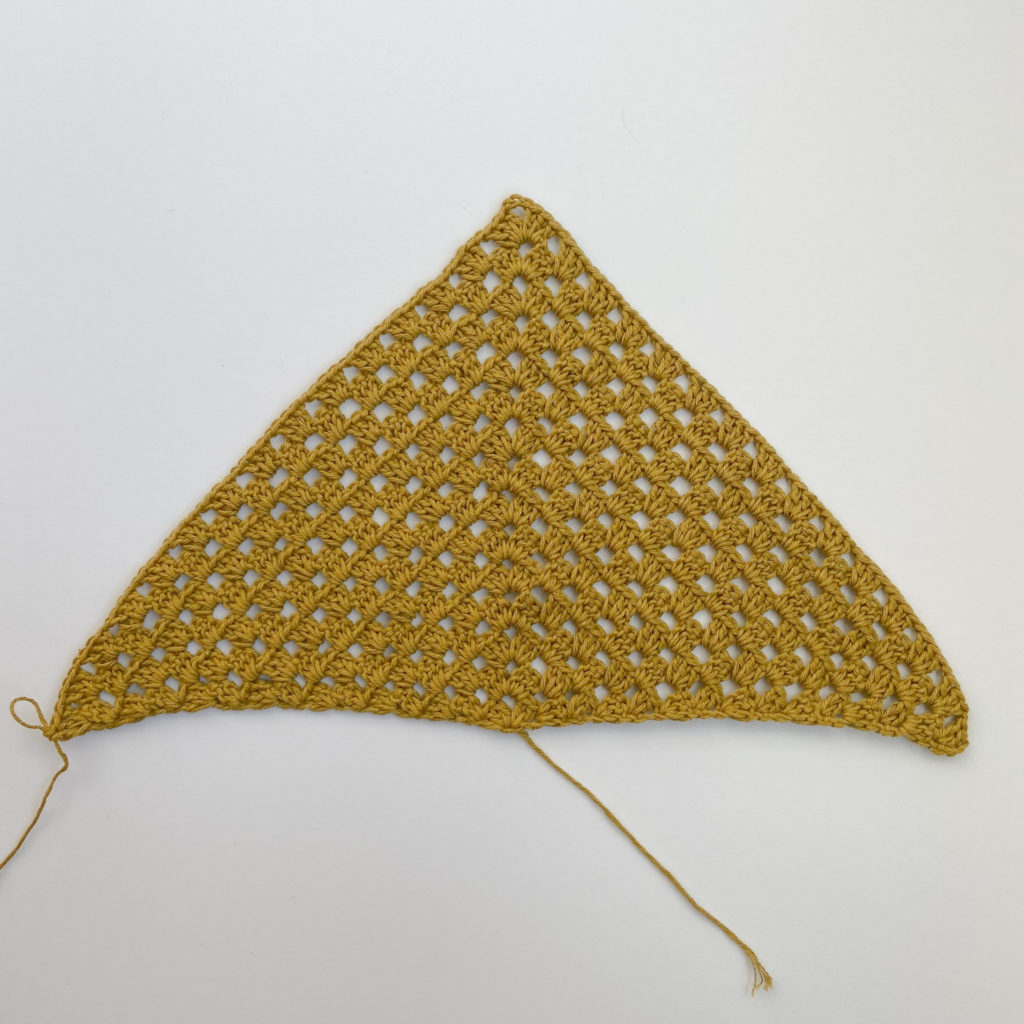
Row 5-15: You will repeat the same process for every row of- Turn your work. 3 dc into first st (ch 3 counts as 1 of the 3 dc in the first st), 3 dc in every ch space with a ch 1 in between each dc cluster, 2 dc clusters in the top corner ch space with a ch 3 to separate the two clusters, and 3 double crochet in the last st of the row. Just keep repeating this pattern until you have 15 rows (or how ever many you want or need for the size head you’re making it for).
If you’re having trouble, maybe my Video Tutorial can help!
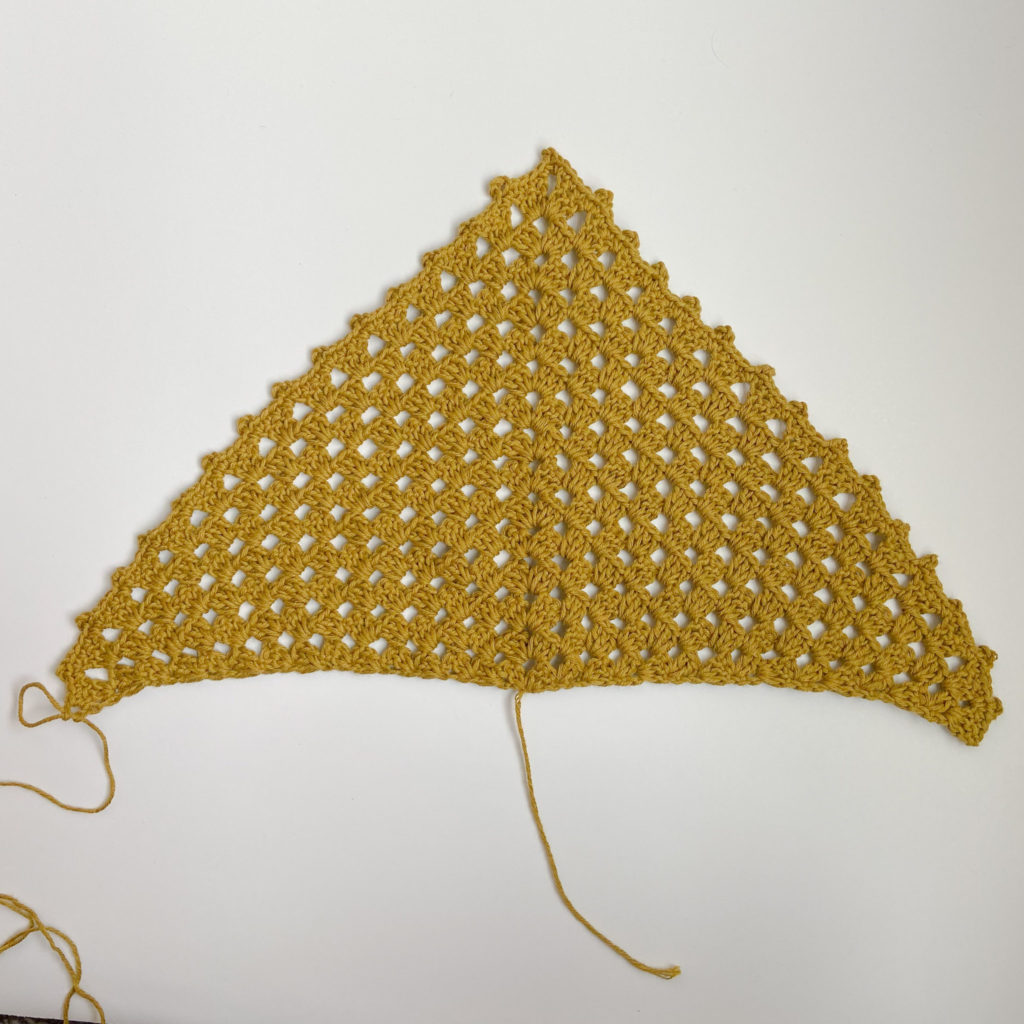
Picot Edging
After you have your 15 rows (or how ever many rows you made), we will now be working on the Picot Edging (if you do not care for this part, this step can easily be skipped).
Row 1: Turn your work. Ch 1 (ch 1 does not count as a st), sc 3, ch 3, sl st into the 3rd ch from the hook, sc 4 (with one of those 4 sc being worked into the ch space), *ch 3, sl st into the 3rd ch from your hook, sc 4, *repeat until you come to the top corner ch space.
When you come the the top corner ch space, work 1 sc in ch space, ch 3, sl st into the 3rd ch from the hook, sc 4 (with 1 of those 4 sc being worked into the top corner ch space), *ch 3, sl st into the 3rd ch from the hook, sc 4, *repeat until you have 3 sts left. Sc in last 3 remaining sts.
Ties
Still being attached to your work (do not fasten off).
Ch 46. Sl st in the 2nd ch from the hook, sl st into each ch until the end of the ch.
Sc crochet across the bottom of the bandana (there is no set number you need to sc across, just enough to make it to the opposite edge of the bandana)
Ch 46. Sl st in the 2nd ch from the hook, sl st into each ch until the end of the ch. Work 1 sl st in to the main body of the bandana to help better secure the tie bandana.
Fasten off, weave in your ends and YOU’RE DONE!
If you recreate this Autumn Breeze Bandana, please tag or DM me @hayhaycrochet on Instagram or TikTok so I can see, like and share!
Happy Crocheting~!
Thank you so much for making this free pattern! I made one and it came out absolutely beautiful. I will definitely be making this pattern again.