
🤍 WELCOME HERE 🤍
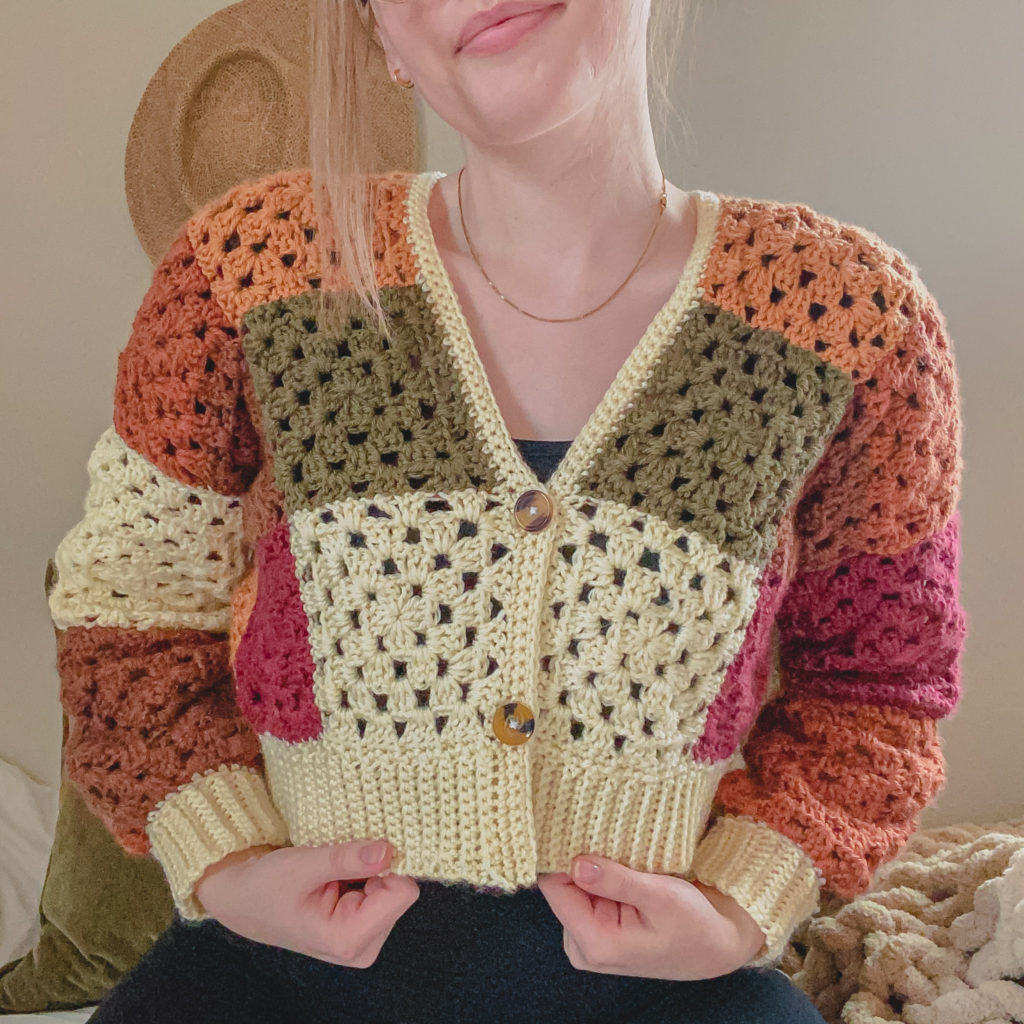
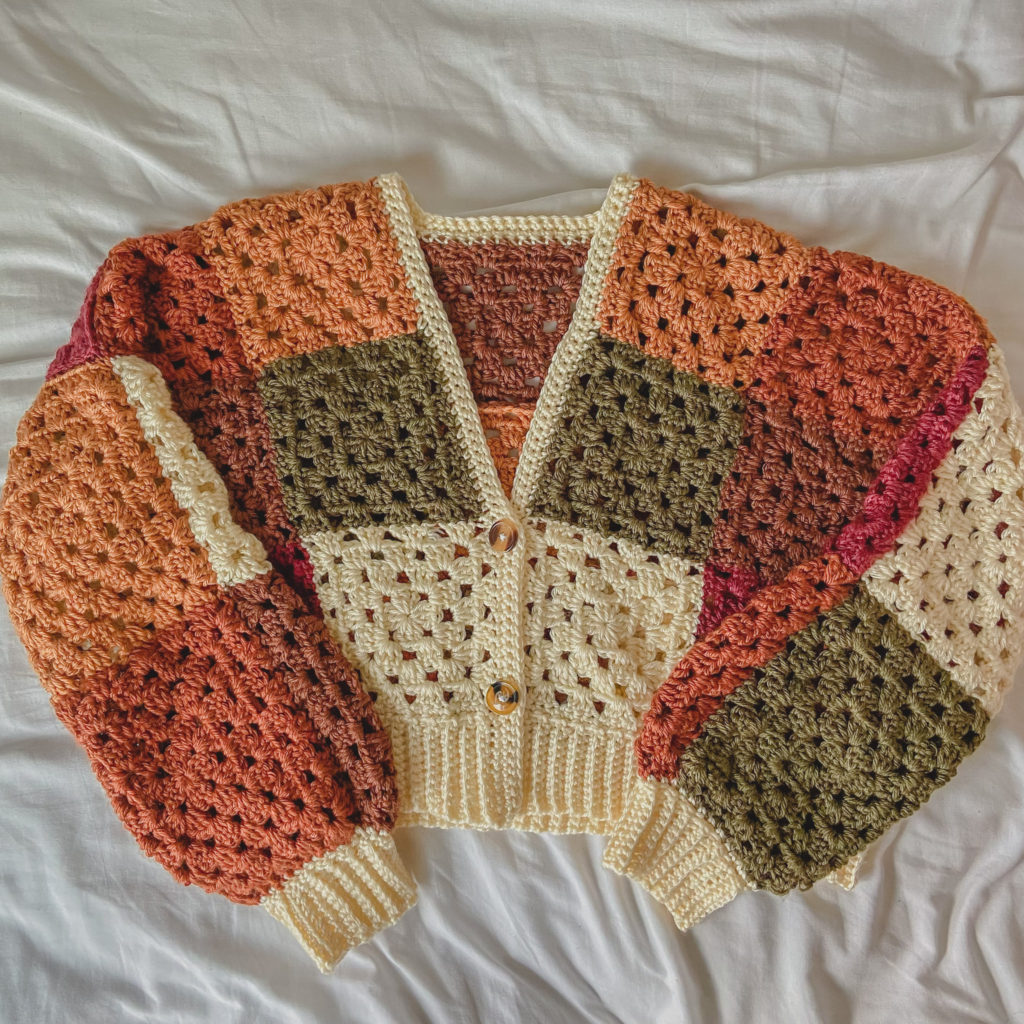
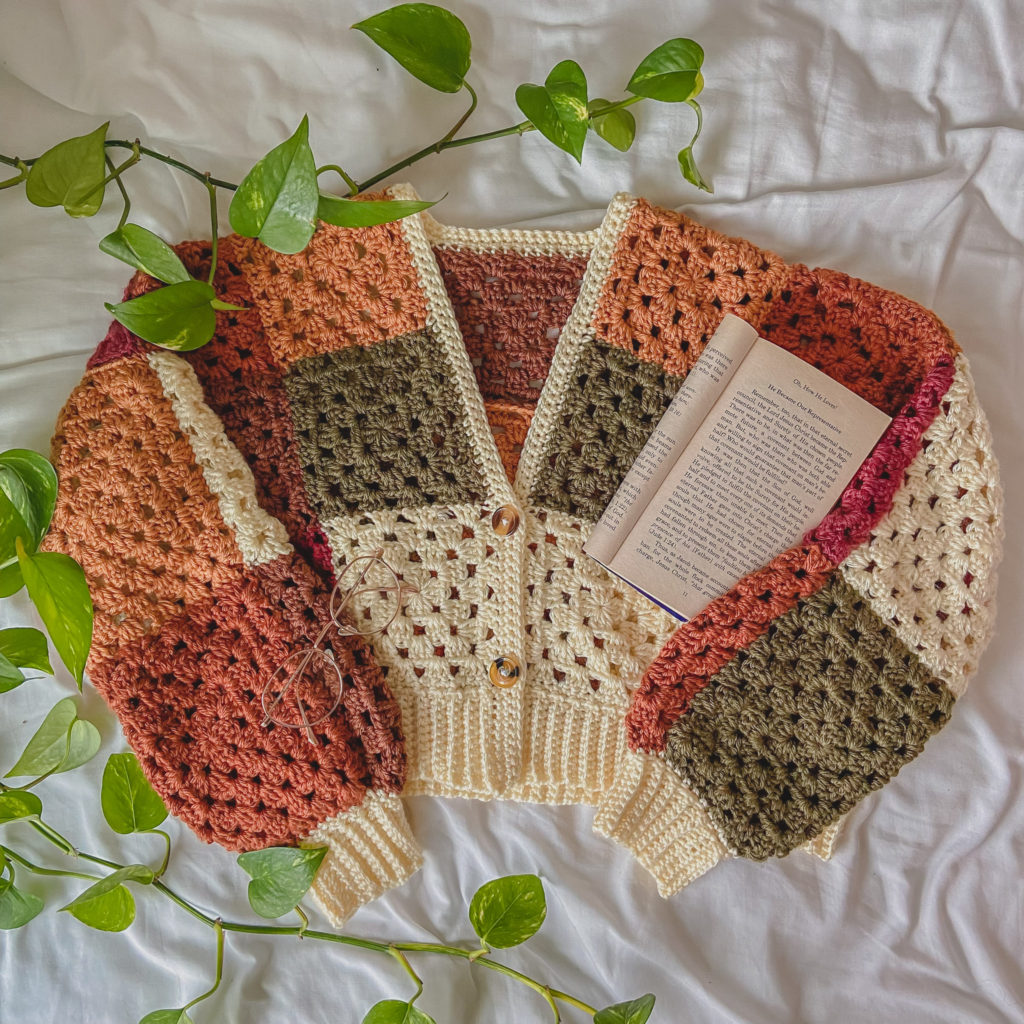
Hello there, friends! Today I am sharing a pattern I am IN LOVE with and its the “Grateful + Thankful Cardi”
This post may contain affiliate links.
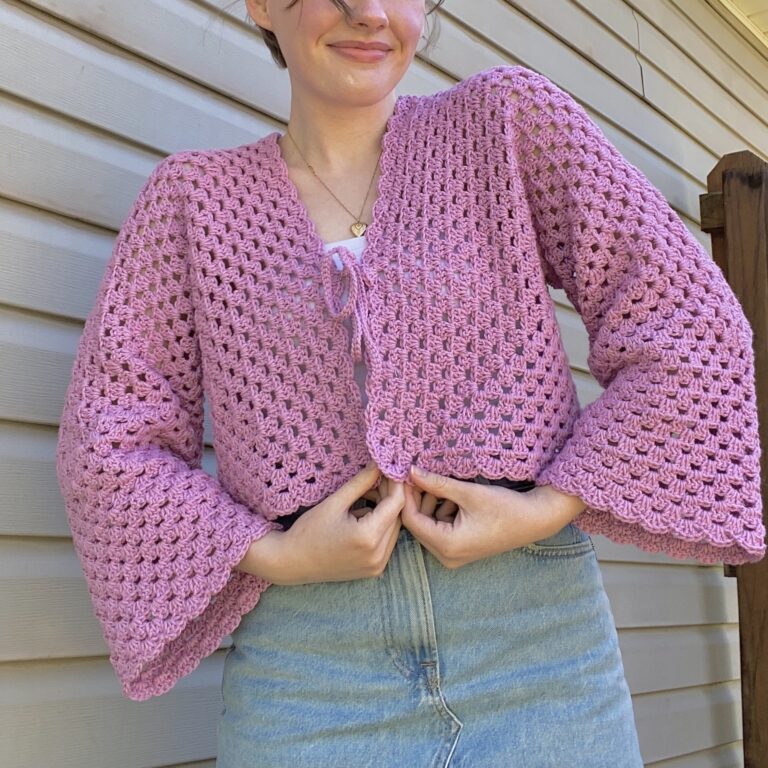
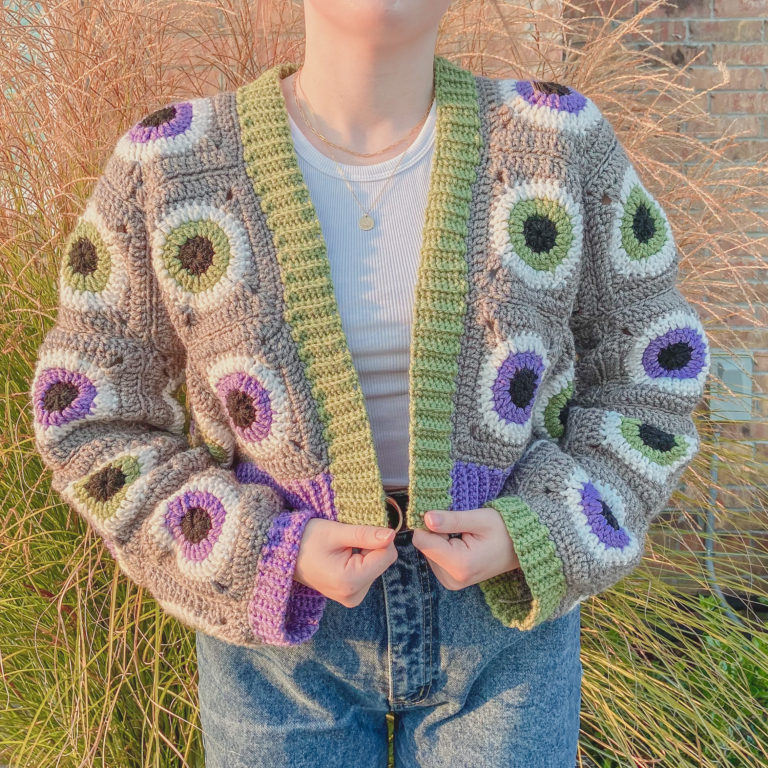
I am so happy with how this turned out, and though the colors I chose were very influenced by fall, I think its perfect for winter as well! As with any crochet project, you can change the colors of this cardigan to reflect any season or any color scheme you like!
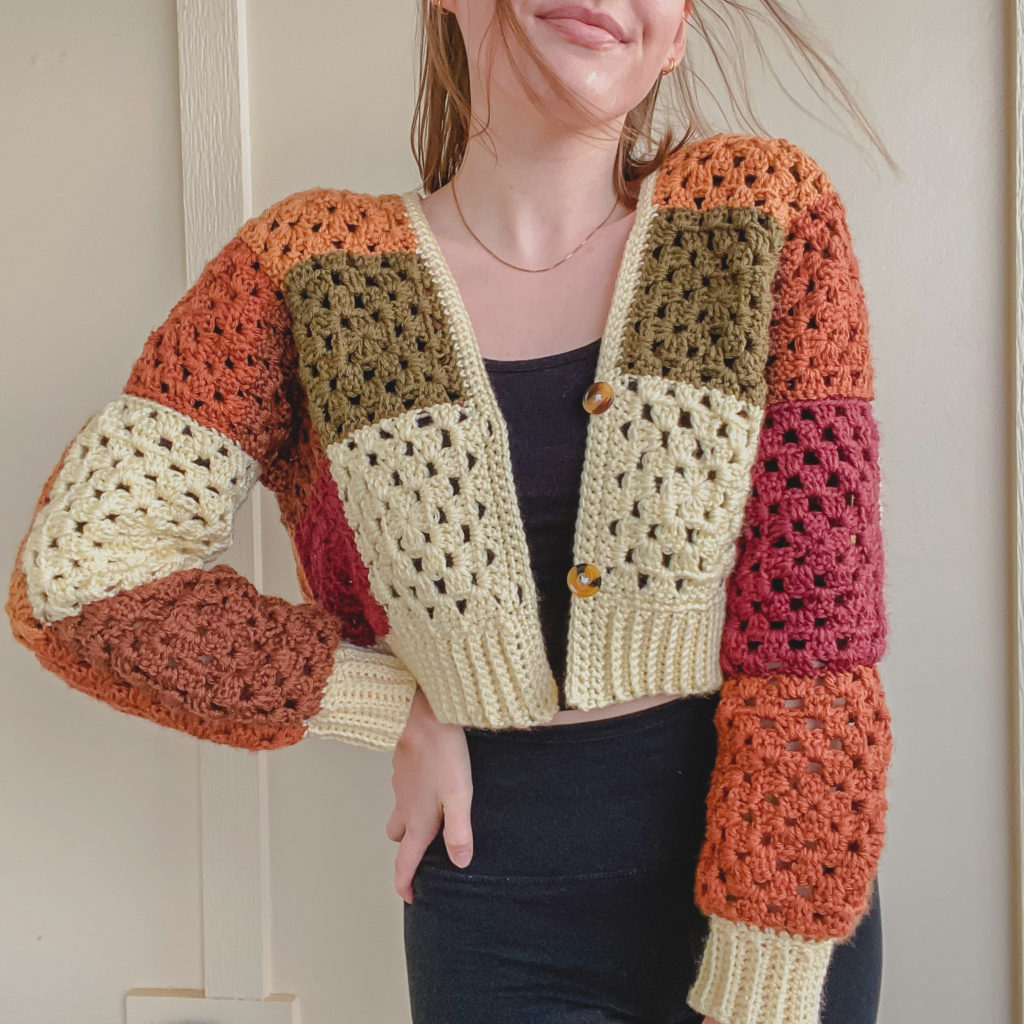
This cardigan pattern, colors and name are all inspired by autumn season and thanksgiving!
Around this holiday season I am feeling very thankful and grateful for the wonderful crochet community I have been blessed with! Thank YOU for all the continued support and love on all my patterns and content I share through all my socials, it really means a lot! 🥰
Now, enough mushy talk, let’s get started!
MATERIALS
Medium Weight (4) Yarn – I used colors; Ecru, Honey, Adobe, Olive, Pomegranate, Mahogany. (I really enjoyed working with this yarn, I have already bought more and have future pattern planned with it!)
Number of Skeins Needed: These are 100g skeins of yarn and I used a total of 6 different colors (as shown below, you will need an extra skein of yarn of the color you chose for your ribbing).
XS/S you need 1 skein of each color, and 2 skeins for the color you use for the ribbing.
M/L & XL/2XL you need 2 skeins of each color, and 3 skeins for the color you use for the ribbing.
3XL/4XL you need 3 skeins of each color, and 4 skeins for the color you use for the ribbing.
Buttons – I linked some similar ones, but I can’t link the ones I used, because I used mismatched 19mm buttons I had laying around in my craft stash. You can really use whatever button style/size you’d like (I think some wooden buttons would look lovely)!
Gauge
XS/S front and back panel squares should measure 5inches x 5inches and sleeve squares should measure 7inches x 7inches.
M/L front and back panel squares should measure 6inches x 6 inches and sleeve squares should measure 8inches x 8 inches.
XL/2XL front and back panel squares should measure 7inches x 7inches and sleeve squares should measure 9inches x 9inches.
3XL/4XL front and back panel squares should measure 8inches x 8inches and sleeve squares should measure 10inches x 10inches.
STITCHES + ABBREVIATIONS
Ch = Chain
St(s) = Stitches
Sc = Single Crochet
Dc = Double Crochet
Sl st = Slip Stitch
Sc2tog = Single Crochet Two Together (also known as a decrease)
Sc Blo = Single Crochet Back Loop Only
Sk st = Skip Stitch
Dc cluster = 3 double crochet
Pattern Notes
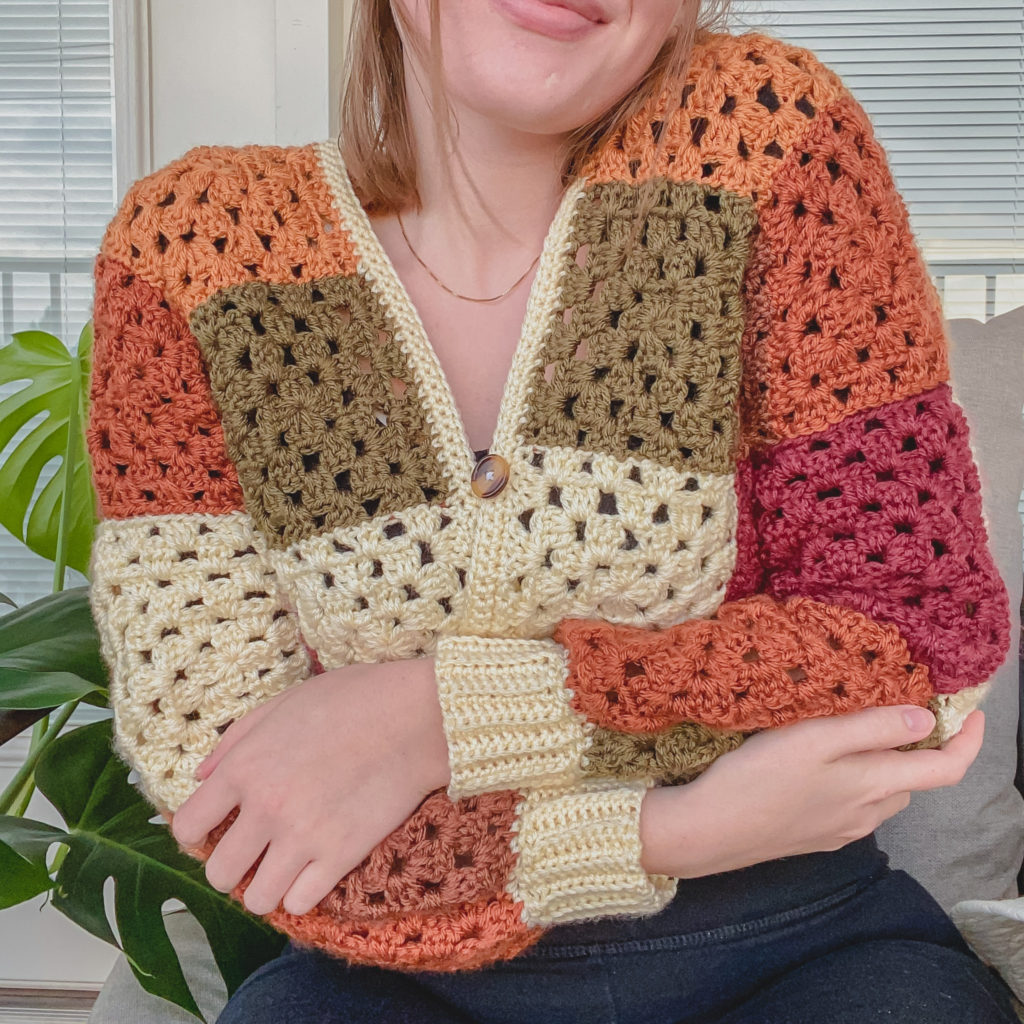
*Cardigan is meant to be a boxy, slightly oversized with crop fit, if you do not like that, maybe consider sizing down.
*This pattern follows size XS/S, but has sizes XS-4XL
*This pattern uses US crochet terms.
*Turning ch 3 DOES count as a dc stitch in this pattern.
Turning ch 1 DOES NOT count as a sc stitch
*When making the granny squares, you will be work in ch spaces and not in sts.
*For every size you will need 27 Panel Squares and 8 Sleeve Squares.
Grateful + Thankful Cardi
Pattern
Front and Back Panel Squares
Start off by making a magic ring.
Round 1: Ch 3, (first ch 3 of EVERY ROUND counts as a dc st), work 2 dc into the magic ring, ch 3, work 3 dc into the magic ring, ch 3, work 3 dc into the magic ring, ch 3, work 3 dc into the magic ring, ch 3. Sl st into the first st of the round and turn your work.
Round 2: Ch 3, work 2 dc into ch space, ch 3, work 3 more dc in same ch space, ch 1, work 3 dc into next ch space, ch 3, work 3 more dc into same ch space, ch 1, work 3 dc into next ch space, ch 3, work 3 more dc into same ch space, ch 1, work 3 dc into next ch space, ch 3, work 3 more dc into same ch space, ch 1, sl st into the first st of the round and turn your work.
Round 3: Ch 3, work 2 dc in the ch 1 space, ch 1, *work 3 dc into the ch 3 space, ch 3, work 3 dc into the same ch 3 space, ch 1, work 3 dc into the next ch 1 space, ch 1, work 3 dc into the next ch 3 space, ch 3, work 3 dc into the same ch 3 space, ch 1, *repeat until the end of the round. Sl st into the first st of the round and turn your work.
Round 4(-5 for M/L, 4-6 for XL/2XL, 4-7 for 3XL/4XL): Repeat the process of a dc cluster in each ch 1 space, with a ch 1 to separate each cluster and 2 dc clusters in each ch 3 space (the corner ch space), with a ch 3 to separate the 2 clusters.
Fasten off at 4 rounds for size XS/S, fasten off at 5 rounds for M/L, fasten off at 6 rounds for XL/2XL, fasten off at 7 rounds for 3XL/4XL.
Sleeve Squares
Start off by making a magic ring.
Round 1: Ch 3, work 2 dc into the magic ring, ch 3, work 3 dc into the magic ring, ch 3, work 3 dc into the magic ring, ch 3, work 3 dc into the magic ring, ch 3. Sl st into the first st of the round and turn your work.
Round 2: Ch 3, work 2 dc into ch space, ch 3, work 3 more dc in same ch space, ch 1, work 3 dc into next ch space, ch 3, work 3 more dc into same ch space, ch 1, work 3 dc into next ch space, ch 3, work 3 more dc into same ch space, ch 1, work 3 dc into next ch space, ch 3, work 3 more dc into same ch space, ch 1, sl st into the first st of the round and turn your work.
Round 3: Ch 3, work 2 dc in the ch 1 space, ch 1, *work 3 dc into the ch 3 space, ch 3, work 3 dc into the same ch 3 space, ch 1, work 3 dc into the next ch 1 space, ch 1, work 3 dc into the next ch 3 space, ch 3, work 3 dc into the same ch 3 space, ch 1, *repeat until the end of the round. Sl st into the first st of the round and turn your work.
Round 4-6 (4-7 for M/L, 4-8 for XL/2XL, 4-9 for 3XL/4XL): Repeat the process of a dc cluster in each ch 1 space, with a ch 1 to separate each cluster and 2 dc clusters in each ch 3 space (the corner ch space), with a ch 3 to separate the 2 clusters.
Fasten off at 6 rounds for size XS/S, fasten off at 7 rounds for M/L, fasten off at 8 rounds for XL/2XL, fasten off at 9 rounds for 3XL/4XL.
For every size you will need:
27 Panel Squares
8 Sleeve Squares
If you need a little help visualizing the granny square better, you can watch my Video Tutorial here.
Sew all your squares together.
Assembly
I included some illustrations below on how I seamed mine together.
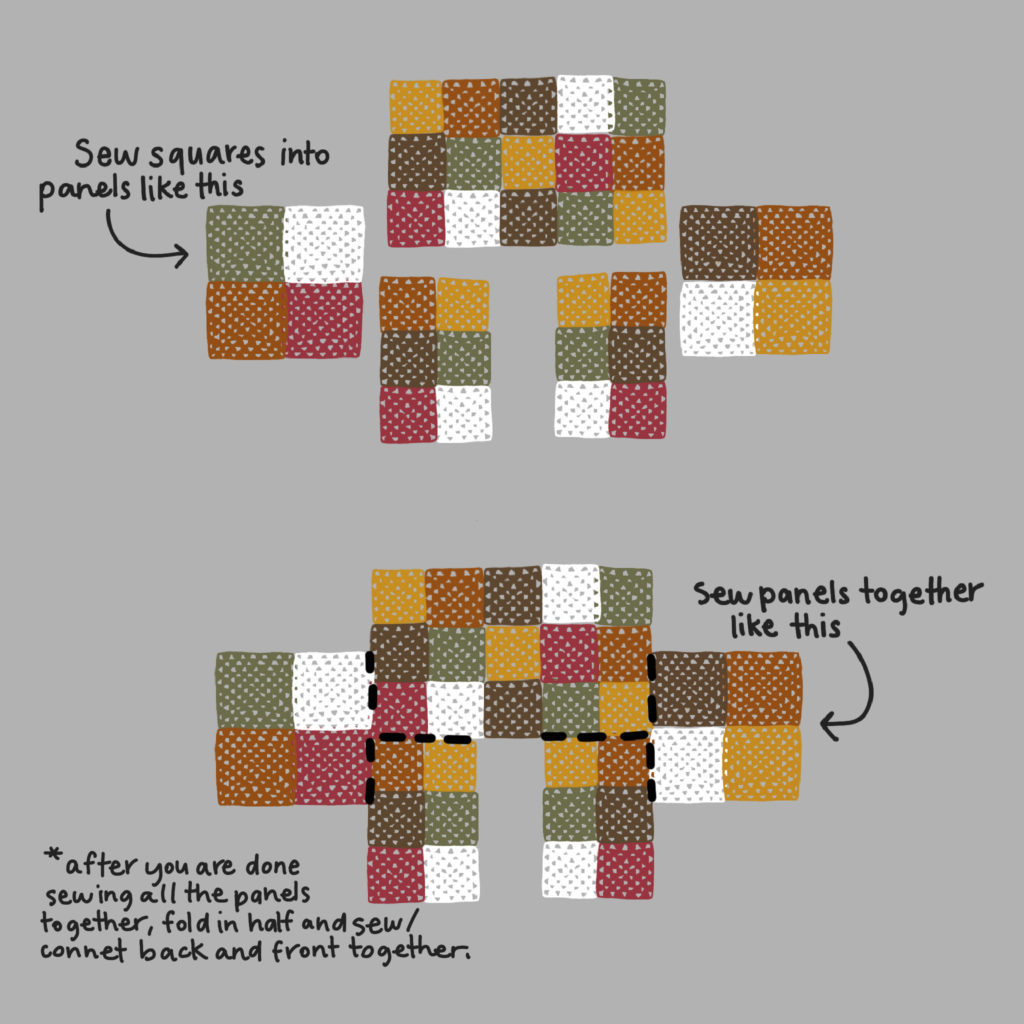
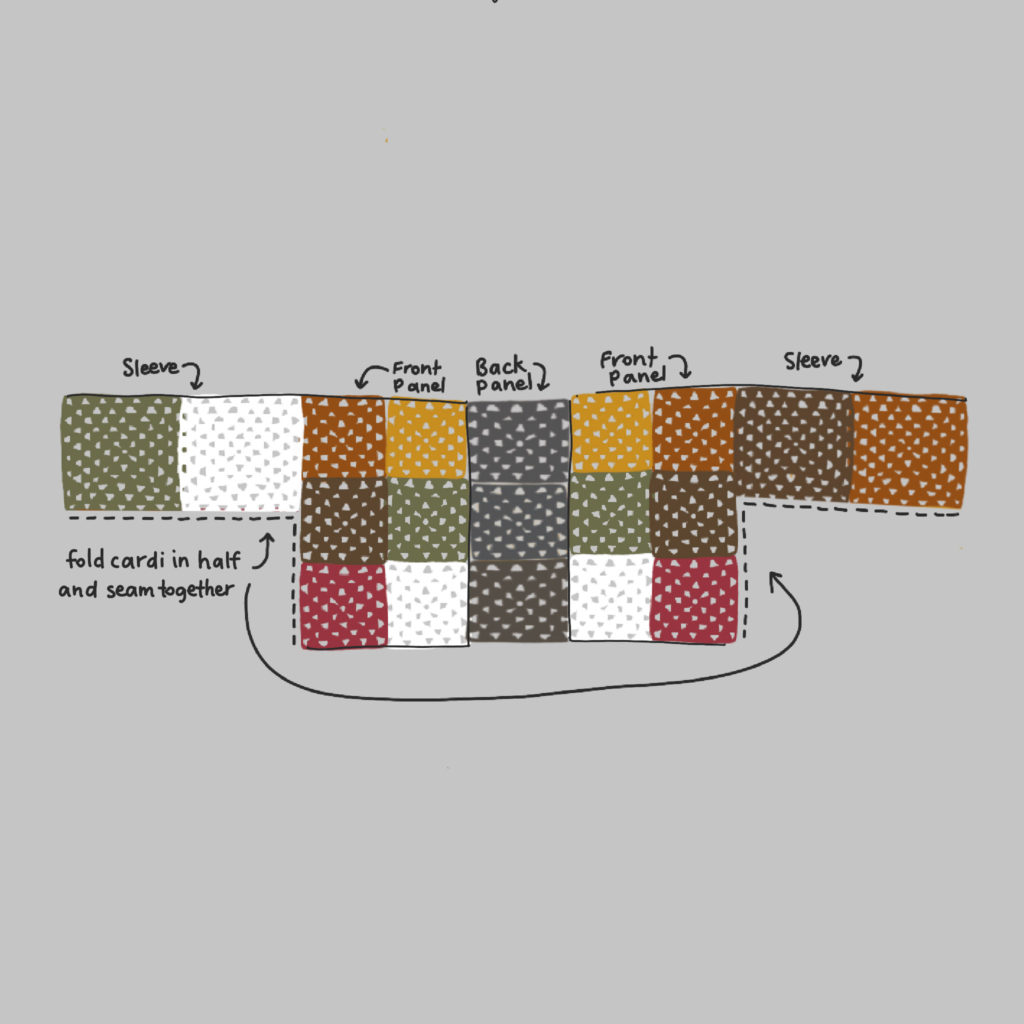
I used the mattress stitch seam to sew mine together. I linked a video here by TL Yarn Crafts that is very helpful! The video teaches you 4 ways (including the mattress stitch seam) to sew your granny squares together.
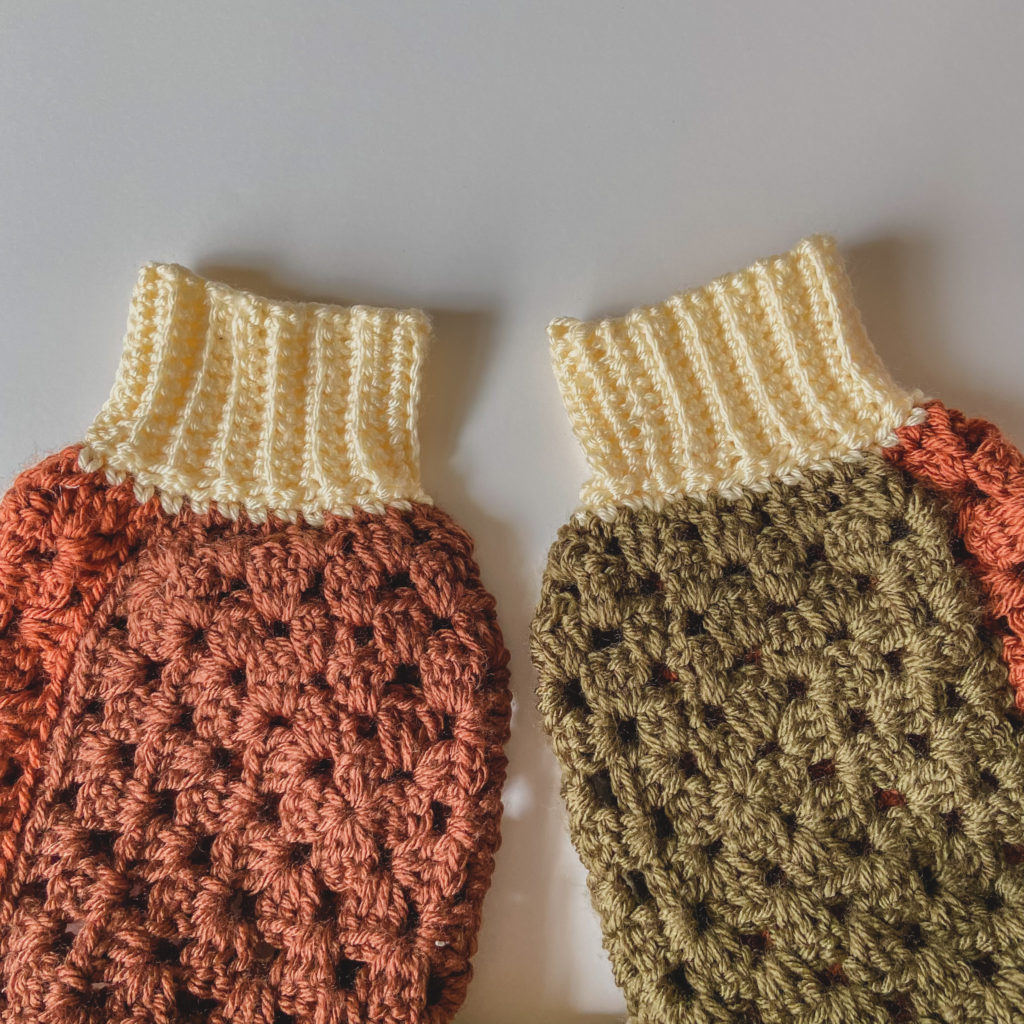
Wrist Cuff Ribbing
Attach yarn to the end of either sleeve opening of your cardigan.
Round 1: Ch 1 and sc2tog (decrease) along the whole sleeve opening to help the cuff be more snug around your wrist. Sl st into the first st of the round. (If your ribbing to be more loose, just sc in each st without the decrease OR do away with the ribbing all together.)
Ribbing Rows: Ch 11, sc into the 2nd ch from the hook, sc in remaining 9 ch, work 2 sl sts into 2 of the sc from the previous round 1, turn your work, skipping the sl sts you just made and *sc blo into the next 10 sts, turn your work, ch 1 and sc blo in to next 10 sts, work 2 sl sts into 2 of the sc from the previous round 1, turn your work, *repeat this until you have no more sc from the previous round 1 to do your ribbing in.
Fasten off and leave a fairly long tail to sew both ends of your ribbing together.
Repeat for other sleeve.
See my Video Tutorial here if you are having trouble visualizing the ribbing.
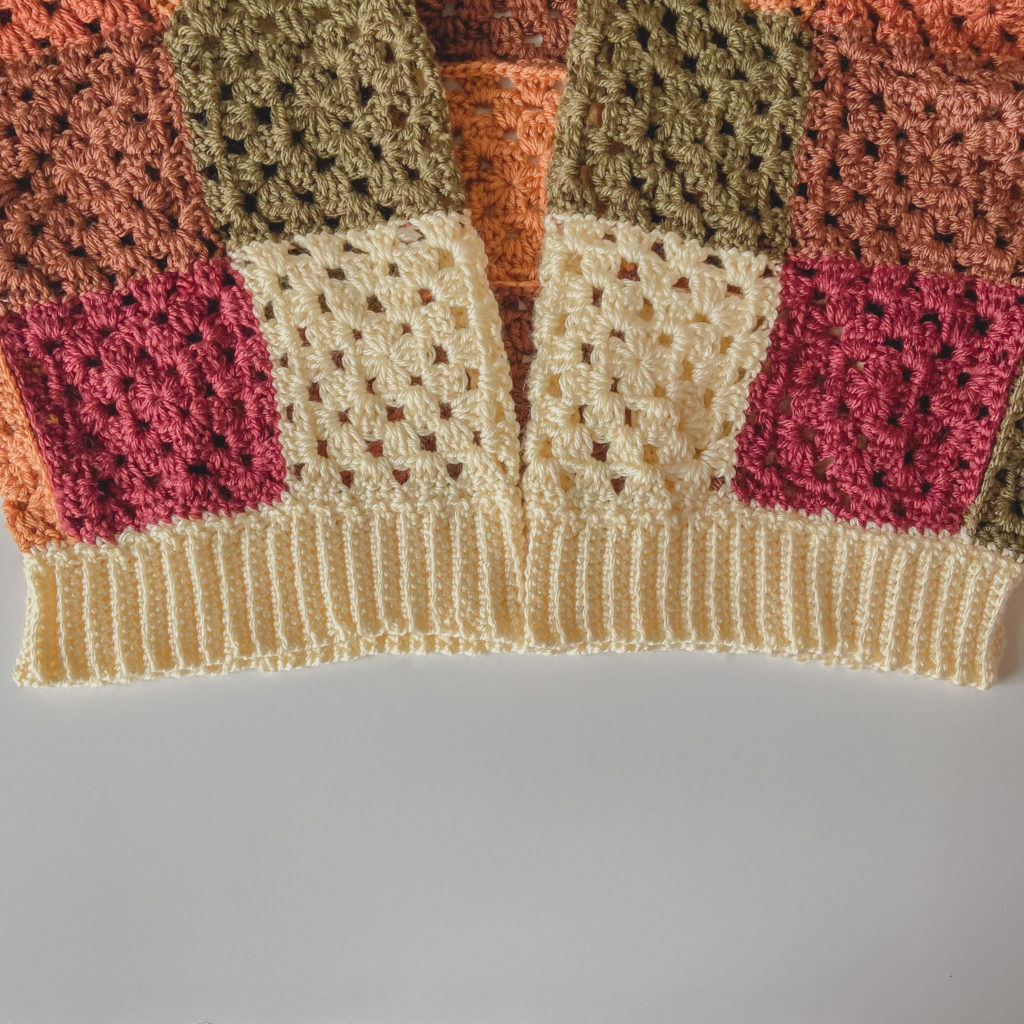
Bottom Ribbing
Attach yarn to the bottom of your cardigan
Round 1: Ch 1 and sc along the bottom of your cardigan until you reach the other end.
Ribbing Rows: You will repeat the same ribbing technique as you did for your wrist cuffs until you have no more sc to do your ribbing in.
Ch 11, sc into the 2nd ch from the hook, sc in remaining 9 ch, work 2 sl sts into 2 of the sc from the previous round 1, turn your work, skipping the sl sts you just made and *sc blo into the next 10 sts, turn your work, ch 1 and sc blo in to next 10 sts, work 2 sl sts into 2 of the sc from the previous round 1, turn your work, *repeat this until you have no more sc from the previous round 1 to do your ribbing in.
Front Opening of the Cardigan and Button Holes
Attach yarn to one of the front bottom corners of the cardigan.
Round 1: Ch 1, sc along the front opening of the cardigan until you reach the opposite end of the front bottom corner. Turn your work.
*This next round we will be making button holes, but if you do not want buttons on your cardigan, you can simply skip those steps.
Round 2: Ch 1 and again sc along the front opening of the cardigan until you come by the st aligned with the top of the last square on the opposite side. When you reach that st aligned with the top of the last square, we are going to make one our button holes, ch 2, sk 2 sts and then sc as usual until you reach the st that is aligned with the bottom end of the same square, where we will work another button hole, ch 2, sk 2 sts and sc as usual until the end of the row. Turn your work.
Round 3: Ch 1, sc as usual until you reach the ch 2 of the row, work 2 sc into the ch 2 space, sc as usual until next ch 2 space, work 2 sc into the ch 2 space, sc in each st until the end of row.
Fasten off.
Sew on your buttons (make sure they align with the button holes you made for them).
Some tips for the button holes…
*I made only 2 button holes, but you can work more, less or none if you’d like!
*For your button holes, you will ch as many as you need for YOUR button size. My 19mm buttons need a ch 2 to fit through, but if your buttons are smaller or bigger you might need fewer or more chains.
*How ever many chains you make, on the next row when you are working over those chains, you will work as many sc as chains there are you are working over. (e.g. if you made 2 ch, the next row when working over those 2 chains you will work 2 sc for each ch you made in the previous row.)
If you are having trouble, maybe my Video Tutorial can help!
Weave in your ends and YOU’RE DONE!
If you recreate this cardigan, please tag or DM me @hayhaycrochet on Instagram or TikTok so I can see, like and share!
Happy Crocheting~!
This is such an easy pattern to follow and its so amazing looking!
Hi! I’m interested in making the cardigan in one color. Do you have any info about yardage for doing that? I’d be doing 2XL, which says 2 of each color for 6 colors, but would I really need 12 of one color?
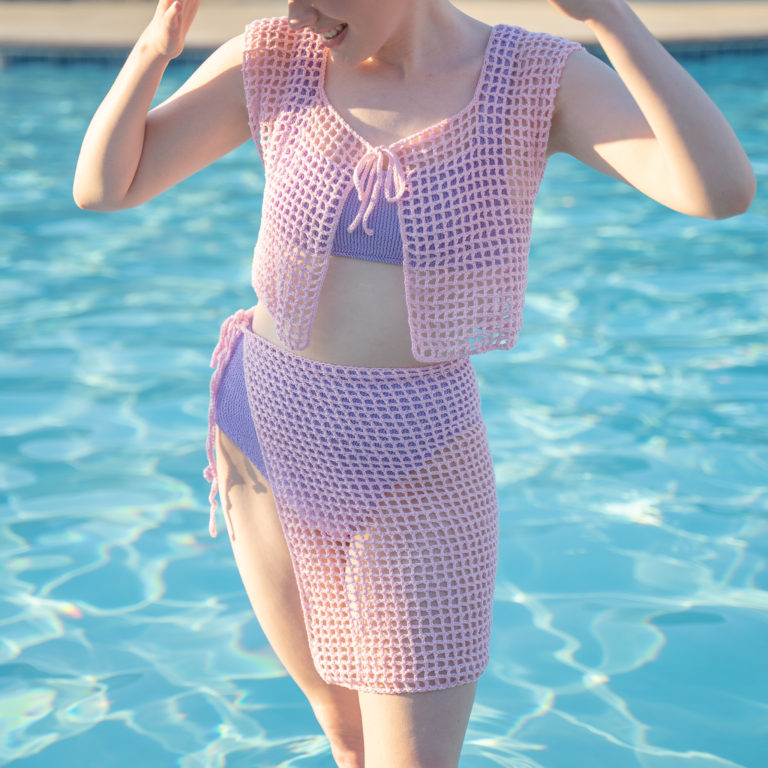
[…] is a great scrap/left over yarn project. I made one vest from the left over yarn from my “Grateful + Thankful Cardi” and the other one from some of the left over yarn from my “Fall Picnic” Tote […]
Wow, I love it!! Will definitely try it out😍 thanks for sharing
Wowwwww this is just stunning!!! Thanks for sharing your pattern. Will be in my to-make list next 🤩 thanks once again 💕