
🤍WELCOME HERE🤍
This post may contains affiliate links.
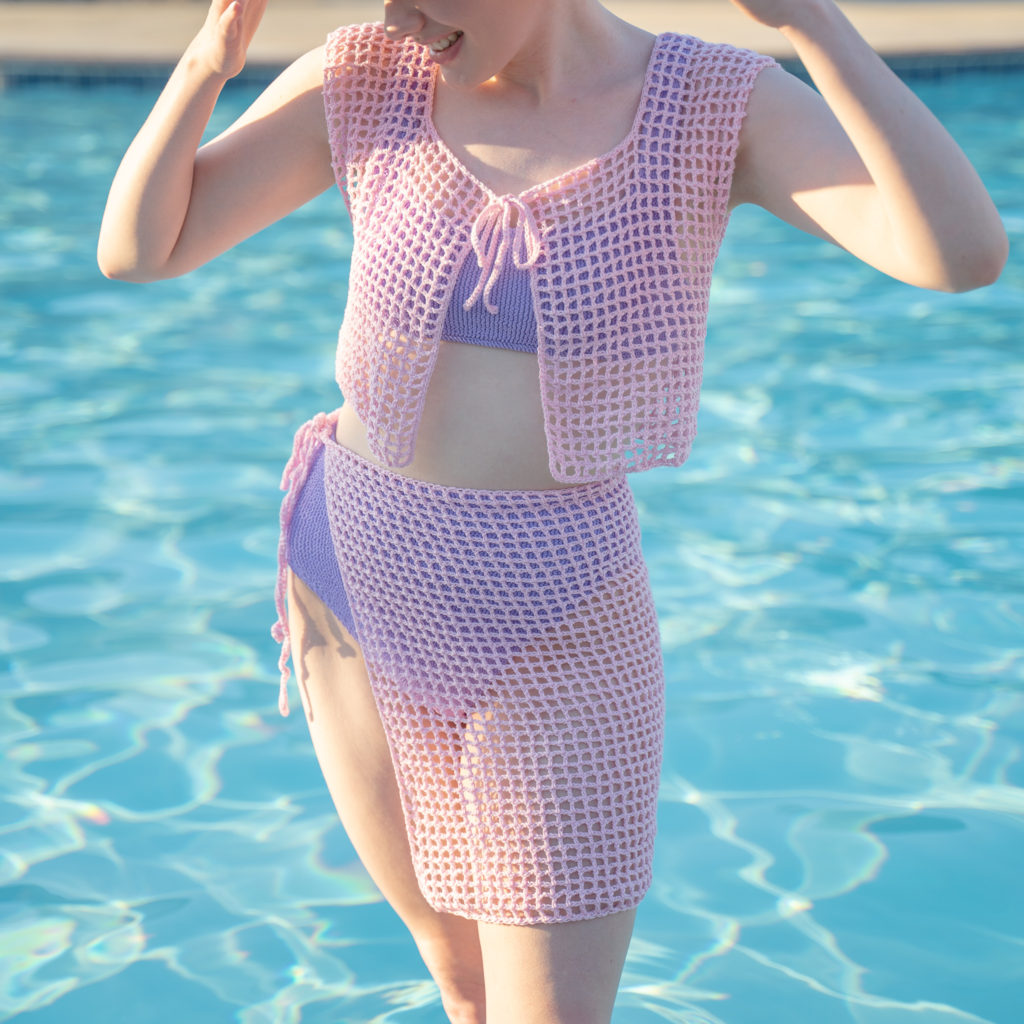
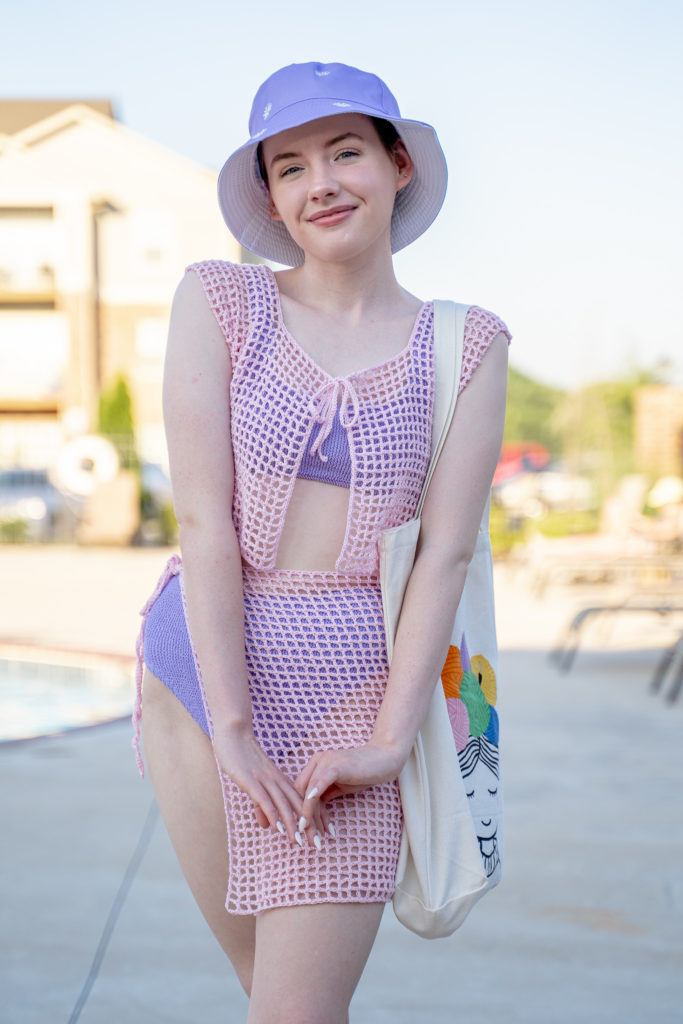
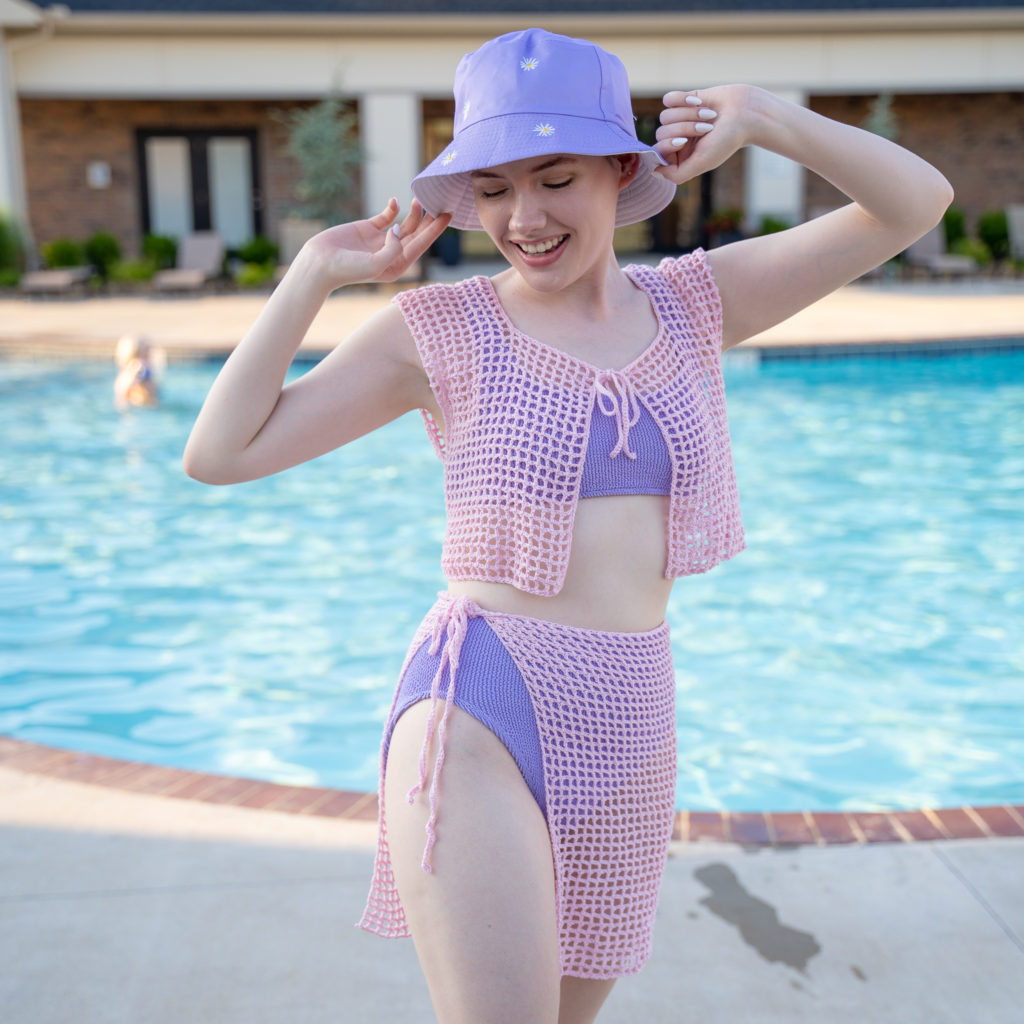
Hello there! After a little break, I am back with another pattern for y’all and its the “Summer Love Set“!
I am so excited to finally share this design! I came up with it in early March (pictured below) and wanted to release it before the summer started, but due to some unfortunate circumstances, I only now have had the chance to share it with y’all!
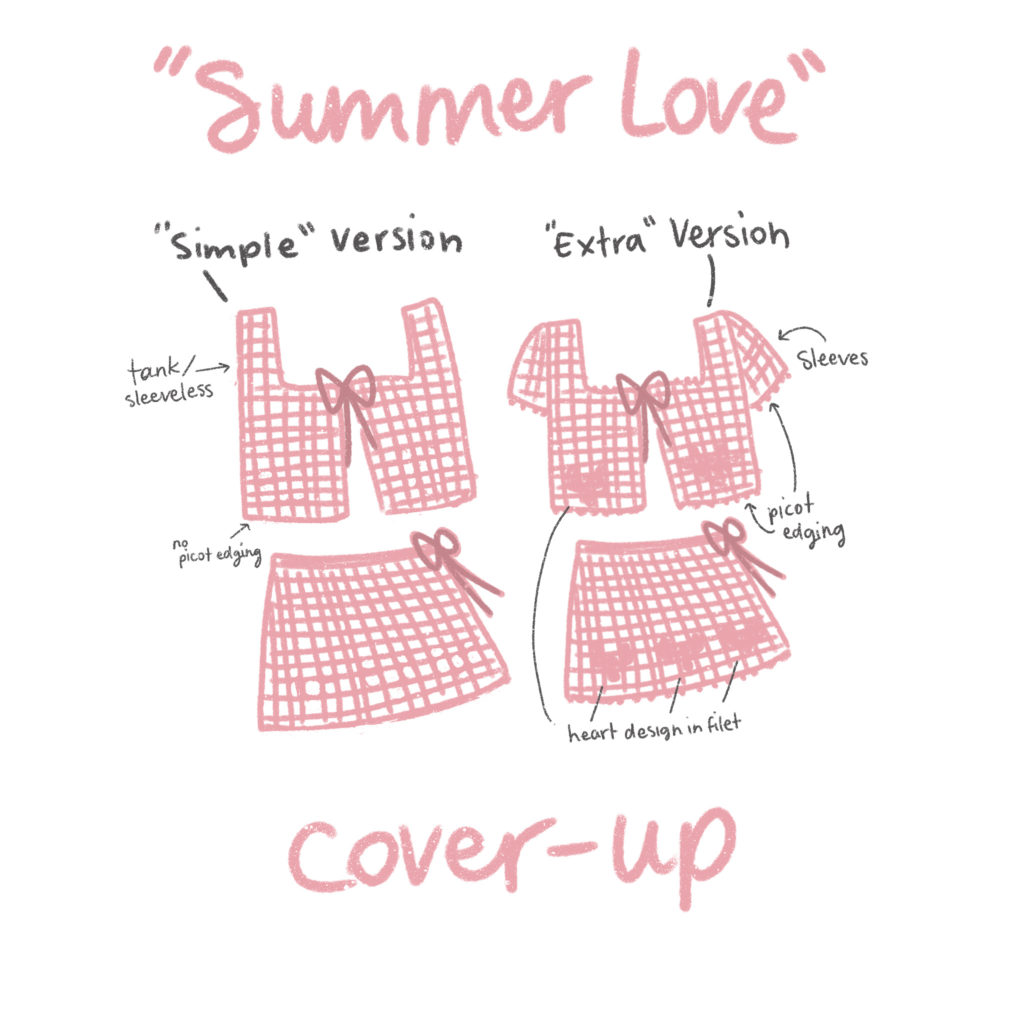
This pattern went through many changes and really I wanted all the little details of the “Extra Version” but after some thought and testing, I decided on the “Simple Version” to make it more approachable for all skill levels (I still plan on making the “Extra Version” sometime in the future 👀).
With this set being made with a Cotton, Fingering Weight (size 1) Yarn and the basic “Filet Stitch” , it is very lightweight and breathable; has a nice slight stretch to it and drapes nicely.
SO, without further ado, LET’S GET STARTED!
MATERIALS
Fingering Weight/Super Fine (1) Cotton Yarn – I used the color Tulip, but it comes in 40 other colors! (you get A LOT of yarn with this cone, I have a little over half left after making my set. You should be able to get away with just one all sizes, depending on your tension/gauge)
MEASUREMENTS
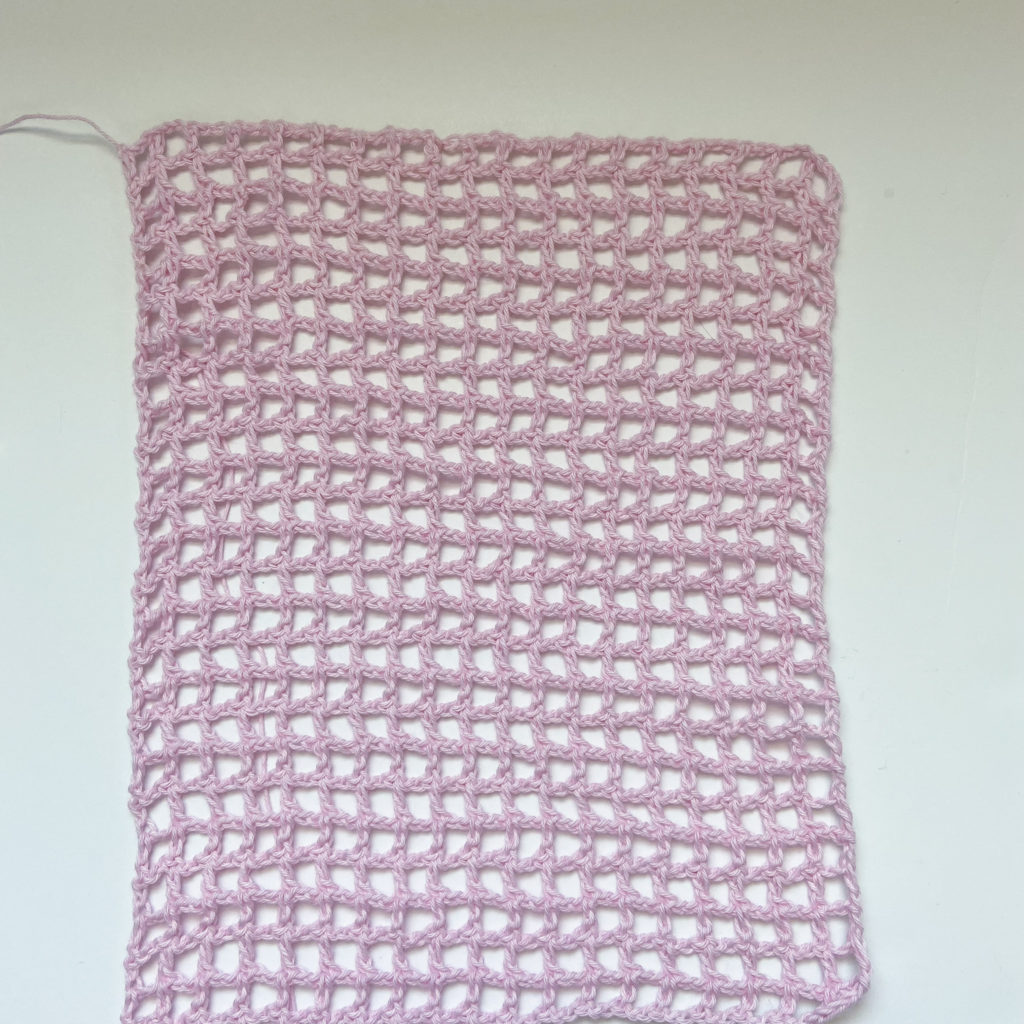
Gauge: 4″x4″ square = 9 filet stitches wide x 9 filet rows tall
*Measurements taken while garment was laid flat.
Top
S/M – 15 1/2″ wide x 14″ long
L/XL – 19″ wide x 15 1/2″ long
2XL/3XL – 22 1/2″ wide x 17″ long
4XL/5XL – 26″ wide x 18 1/2″ long
Bottom/Skirt
Width and Length of skirt is made custom to fit YOUR size, so there is no definite measurement.
With that being said, the measurements for my skirt are 26″ wide x 15 1/2″ long.
STITCHES + ABBREVIATIONS
Ch = Chain
St(s) = Stitch(es)
Sc = Single Crochet
Dc = Double Crochet
Sk/Sk ch = Skip/Skip chain(s)
Sl St = Slip Stitch
PATTERN NOTES
*The “Summer Love Set” is designed to be a slightly “oversized”, breezy fit.
*This Pattern follows size S/M, but has sizes S-5XL
*This Pattern follows US crochet terms
*Turning ch 4 DOES count as a stitch in this pattern.
*Number of stitches (and rows) indicated between “<>” and “( )“. E.g. “<57 for S/M, 69 for L/XL, 81 for 2XL/3XL, 93 for 4XL/5XL>” and “57 (69, 81, 93)”
Summer Love Set Pattern
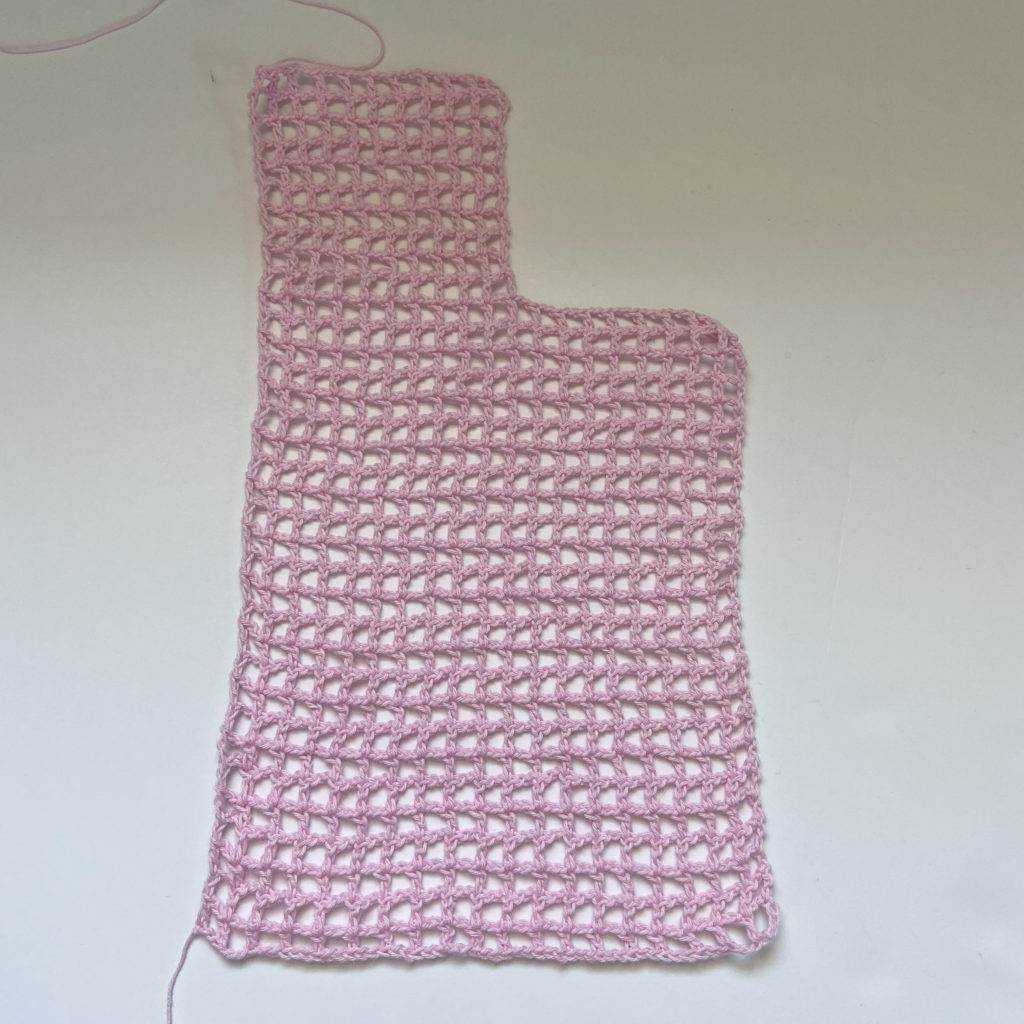
Front Panel
Foundation Chain: Ch 57 *+4 (69 +4, 81 +4, 93 +4)
*the “+4” chains is for turning your work. You will be doing this at the beginning of every row.
Row 1: Work 1 dc into the 7 ch from the hook, ch 2, sk 2 ch, *dc into the next ch, ch 2, sk 2 ch, *repeat until the end of the ch. <19, 23, 27, 31 filet sts total>
(If you’re having some trouble visualizing how to work the “filet stitch” you can check out my video tutorial for this pattern HERE!)
Row 2: Turn your work and ch 4. Sk 2 ch, *dc into the next st, ch 2, sk 2 ch, *repeat until the end of the row <19, 23, 27, 31 filet sts total>.
Row 3: Turn your work and ch 4. Sk 2 ch, *dc into the next st, ch 2, sk 2 ch, *repeat until the end of the row <19, 23, 27, 31 filet sts total>.
Repeat row 3 until you have 25 (27, 29, 31) filet rows total.
MAKE SURE you are working your last st of the row each row, otherwise your panel will start to decrease. Tho is might be a little hard to tell where you are supposed to work your last st, after you “ch 2, sk 2 ch“, you will need to work your last dc st into the top of the ch 2 from the previous row.
Again, if you need more assistance, the Video Tutorial is available on my YouTube!
Front Panel Strap
Row 26 (28, 30, 32): Turn your work and ch 4. Sk 2 ch, *dc into the next st, ch 2, sk 2 ch, *repeat until you have 10 (12, 14, 16) filet sts total. (You can do less filet sts if you want thinner straps.)
Row 27 (29, 31, 33): Turn your work and ch 4. Sk 2 ch, *dc into the next st, ch 2, sk 2 ch, *repeat until the end of the row <10, 12, 14, 16 filet sts total>.
Repeat row 27 (29, 31, 33) until you have 10 (11, 12, 13) filet strap rows total.
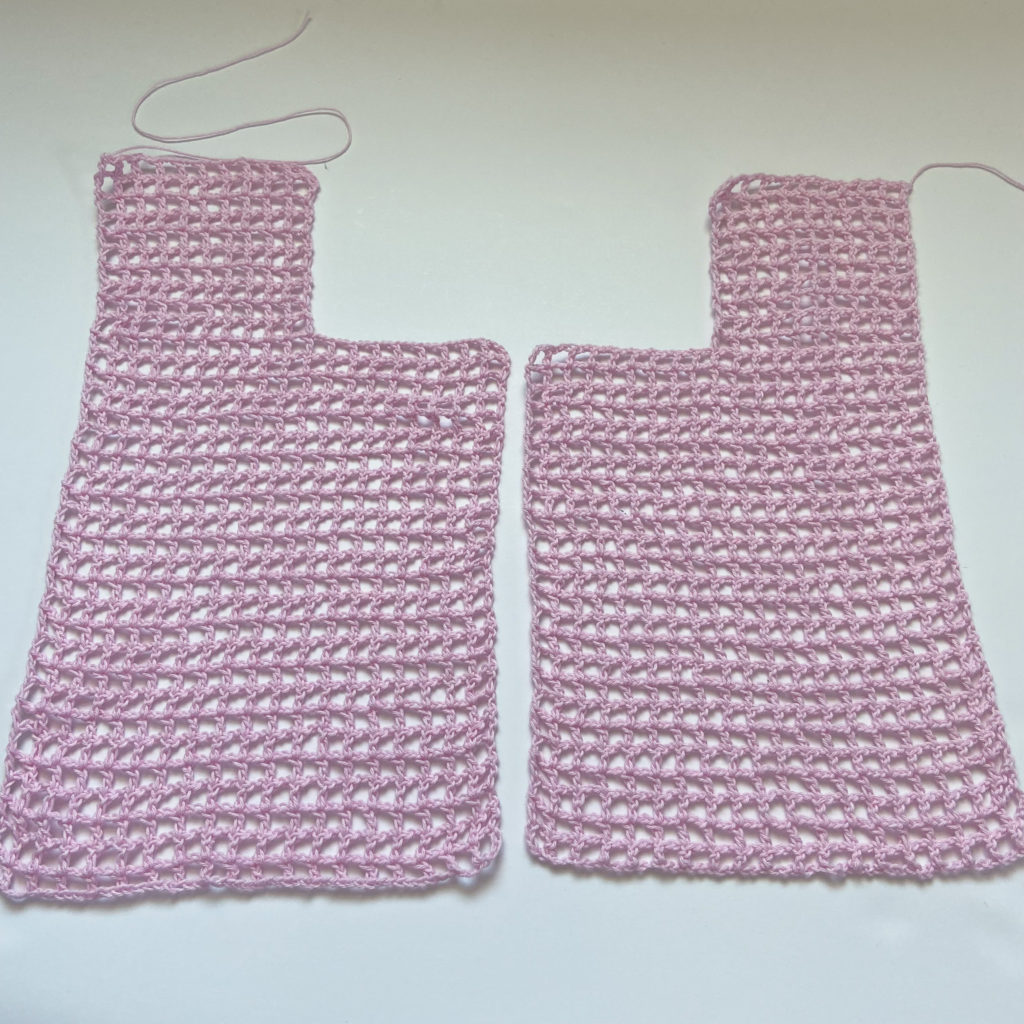
Fasten off and repeat entire process for your *second front panel.
*There are no “right or wrong side/front or back” to these panels.
Back Panel
Foundation Chain: 114 +4 (138 +4, 162 +4, 186 +4)
Row 1: Dc into the 7 ch from the hook, ch 2, sk 2 ch, *dc into the next ch, ch 2, sk 2 ch, *repeat until the end of the ch. <38, 46, 54, 62 filet sts total>
Row 2: Turn your work and ch 4. Sk 2 ch, *dc into the next st, ch 2, sk 2 ch, *repeat until the end of the row <38, 46, 54, 62 filet sts total>.
Repeat row 3 until you have 33 (35, 37, 39) filet rows total.
Back Straps
Row 34 (36, 38, 40): Turn your work and ch 4. Sk 2 ch, *dc into the next st, ch 2, sk 2 ch, *repeat until you have 10 (12, 14, 16) filet sts total. (Or as many as you worked for your front panel straps, if you worked less filet stitches)
Row 35 (37, 39, 41): Turn your work and ch 4. Sk 2 ch, *dc into the next st, ch 2, sk 2 ch, *repeat until the end of the row <10, 12, 14, 16 filet sts total>.
Fasten off.
For second strap, count 10 (12, 14, 16) filet sts from the opposite end of your back panel and attach your yarn.
Row 34 (36, 38, 40): Ch 4. Sk 2 ch, *dc into the next st, ch 2, sk 2 ch, *repeat until the end of the row <10, 12, 14, 16 filet sts total>.
Row 35 (37, 39, 41): Turn your work and ch 4. Sk 2 ch, *dc into the next st, ch 2, sk 2 ch, *repeat until the end of the row <10, 12, 14, 16 filet sts total>.
Fasten off.
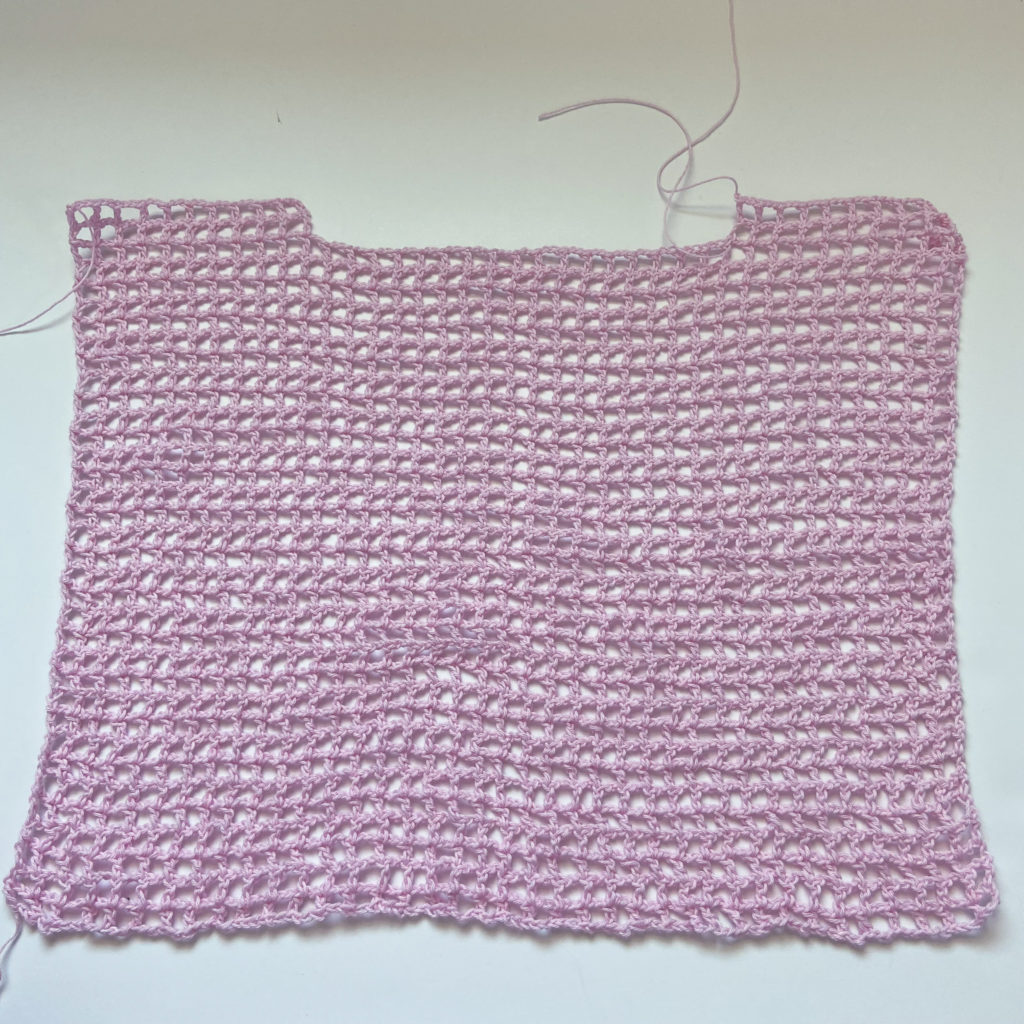
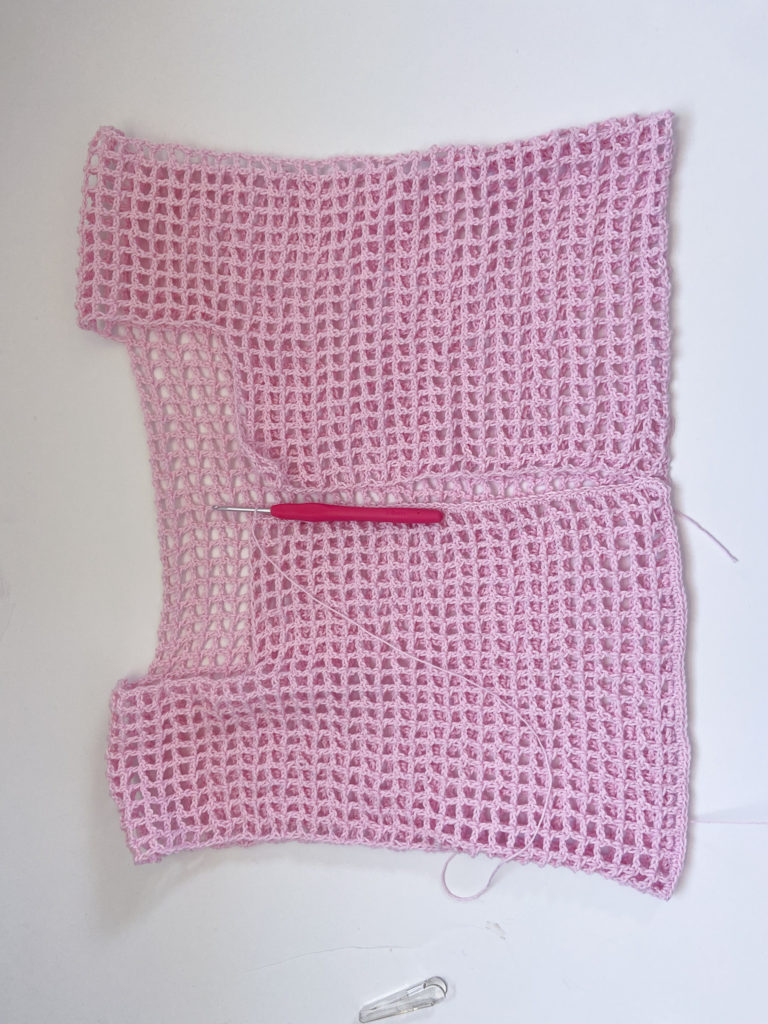
Seam all 3 top panels together.
(I seamed all mine together using the ‘single crochet method’.)
For the sides, I seamed up 12 filet rows high.
I recommend seaming: 12 rows high for S/M, 13 rows high for L/XL, 14 rows high for 2XL/3XL and 15 rows high for 4XL/5XL.
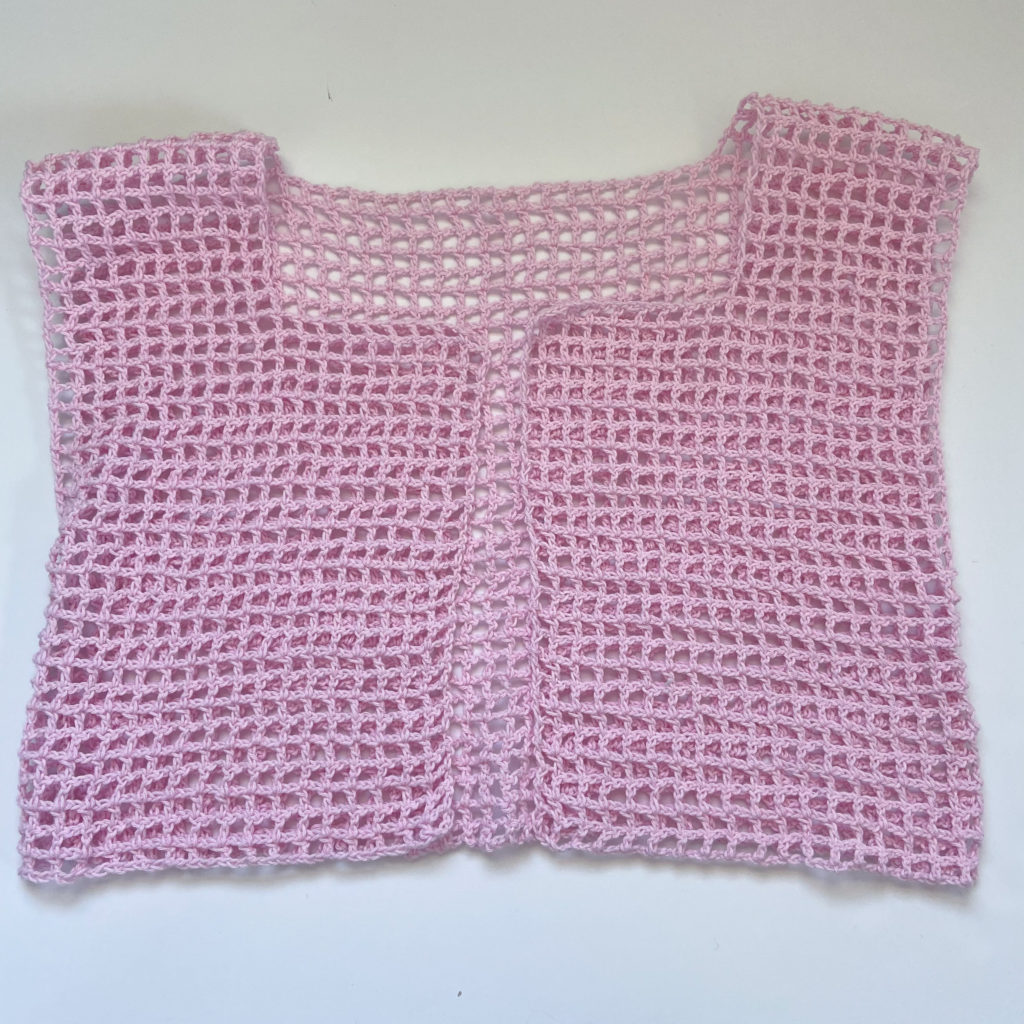
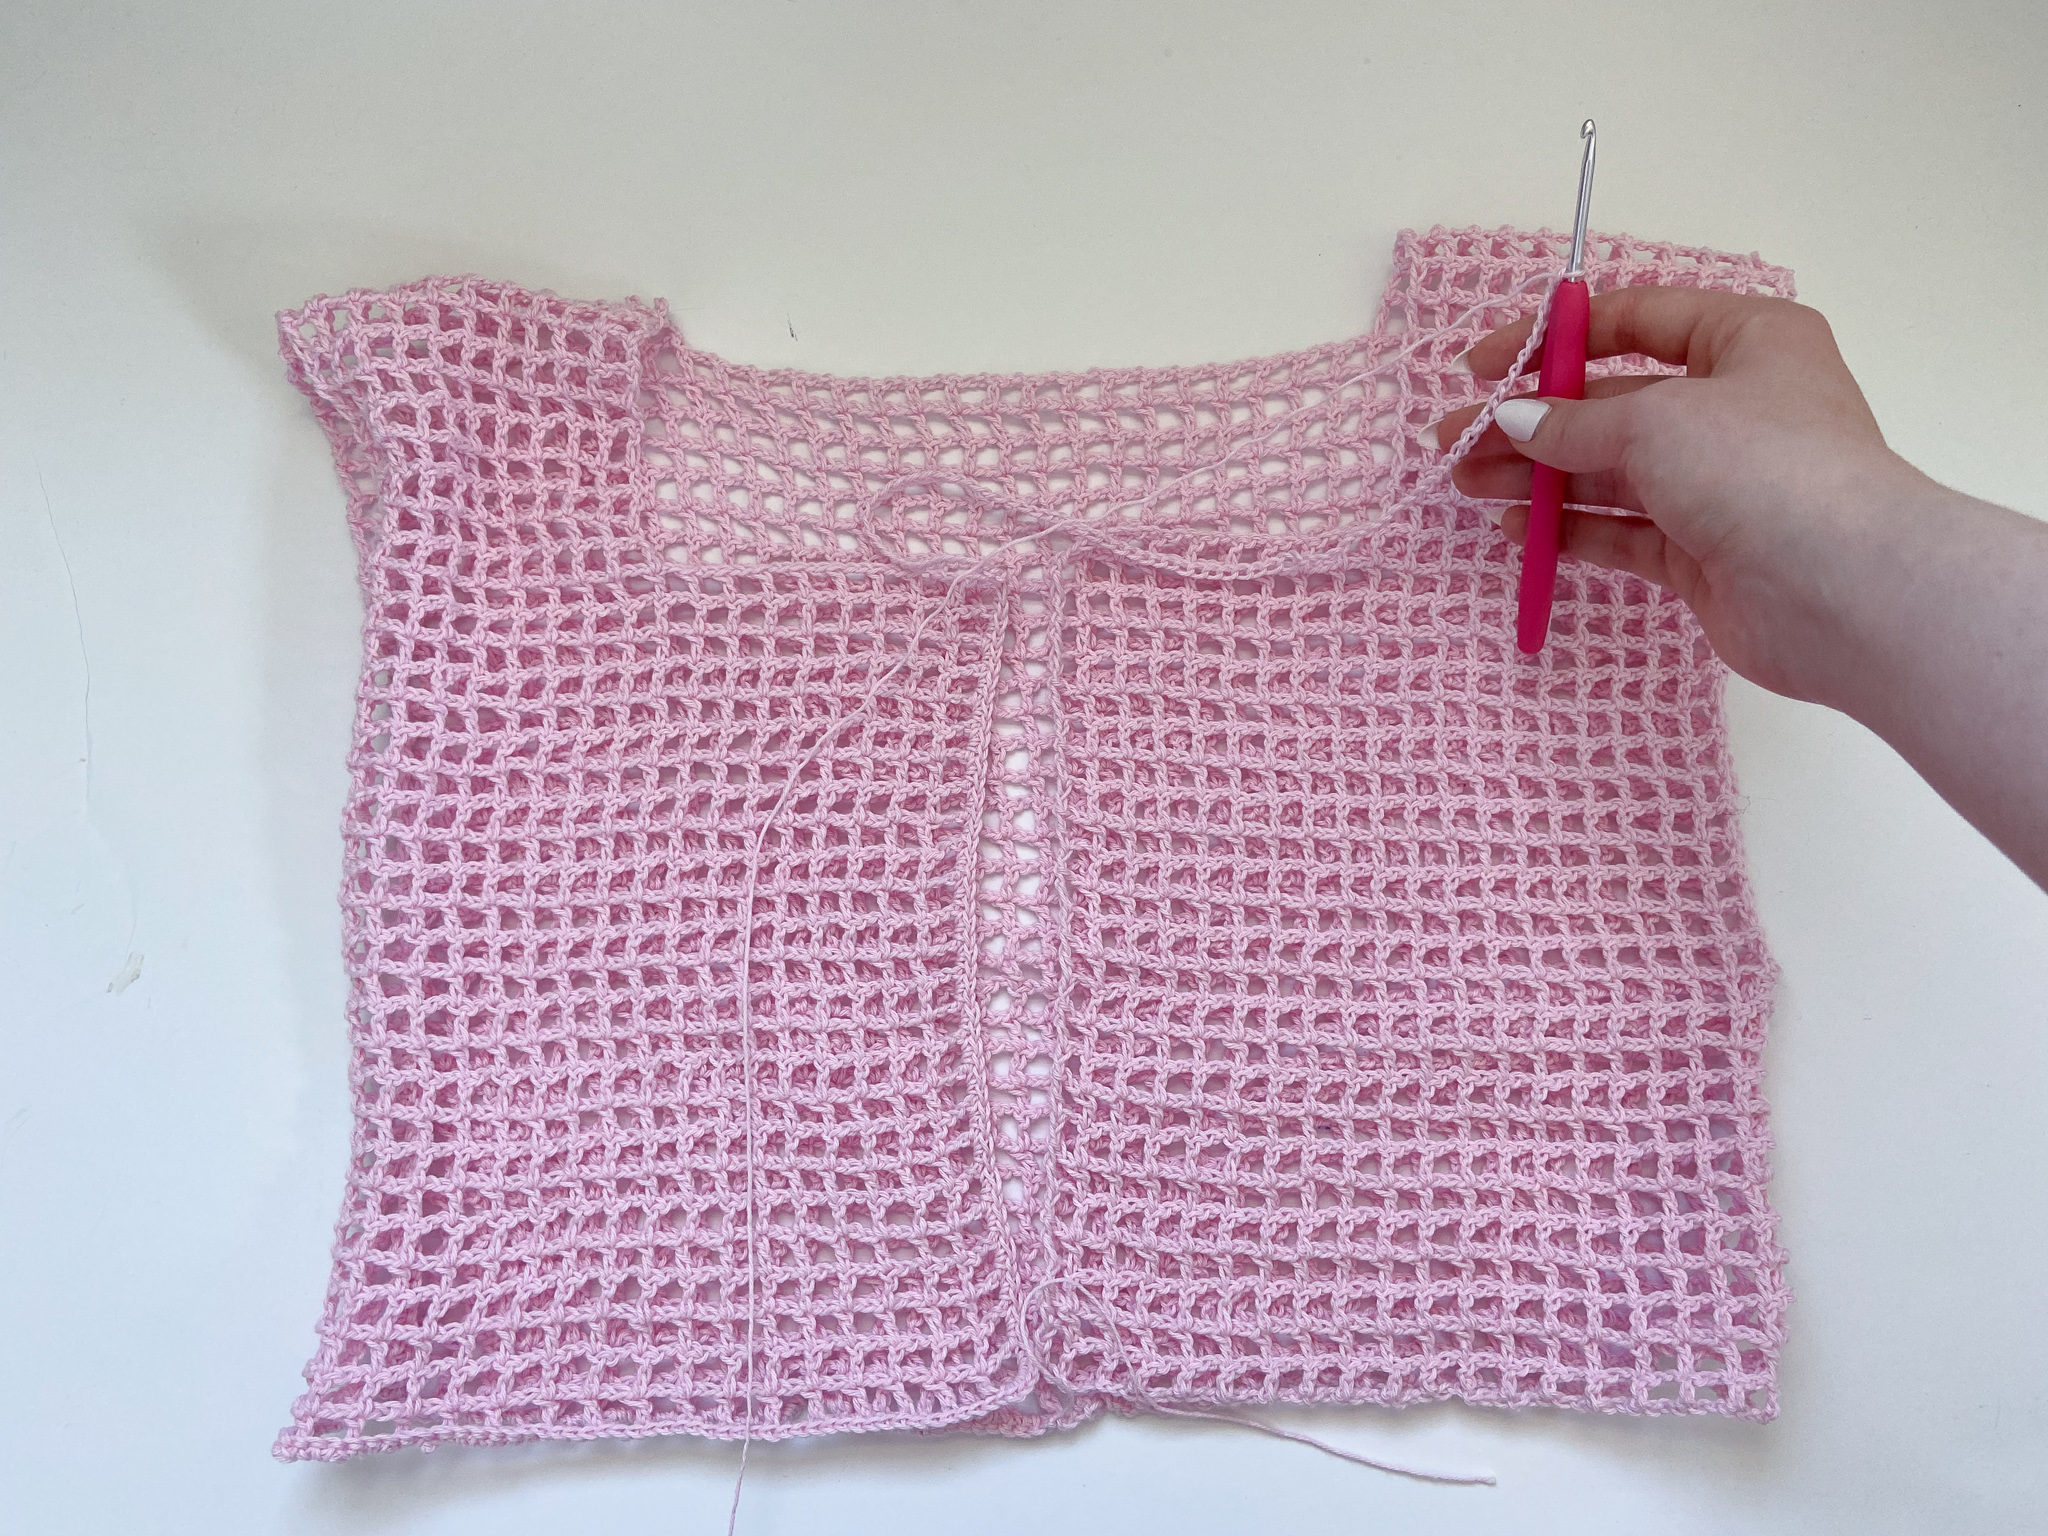
Finishing Touches
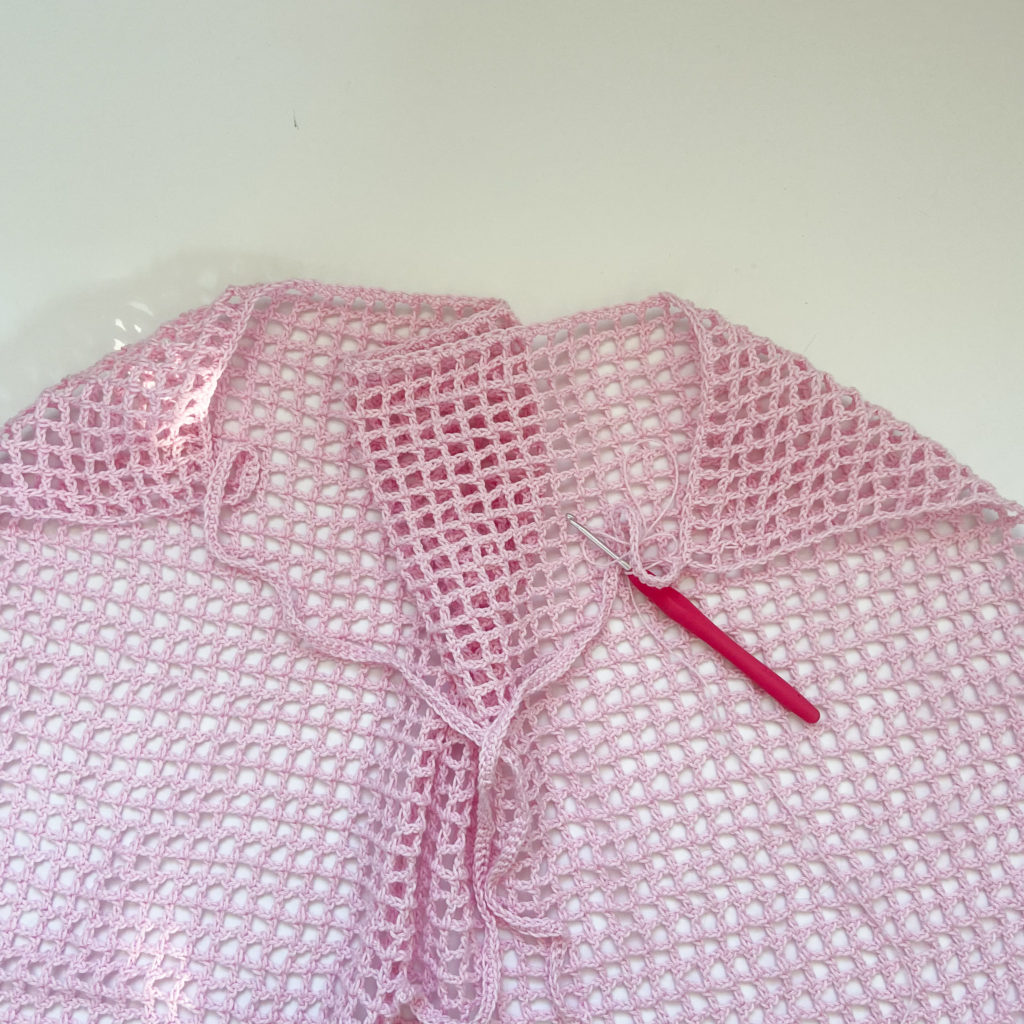
Now we will be single crocheting around the entirety of the main opening of the top (for a cleaner look) AND adding ties along the way!
I filmed the process of how to do this in my Video Tutorial for this pattern, so if you need a bit more help visually, make sure to check it out!
Row 1: Attach yarn to the bottom of the back panel and work 2 sc in each ch 2 space.
make sure to not work your single crochet too tight.
Continue doing this until you come to your first bottom corner, when you come to the corner, work 6 sc into that corner filet st, then continue working 2 sc in each ch 2 space until you come to your first top corner.
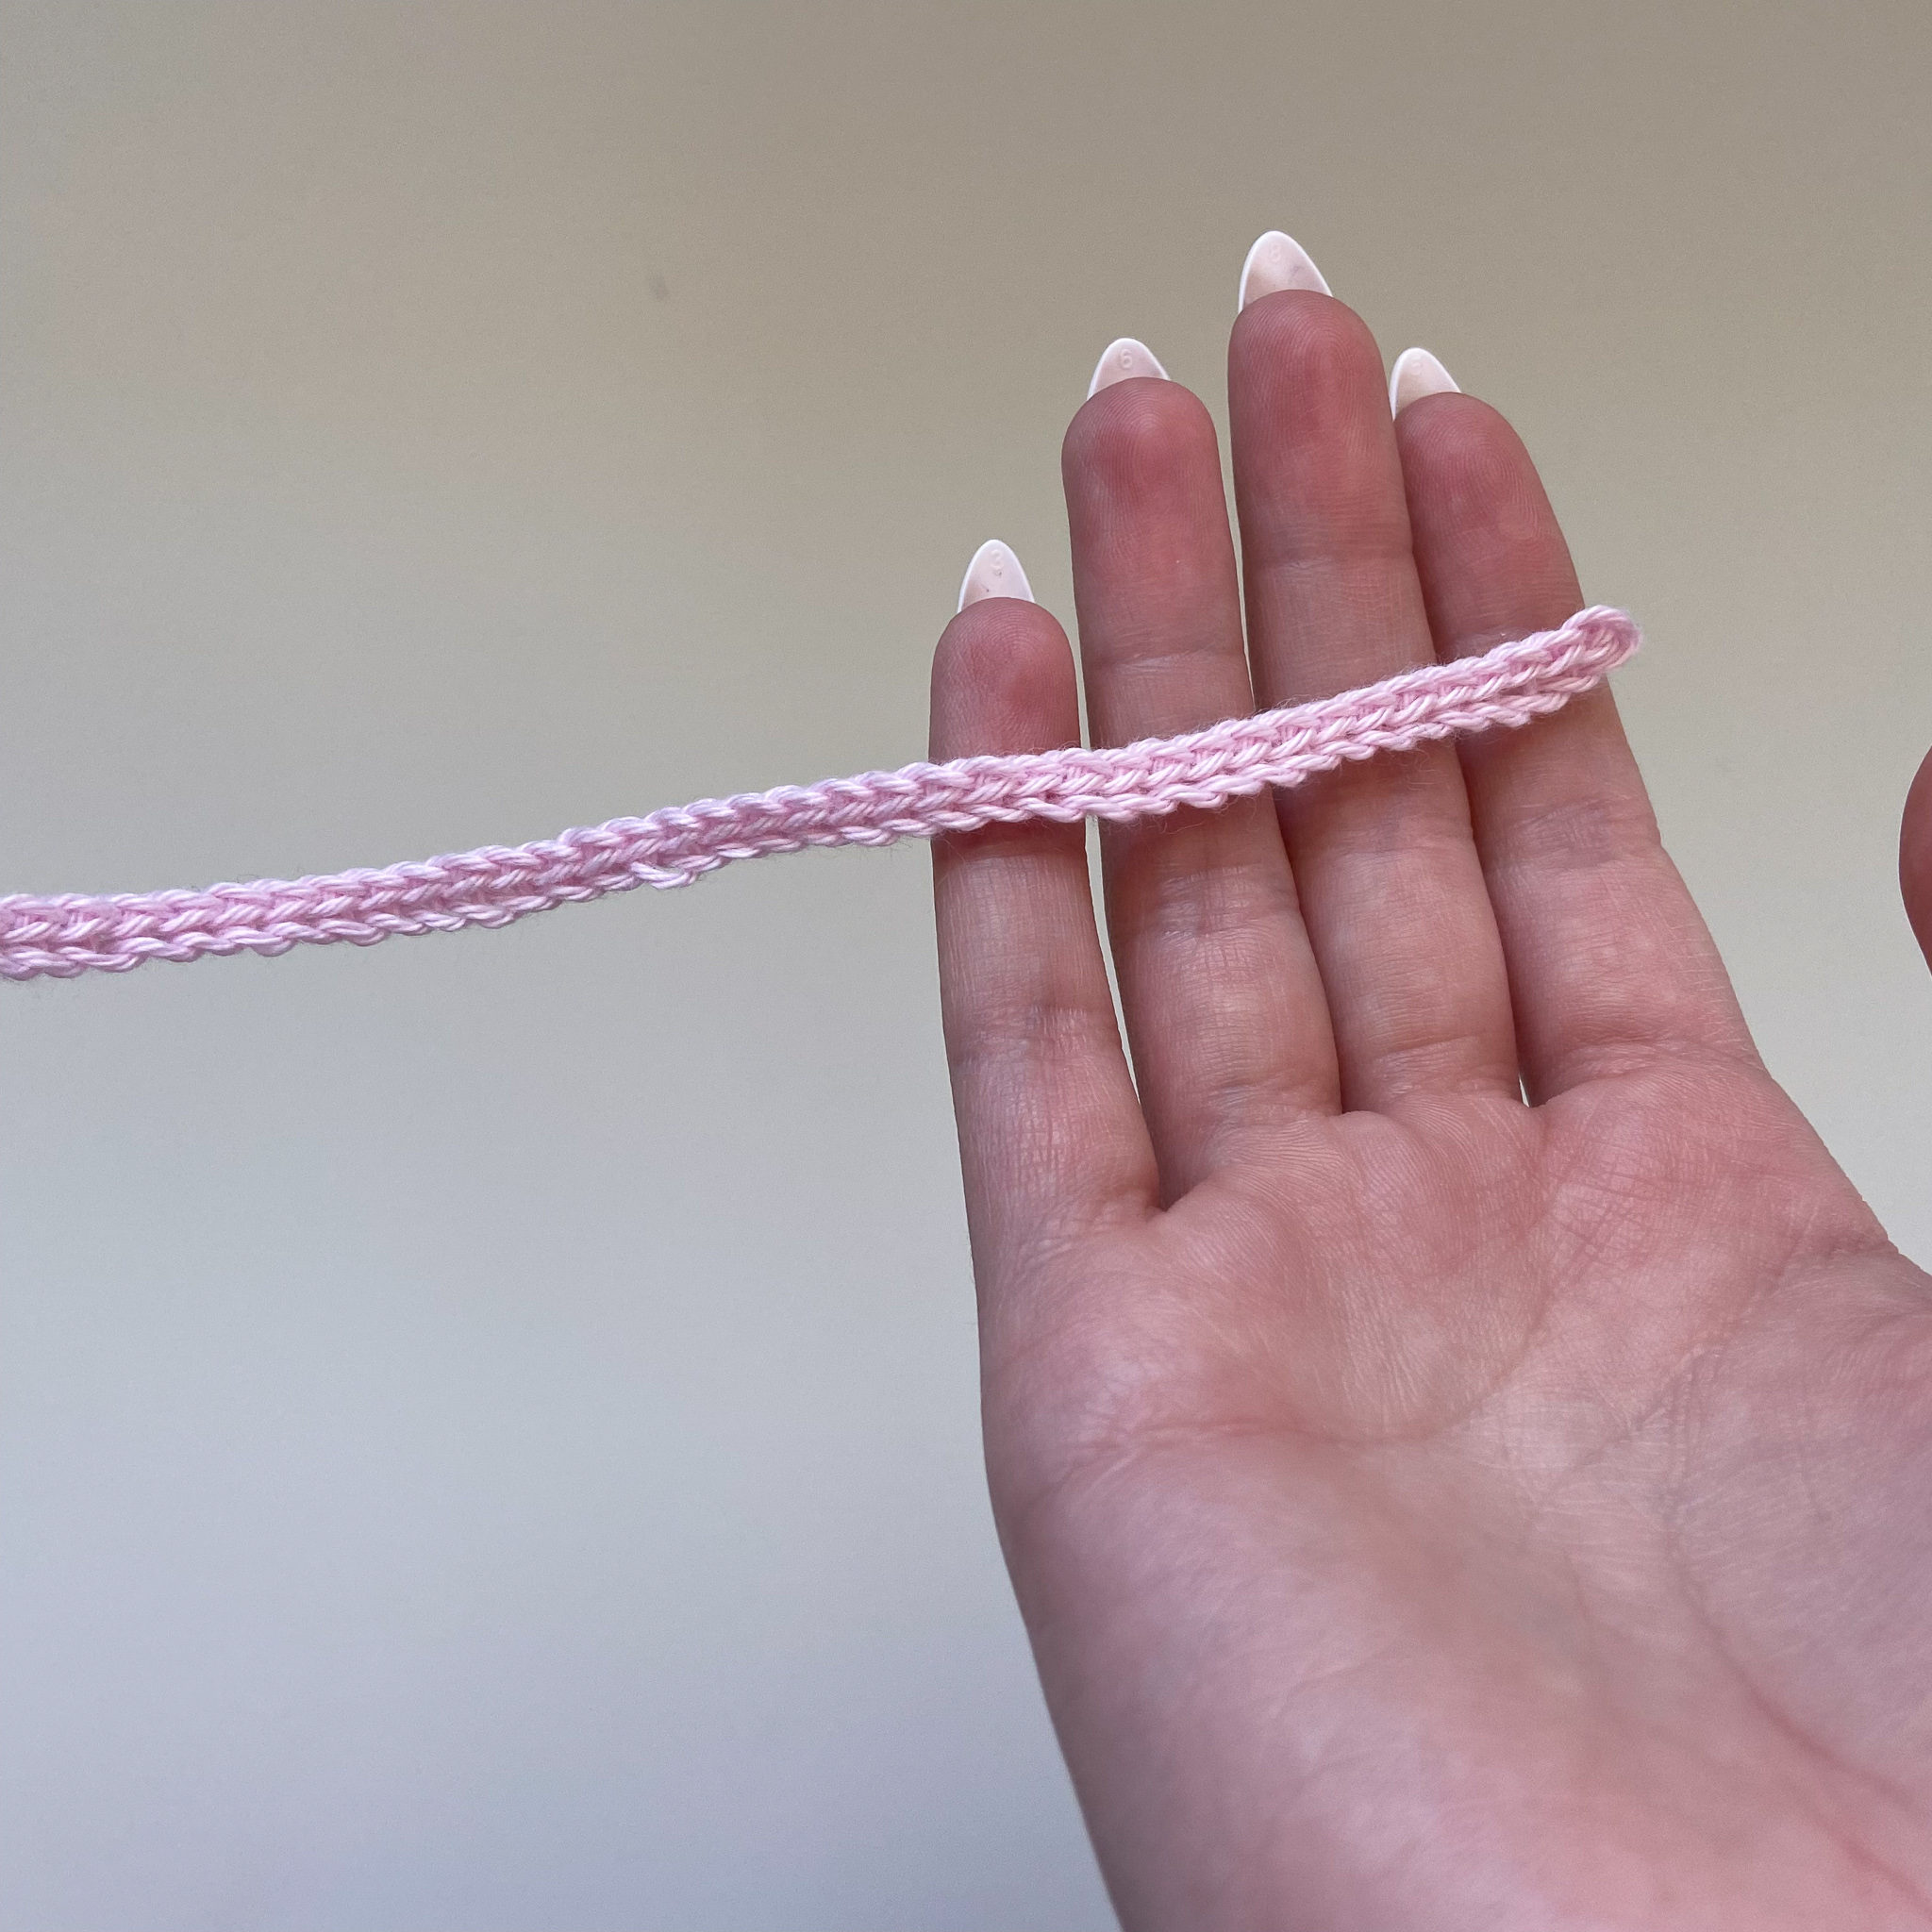
after you have worked 2 sc into the top corner filet st, ch 76 (more or less if you want longer or shorter ties), sl st into the 2nd ch from the hook, sl st in each ch until the end of the ch.
work 2 more sc into that top corner filet st, then continue working 2 sc in each ch 2 space until you come to your next top corner.
after you have worked 2 sc into the top corner filet st, ch 76 (more or less if you want longer or shorter ties), sl st into the 2nd ch from the hook, sl st in each ch until the end of the ch.
work 2 more sc into that top corner filet st, then continue working 2 sc in each ch 2 space until you come to your next bottom corner, when you come to the corner, work 6 sc into that corner filet st, then continue working 2 sc in each ch 2 space until the end of the round.
Sl st into the first st of the round and fasten off.
Wrap Skirt
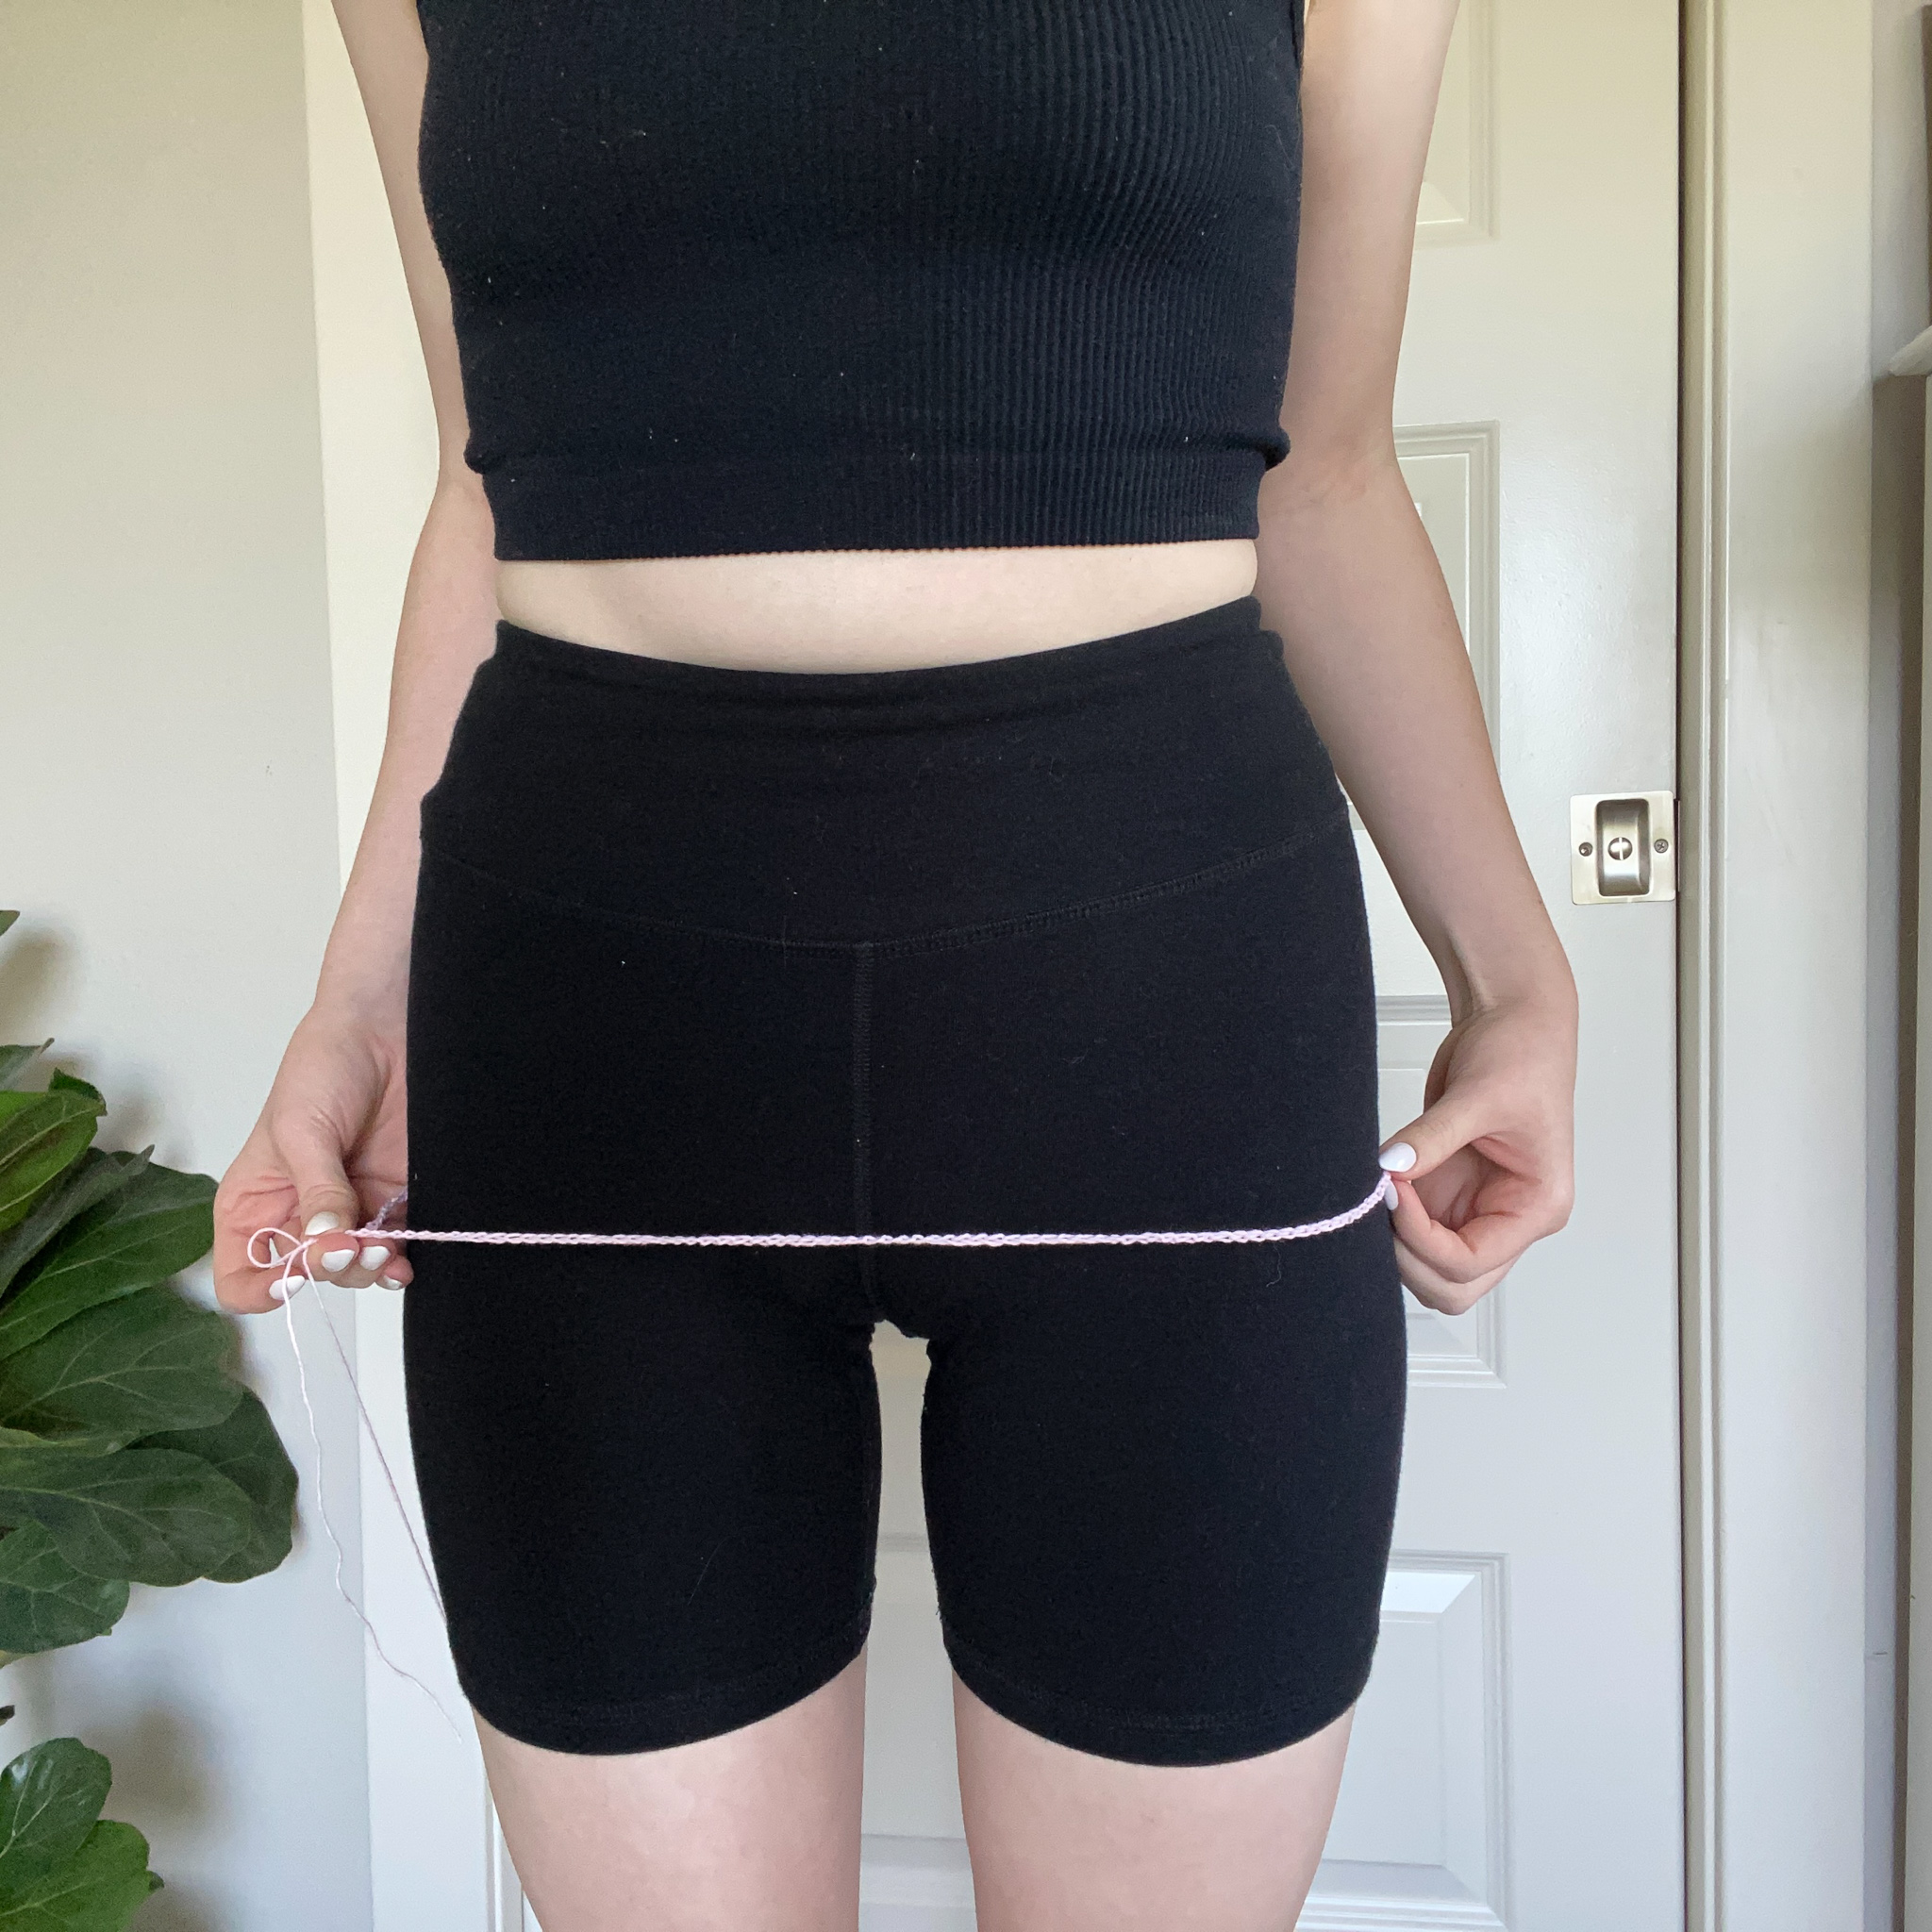
Now for the skirt part of the pattern, it will made to fit you, so there are no exact amount of sts you need to have.
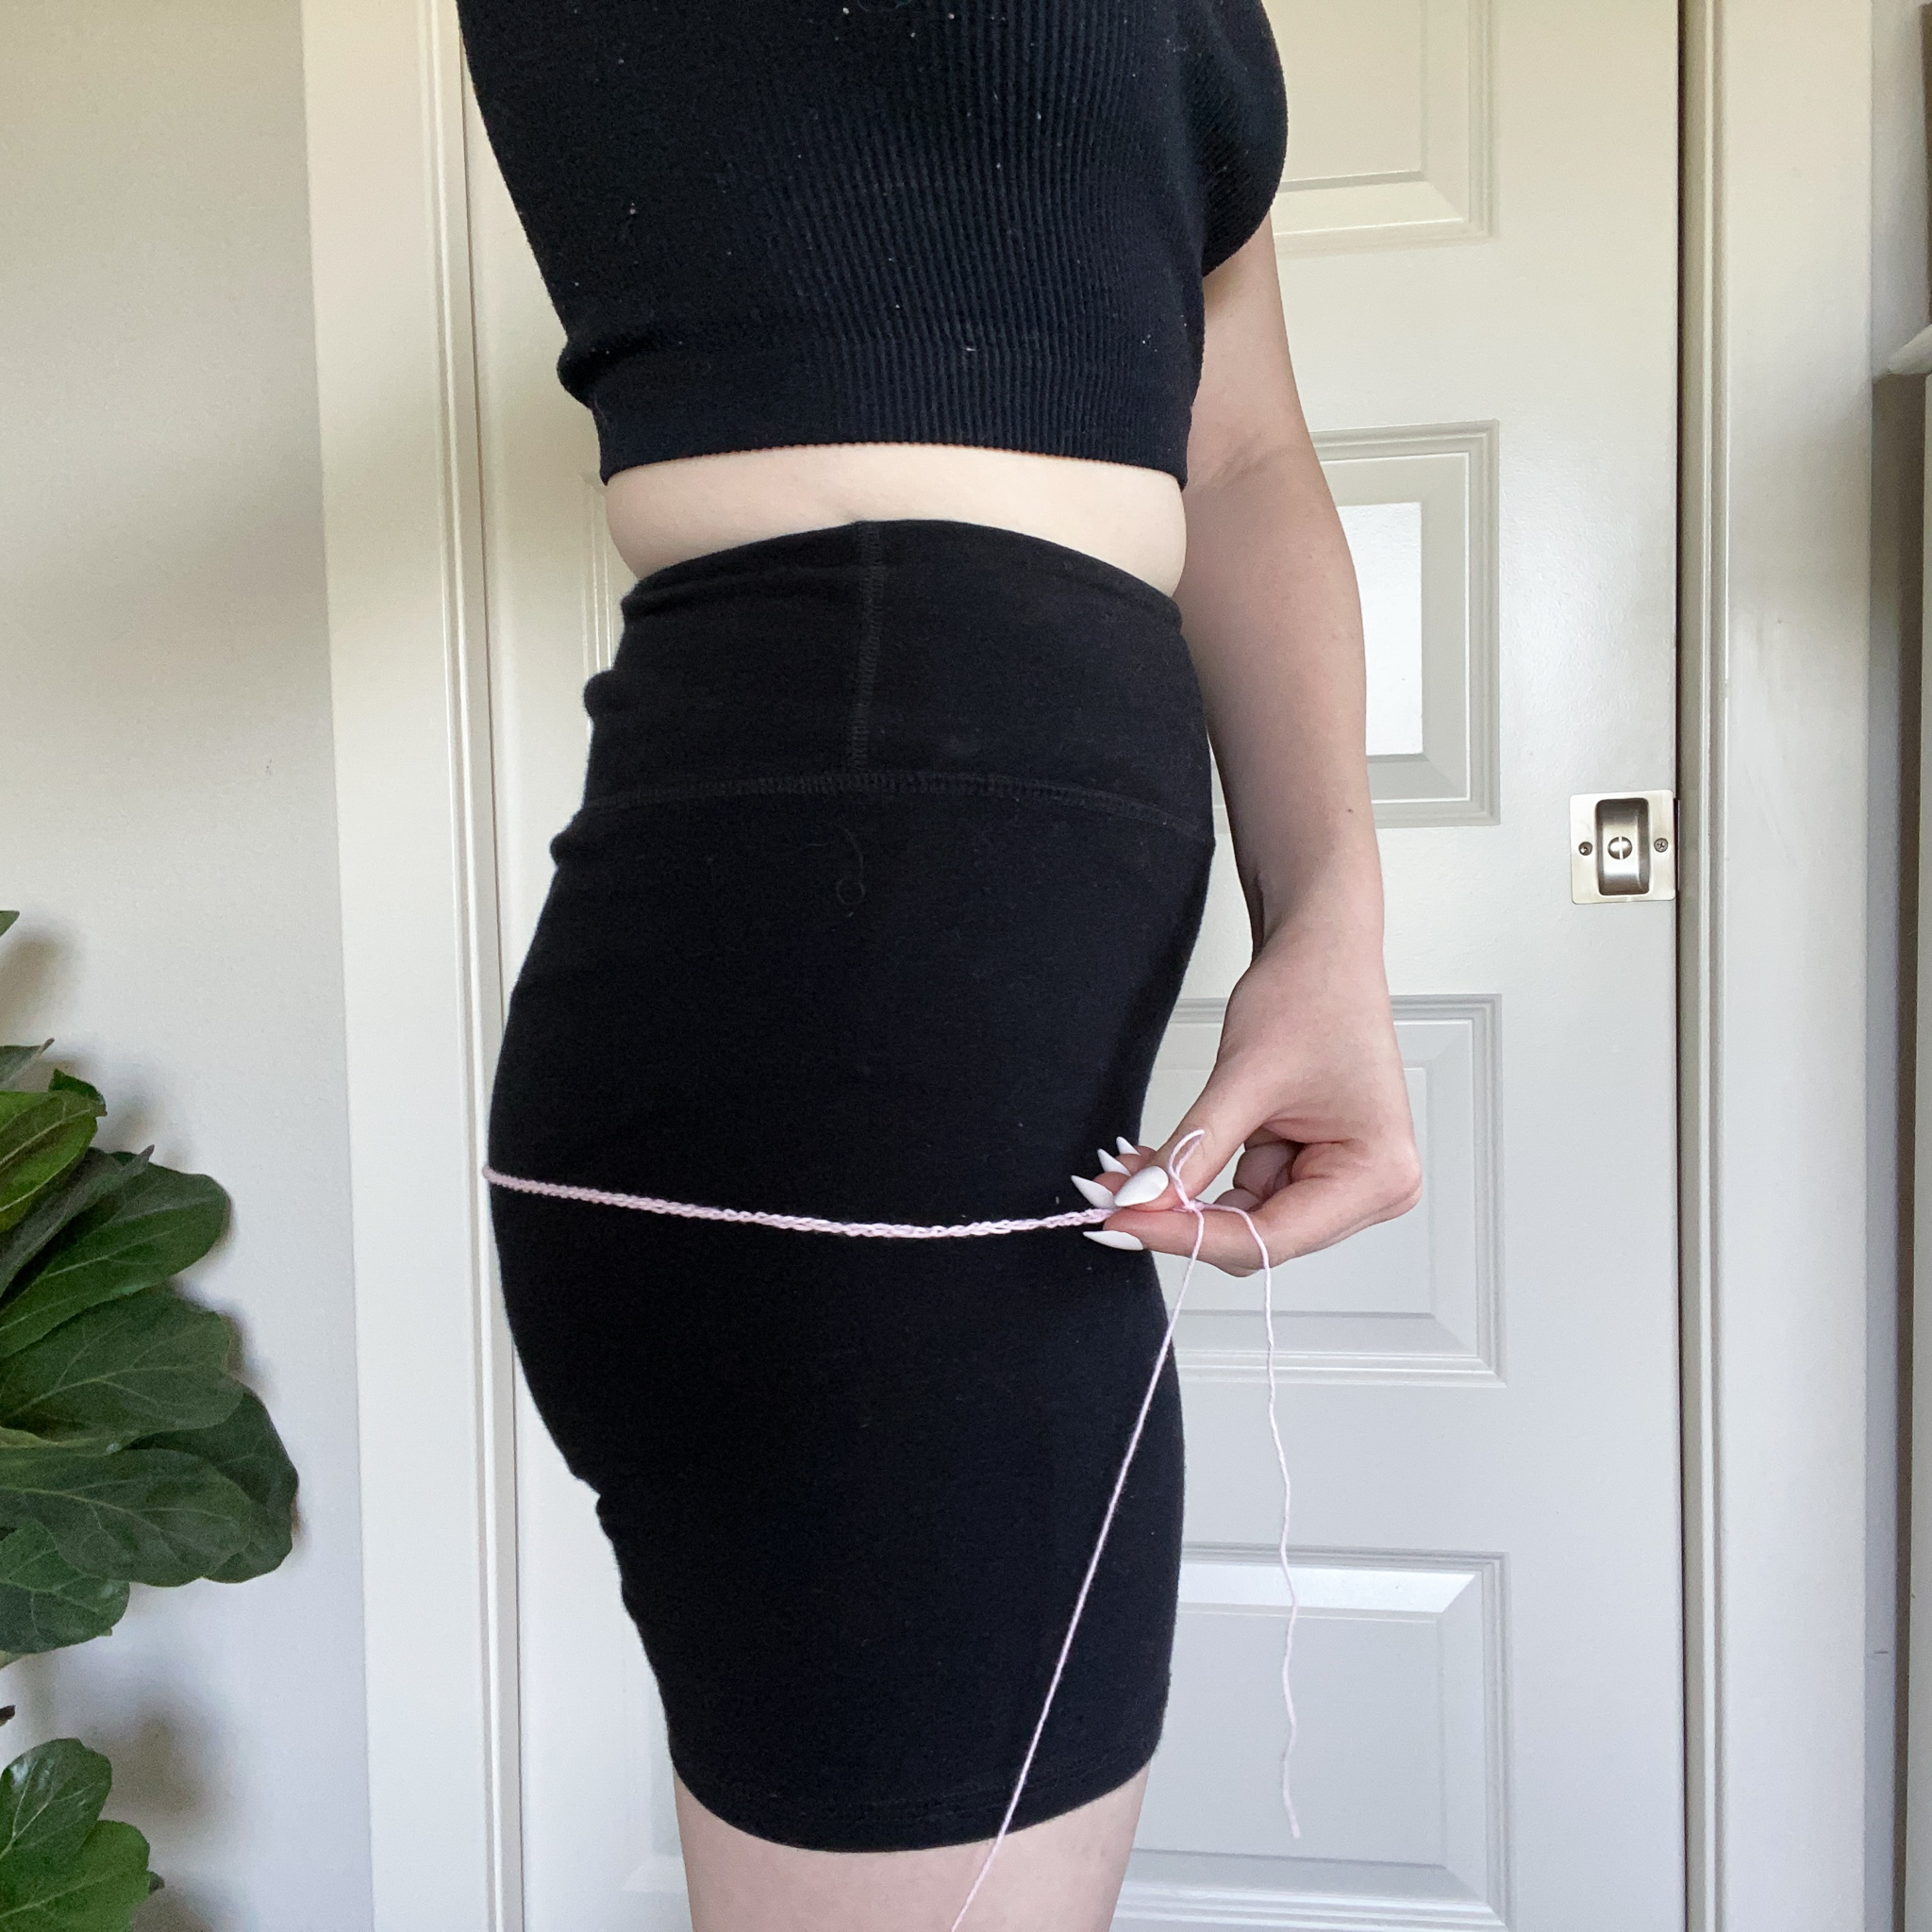
Start by chaining in multiples of 3’s until you have enough chains to fit around your bum.
I ended up with a total of 177 chains (NOT counting the +4 ch needed for working the filet st pattern)
Though when worked in the filet stitch pattern, the end result of the fabric will NOT entirely cover you lower half (as shown in the pictures below).
Due to the nature of cotton yarn and the filet stitch combined, this skirt (and the top) will have nice stretch to it.
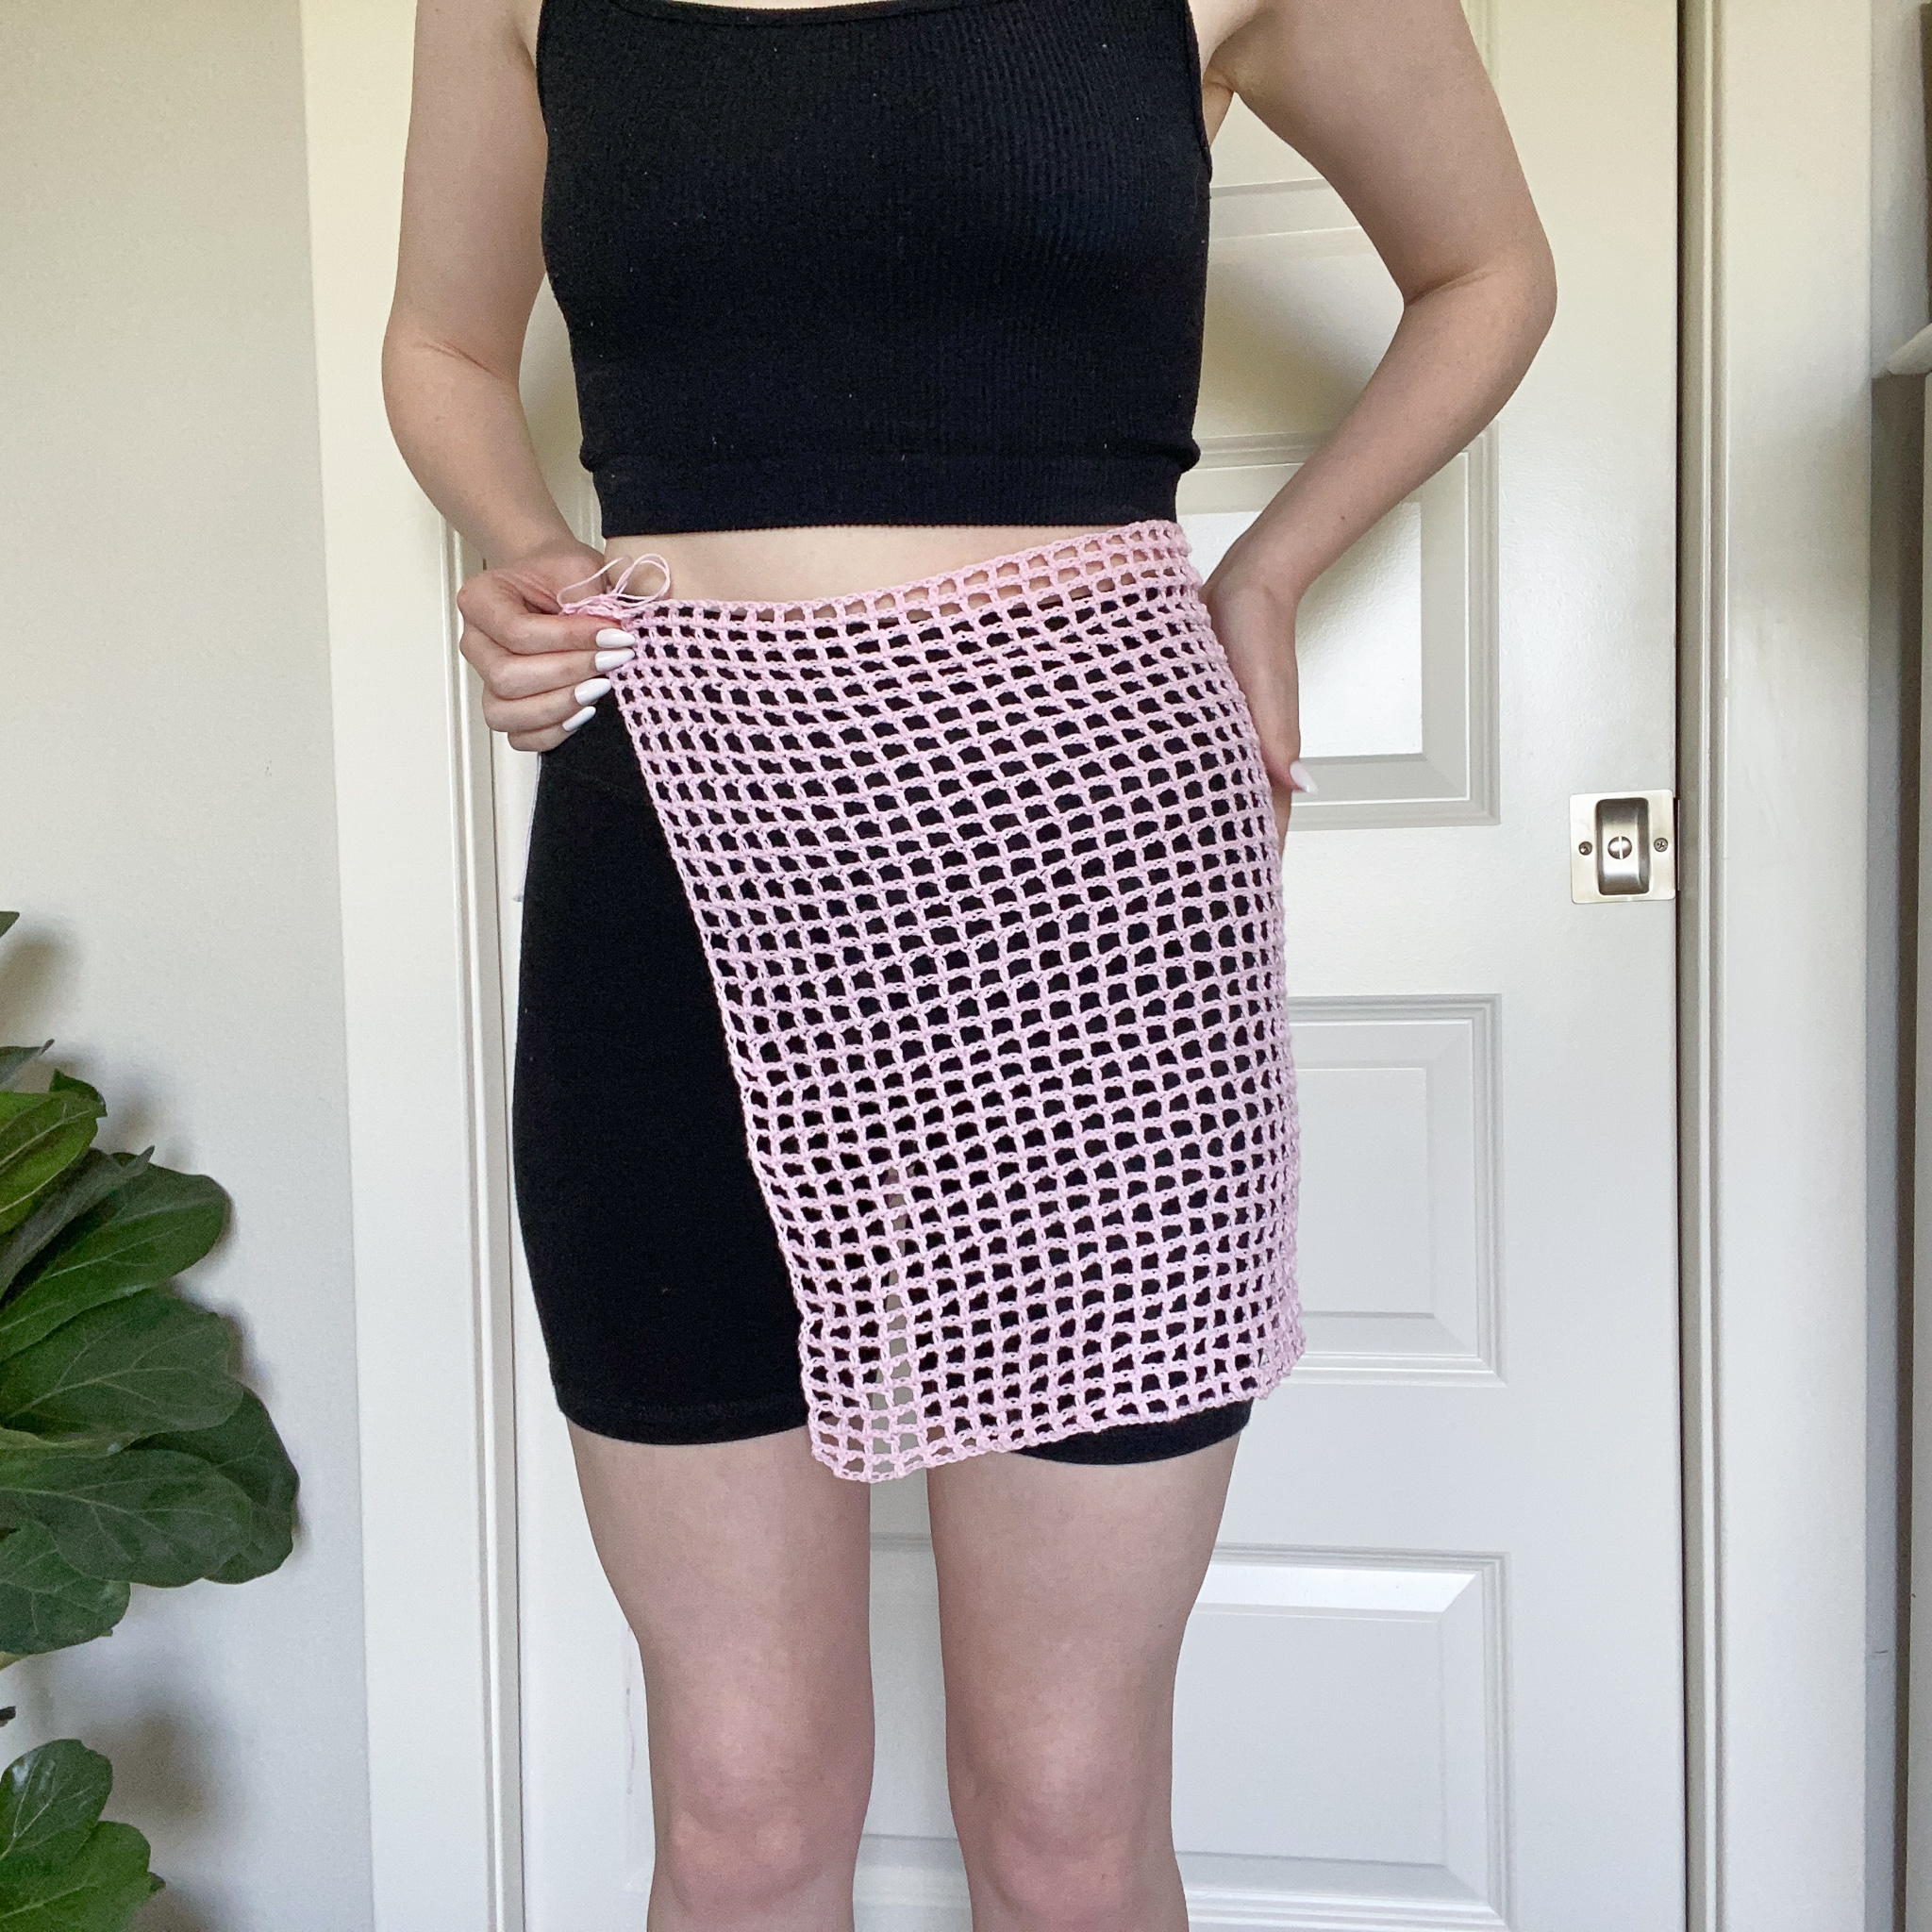

For my skirt, I worked a total of 59 filet sts wide by 40 filet rows tall. You can really play around with how wide and long you want your skirt, it is up to YOU!
Skirt Ties
After you have finished working as many rows as you want, ch 101 (more or less if you want longer or shorter ties).
Sl st into the 2nd ch from the hook, sl st into each ch until the end of the ch.
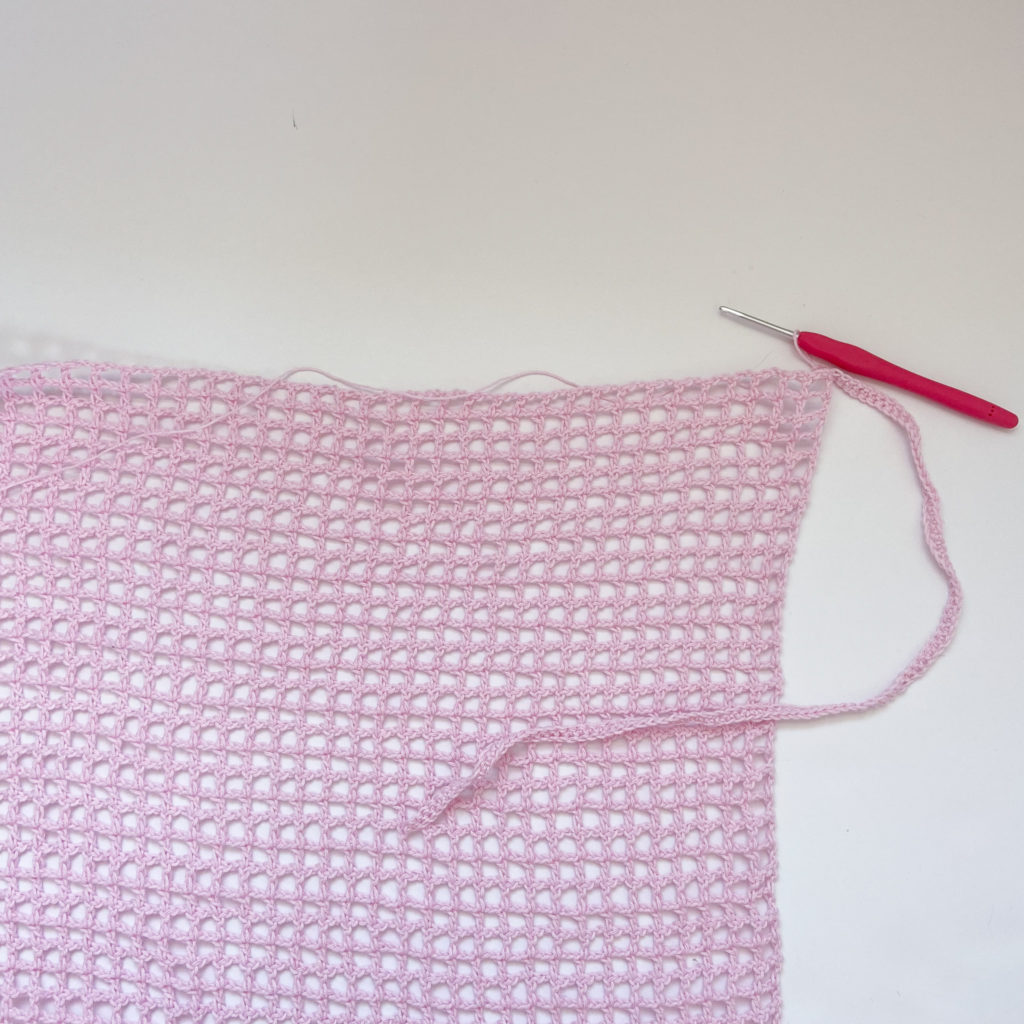
Next, work 2 sc in each ch 2 space until the end of the row.
Ch 101 (or as many as you made for your first tie), sl st into the 2nd ch from the hook, sl st into each ch until the end of the ch, sl st into the nearest sc from the previous row and fasten off.
OPTIONAL: To give the bottom of my skirt a bit of a cleaner look, I single crochet across the bottom of the skirt for 1 row by working 2 sc in each ch 2 space.
Weave in all your ends and…
YOU’RE DONE!
If you recreate this “Summer Love Set“, please tag or DM @hayhaycrochet on Instagram or TikTok so I can see, like and share!
Happy Crocheting~!
I’m not sure if you patterns are tested on plus sizes but the two i have made the patterns don’t work. This one specifically, the front panels are probably 5 rows longer that the back panels even though i followed the pattern precisely. This is a running theme now that needs to be addressed.