🤍WELCOME HERE🤍
This post may contain affiliate links.
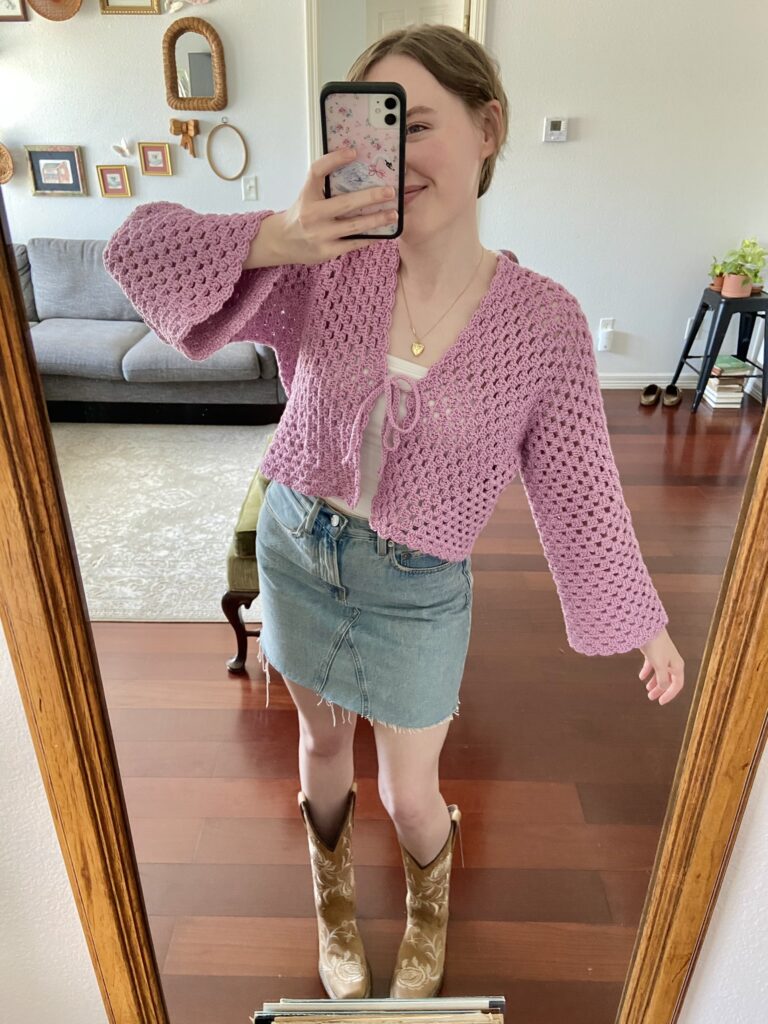
Today I am sharing a spin-off from my original ‘Granny Hexagon Cardigan’ pattern, but this time its the CROPPED version!
I have got lots of comments and DMs since coming out with that pattern of y’all asking if there’s a way to make it cropped, instead of the original version which has more of an oversized fit, and the answer is YES and this is just the pattern + tutorial to get the most customized fit for the cropped cardi of your dreams~💕
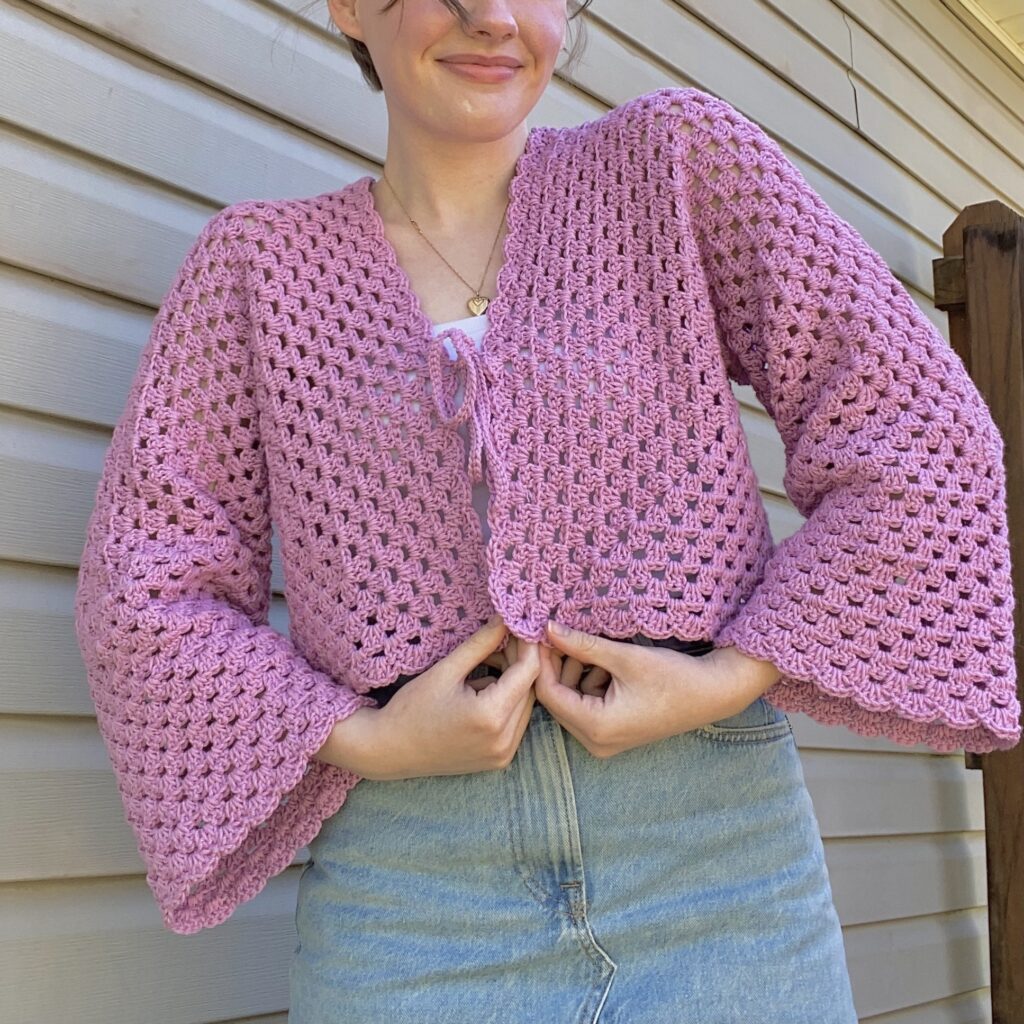
This cardigan can be made with ANY yarn, hook and gauge for this design! I know, awesome, right?? Since this all depends on just how big you want to make your hexagon, it doesn’t matter what yarn or hook you use at all.
For my first version of this granny hexagon cardigan I used a weight 4 yarn, but for THIS version I used a weight 3! And soon I plan on making a real chunky one (so stay tuned for that).
SO, without further ado, LET’S GET STARTED!
Materials
YARN
You can use ANY yarn you’d like since this cardigan is so customizable. BUT, if you want a sweater most similar to mine, I used 9 skeins/approx. 450 grams of a weight 3 yarn called “Drops Cotton Merino” in the color “04 Lilac” for my cropped cardigan that’s a size XS/S
HOOK
Again, you can use whatever crochet hook you desire. I used a 4.5mm Hook.
Darning Needle (my FAVES!! make seaming and weaving in ends so much easier because of the bent tip)
Stitch markers (The best! They stay in place, so you don’t have to worry about them falling out.)
Stitches + Abbreviations
St(s) = Stitch(es)
Ch = Chain
FTC = * Foundation Turning Ch/Stacked Sc (tutorial linked)
*I used this in place of a Ch 3 at the beginning of every round, you do not have to do this, its just personal preference.)
Sl st = Slip Stitch
Dc = Double Crochet
Rep = Repeat
Pattern Notes
*This Pattern uses US crochet terms
*Ch 3/stacked sc/FTC ALWAYS counts as a stitch in this pattern.
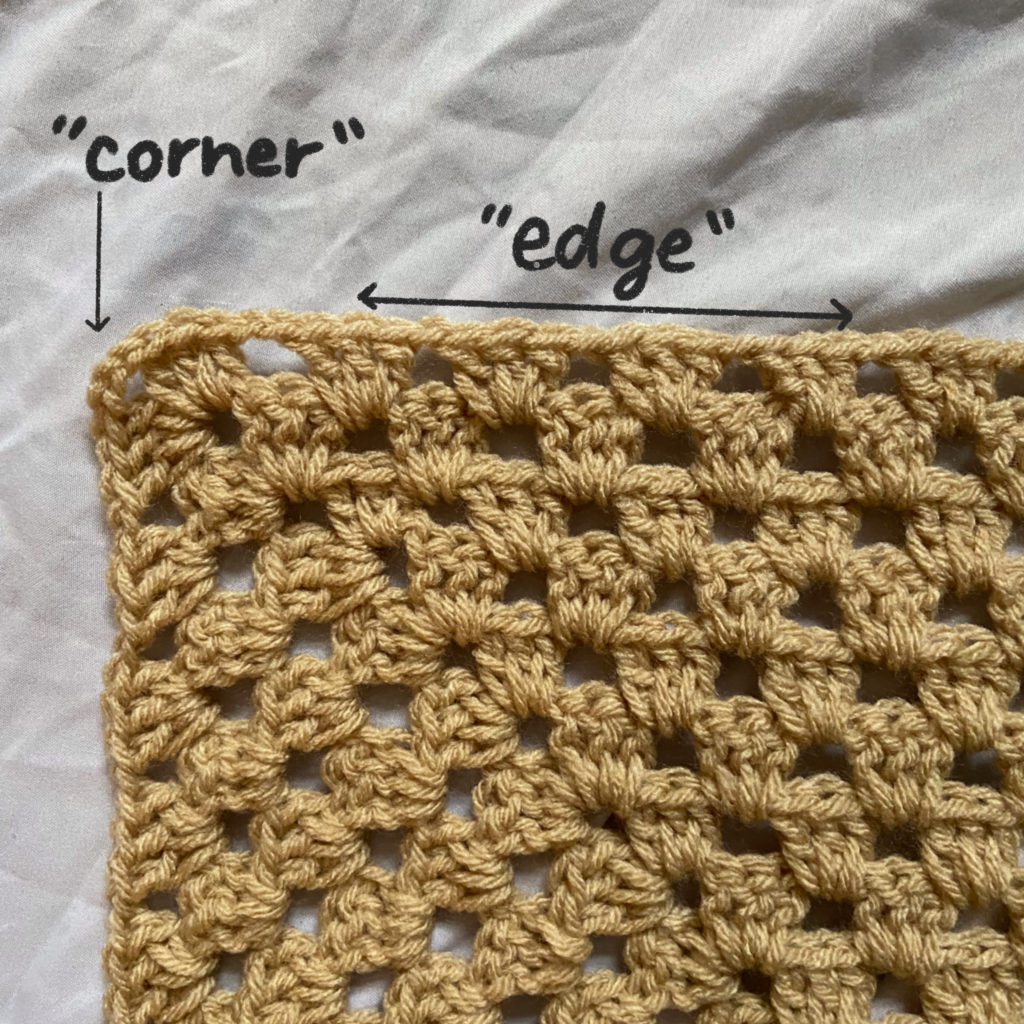
*There are ALWAYS two clusters in every corner, ALWAYS separated by a ‘ch 3‘
*While making hexagon, hexagon WILL BE lumpy/wavy and not lay flat. Do not worry that you’re something wrong.
*Through the remainder of this pattern, you will be work in ch spaces and not in sts.
(exception for the slip stitch worked to join your round together).
Granny Hexagon Cardigan Pattern
How to start hexagon
Make a magic ring.
*The first ch 3/stacked sc/FTC of each round ALWAYS counts as a st/dc)
Rnd 1: Ch 3 (or a stacked sc/FTC as I did for the first st of every row in my Video Tutorial), work 2 dc in MR, ch 3, *work 3 dc in MR, ch 3, *rep 4 more times. Sl st into the first st of the round. <6 clusters total>
*3 dc worked into the same ch space is referred to as a cluster
Rnd 2: Turn your work. Ch 3, work 2 dc in ch space, ch 3 and work 1 cluster into same ch space. ch 1, *work 1 cluster, ch 3, work cluster into same ch space. ch 1, *rep until the end of the round. Sl st into the first st of the round.
*always ch 1 before you move on the the next ch space.
Rnd 3: Turn your work. Ch 3, dc 2, ch 1, when you come to one of the 6 corners in your project work 2 clusters in the corner (“2 clusters in the corner” will always consist of 1 cluster, ch 3, 1 cluster worked in the same ch space to create a corner), ch 1, *work 1 cluster, ch 1, work 2 clusters in the corner, ch 1, *rep until the end of the round. Sl st into the first st of the round.
Video tutorial available here if you need better help visualizing the process!
Rnd 4: Turn your work. Ch 3, 2 dc, ch 1, work 2 clusters in corner, ch 1, *work 1 cluster, ch 1, work 1 cluster, ch 1, work 2 clusters in the corner, ch 1, *rep until the end of the round. Sl st into the first st of the round.
Rnd 5: Turn your work. Ch 3, dc 2, ch 1, work 1 cluster, ch 1, work 2 clusters in the corner, ch 1, *work 1 cluster, ch 1, work 1 cluster, ch 1, work 1 cluster, ch 1, work 2 clusters in the corner, ch 1, *rep until the end of the round. Sl st into the first st of the round.
Rnd 6: Turn your work. Ch 3, 2 dc, ch 1, work 1 cluster, ch 1, work 2 clusters in the corner, ch 1, *work 1 cluster, ch 1, work 1 cluster, ch 1, work 1 cluster, ch 1, work 1 cluster, ch 1, work 2 clusters, ch 1, *rep until the end of the round. Sl st into the first st of the round.
You will repeat this pattern (1 cluster in every “edge” ch space and 2 clusters in every “corner” ch space) until you have the number of rounds for the desired length of your cardigan!
Each corner set of clusters will increase your number of clusters in each round, this is how your project grows!
I stopped at 17 rounds because it was the perfect cropped length for me (don’t worry IF the width of the cardigan does not cover much surface area across your chest because I’ll show you how to add to that later on in the pattern if you need it, right now were looking for the cropped length that works for you.)
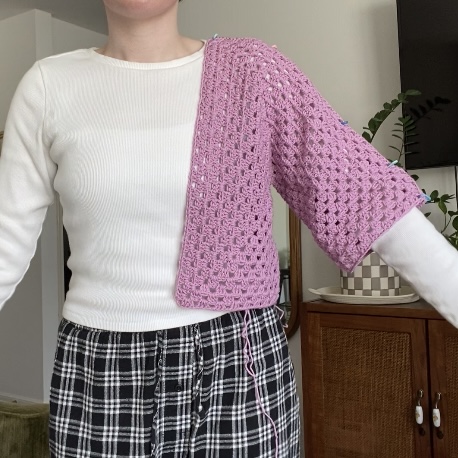
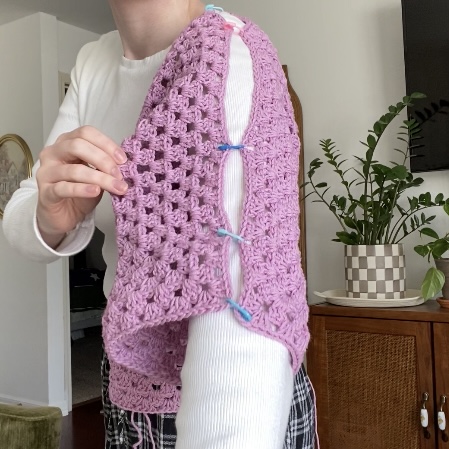
*After you have worked as many rounds as you think you might need, TRY ON your cardigan by folding your hexagon in half and then using stitch markers (or scrap yarn) to connect the top half of your cardigan together so you can put it on.
*example shown in photos below
Seaming
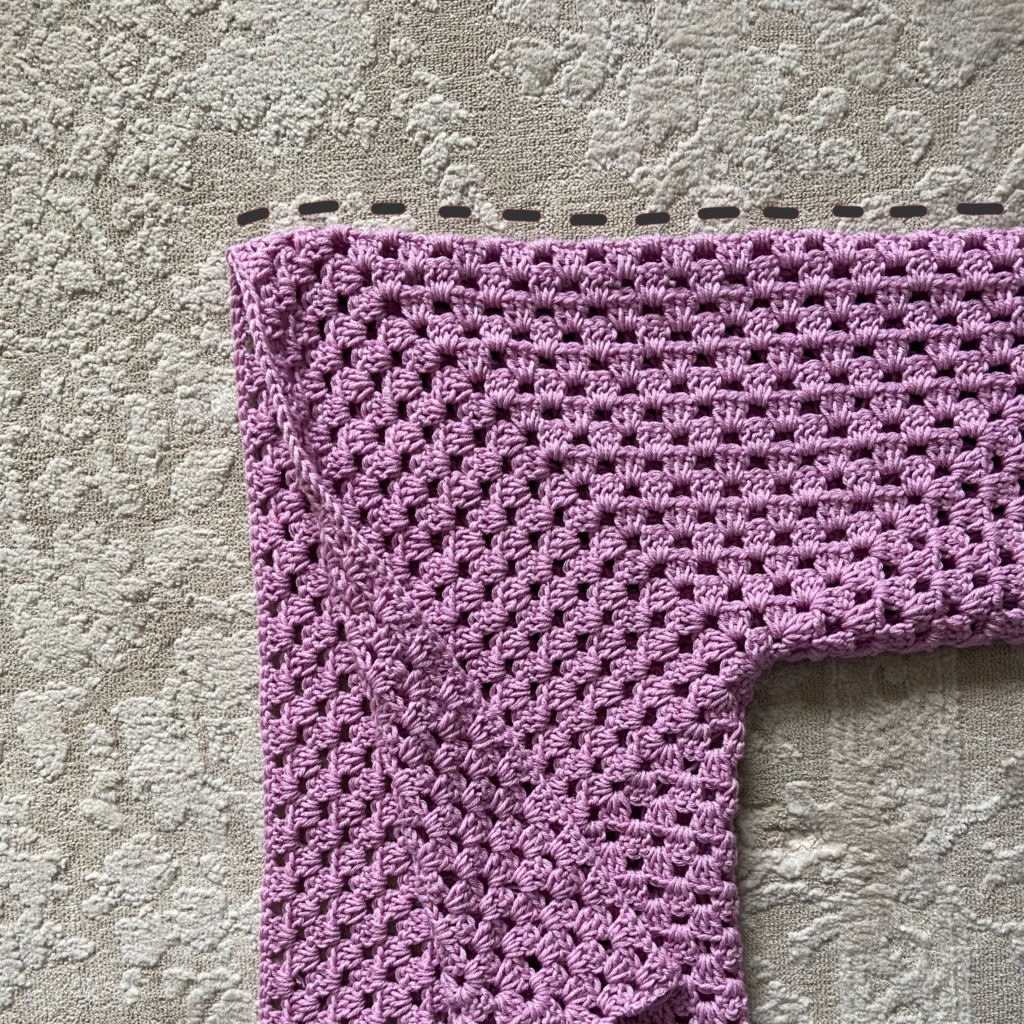
If the size is a good length for you, then you can go ahead and Fasten off, and then seam the top portion of your cardigan together. I use single crochet to seam, but you can use whatever seaming method you want. You can check out my video on how I seamed it together here on how I did it (use the timestamps on the video will help navigate where in the video you can find this part).
Adding Width to the Front and Back
This part of the pattern is completely optional. If your cardigan is a perfect length and width for you overall (like if your covers and fits across you chest and back as you want it to) you can skip this step. BUT for those who have wider chests/busts/OR just went for a super cropped cardi and need it to cover more surface area in the front and back, this is for YOU!
To start, attach your yarn to a corner either on the front or back of your work (the front and back are identical) and now you will be working in rows instead of rounds.
Row 1: Ch 3, work 2 more dc into that same ch space (This is your first dc cluster of the row. There will be NO cluster corners in these rows), now continue working the normal granny stitch along the front and back of the cardigan.
Row 2: Turn your work. Ch 4 (the extra ch is for moving on to the next cluster), work the normal clusters/granny stitches until the end of the row. At the end of the row when you run out of ch spaces, ch 1 and work 1 dc into the corner/the very last st/dc from the previous row.
Repeat Rows 1 & 2 until you have as many rows as you want for the width of your cardigan. You can continually try it on after each row to get a feel for how many you want.
I did a total of 3 rows for my cardigan.
Check out my Tutorial HERE if you are having trouble with how to visualize and do this.
Fasten off.
Adding Length to the Sleeves
Attach your yarn to the sleeve part of your cardigan.
Rnd 1: Ch 3, work 2 more dc into that same ch space. Work the dc clusters/granny stitches into each ch space until the end of the rnd (no increases). Sl st into the first st of the rnd.
Repeat Rnd 1 (turning your work after every rnd) until the sleeve is to your desired length.
I did a total of 13 rnds, +1 scallop rnd.
Scallop Edging Part 1
This scallop detailing is optional if it is not your vibe. BUT if do you like it, please refer to my tutorial for this pattern, as I feel like I explain it much better there than I can write it here. The timestamps in the video will make it super easy and convenient to find!
(Btw this scallop edging is slightly different from the first version of this cardigan, if you like that scallop better, than you can check out that pattern here.)
Fasten off.
Seaming up the Back
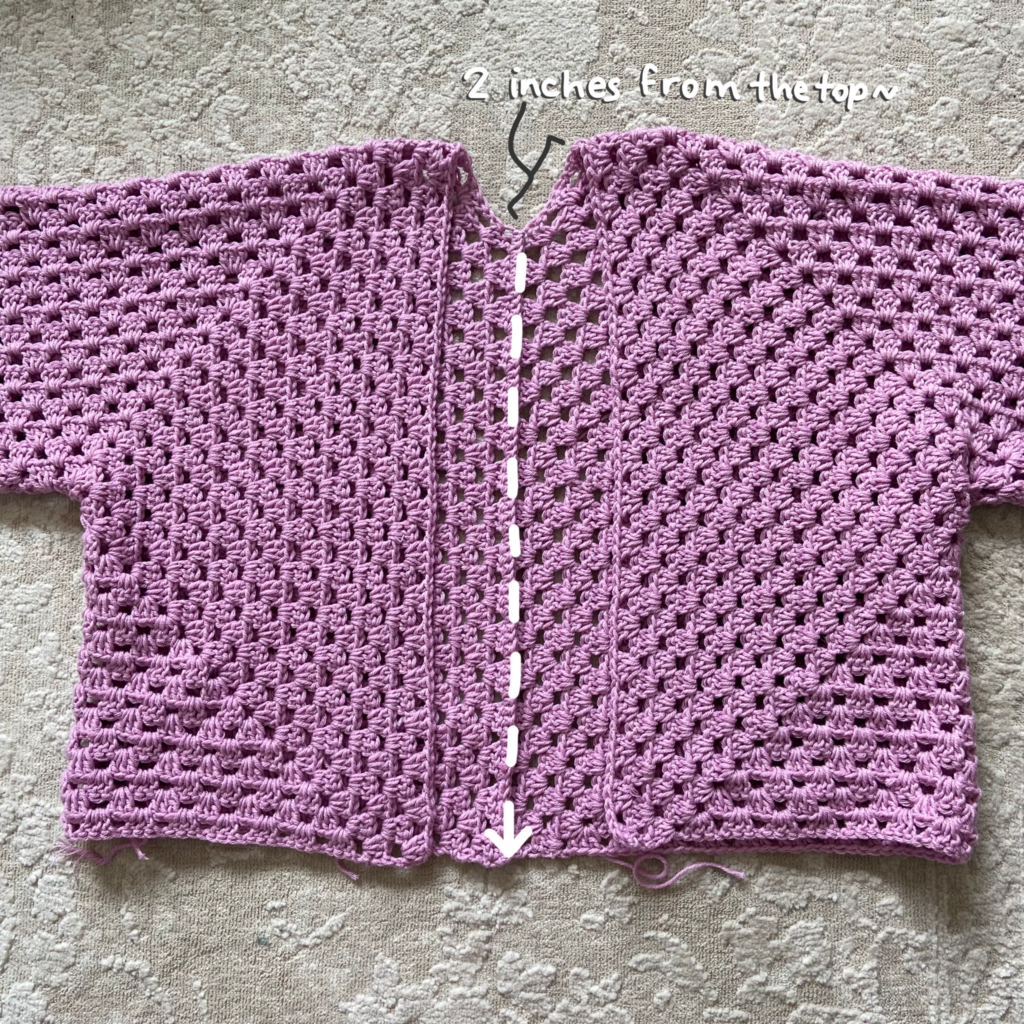
I am using single crochet, the same as I did for seaming together the shoulder/sleeve part (you can use whatever seaming method you’d like). I started seaming about 2-3 inches from the top (the top being where the shoulder/sleeve seam is). You can start and seam from the top all the way down, but I have found that starting a little lower with your seam helps the cardigan drape more nicely around your shoulders.
Scallop Edging Part 2
Again, if you are adding the scallop detailing to your cardi, please refer to my tutorial for this part because I better show and explain there how to do this part <3.
Fasten off.
Ties
The ties are also optional like many of the elements in this design, BUT if you like them, then they are very simple to incorporate!
Attach your yarn anywhere you’d like on the front of your cardigan (I attached mine around the middle) and then start making as many chains as you’d like for the length of your tie (I chained 75 total)
In the second ch from the hook work a sl st, then sl st in each ch until the end of the ch. Then sl st into where you attached your yarn in the beginning and then Fasten off.
Repeat for second tie.
Weave in all your ends and then…
…YOU’RE DONE!
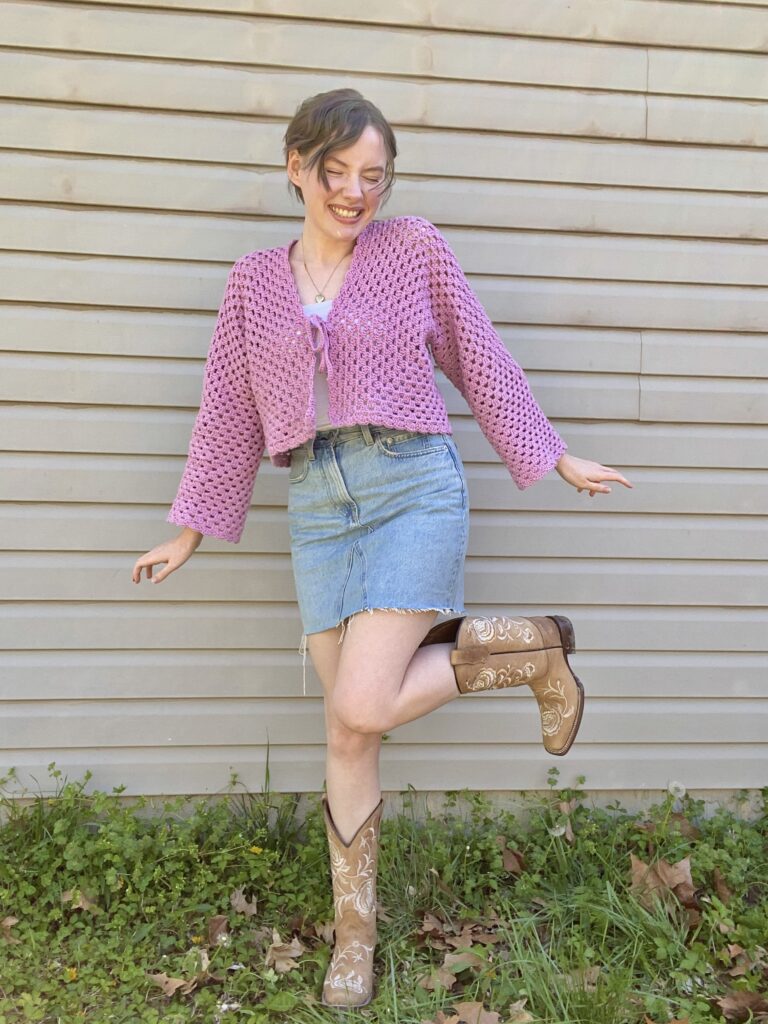
If you recreate this Cropped Granny Hexagon Cardi, please tag or DM @hayhaycrochet on Instagram so I can see, like and share!
Happy Crocheting~!


I relish, lead to I discovered exactly what I used to be looking
for. You have ended my 4 day long hunt! God Bless you man. Have a nice
day. Bye