🤍WELCOME HERE🤍
This post may contain affiliate links.
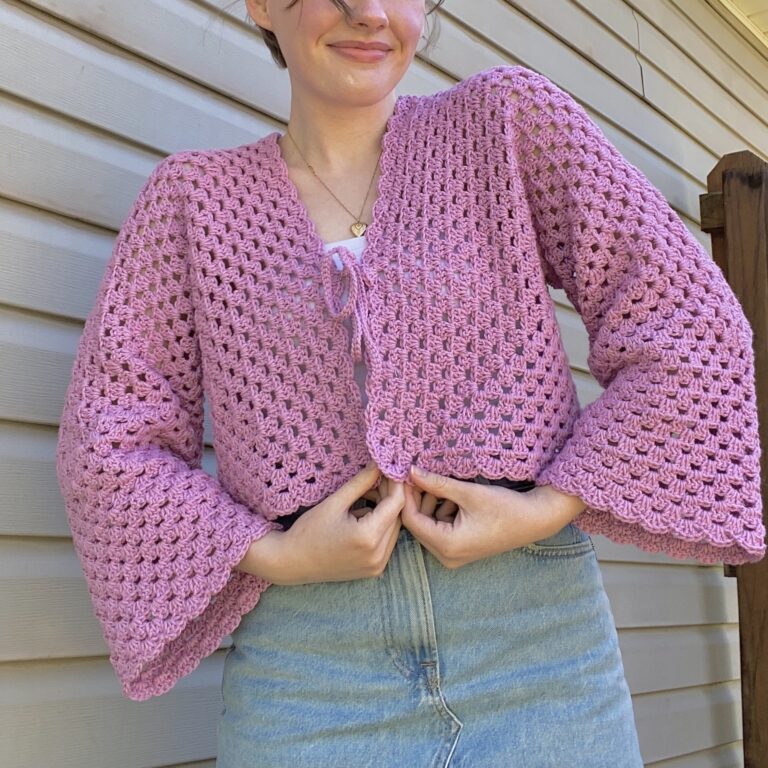
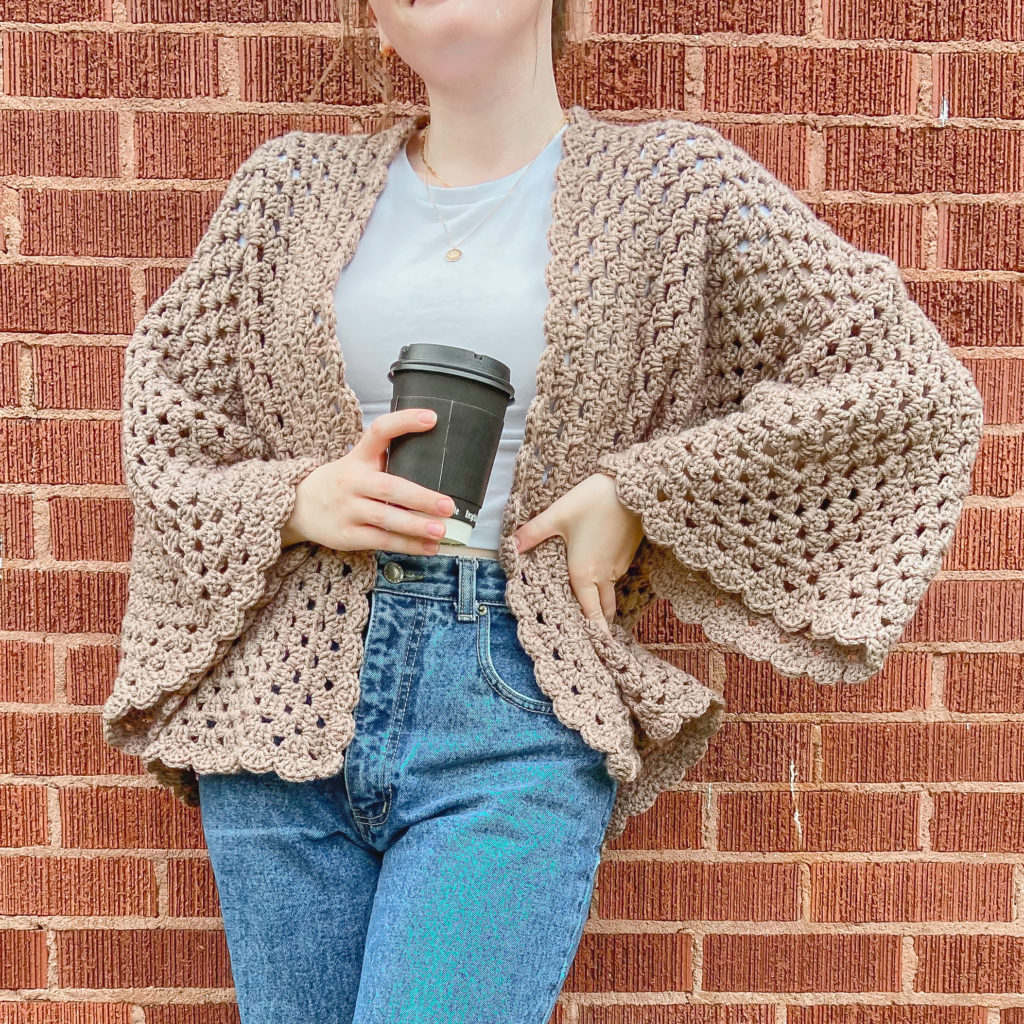
Today I am sharing a pattern with my spin on the classic “Granny Hexagon” cardigan. 🙂
This is not an original idea, if you look up “crochet hexagon cardigan” anywhere on the web you will see about 100 or more different patterns all with the same foundation of the Granny Hexagon all with their own spin on it, so I have decided to share my take on the hexagon cardi!
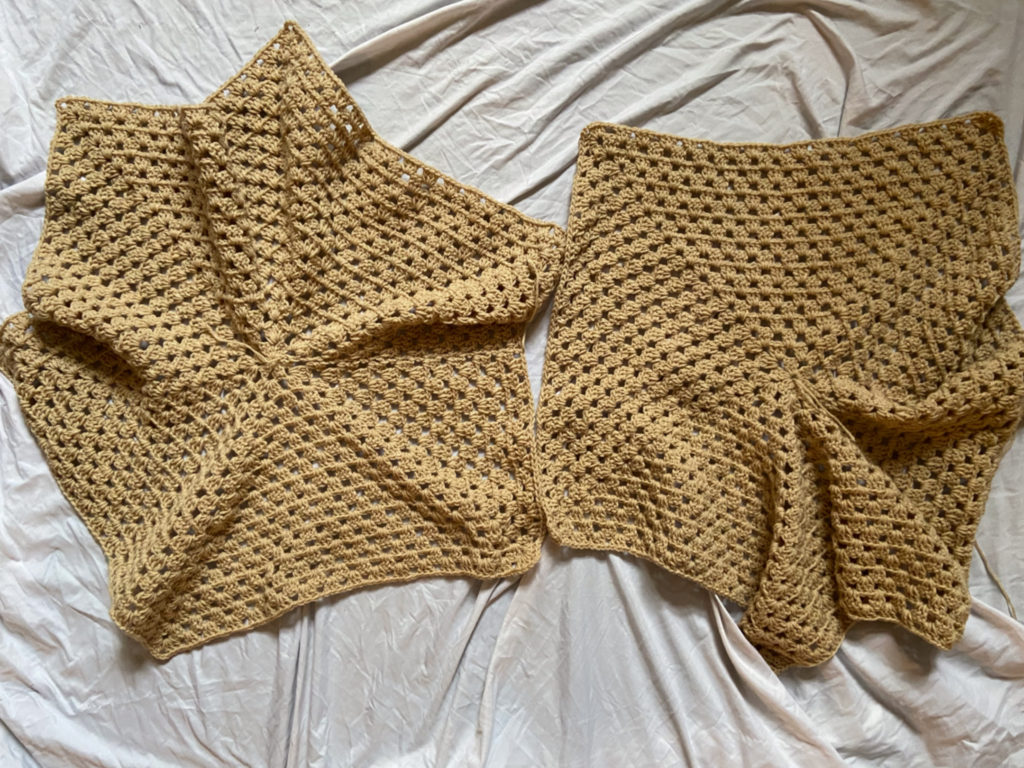
This is a very simple, beginner friendly tutorial that’s fun and works up very fast! I made myself two cardigans using this pattern and one of the two I made I completed in just 2 days.
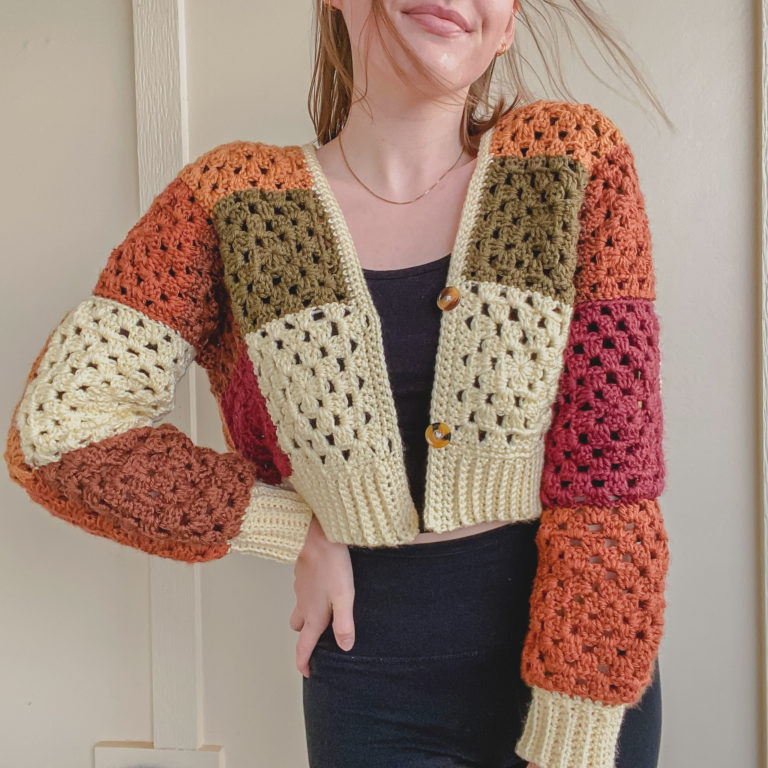
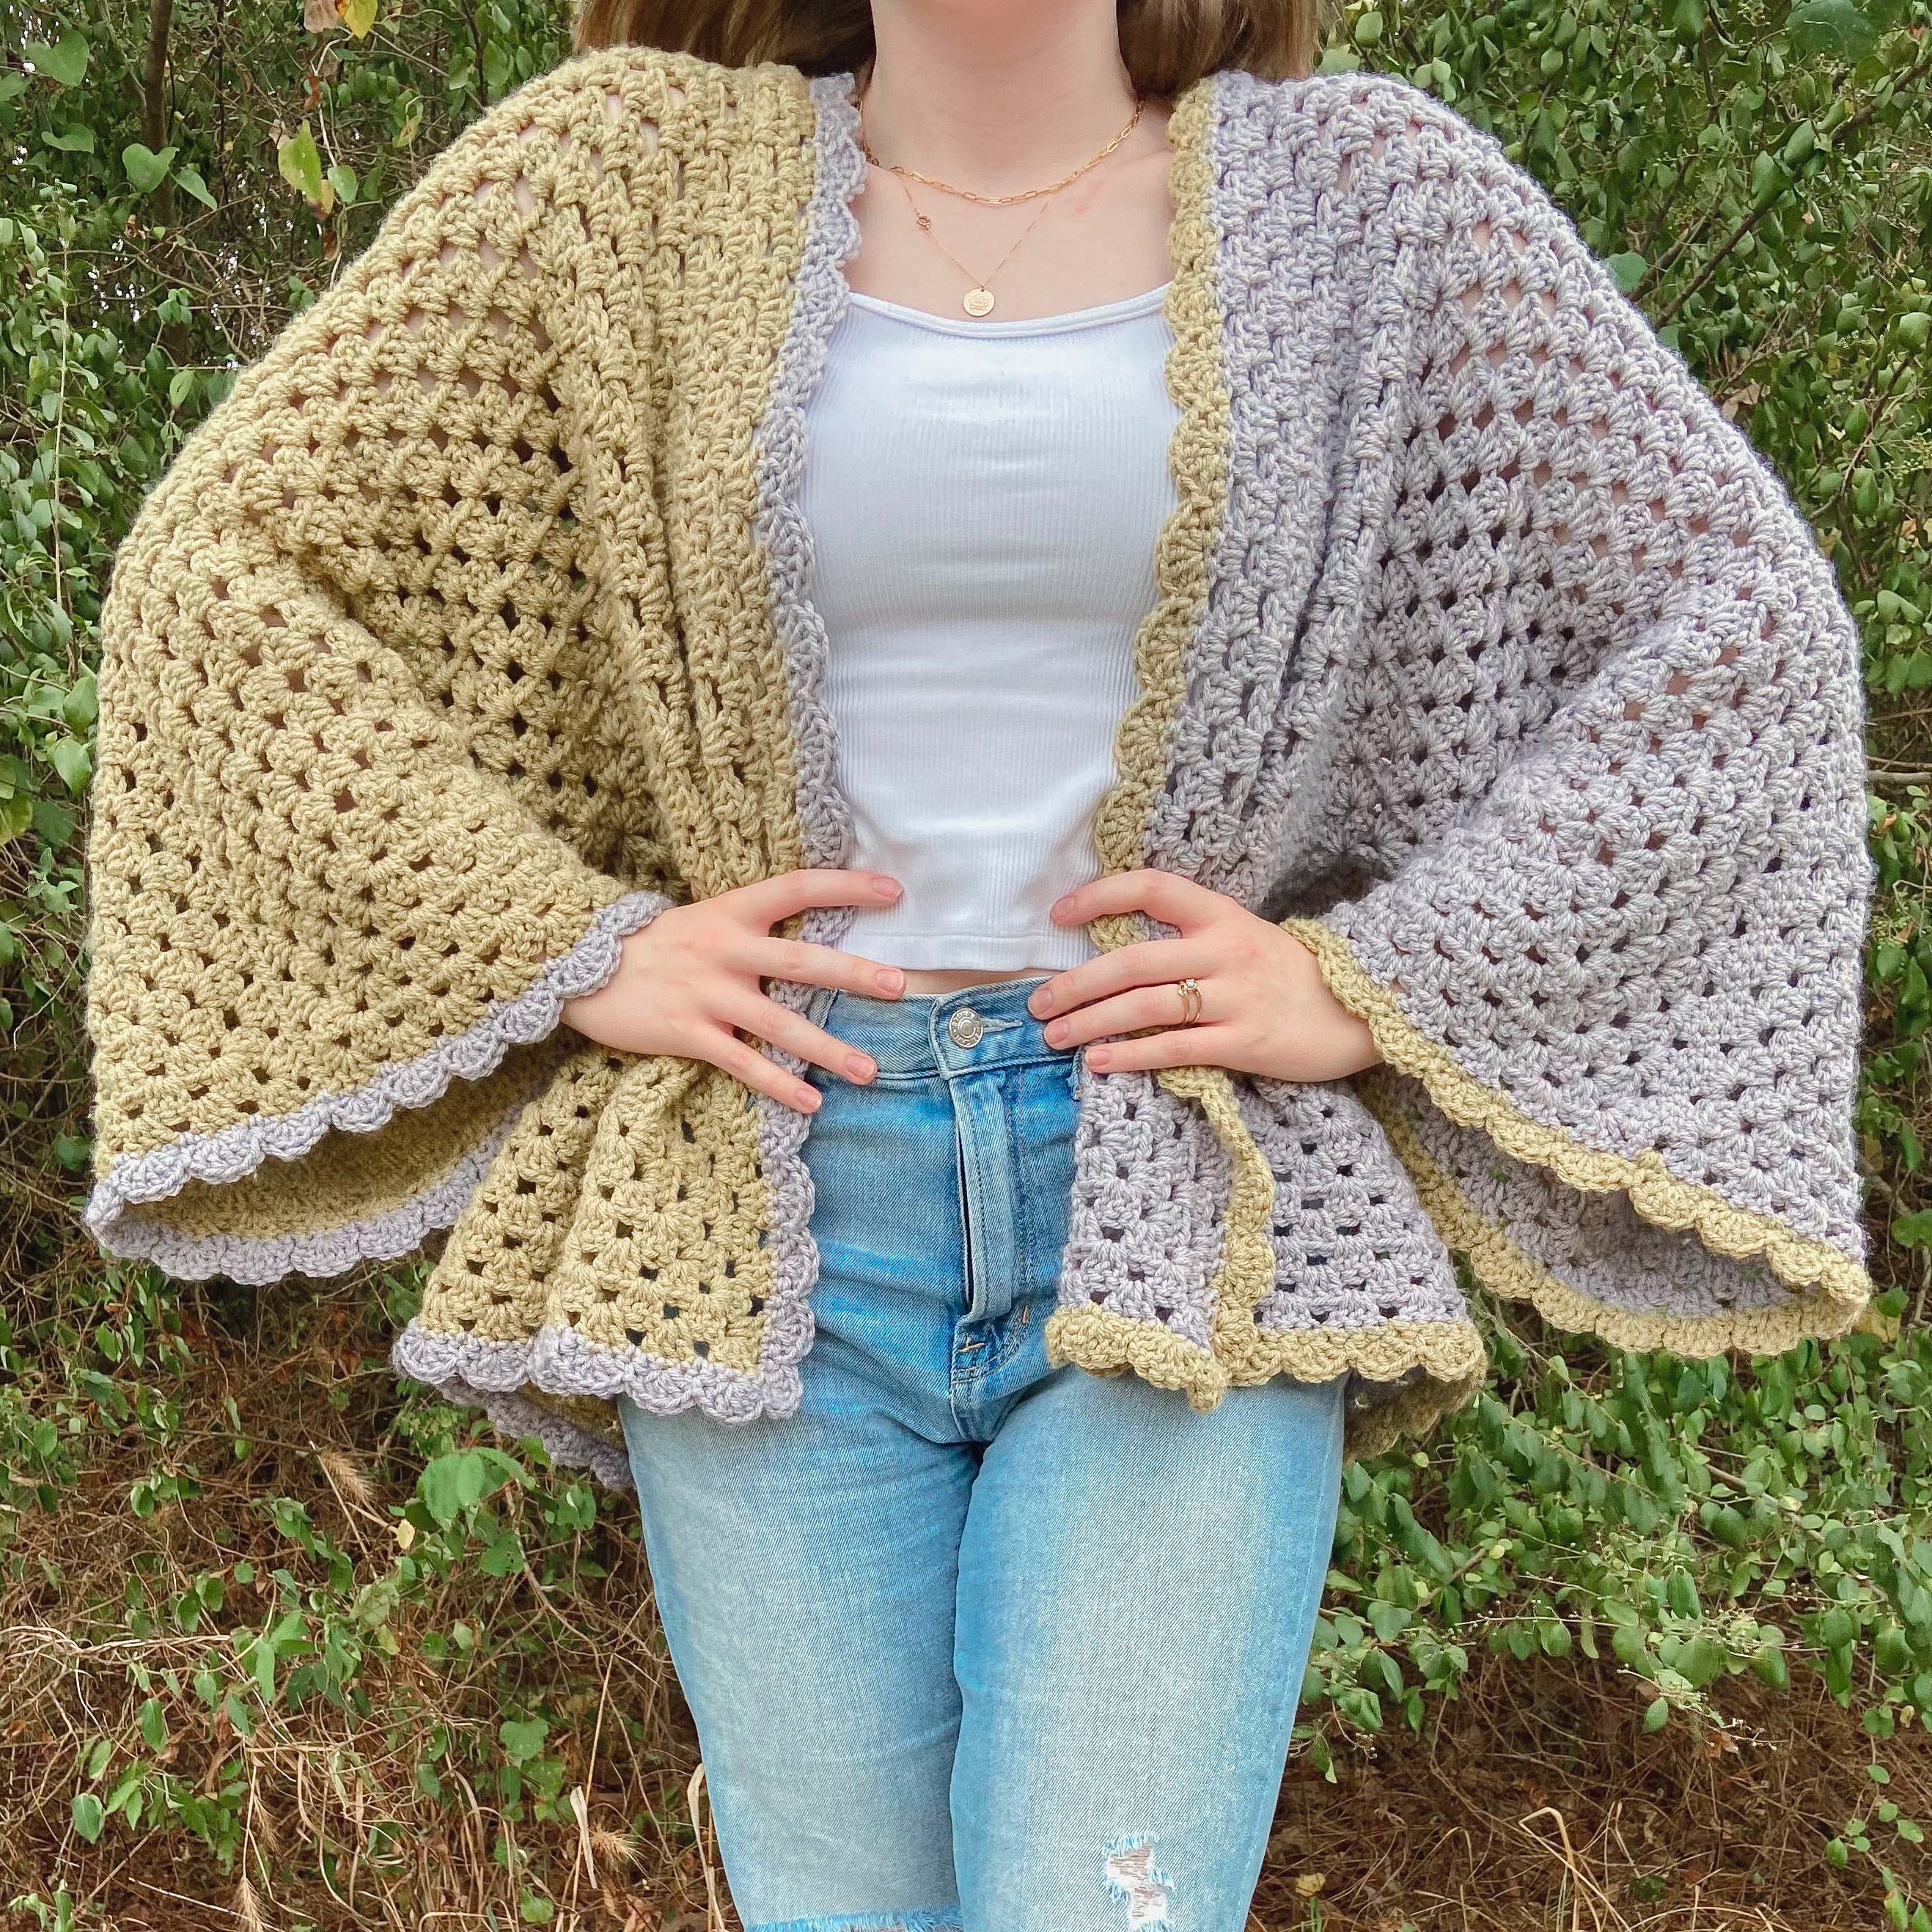
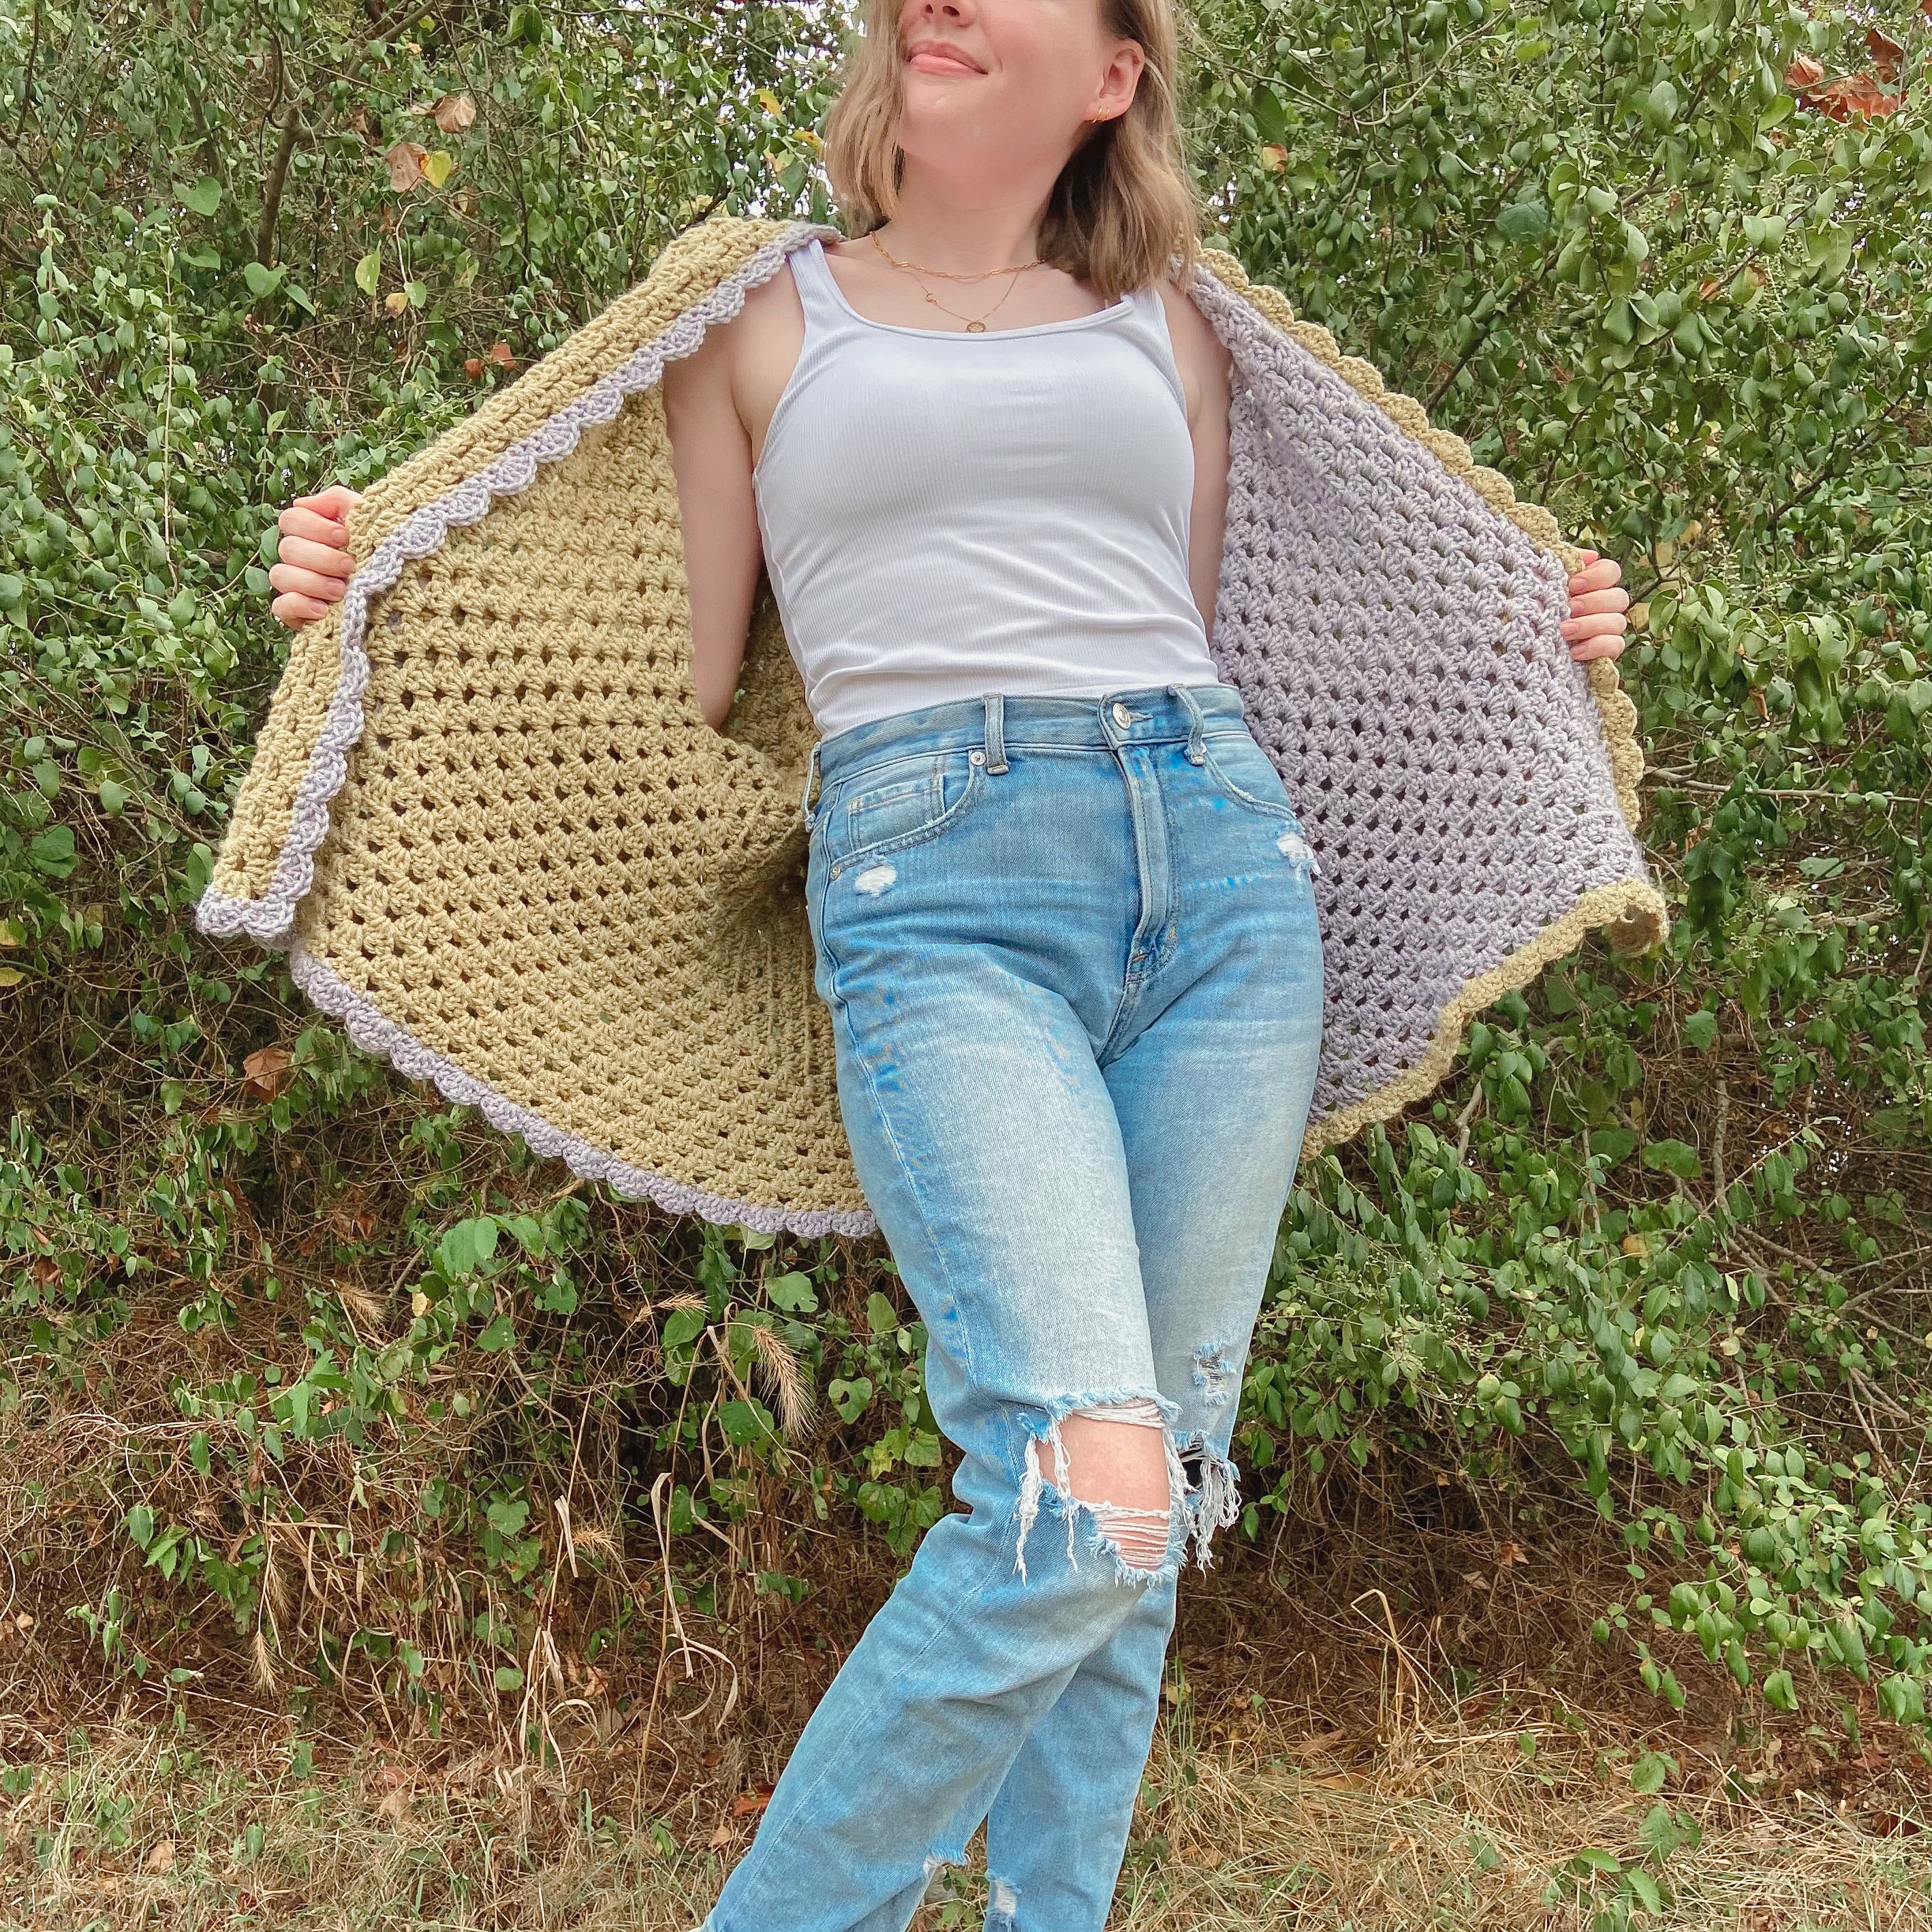
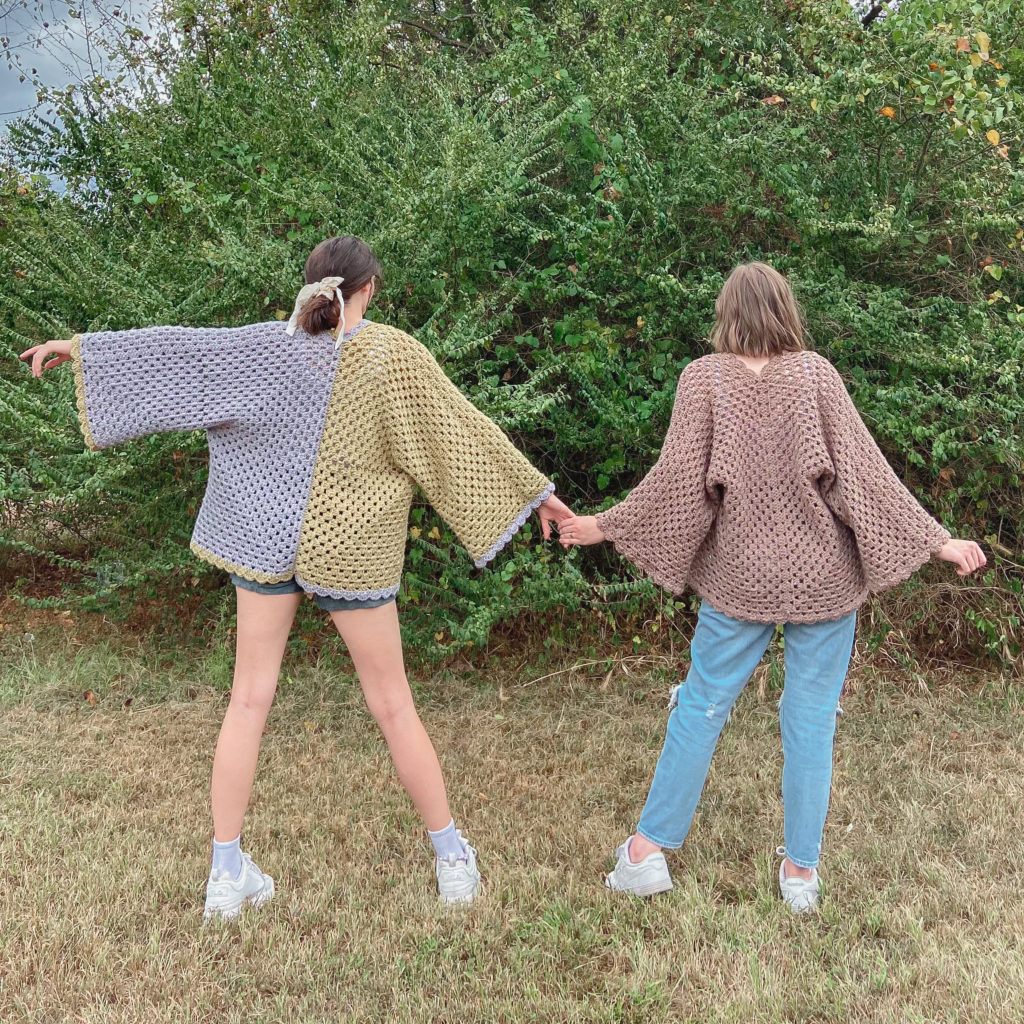
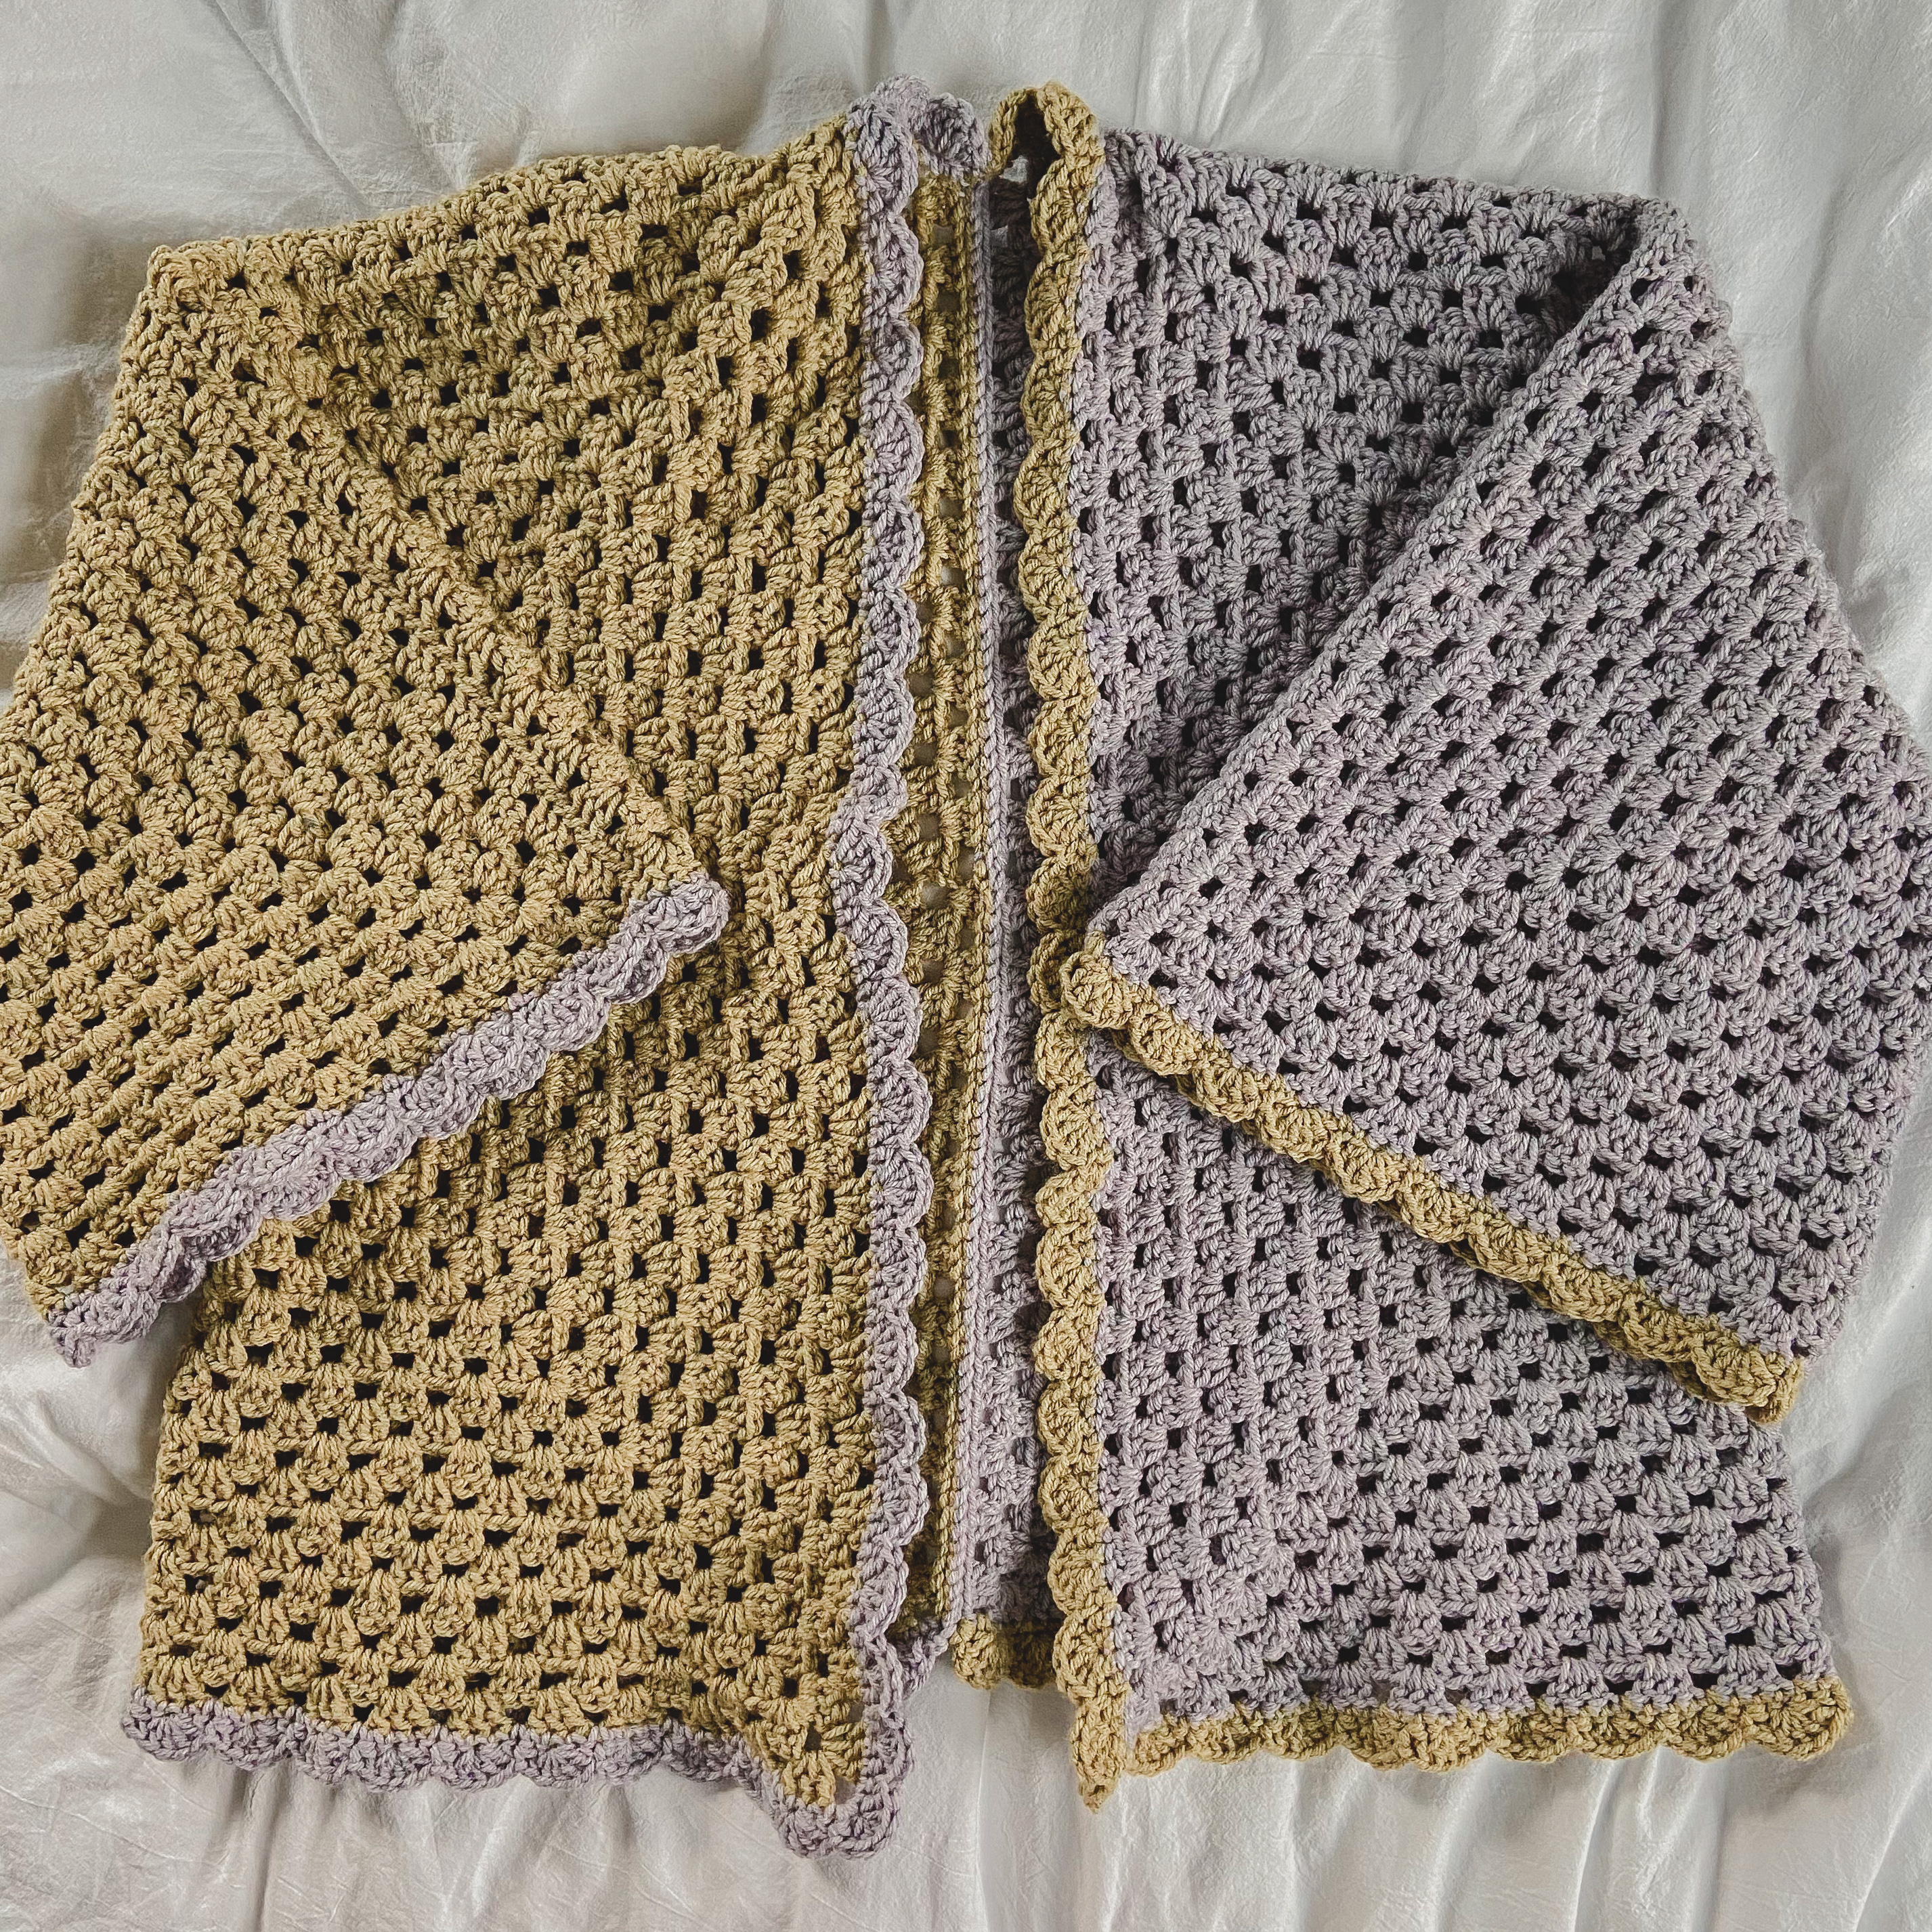
You can make this in any size, from toddler to adult, all depending on how many rounds you crochet! For example, I made one for my little niece by crocheting just 13 rounds, but the ones I crocheted for myself (that could fit sizes S-XL, probably even a larger size) I crocheted one with 21 rounds (the two-toned one shown in the picture below) and one with 20 rounds (the brown one shown in the picture below). You can crochet as many or as few rounds to fit whatever size you need!
So, without further ado, let’s get started!
Level: Easy
Materials
Worsted/Medium Weight Yarn
Yarn for two-toned cardigan (colors used “Thistle” and “Dijon”)
Yarn for brown cardigan (color used “Brownie”)
*I used 6 skeins of yarn for each cardigan
5.00mm Crochet Hook (my FAVORITE crochet hooks)
Stitch Marker (I personally don’t use a stitch marker for this pattern, but you’re a beginner or lose track of where you started easily, stitch markers are very helpful.)
Gauge
4″ square = 4 dc clusters wide x 4 dc clusters tall
Stitches + Abbreviations
MR = Magic Ring
St(s) = Stitch(es)
Ch = Chain
Sc = Single Crochet
Sl st = Slip Stitch
Dc = Double Crochet
Scallop Stitch = Sl st, sk st, 5dc in 1 st, sk st, rep as needed.
(The scallop st is done over 4 sts
Rep = Repeat
Pattern Notes
*Cardigan dimensions WITH scallops = 48 and a 1/2 inches wide x 24 and a 1/2 inches long for two-toned version with 21 rows, and 46 inches wide x 24 inches long for solid brown version with 20 rows.
Cardigan Dimensions WITHOUT scallop edging detail = 46 and a 1/2 inches wide x 23 and a 1/2 inches long for two-toned version, and 44 inches wide x 23 inches long for solid brown version.
(Measurements from cardigan laid flat. Width measured from sleeve to sleeve)
*I crocheted a total of 20 rounds (21 round for two-toned version) and both could fit a number of sizes! I feel that this cardigan could fit sizes S-XL, maybe even smaller or larger sizes if you like a more oversized/more fitted look!
*I used 6 skeins of yarn for this project (3 of each color for two-toned cardigan.
*This Pattern uses US crochet terms
*Turning Ch 3 DOES count as a stitch in this pattern.
*While making hexagon, hexagon WILL BE lumpy and not lay flat. Do not worry that you’re something wrong.
*Through the remainder of this pattern, you will be work in ch spaces and not in sts.
Classic Granny Hexagon
Cardigan Pattern
Start off by making a magic ring.
Round 1: Ch 3 (first ch 3 of each round ALWAYS counts as a st/dc), work 2 dc in MR, ch 3, *work 3 dc in MR, ch 3, *rep 4 more times. Sl st into the first st of the round. <6 clusters total>
*3 dc worked into the same ch space is referred to as a cluster
Round 2: Ch 3, turn your work, work 2 dc in ch space, ch 3 and work 1 cluster into same ch space. ch 1, *work 1 cluster, ch 3, work cluster into same ch space. ch 1, *rep until the end of the round. Sl st into the first st of the round.
*always ch 1 before you move on the the next ch space.
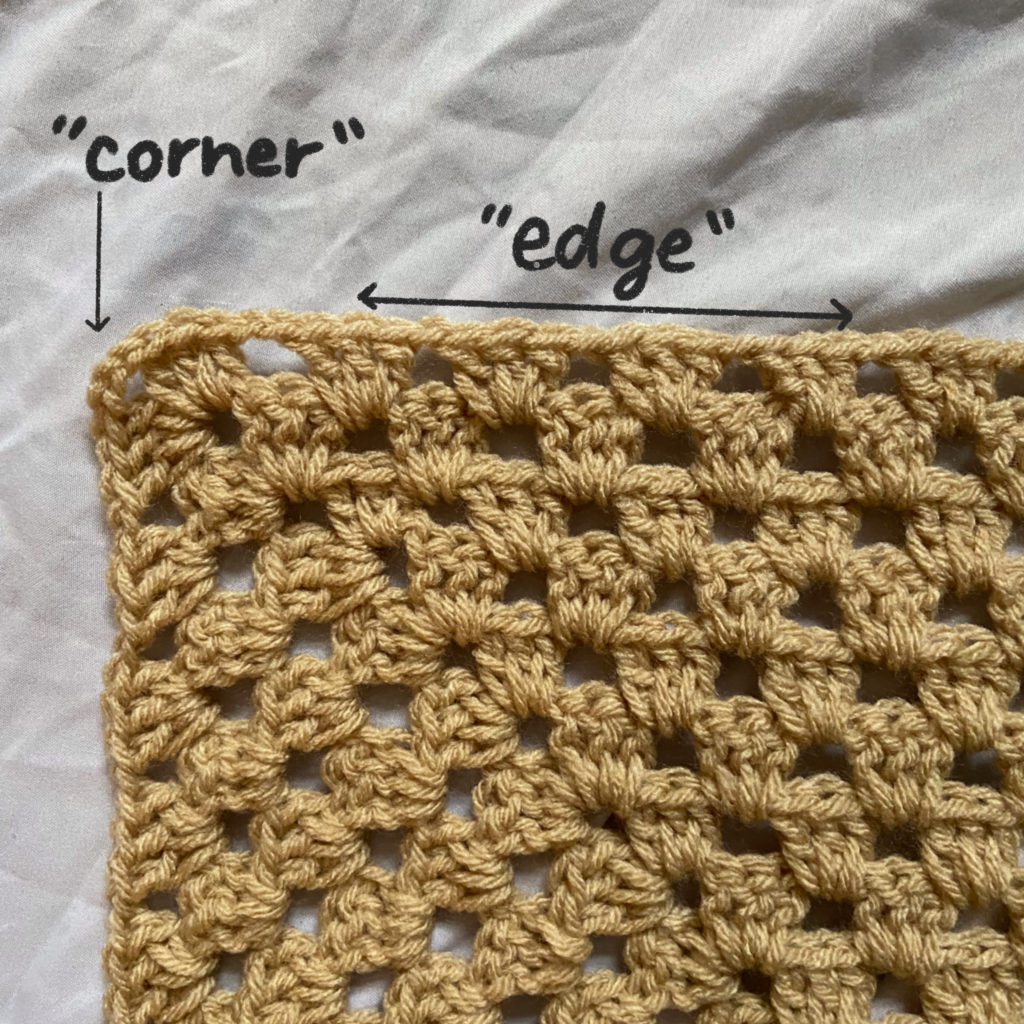
Round 3: Ch 3, turn your work, dc 2, ch 1, when you come to one of the 6 corners in your project work 2 clusters in the corner (“2 clusters in the corner” will always consist of 1 cluster, ch 3, 1 cluster worked in the same ch space to create a corner), ch 1, *work 1 cluster, ch 1, work 2 clusters in the corner, ch 1, *rep until the end of the round. Sl st into the first st of the round.
Round 4: Ch 3, turn your work, 2 dc, ch 1, work 2 clusters in corner, ch 1, *work 1 cluster, ch 1, work 1 cluster, ch 1, work 2 clusters in the corner, ch 1, *rep until the end of the round. Sl st into the first st of the round.
Round 5: Ch 3, turn your work, dc 2, ch 1, work 1 cluster, ch 1, work 2 clusters in the corner, ch 1, *work 1 cluster, ch 1, work 1 cluster, ch 1, work 1 cluster, ch 1, work 2 clusters in the corner, ch 1, *rep until the end of the round. Sl st into the first st of the round.
Round 6: Ch 3, turn your work, 2 dc, ch 1, work 1 cluster, ch 1, work 2 clusters in the corner, ch 1, *work 1 cluster, ch 1, work 1 cluster, ch 1, work 1 cluster, ch 1, work 1 cluster, ch 1, work 2 clusters, ch 1, *rep until the end of the round. Sl st into the first st of the round.
You will repeat this pattern (1 cluster in every “edge” ch space and 2 clusters in every “corner” ch space) until you have the number of rows for your desired width and length of your cardigan!
I stopped at 20 rounds.
Each corner set of clusters will increase your number of clusters in each round, this is how your project grows!
Video tutorial available here if you need better help visualizing pattern.
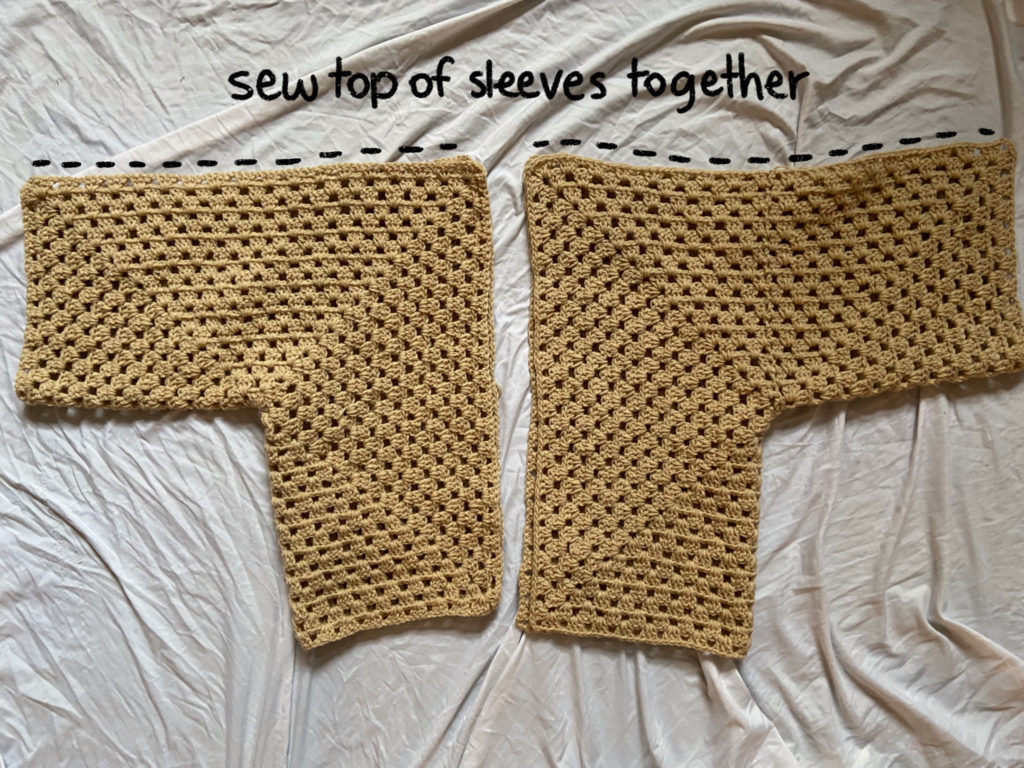
After you finish your desired amount of rows, fasten off and repeat the same process for the other half of your cardigan!
*If you are making a two-toned cardigan, make other side cardigan with the same steps, just a different color.
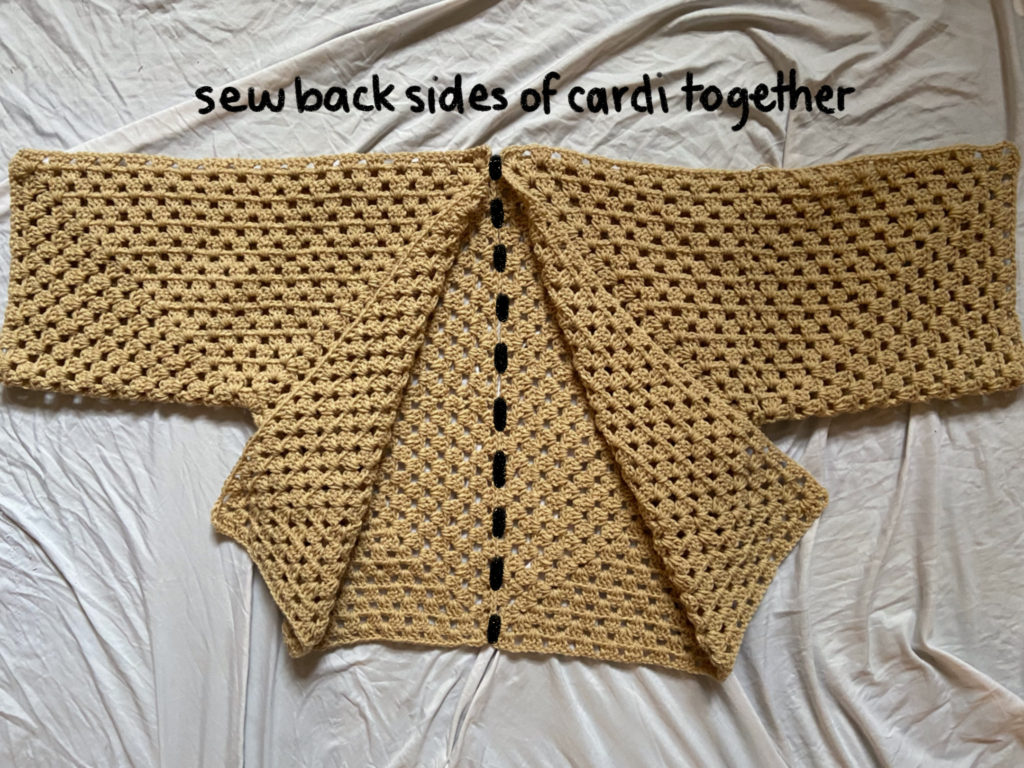
Fold each side of the cardigan in half and sew the top of the sleeve.
And then the back sides of the cardigan together
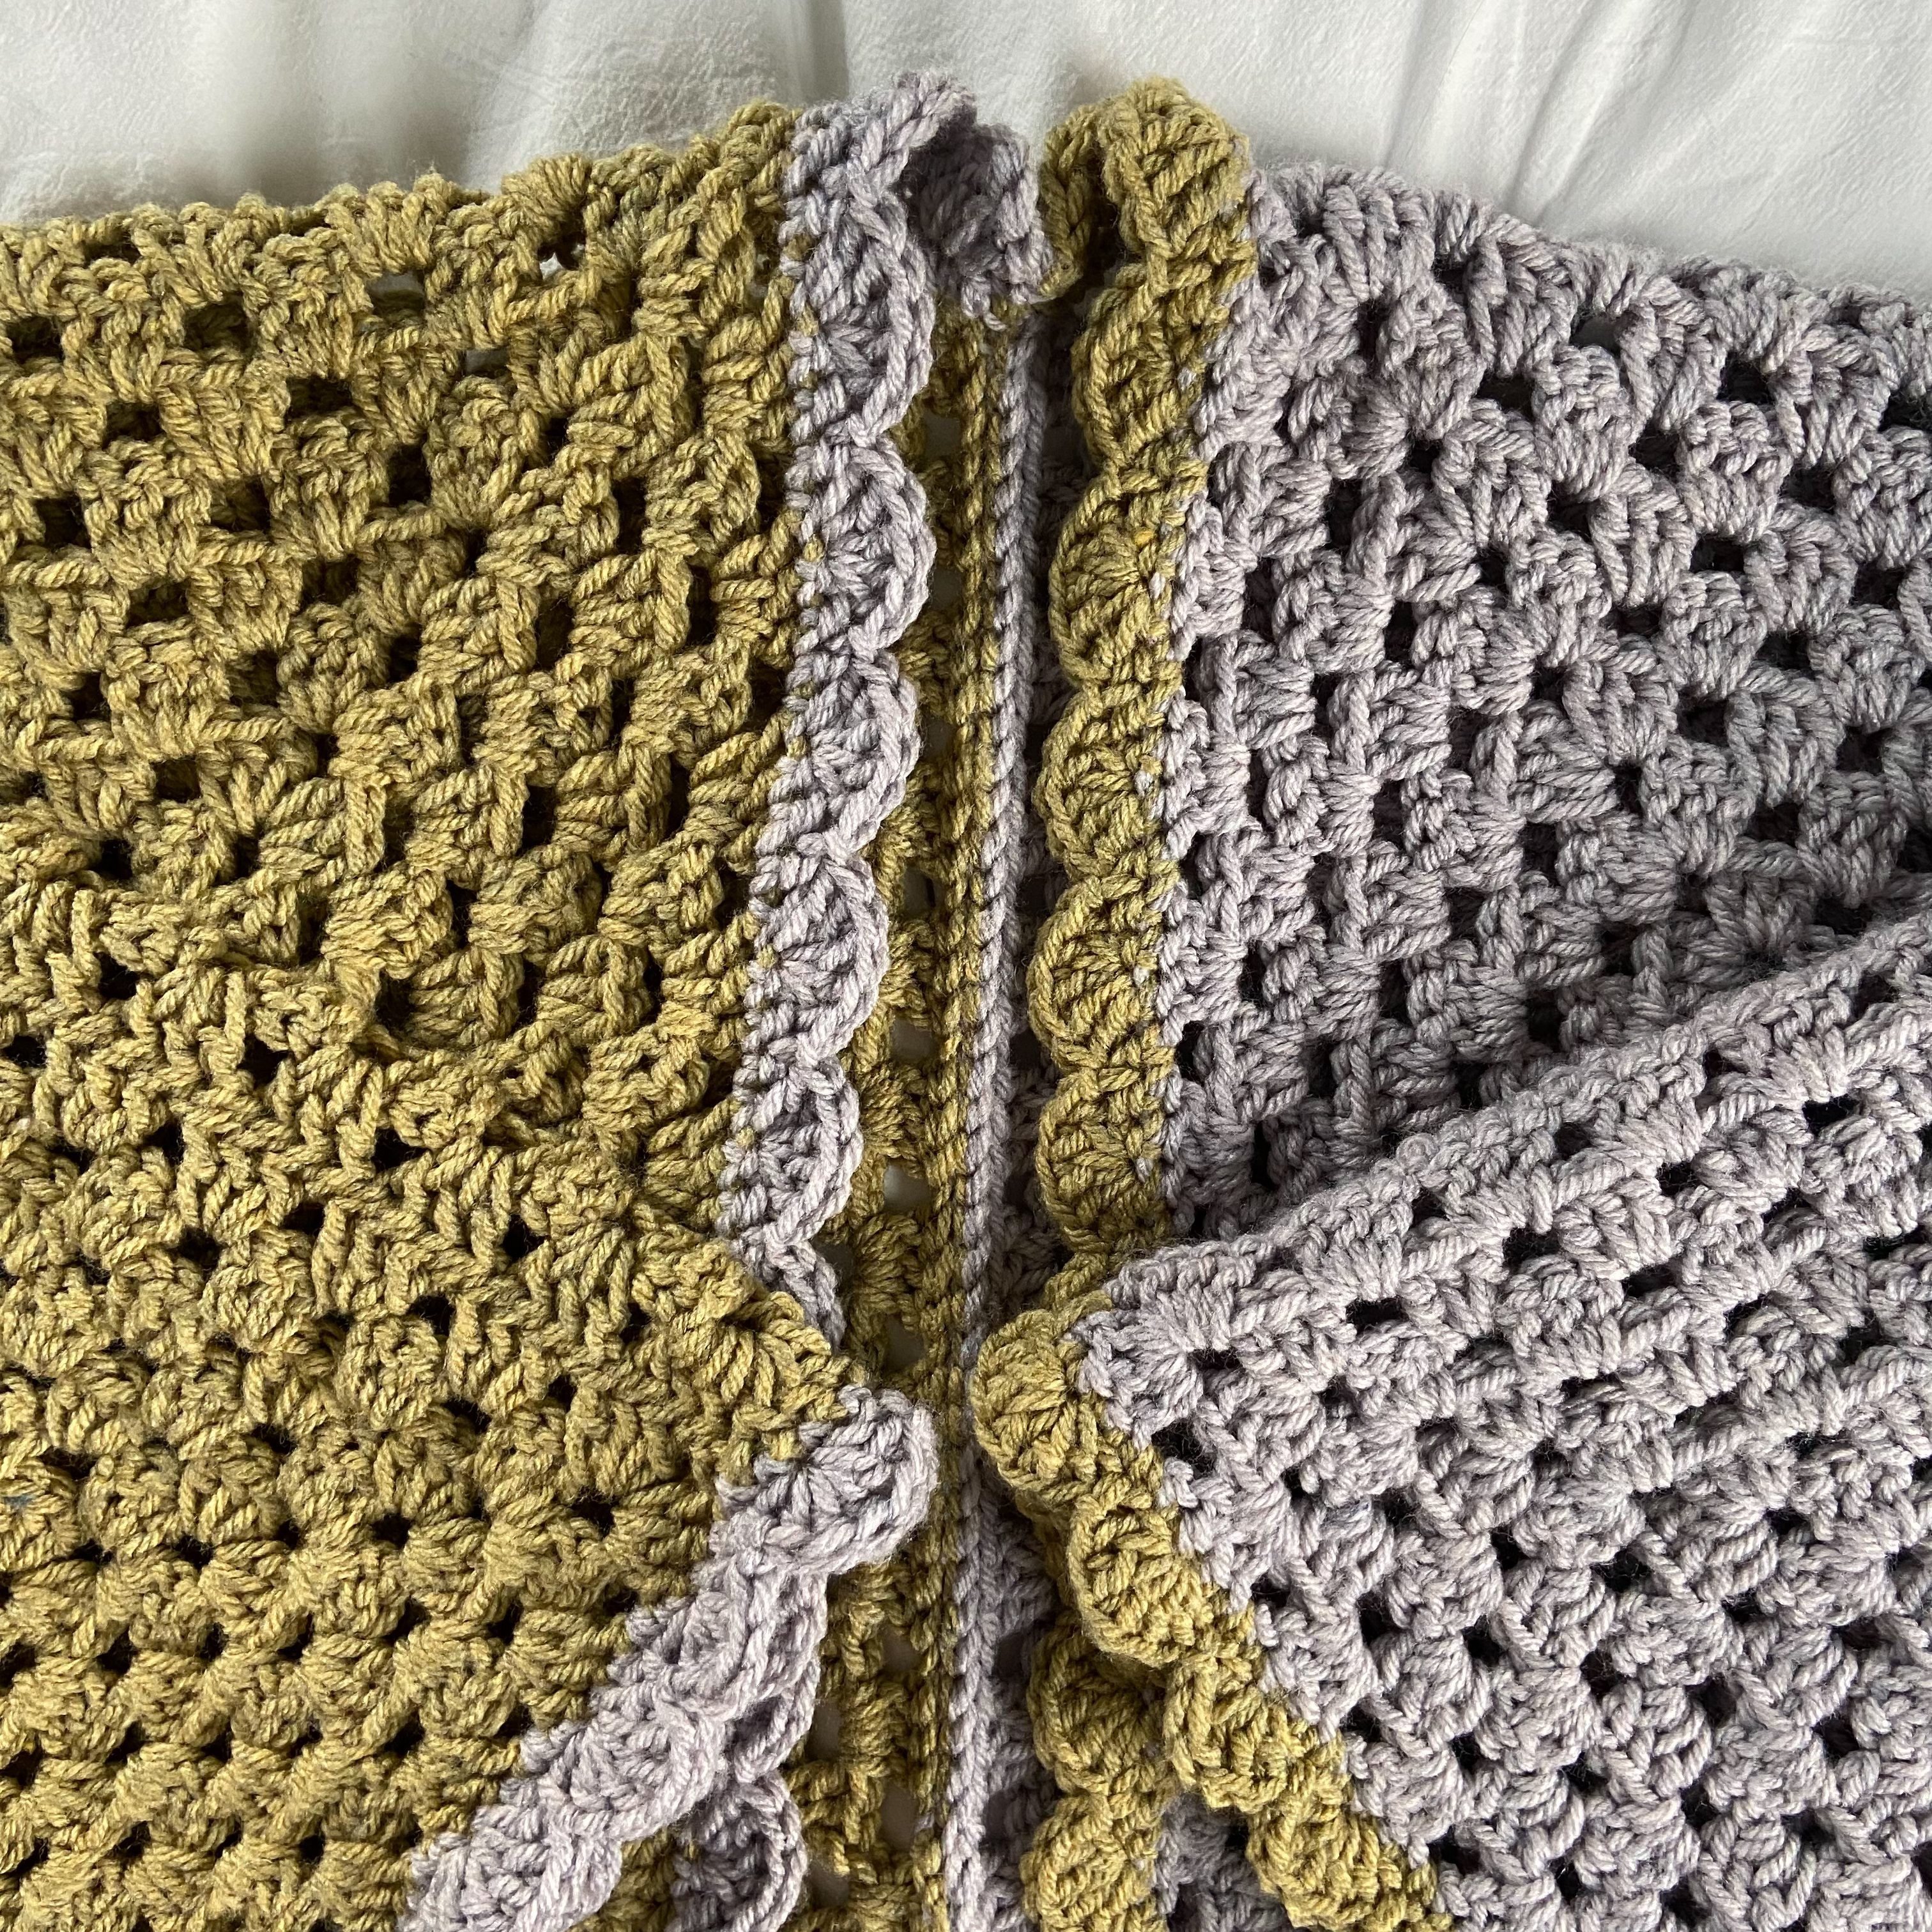
Scallop Edging
These steps for the scallop edging can be completely skipped over if you don’t like the look of them!
Attach yarn to upper opening of cardigan and ch 1 (see Youtube video if you need help visualizing it) and ch 1.
Round 1: Sc all the way around. 3 sc for each cluster and 1 sc for each ch 1 space (stick to this sequence so your scallops will turn out right). When you come to a corner work 4 sc in ch space.
*If you are making two-toned cardigan, sc around only half of the cardigan (it should be easy to see which side is which by the seam made in the back of the cardigan) with one color yarn, and then switch to other color yarn to finish sc around cardigan.
Sl st into the first st of the round.
Round 2: Ch 1, sl st into that same st you chained in, sk st, *work 5 dc into same st, sk st, sl st, sk st, *rep scallop stitch until the end of the round. Sl st into the first st of the round.
*Again, if making two-toned cardigan, scallop st only one side of cardigan with one color, and then switch to other color yarn to finish scallop st around cardigan.
Fasten off.
Repeat same process for the sleeve with a round of sc and then a round of scallop stitches.
Weave in your ends and then…
…YOU’RE DONE!
Video Tutorial available on my YouTube Channel Hayhay Crochet!
If you recreate this cardigan, please tag or DM me @hayhaycrochet on Instagram or TikTok so I can see, like and share!
Happy Crocheting~!