
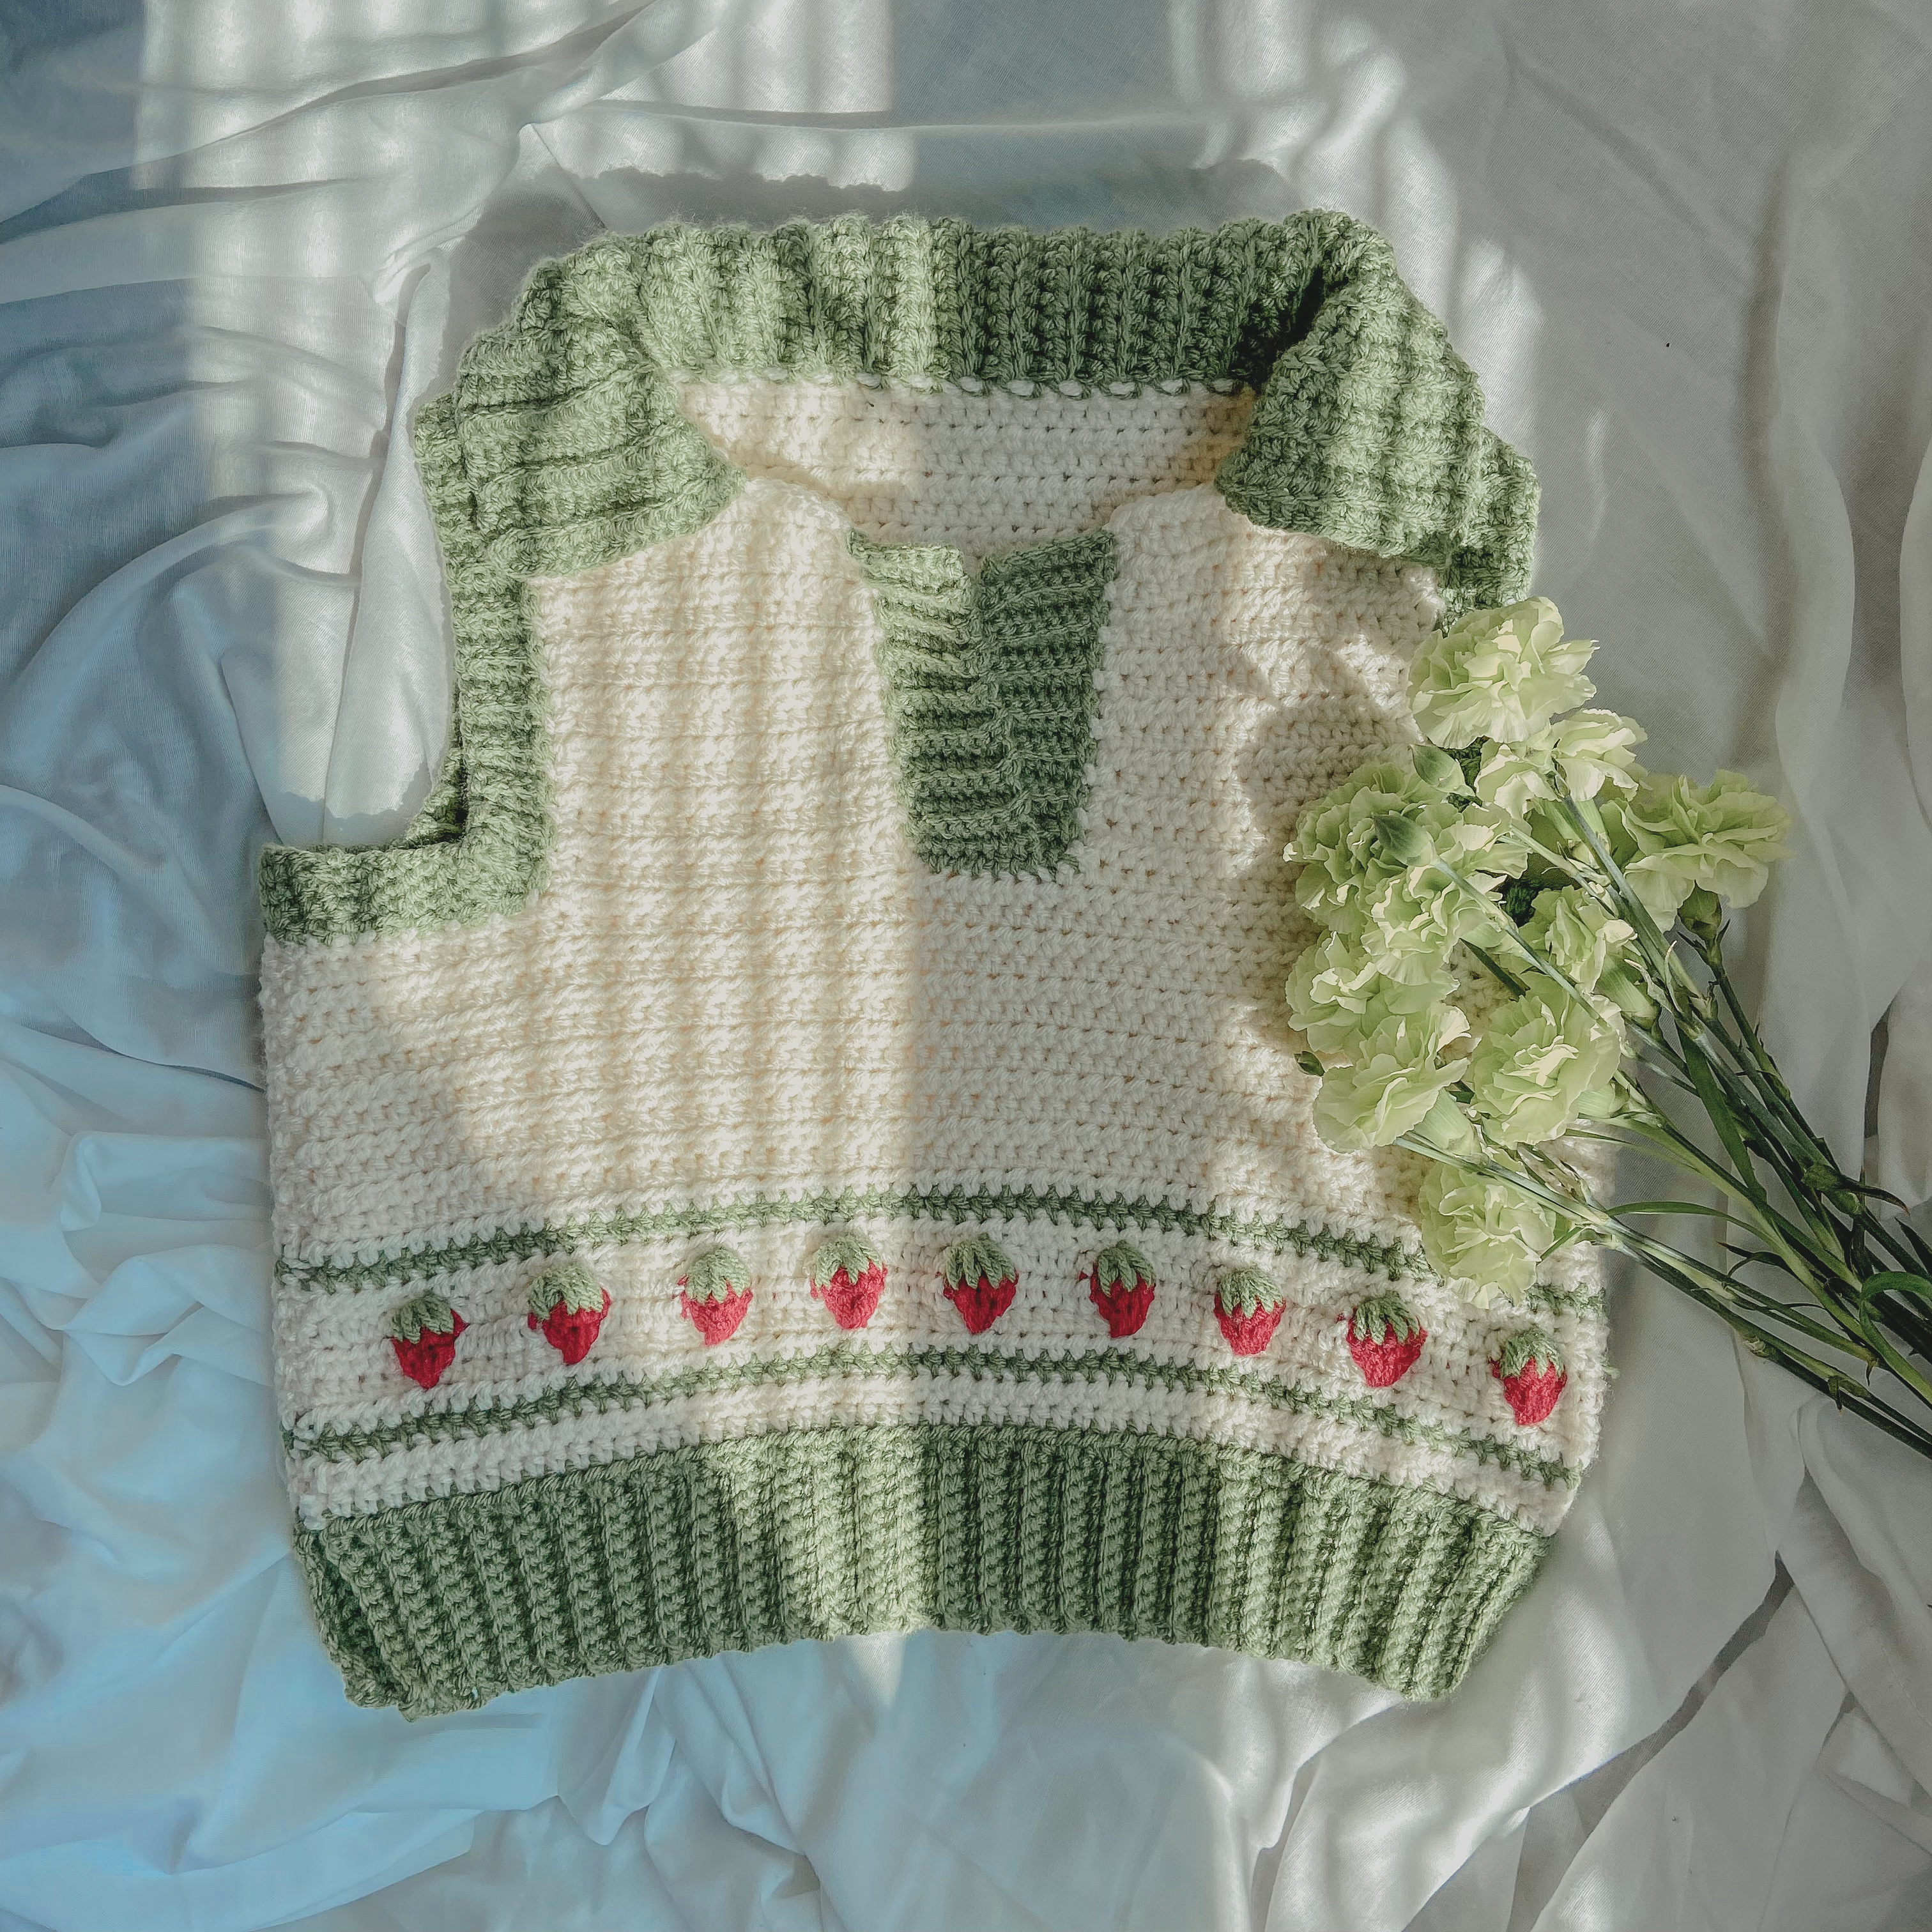
🤍WELCOME HERE🤍
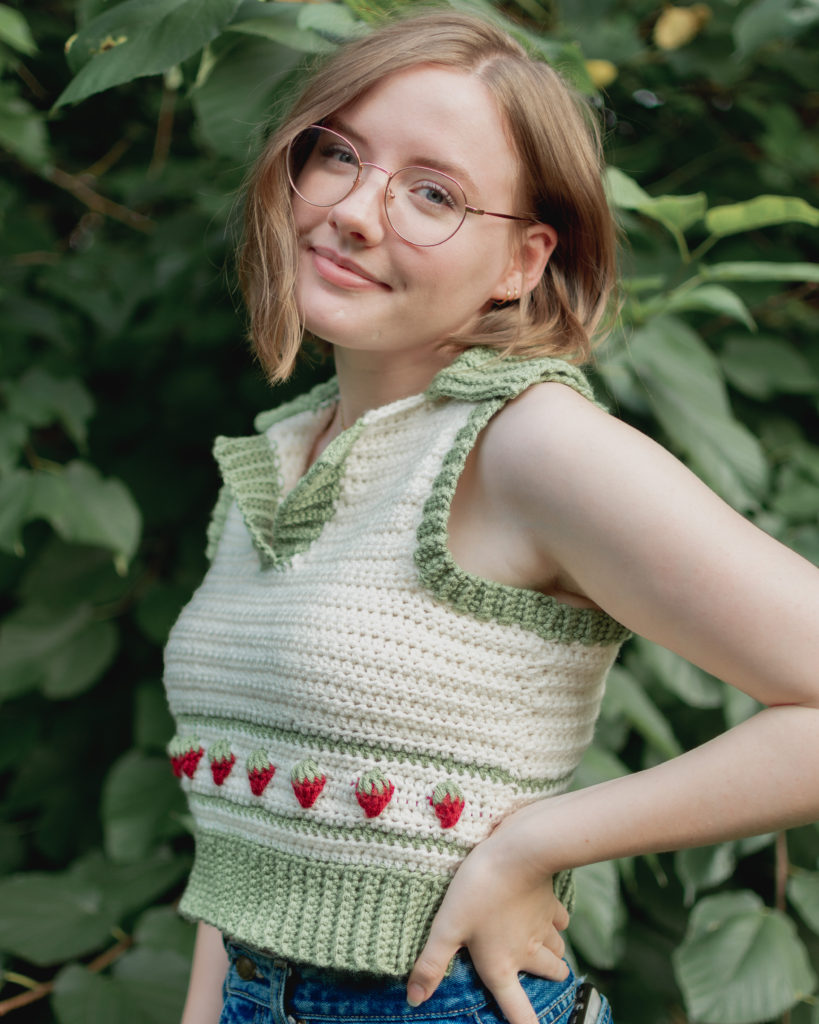
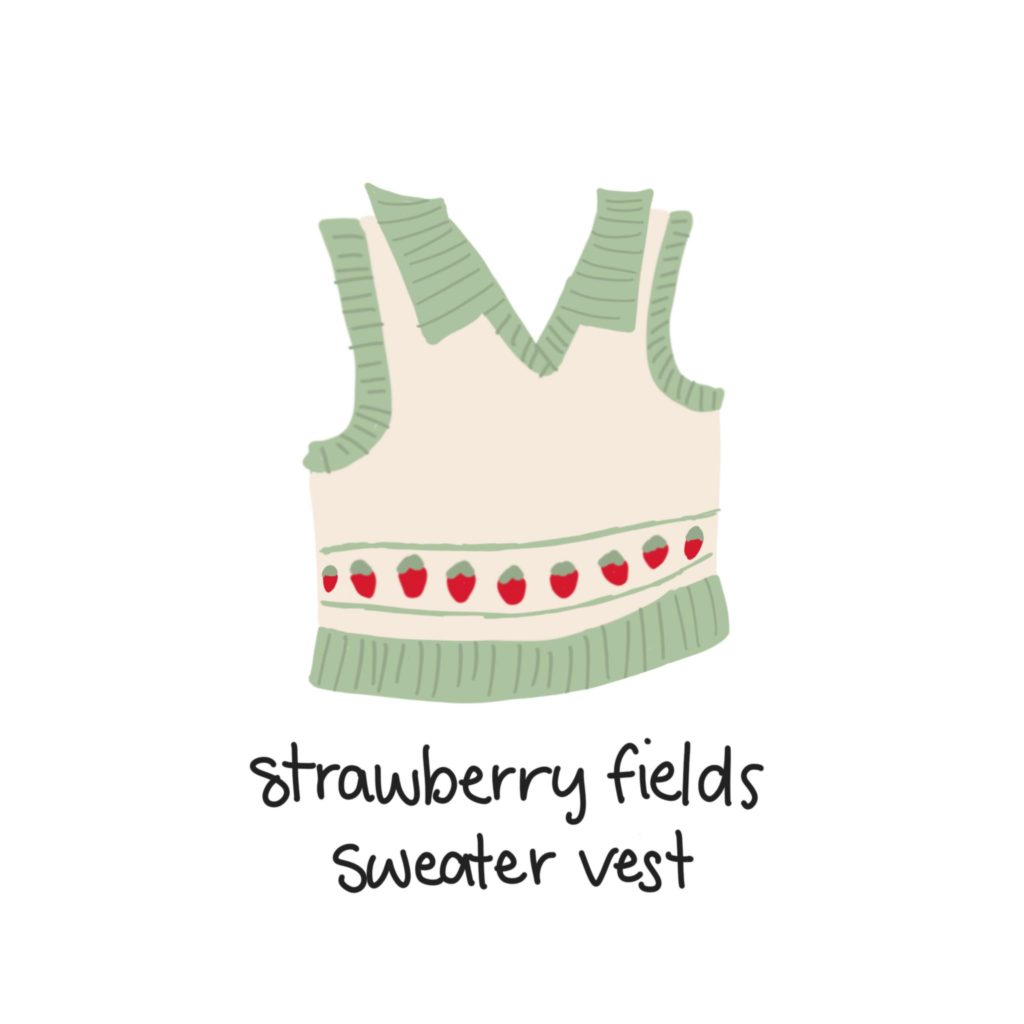
Today I will share with you how to crochet the sweet, vintage-inspired “Strawberry Fields” Sweater Vest!
This post may contain affiliate links.
I’ve been wanting to create a pattern for a sweater vest for sometime now and got the inspiration for the Strawberry Fields Sweater Vest pattern at like 1 a.m. one night and immediately had to sketch it out so I wouldn’t forget about it when morning came! (I now try to keep my iPad next to bed in case I get any late night ideas and it has really come in handy, because for some reason when I’m trying to sleep is when I get some of my best ideas 😅)
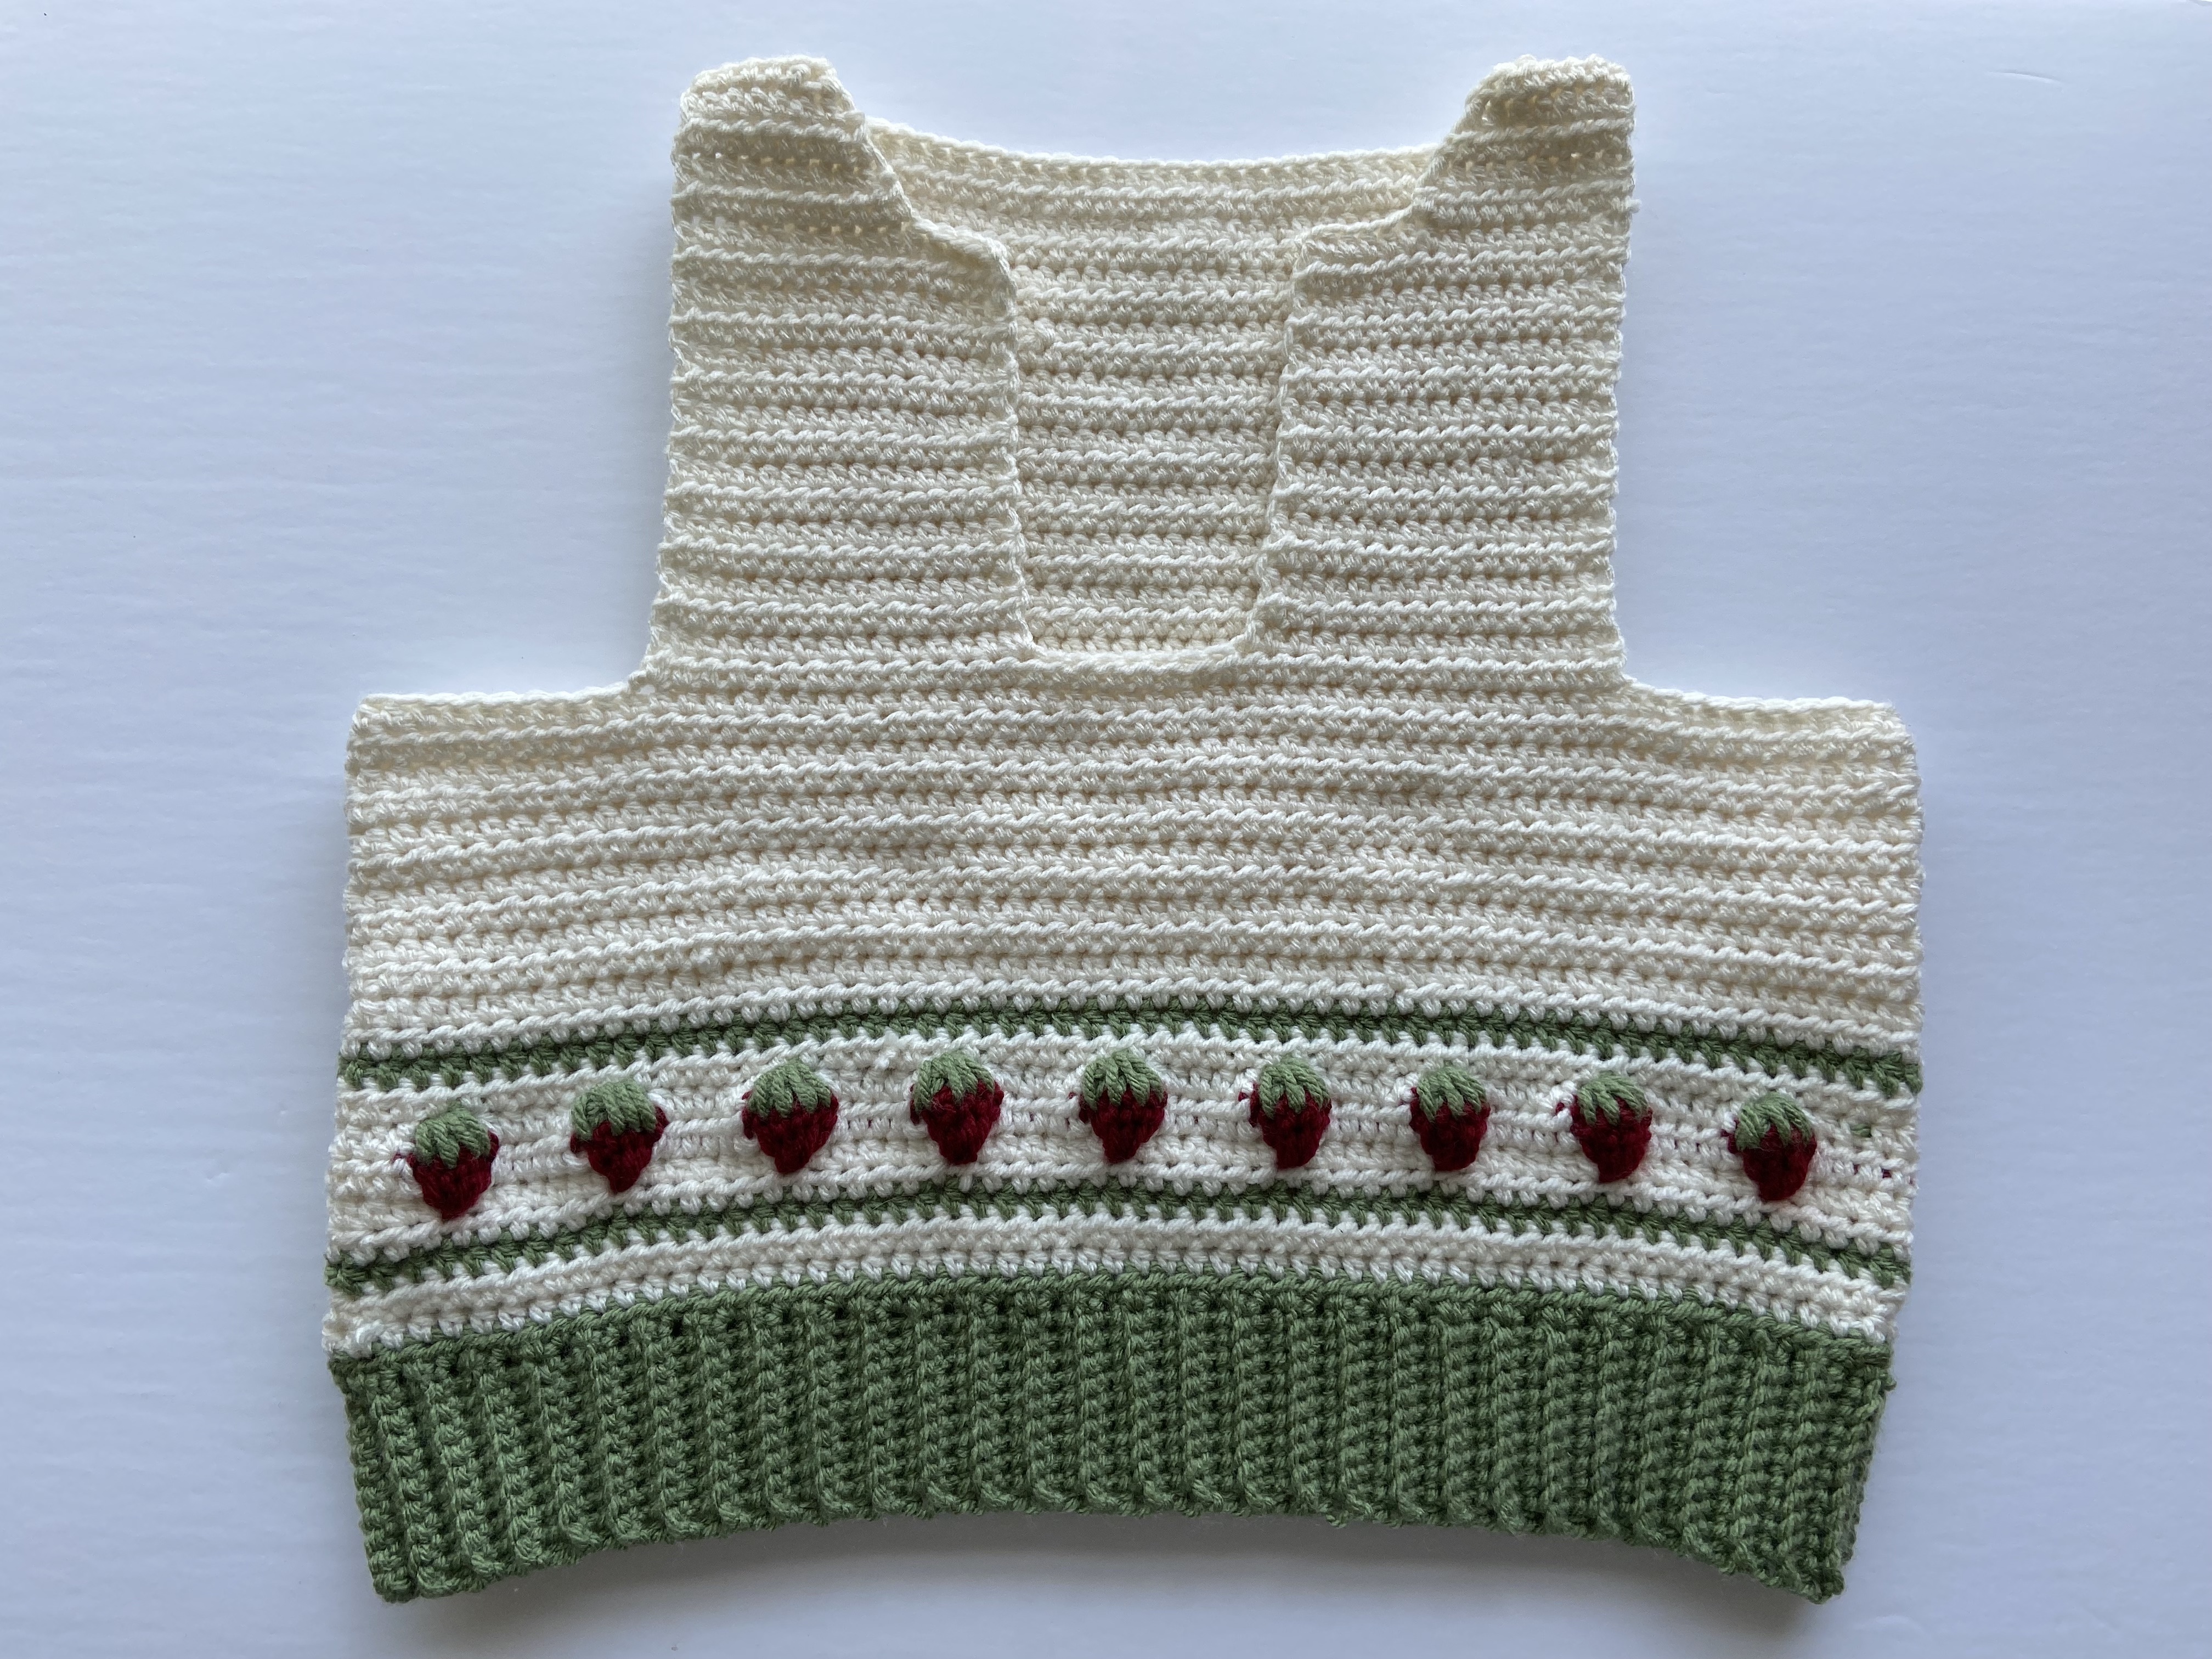
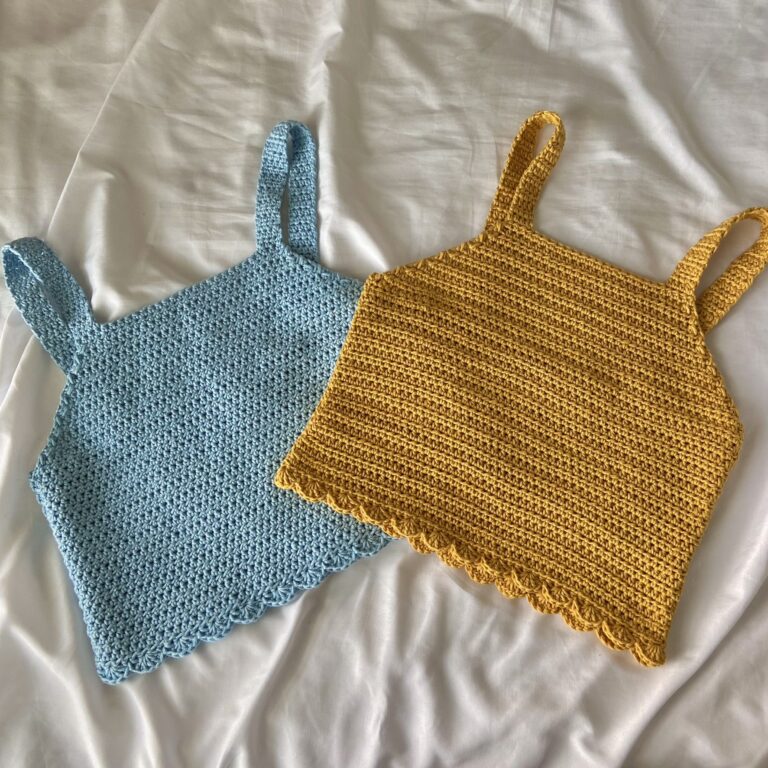
I feel this sweater vest is really good for most any season! Wear it with no shirt underneath and it’s great for spring and summer, or, pair it with a turtleneck or other long sleeved top and it would work nicely for those colder months! Also, you can adjust the pattern colors however you like to fit your personal style! And the strawberry stitch part can be completely replaced with just 2 normal rows of half double crochet if strawberries really aren’t your vibe.
TIP: If you want a more boxy, oversized fit, consider sizing up a size, as this sweater vest is a bit more fitted.
Now, without further ado, let’s get started!
Level: Intermediate
Materials
4.5mm Crochet Hook (my FAVORITE crochet hooks!)
Stitch Markers (I personally don’t use a stitch marker for this pattern, but if you easily lose track of where you started or are a beginner, stitch markers are very helpful.)
Number of skeins:
Color A 1 light sage yarn (1 for sizes S, M, L, 2 for sizes XL and 2XL)
Color B 1 ivory yarn (1 for size S, 2 for sizes M and L, 3 for sizes XL and 2XL)
Color C 1 red yarn (for all sizes)
(You can switch up these colors however you like, this is just the colors I used)
Gauge: 4” square = 14 stitches wide x 14 rows tall (in half double crochet)
STITCHES + ABBREVIATIONS
Ch = Chain
St(s) = Stitch(es)
Sc = Single Crochet
Hdc = Half Double Crochet
Dc = Double Crochet
Sc blo = Single crochet in the BACK LOOP ONLY
Hdc blo = Half double crochet in BACK LOOP ONLY
Rep = Repeat
Strawberry Stitch = See video for stitch located under rows 5-6
PATTERN NOTES
*This pattern follows size S, but has sizes S-2XL
*This pattern uses US crochet terms.
*Turning ch 1 does NOT count as a stitch in this pattern.
*Number of stitches indicated between <> (e.g. <59 for S, 63 for M, 67 for L, 71 for XL,
75 for 2XL>)
*This vest is worked from the bottom up.
STRAWBERRY FIELDS
SWEATER VEST PATTERN
Front Panel
Bottom Ribbing
Foundation: With color A, Ch 11
Row 1: Sc in the second ch from the hook, sc in each chain space until the end of the chain. Ch 1, turn your work. <10>
Row 2: Sc blo in each st until the end of the row. Ch 1, turn your work. <10>
Row 3-59 (63, 67, 71, 75): Sc blo in each st until the end of the row. Ch 1, turn your work. <10>
Now, turn your work so you will be working on the top of your ribbing horizontally.
Row 1: Hdc in each ribbed row (You should have as many sts as you do rows at the end). Ch 1, turn your work. <59, 63, 67, 71, 75>
Row 2-3: With color B, hdc in each st until the end of the row. Ch 1, turn your work. <59, 63, 67, 71, 75>
Row 4: With color A, hdc in each st until the end of the row. Ch 1, turn your work. <59, 63, 67, 71, 75>
Row 5-6: With color B, hdc in each st until the end of the row. Ch 1, turn your work. <59, 63, 67, 71, 75>
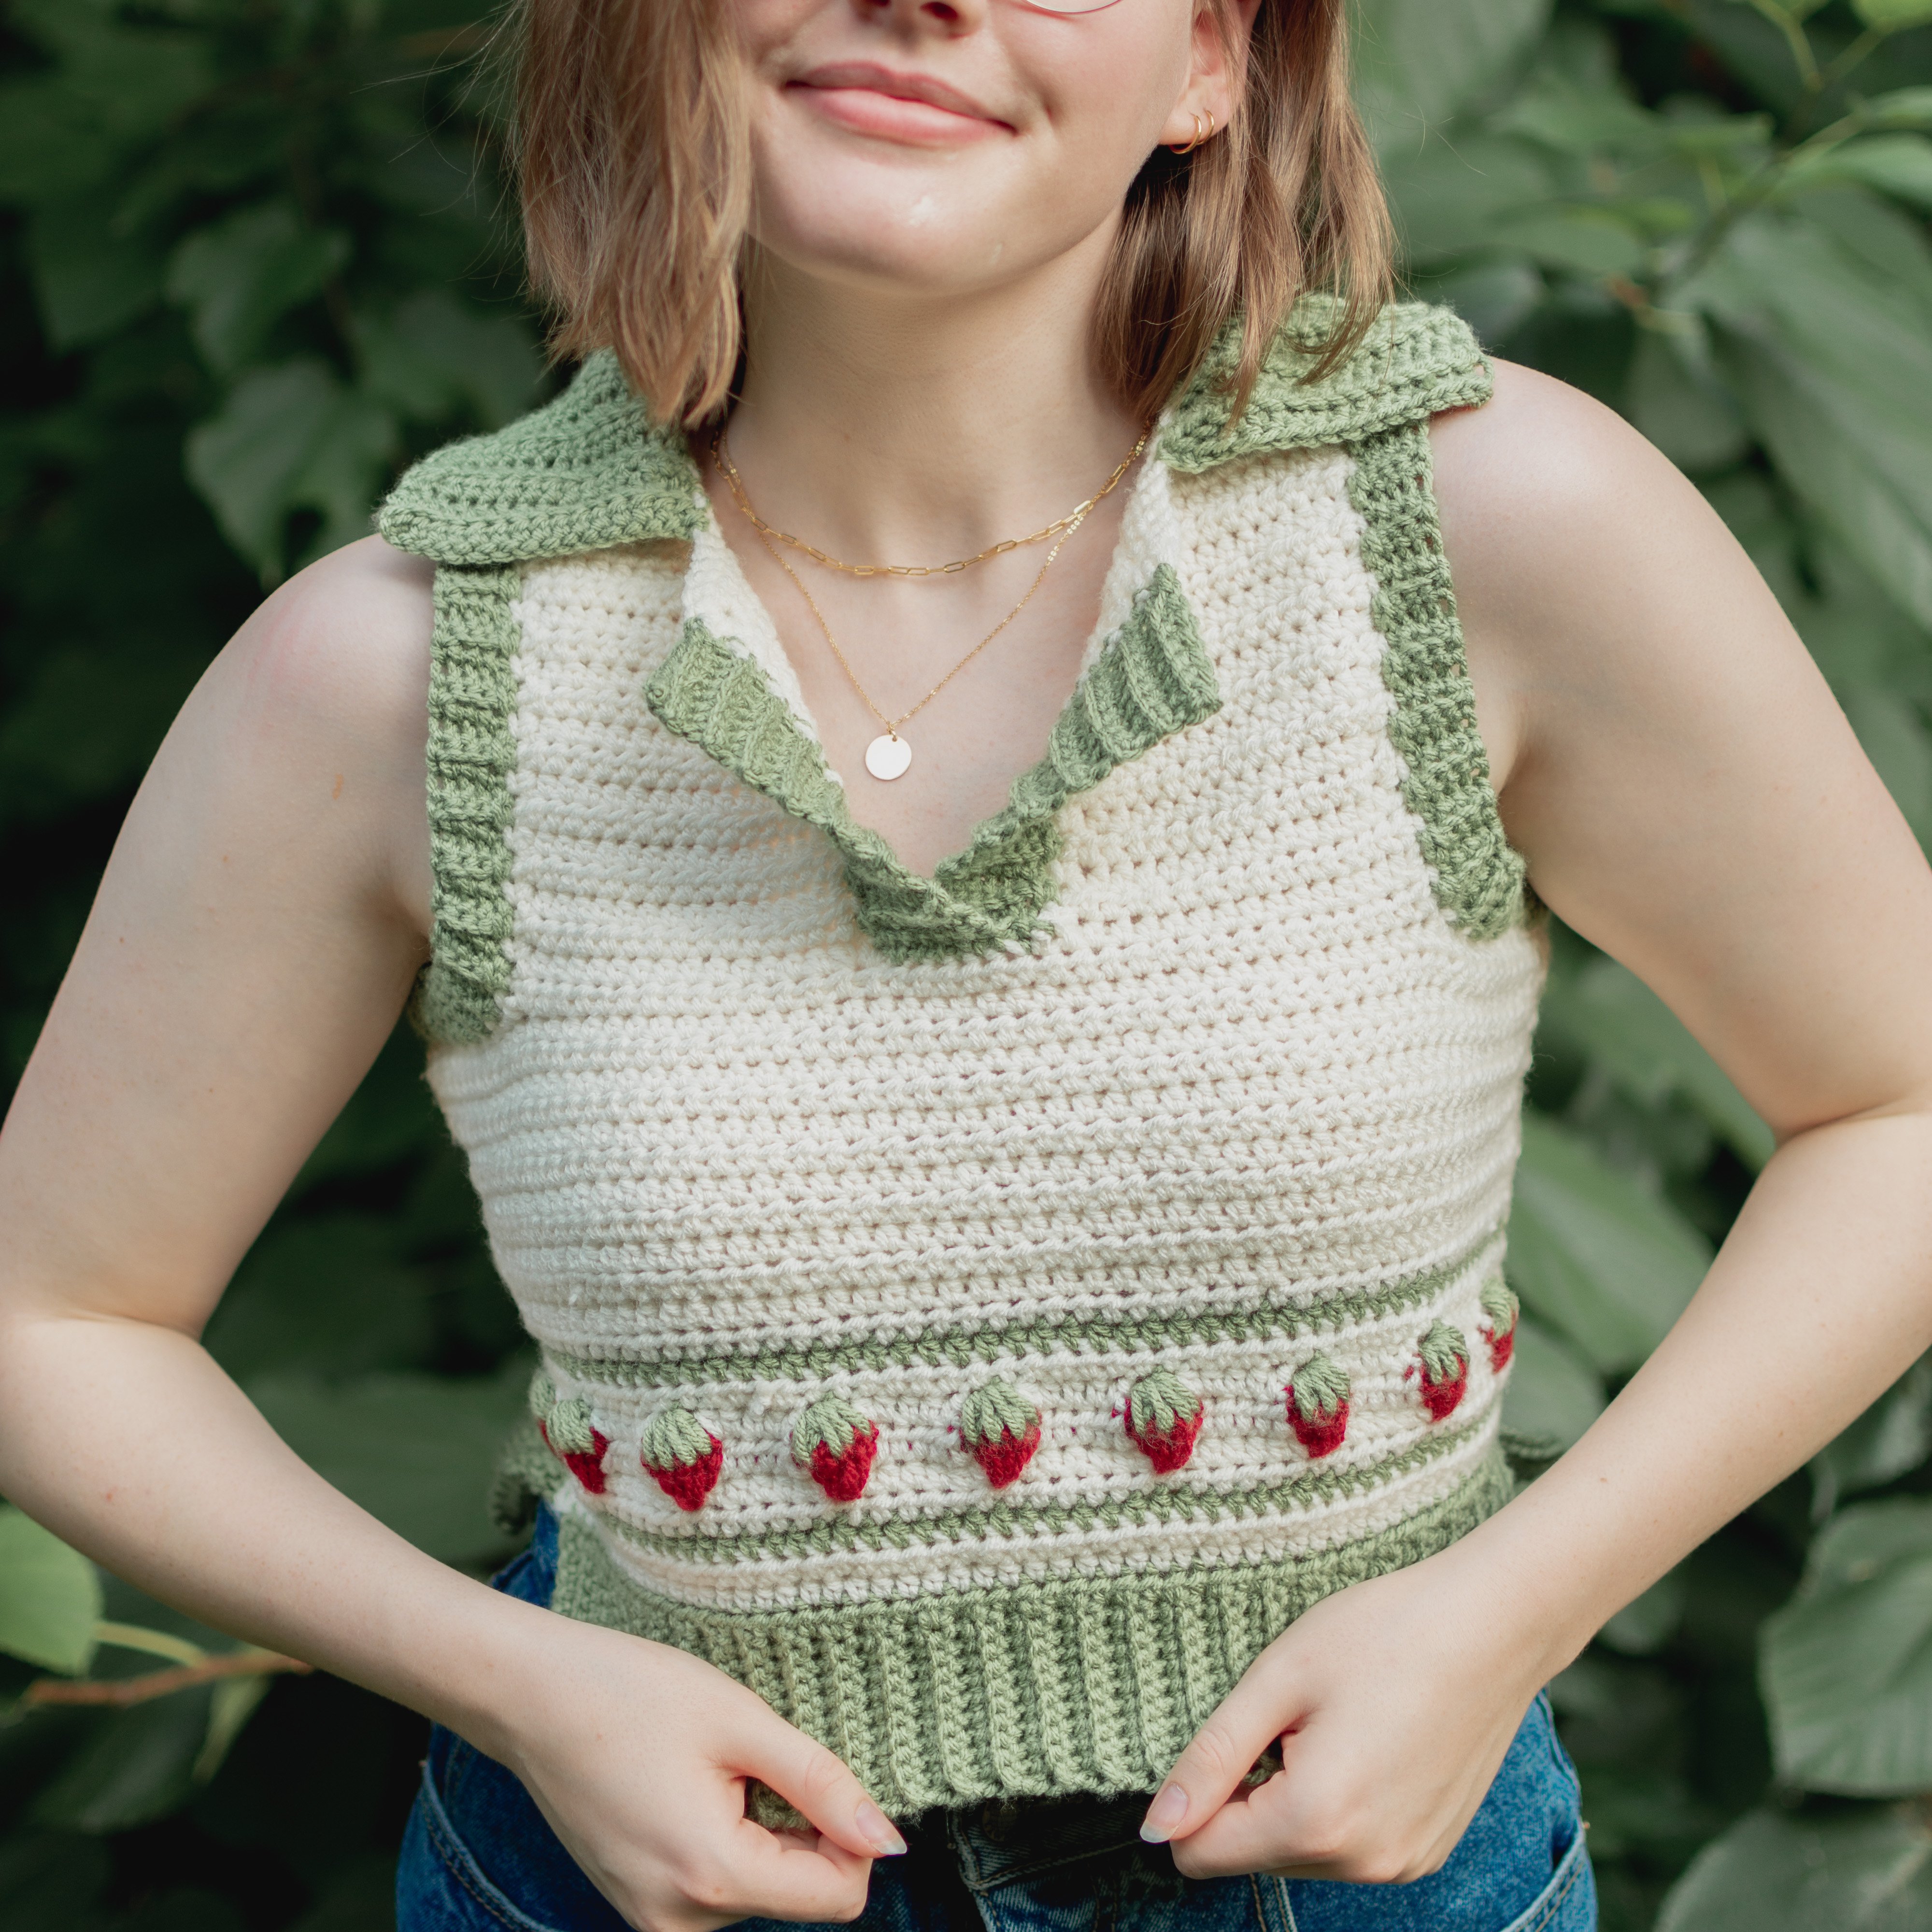
Watch video on how to do the strawberry stitch!
Row 7: Hdc in first 5 (7 M, 3 L, 5 XL, 7 2XL) sts, before finishing 5th hdc pull through color C, with color C work part of strawberry st, *pull through color B to finish last dc of strawberry st, hdc 5, before finishing 5th hdc pull through color C, with color C work part of strawberry st *rep until you have 5 (7 M, 3 L, 5 XL, 7 2XL) sts remaining, hdc in remaining 5 (7 M, 3 L, 5 XL, 7 2XL) sts. Ch 1, turn your work. <NOT counting the extra 4 sts in each strawberry st 59, 63, 67, 71, 75>
Row 8: Hdc in first 5 (7 M, 3 L, 5 XL, 7 2XL) sts,before finishing 5th hdc pull through color A, with color A hdc5tog to finish strawberry st, *pull through all the loops from the hdc5tog with color B, hdc 5, before finishing 5th hdc pull through color with color A, with color A hdc5tog to finish strawberry st, *rep until you have 5 (7 M, 3 L, 5 XL, 7 2XL) sts remaining, hdc in remaining 5 (7 M, 3 L, 5 XL, 7 2XL) sts. Push strawberry sts toward you to make them pop. Ch 1, turn your work. <59, 63, 67, 71, 75>
If you don’t like this strawberry stitch, these steps can be simply skipped and replaced with just 2 regular hdc rows!
Row 9: Hdc in each st until the end of the row. Ch 1, turn your work. <59, 63, 67, 71, 75>
Row 10: With color A, hdc in each st until the end of the row. Ch 1, turn your work. <59, 63, 67, 71, 75>
Row 11: With color B, hdc in each st until the end of the row. Ch 1, turn your work. <59, 63, 67, 71, 75>
Row 12-22 <24 M and L, 26 XL and 2XL>: Hdc in each st until the end of the row. Ch 1, turn your work. <59, 63, 67, 71, 75>
Fasten off at the end of row 22 (24 M and L, 26 XL and 2XL)
Row 23 <25 M and L, 27 XL and 2XL>: Count 12 (13 M, 14 L, 15 XL, 16 2XL) sts in and attach color B yarn to work, ch 1 and hdc in next 37 (39 M, 39 L, 43 XL, 45 2XL) sts. Ch 1, turn your work. <37, 39, 41, 43, 45>
Right side of panel
Row 24 <26 M and L, 28 XL and 2XL: Hdc in next 15 (16 M, 17 L, 18 XL, 19 2XL) sts. Ch 1, turn your work. <15, 16, 17, 18, 19>
Row 25-38 <27-40 M and L, 29-42 XL and 2XL>: Hdc in each st until the end of the row. Ch 1, turn your work. <15, 16, 17, 18, 19>
Fasten off at the end of row 38 (40 M and L, 42 XL and 2XL)
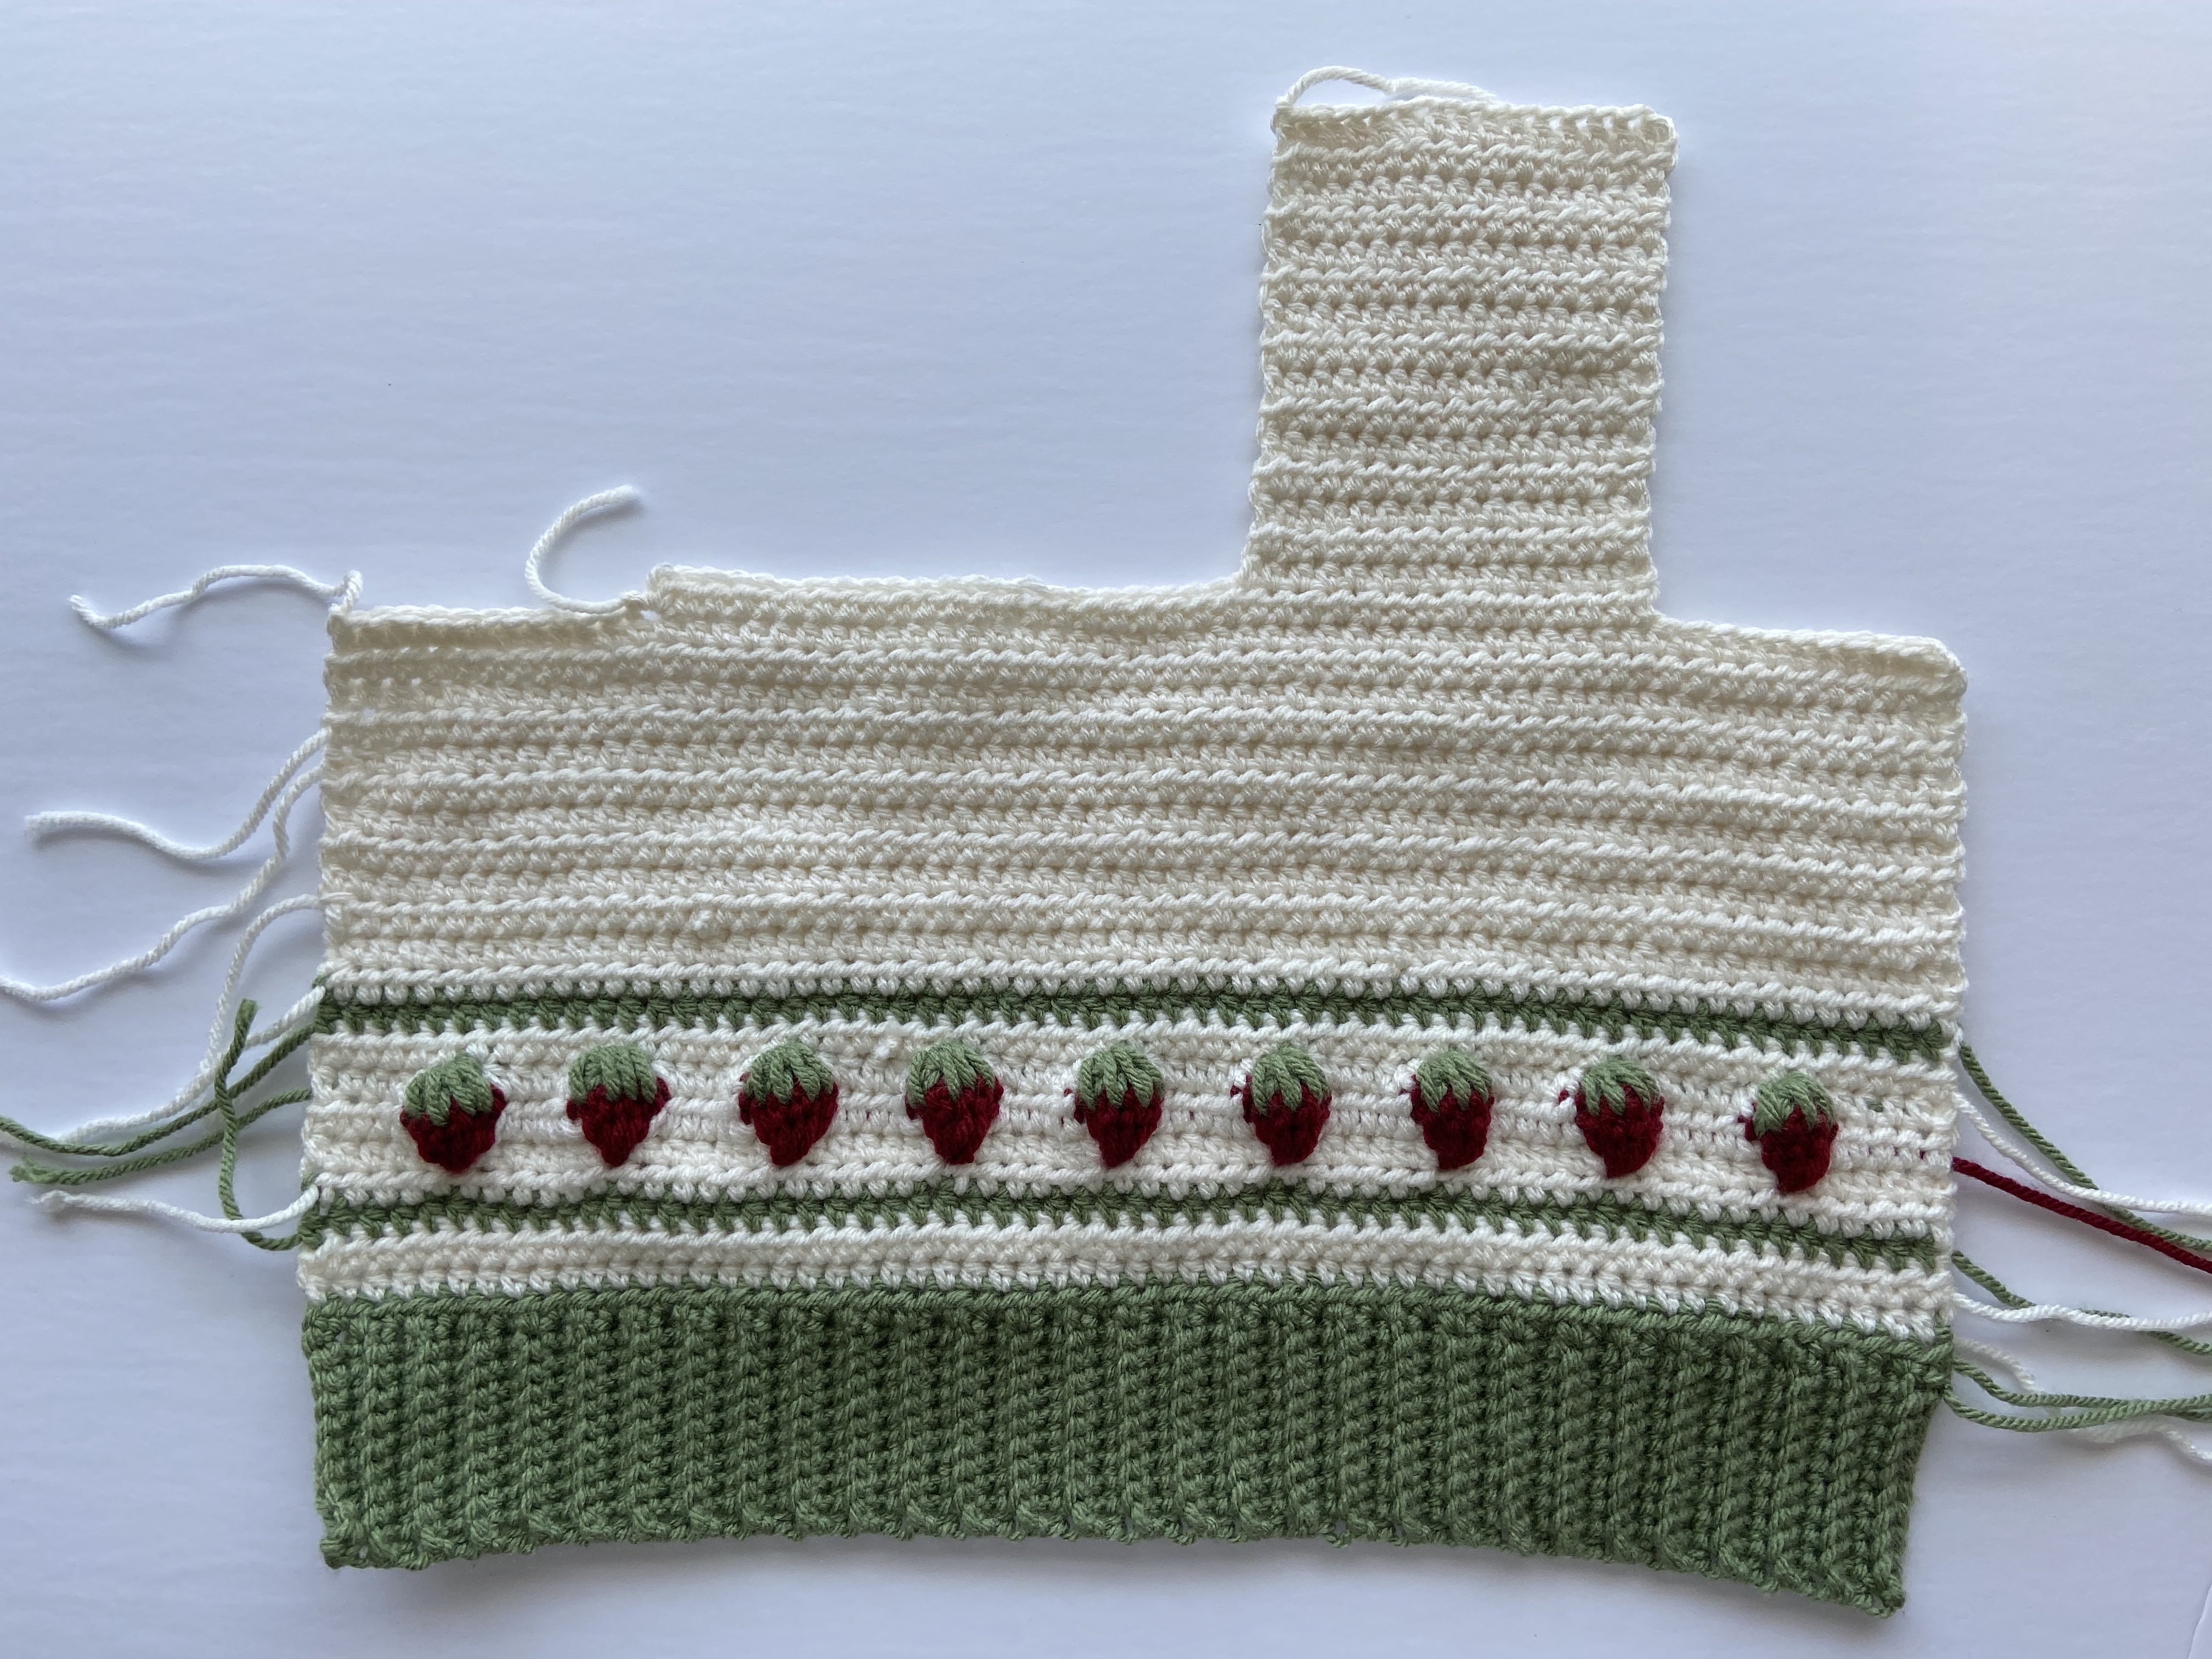
Right Strap
Row 39 <41 M and L, 43 XL and L>: Count 6 sts, attach color B yarn, ch 1, hdc in next 10 (11 M, 12 L, 13 XL, 14 2XL) sts. Ch 1, turn your work. <10, 11, 12, 13, 14>
Row 40 <42 M and L, 44 XL and 2XL>: Hdc in next 8 (9 M, 10 L, 11 XL, 12 2XL) sts, sk st, hdc in last st. Ch 1, turn your work. <9, 10, 11, 12, 13>
Row 41 <43 M and L, 44 XL and 2XL>: Sk first st, hdc in next 8 ( 9 M, 10 L, 11 XL, 12 2XL) sts. Ch 1, turn your work. <8, 9, 10, 11, 12>
Row 42 <44 M and L, 45 XL and 2XL>: Hdc in next 6 (7 M, 8 L, 9 XL, 10 2XL) sts, sk st, hdc in last st. Ch 1, turn your work. <7, 8, 9, 10, 11>
Row 43 <45 M and L, 47 XL and 2XL>: Sk st, hdc in next 6 (7 M, 8 L, 9 XL, 10 2XL) sts. Ch 1, turn your work. <6, 7, 8, 9, 10>
Row 44 <46 M and L, 48 XL and 2XL>: Hdc in next 4 (5 M, 6 L, 7 XL, 8 2XL) sts, sk st, hdc in last st. <5, 6, 7, 8, 9>
Fasten off.
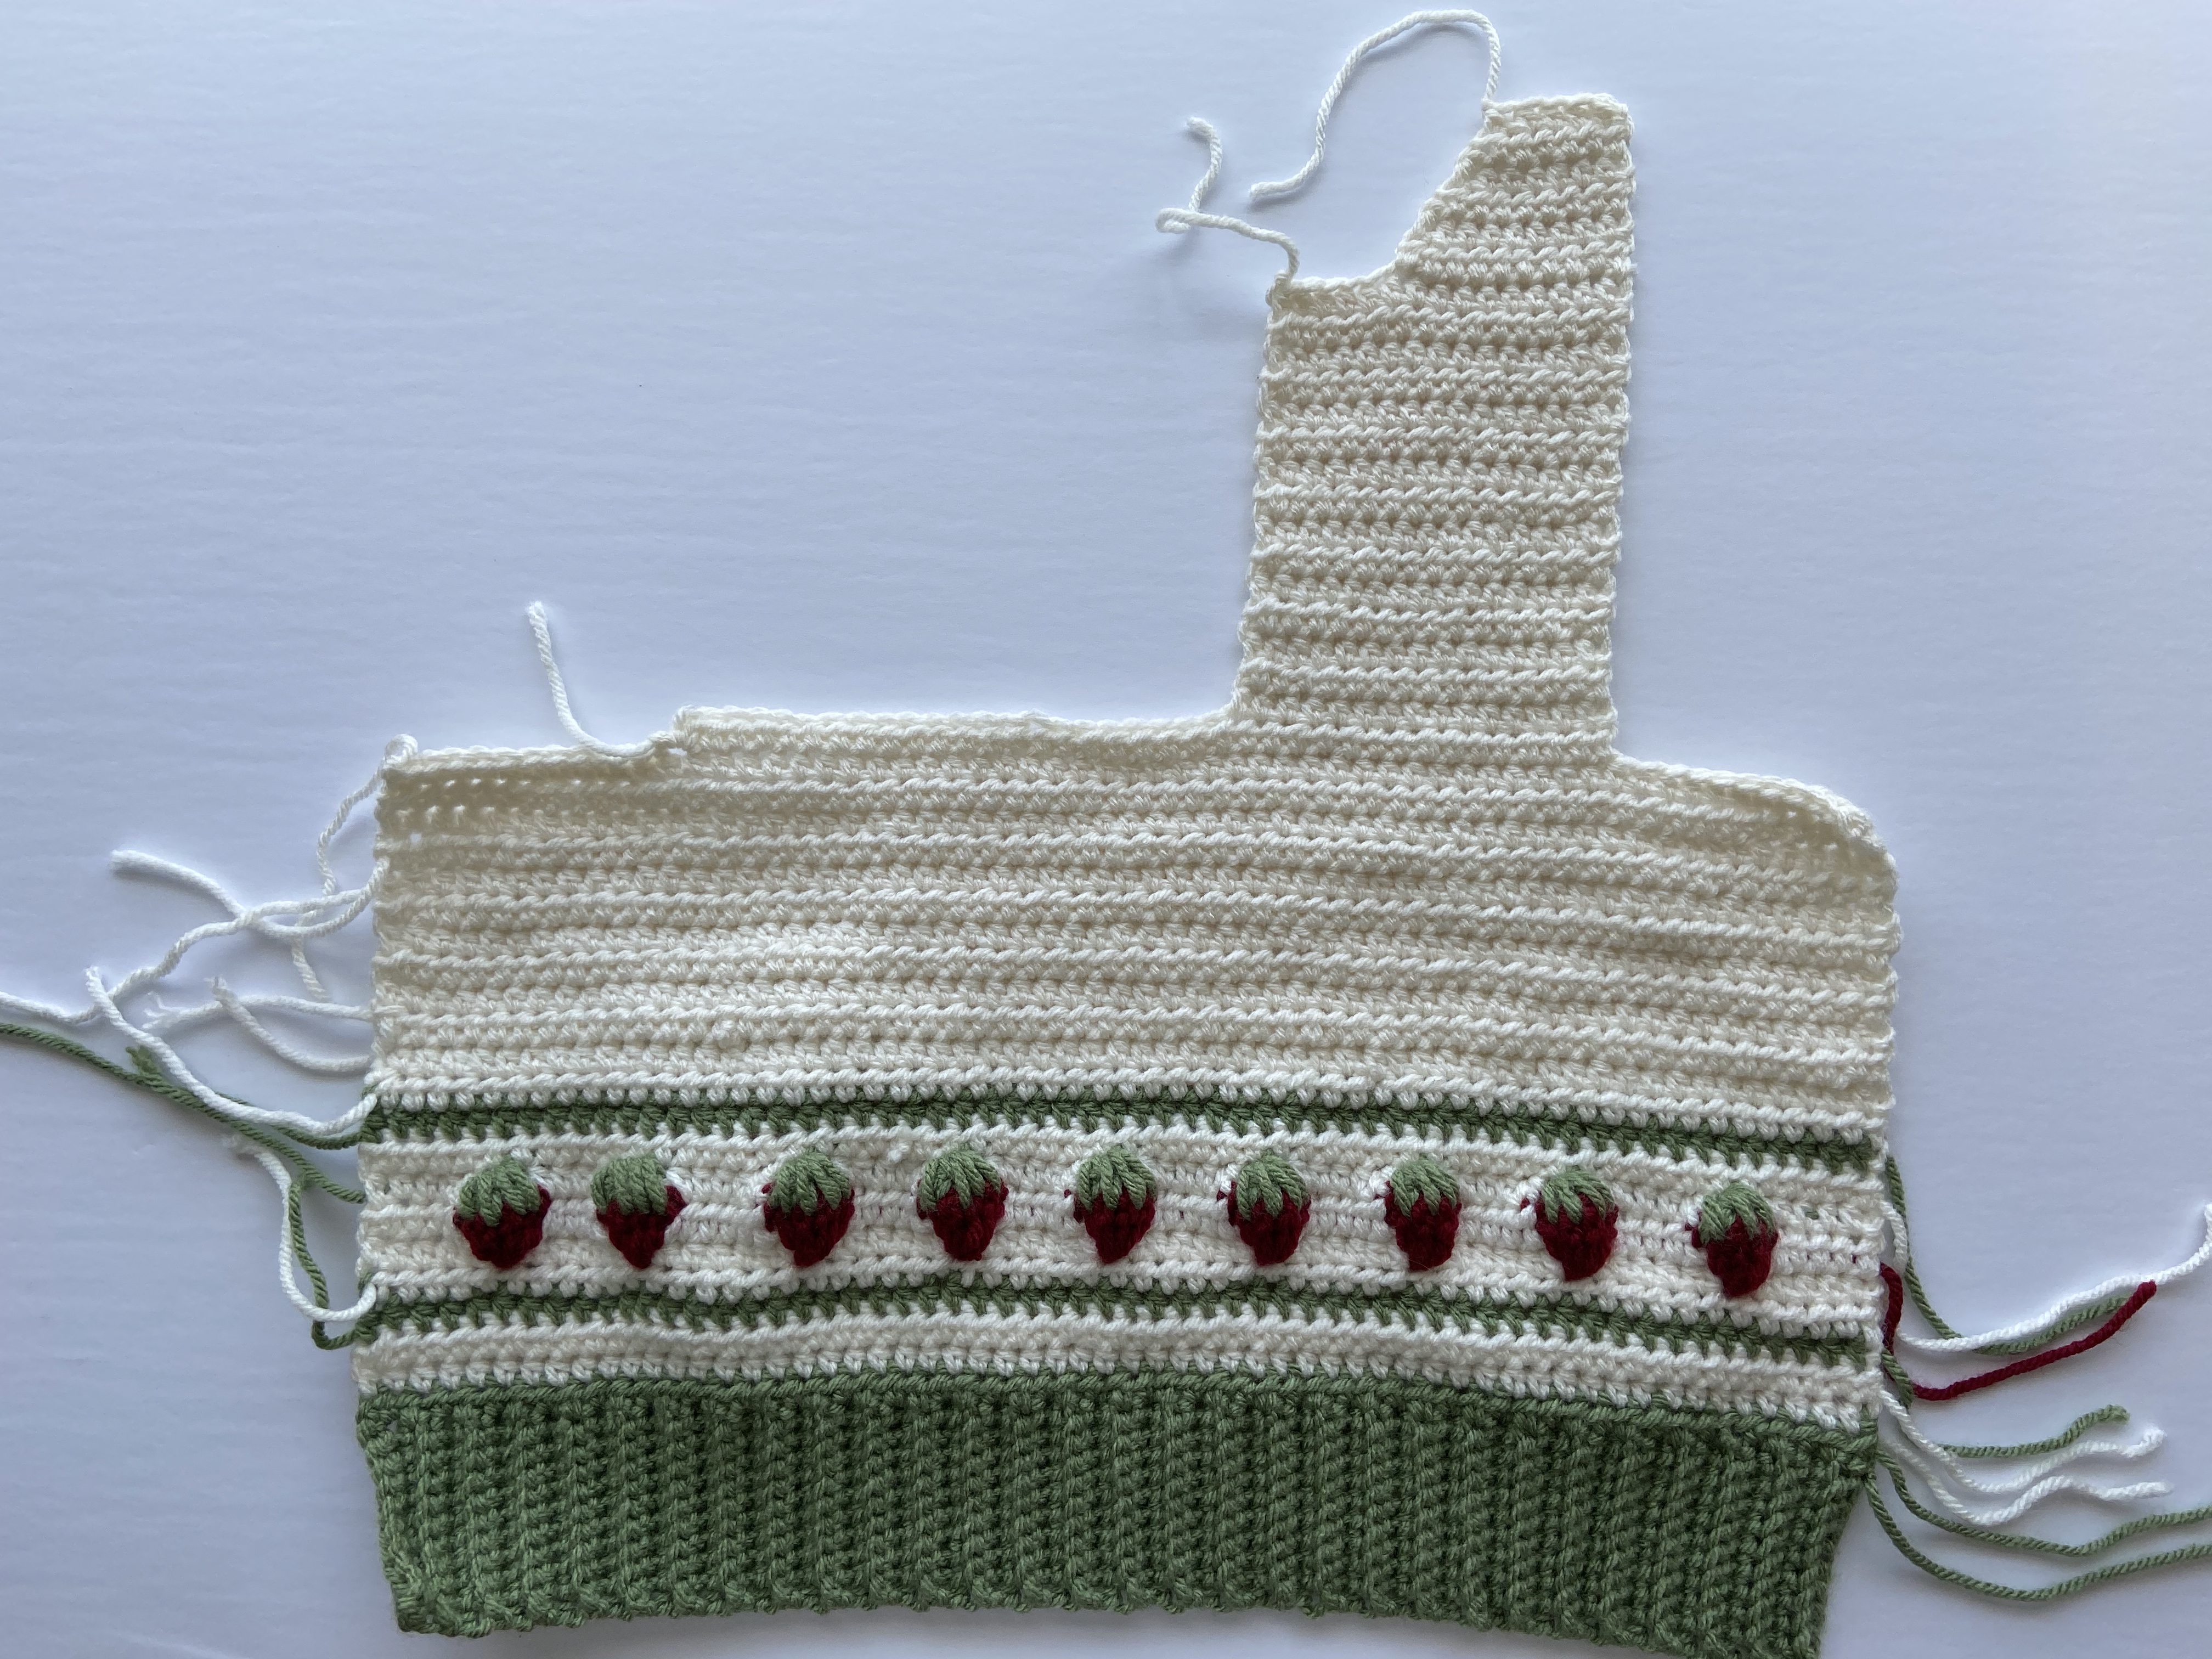
Left side of panel
Row 23 <25 M and L, 27 XL and 2XL>: Count 8 sts over from right side of panel (8 sts for ALL sizes) attach color B yarn, ch 1, hdc in remaining 15 (16 M, 17 L, 18 XL, 19 2XL) sts. Ch 1, turn your work. <15, 16, 17, 18, 19>
Row 24 <26 M and L, 28 XL and 2XL>: Hdc in each st until the end of the row. Ch 1, turn your work. <15, 16, 17, 18, 19>
Row 25-38 <27-40 M and L, 29-42 XL and 2XL>: Hdc in each st until the end of the row. Ch 1, turn your work. <15, 16, 17, 18, 19>
Left Strap
Row 39 <41 M and L, 43 XL and 2XL>: Hdc in next 10 (11 M, 12 L, 13 XL, 14 2XL) sts. Ch 1, turn your work. <10 , 11 , 12, 13, 14>
Row 40 <42 M and L, 44 XL and 2XL>: Sk st, hdc in next 9 (10 M, 11 L, 12 XL, 13 2XL) sts. Ch 1, turn your work. <9, 10, 11, 12, 13>
Row 41 <43 M and L, 45 XL and 2XL>: Hdc in next 7 (8 M, 9 L, 10 XL, 11 2XL) sk st, hdc in last st. Ch 1, turn your work. <8, 9, 10, 11, 12>
Row 42 <44 M and L, 46 XL and 2XL>: Sk st, hdc in next 7 (8 M, 9 L, 10 XL, 11 2XL) sts. Ch 1, turn your work. <7, 8, 9, 10, 11>
Row 43 <45 M and L, 47 XL and 2XL>: Hdc in next 5 (6 M, 7 L, 8 XL, 9 2XL) sts, sk st, hdc in last st. Ch 1, turn your work. <6, 7, 8, 9, 10>
Row 44 <46 M and L, 48 XL and 2XL>: Sk st, hdc in next 5 (6 M, 7 L, 8 XL, 9 2XL> sts. <5, 6, 7, 8, 9>
Fasten off.
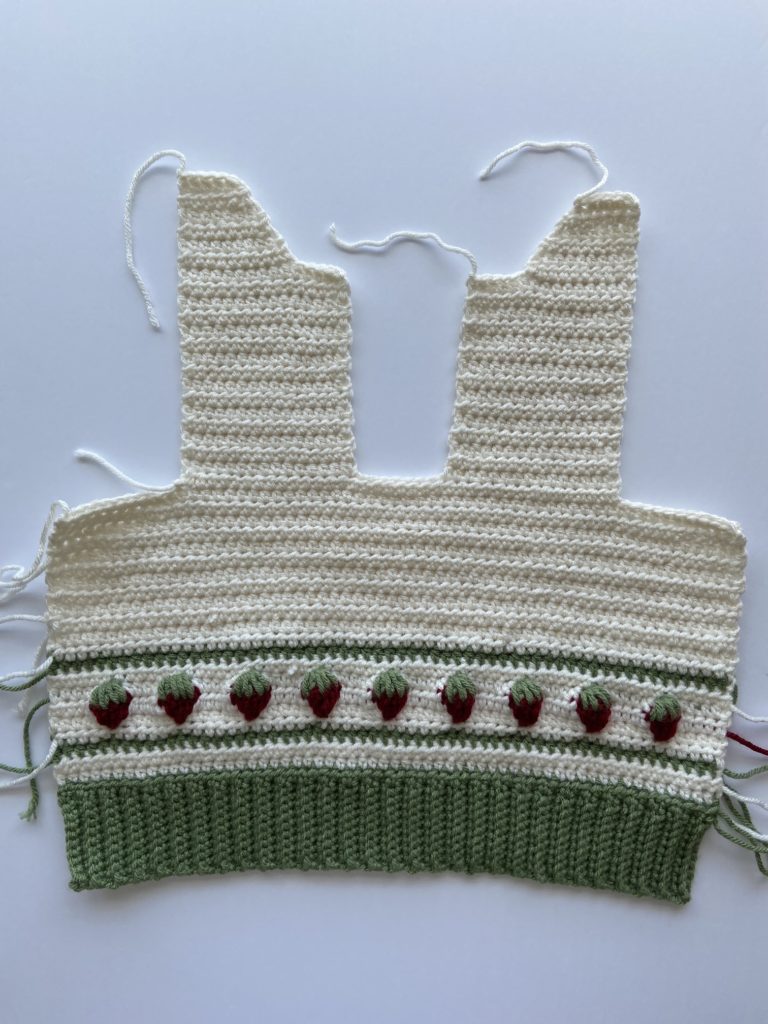
Back Panel
Repeat front panel pattern up to row 23 (25 M and L, 27 XL and 2XL)
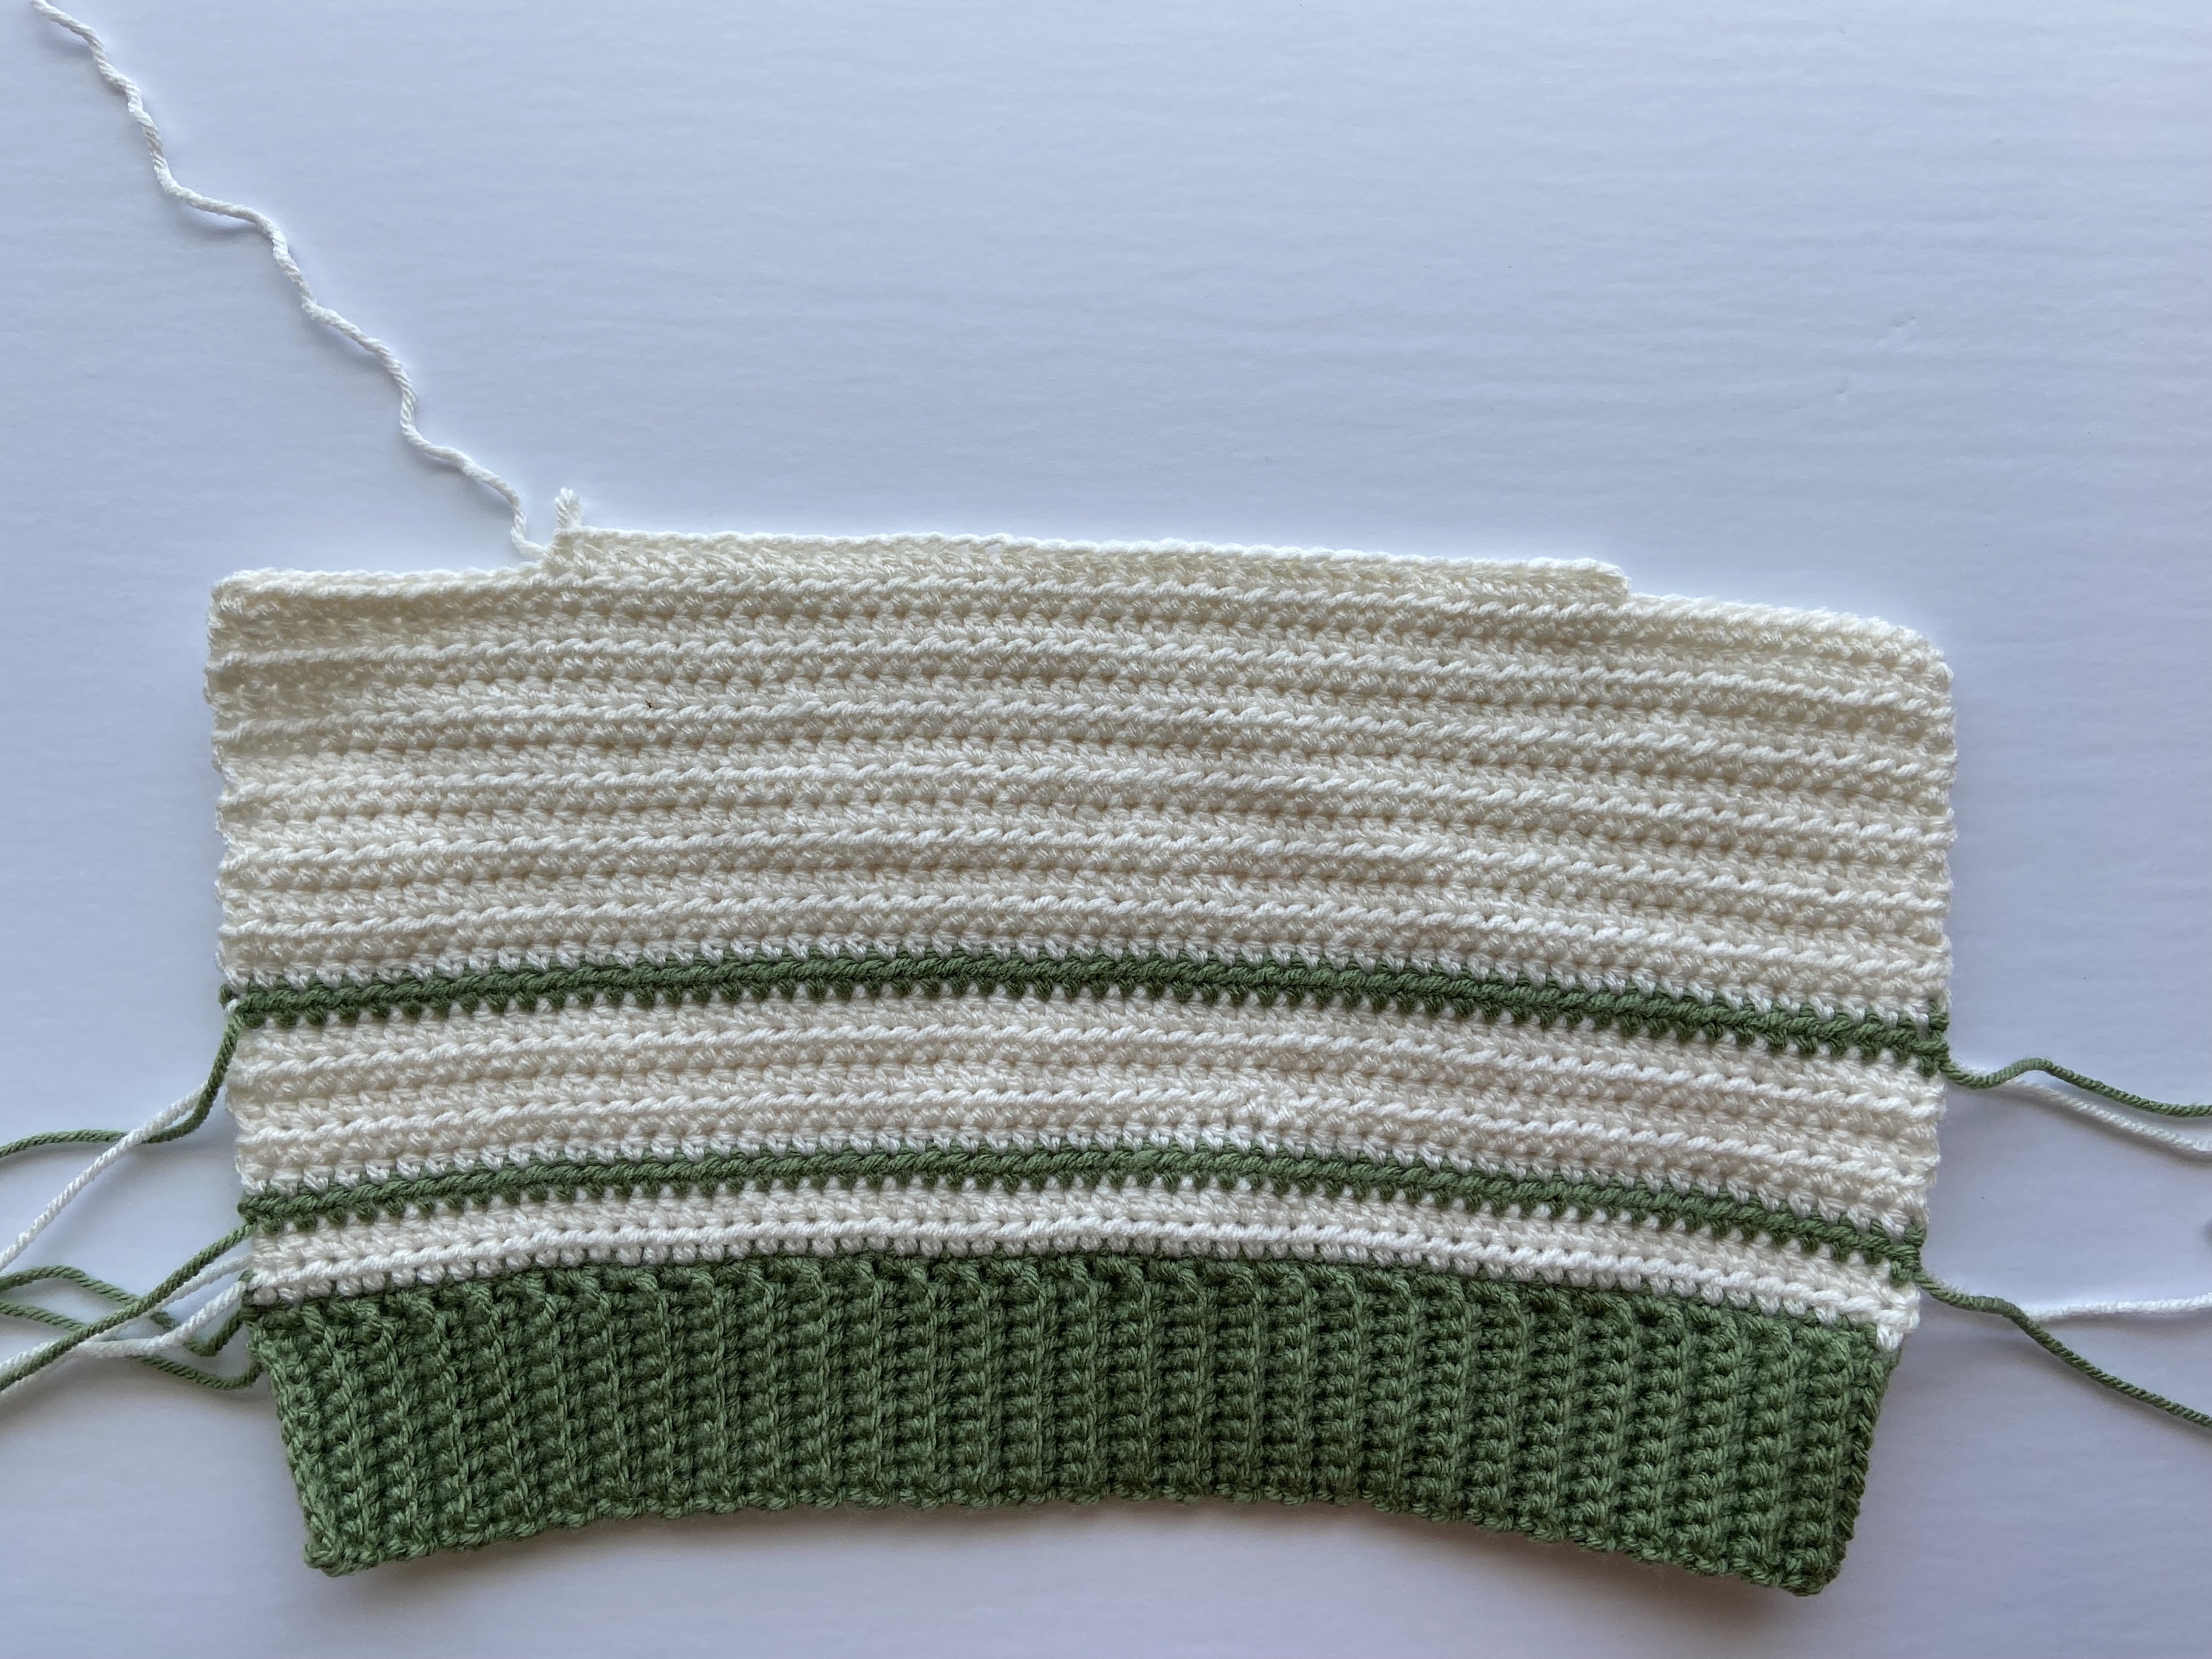
Row 24 <26 M and L, 28 XL and 2XL>: Hdc in each st until the end of the row. Ch 1, turn your work. <37, 39, 41, 43, 45>
Row 25-43 <27-45 M and L, 29-47 XL and 2XL>: Hdc in each st until the end of the row. Ch 1, turn your work. <37, 38, 41, 43, 45>

Row 44 <45 M and L, 47 XL and 2XL>: Hdc in first 5 (6 M, 7 L, 8 XL, 9 2XL) sts, fasten off, count over to the last 5 (6 M, 7 L, 8 XL, 9 2XL) sts, attach yarn, ch 1, hdc in last 5 sts.
Fasten off.
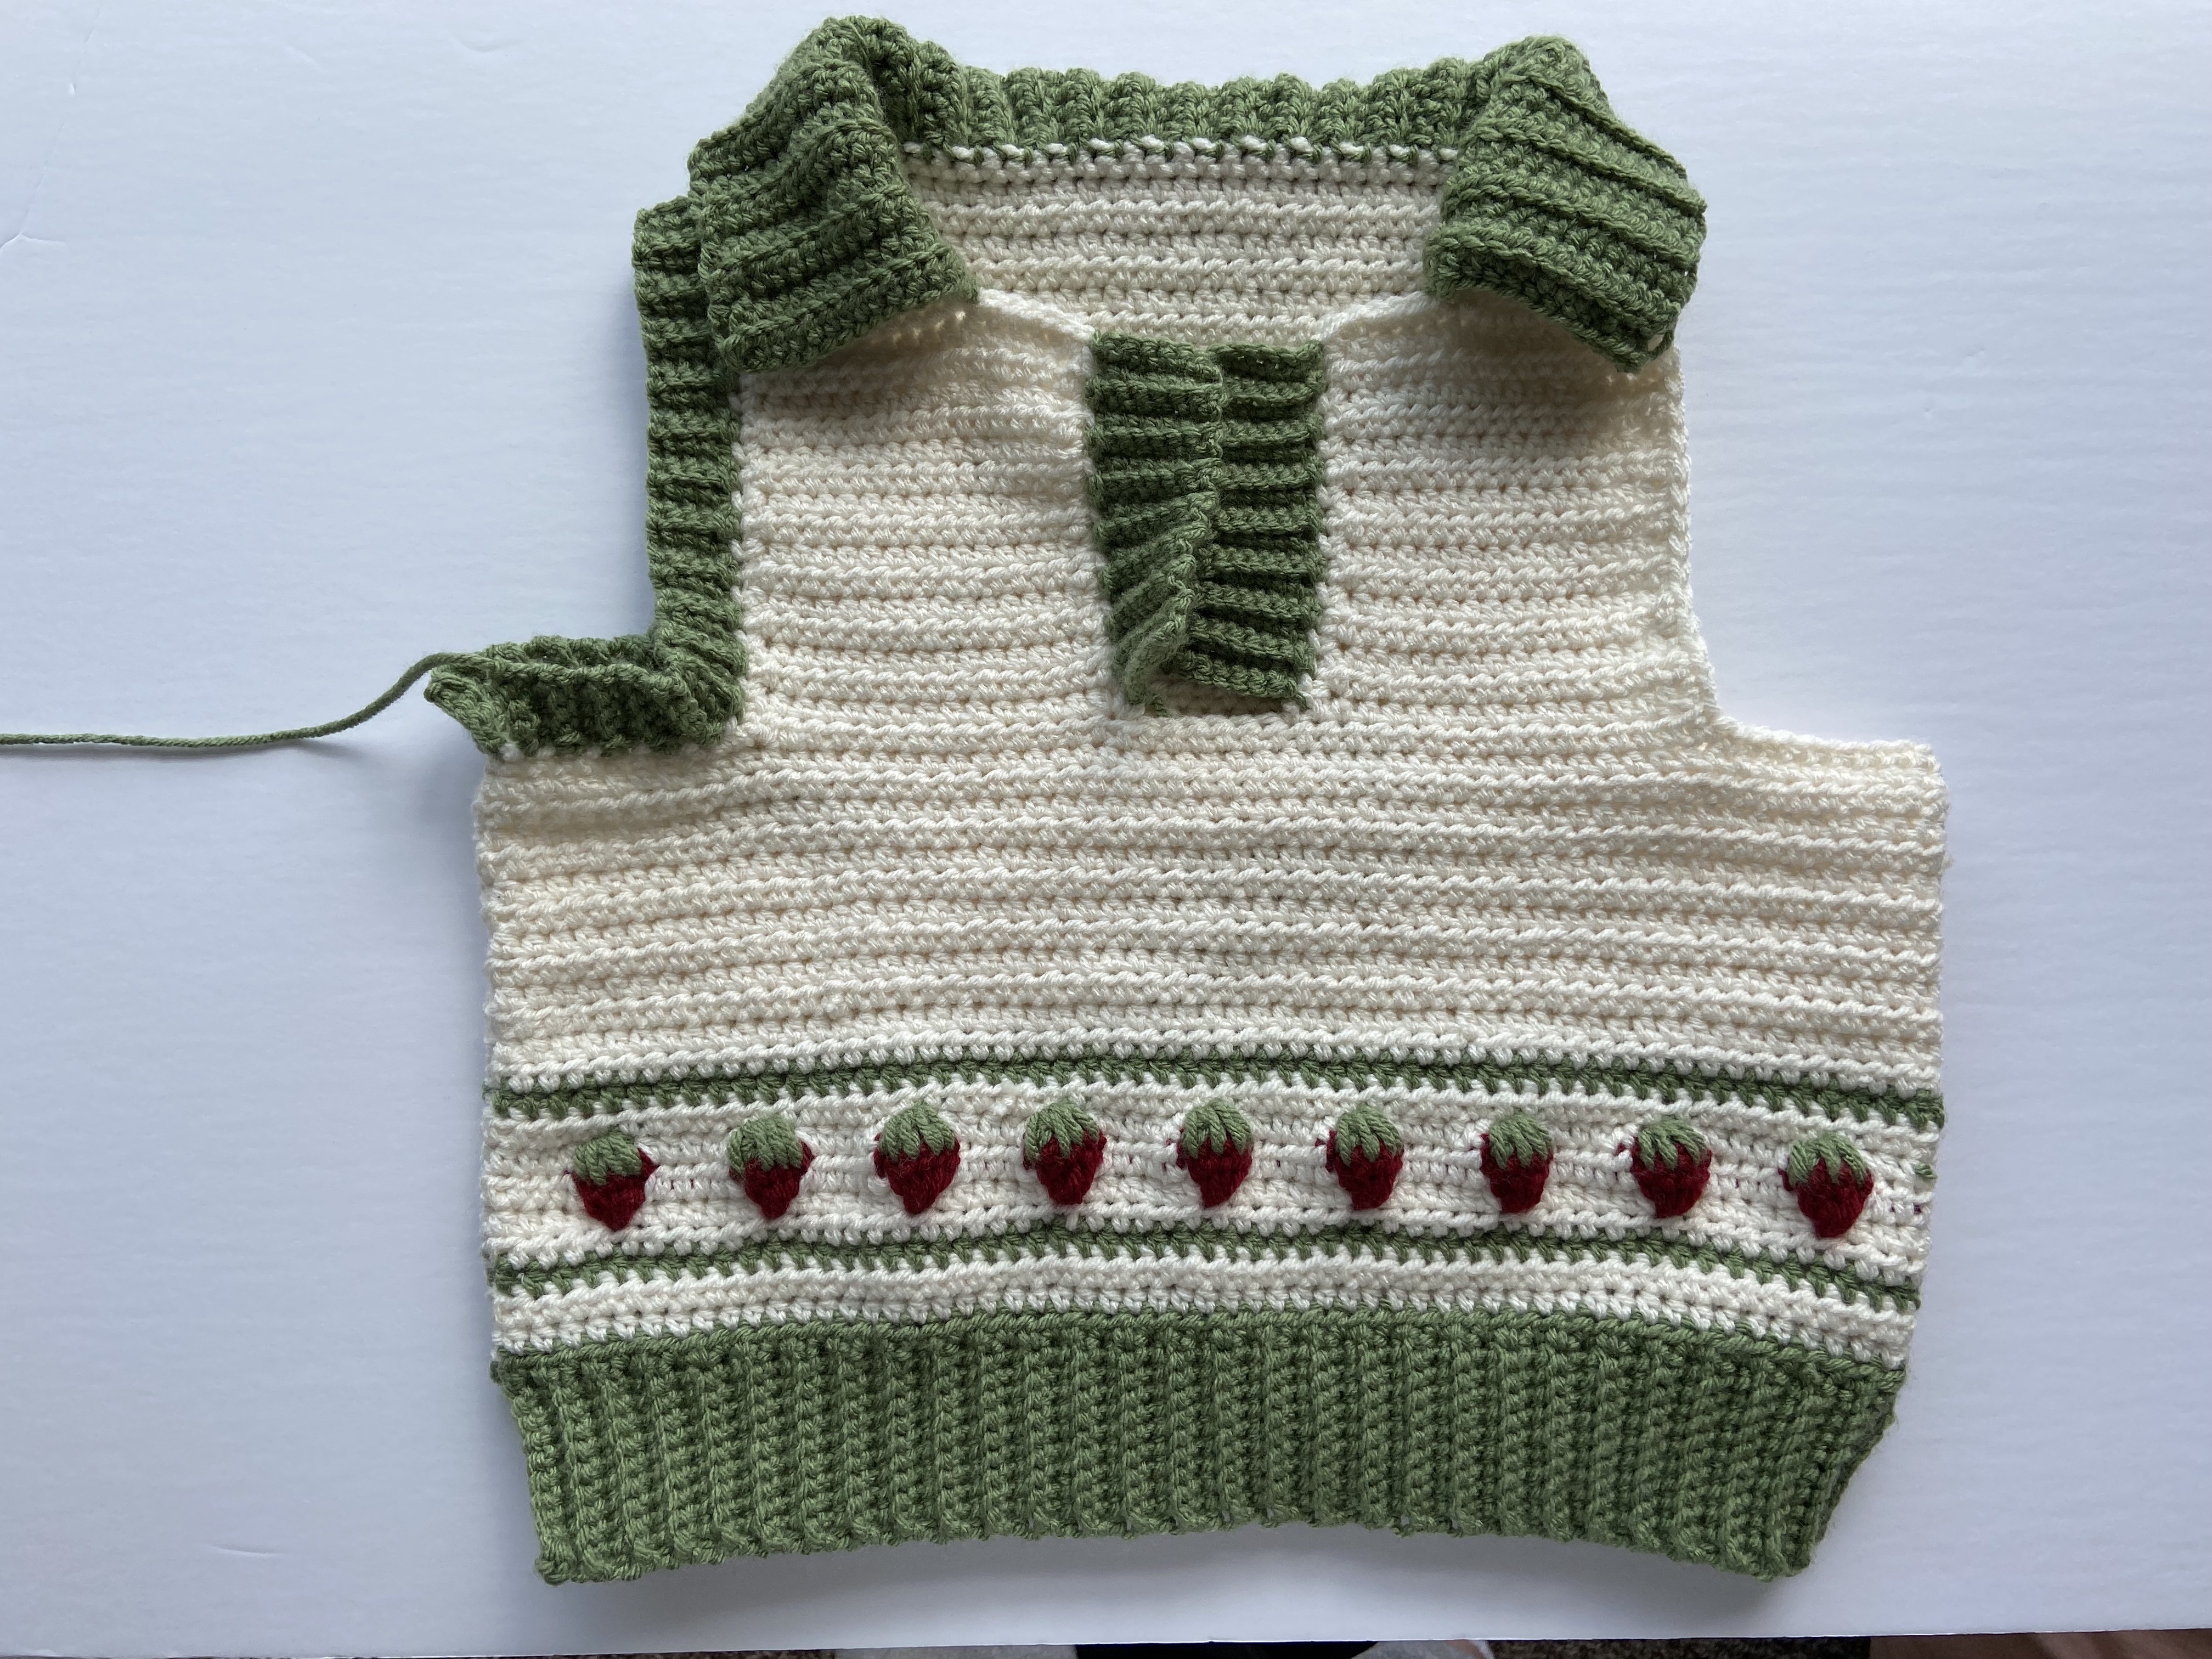
Sew both panels together INSIDE OUT. After you’re done sewing the panels together, turn your vest OUTSIDE IN to continue with pattern.
This part is optional, but I like to do a single crochet border/edging around the neck hole and armholes because I feel like it gives it a slightly cleaner look, but it is not necessary. There is no exact number to single crochet around, just do it for your personal size, just make sure that both arm holes have the same number of single crochet so neither arm will be tighter or looser than the other.
BUT if you want to, simply..
Sc around v-neck/neck opening and around arm holes
Here’s a before and after the sc border/edging..

Before Edging After Edging
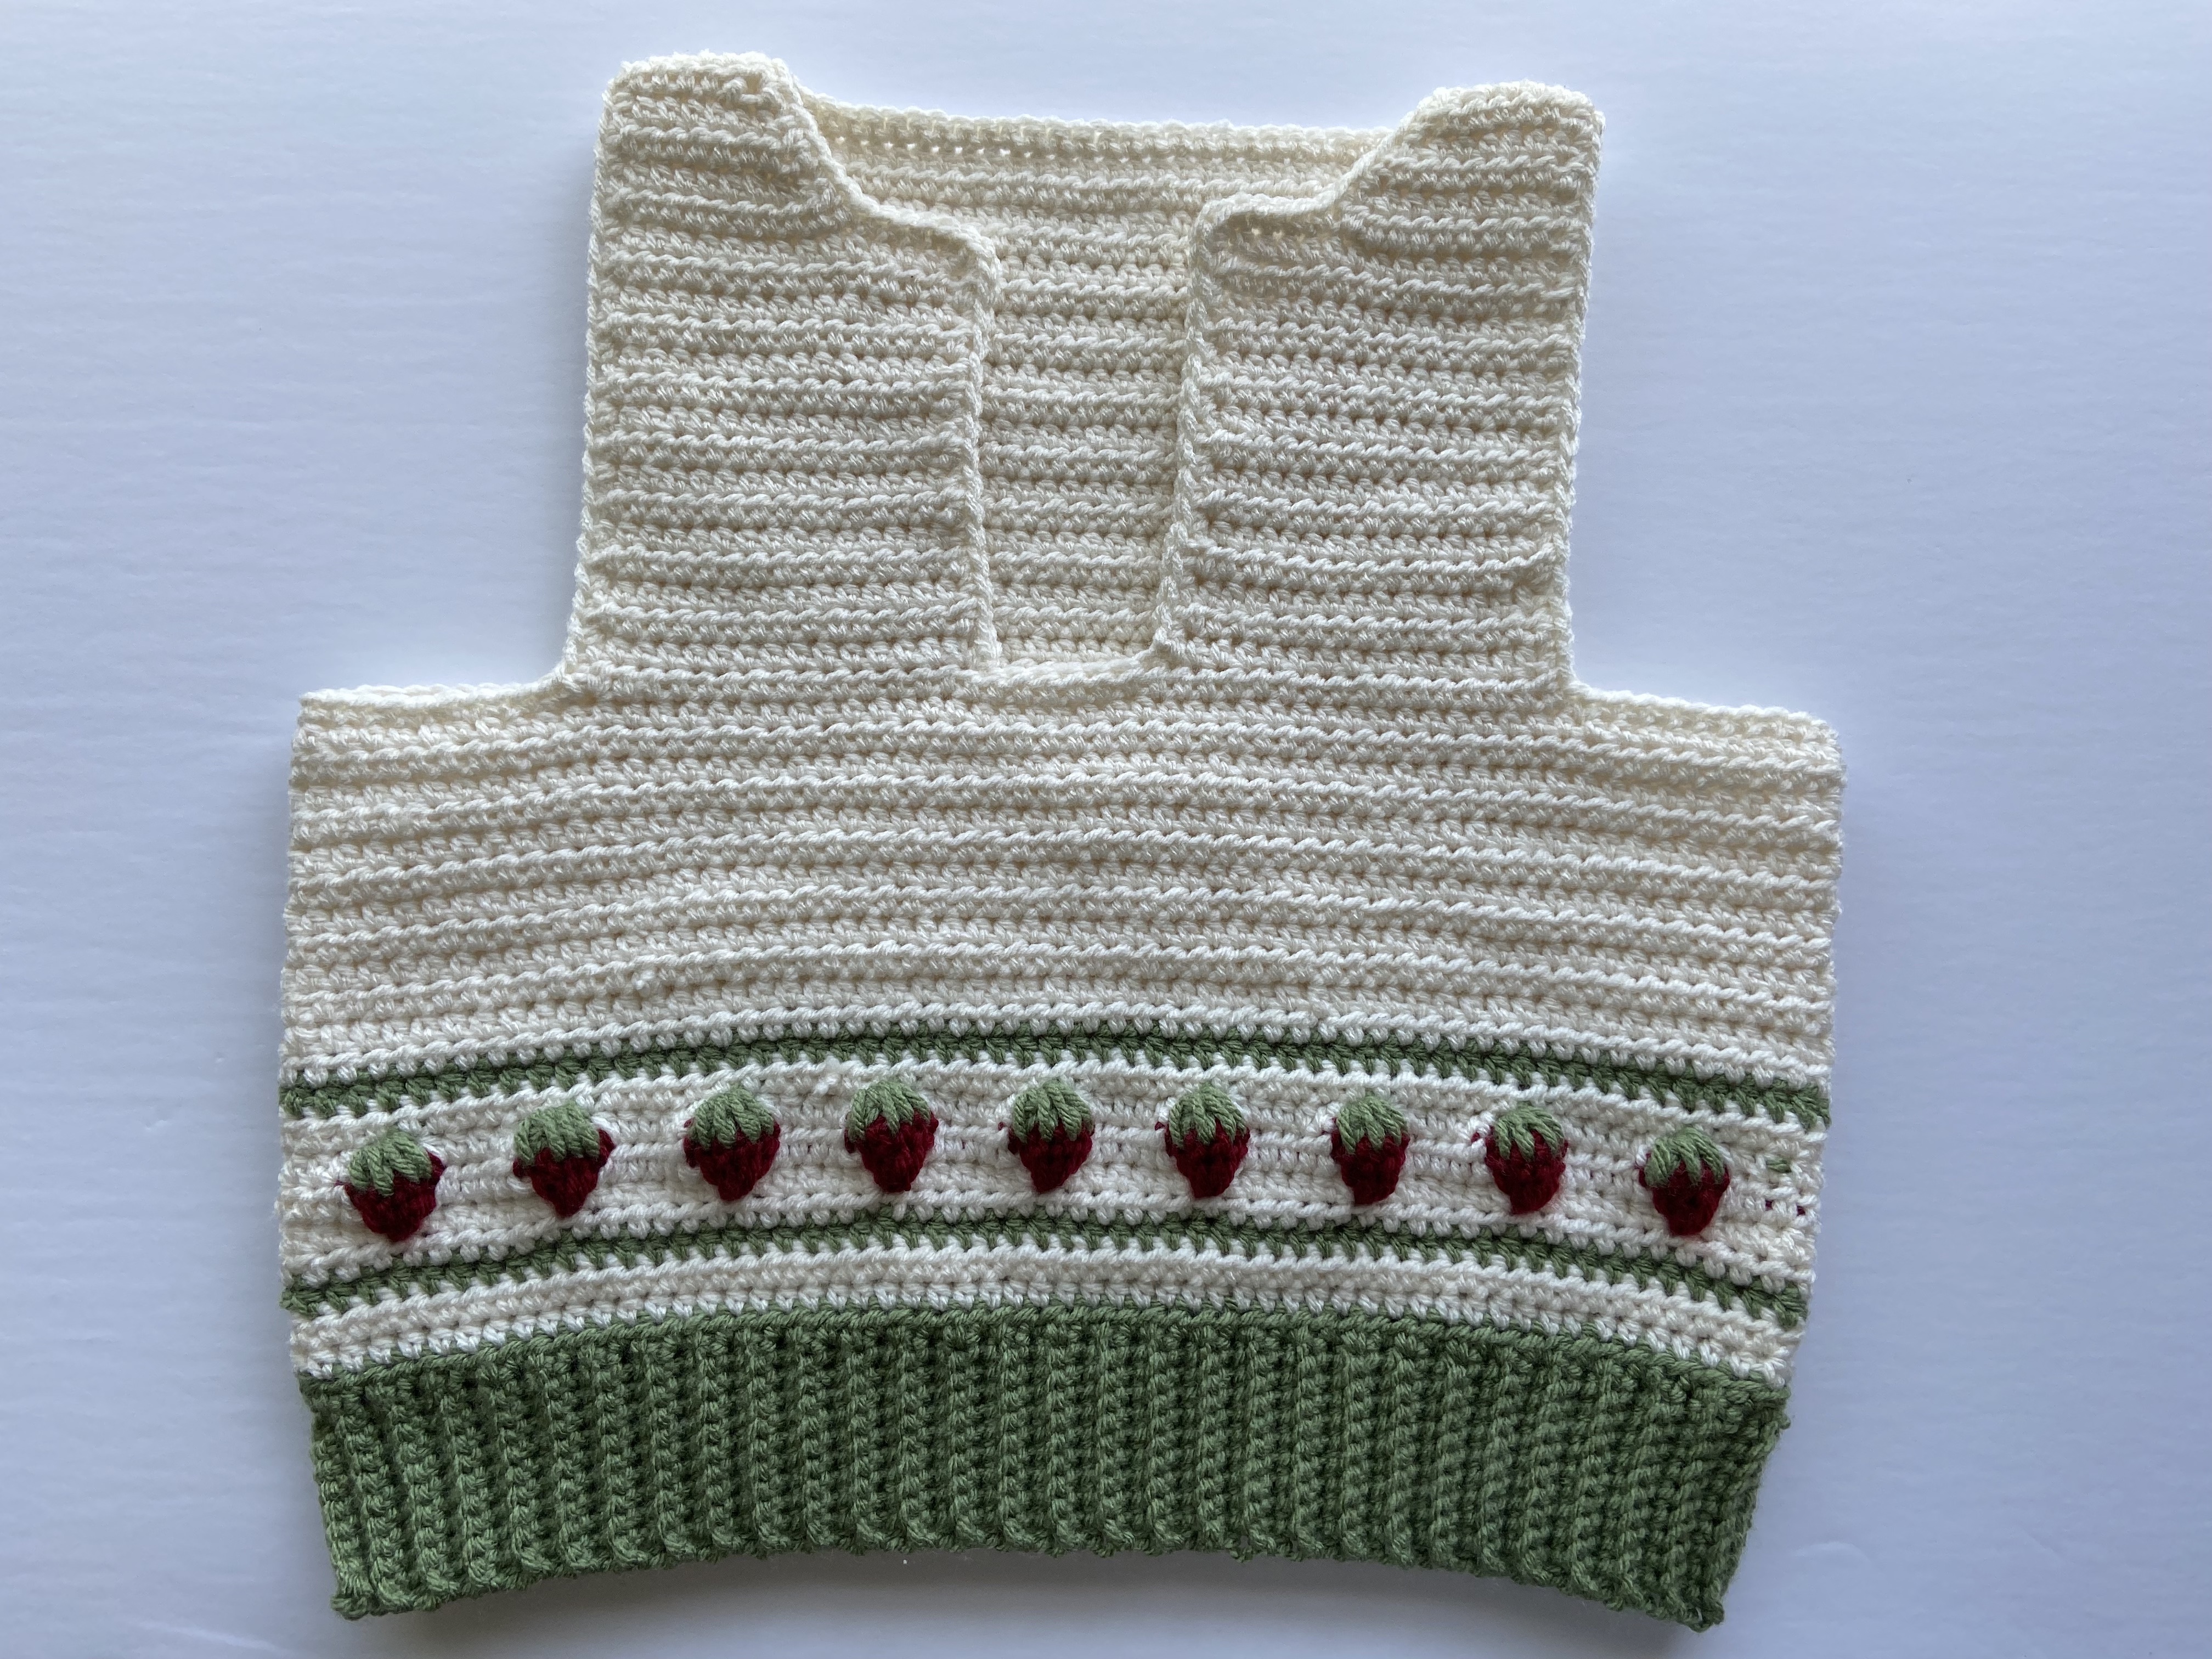
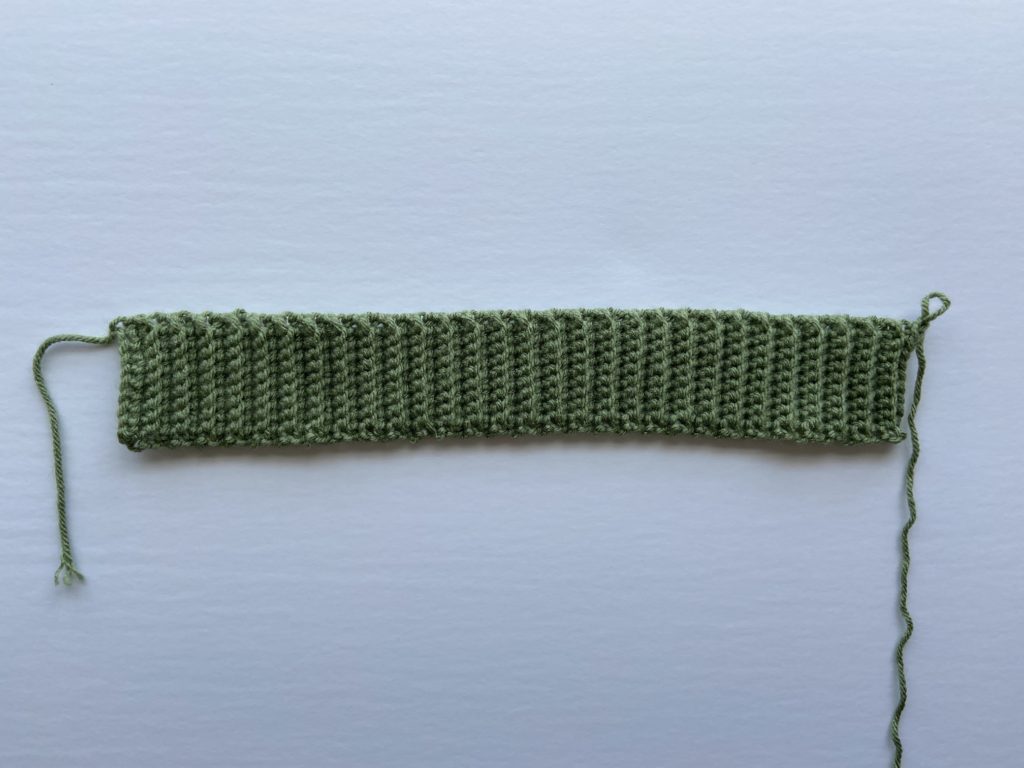
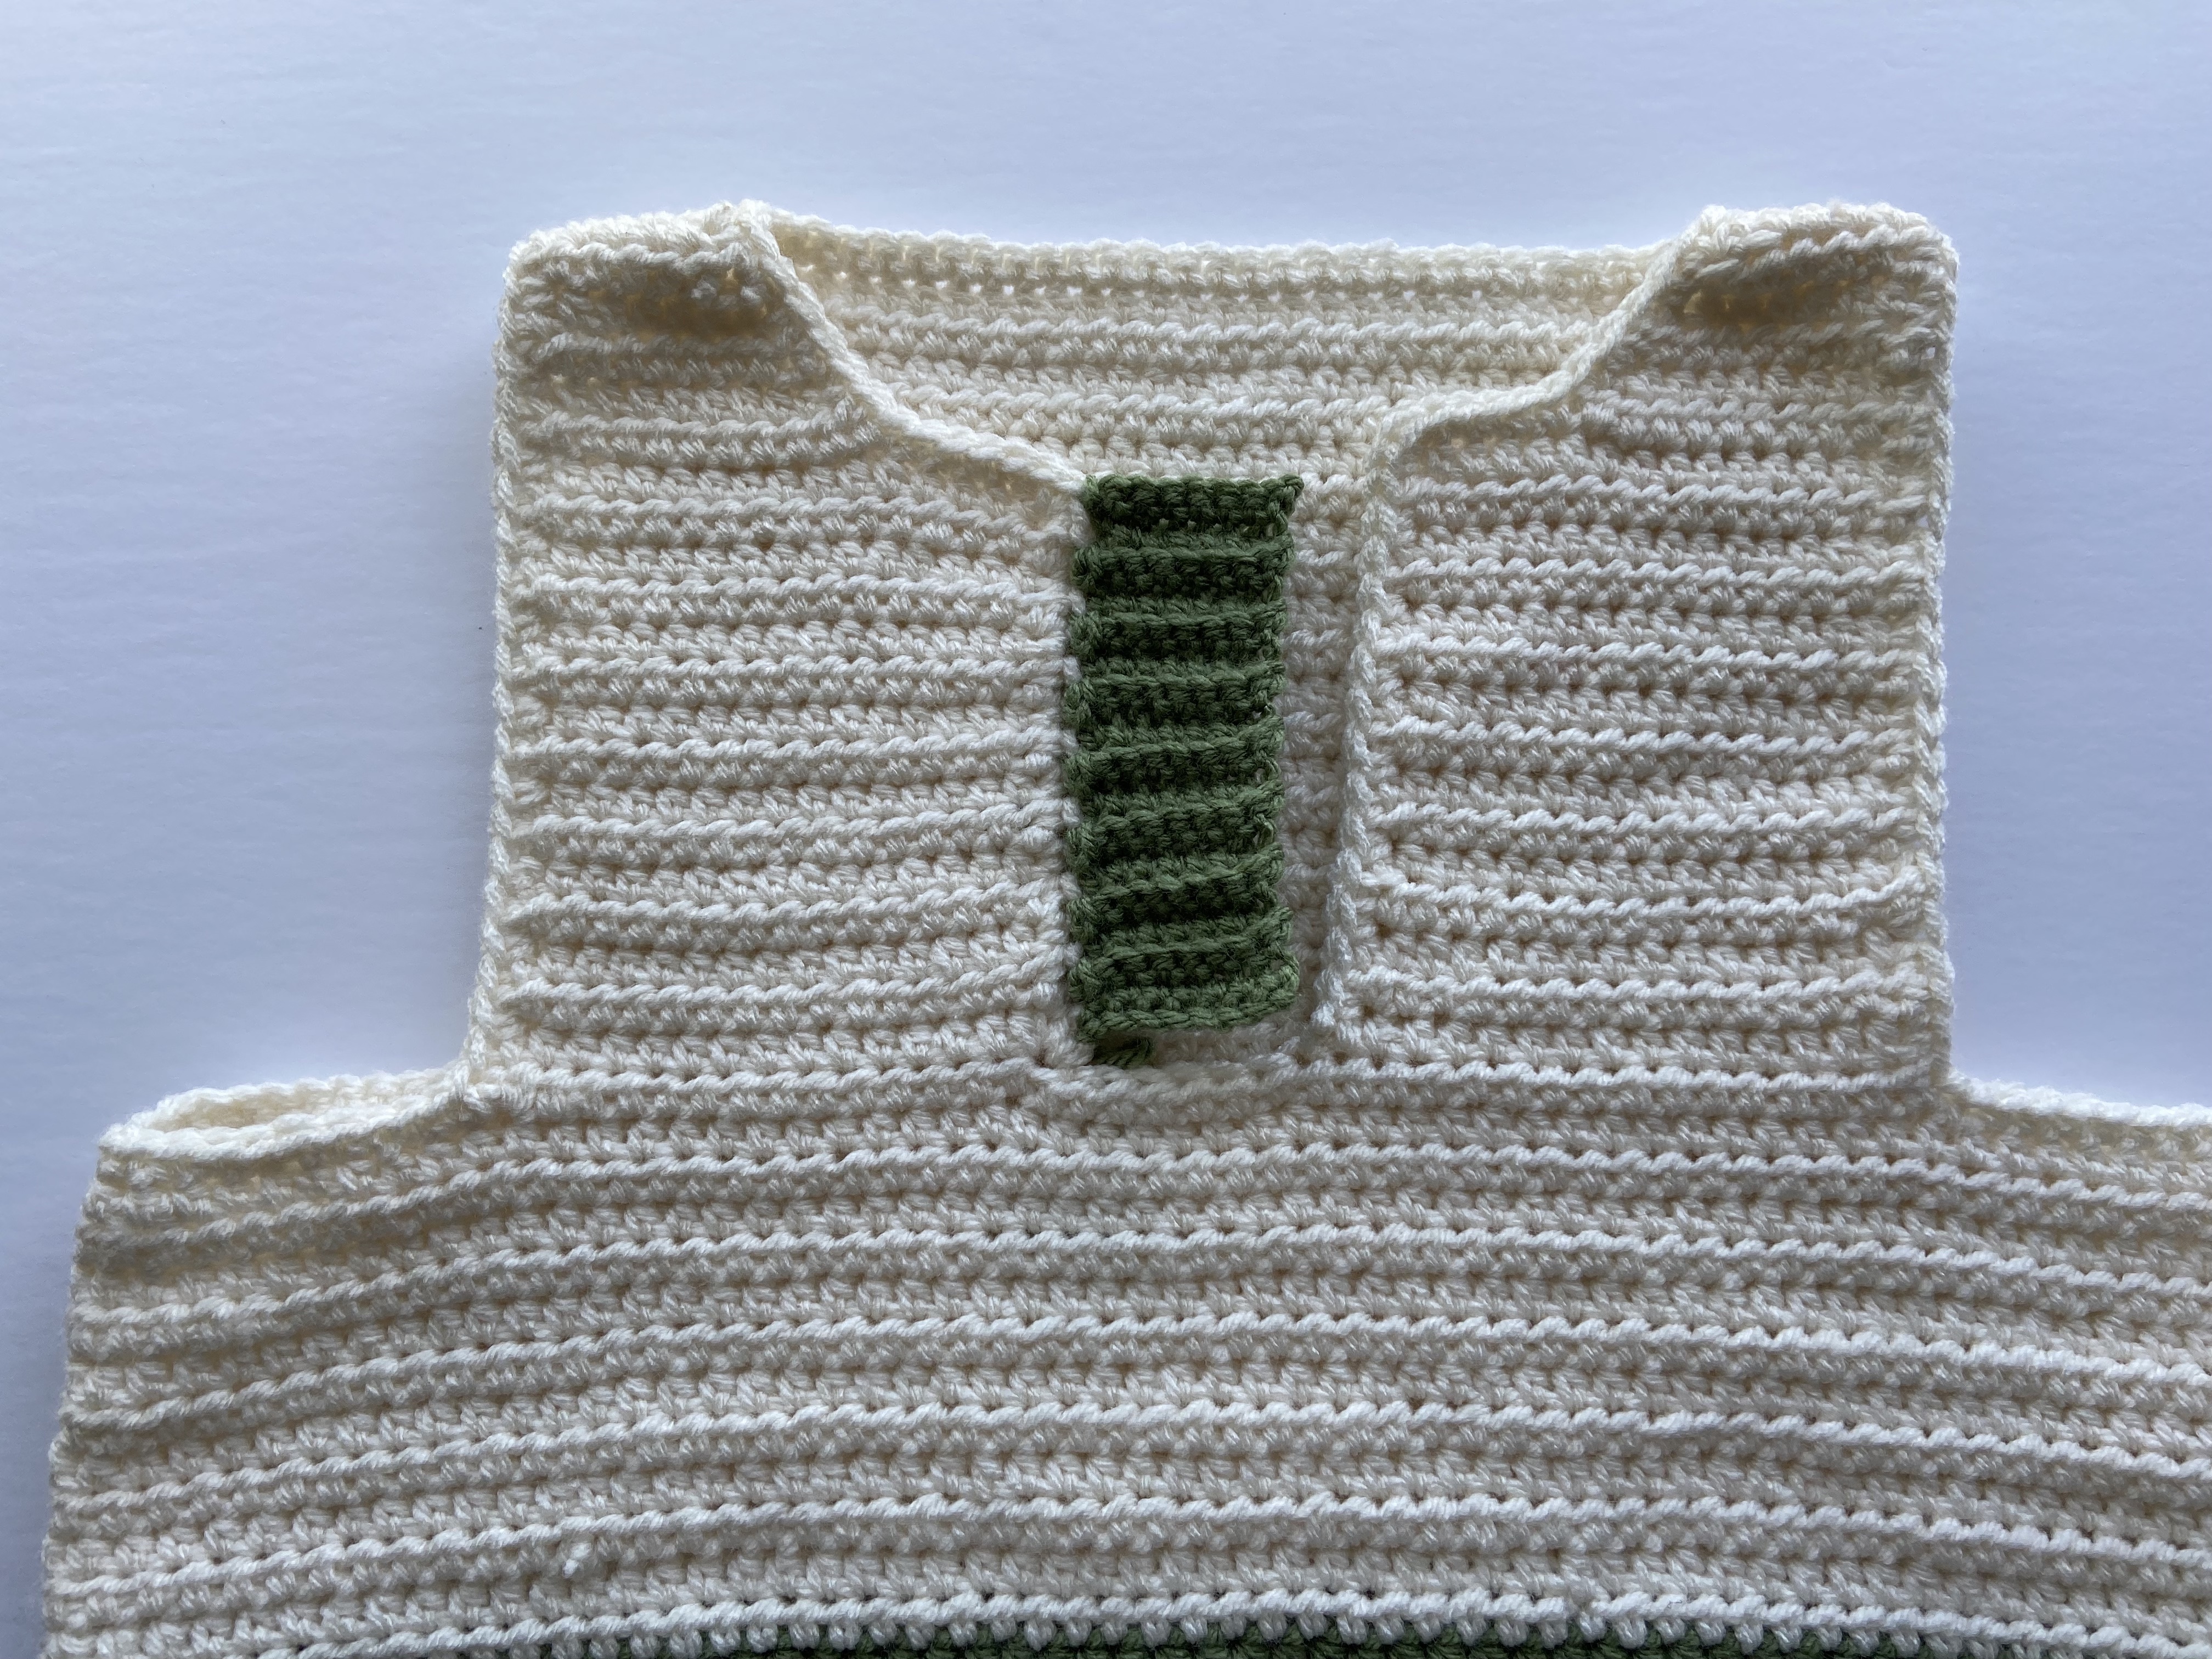
V-Neck Ribbing
In my Youtube video for this pattern, I show you how to crochet your ribbing straight to your top but you don’t have to do it that way, you can just crochet 7 sts wide x however many long you need for your length for the v-neck size.
Ribbing widths apply to all sizes
Row 1: With color A, ch 8, sc in the second ch from the hook, sc in remaining 6 ch. Ch 1, turn your work. <7>
Row 2-the length you need for your size: sc blo in each st until the end of the row. Ch 1, turn your work. <7>
Fasten off.
Repeat for other side of the v-neck.
Sew ribbed piece to v-neck.
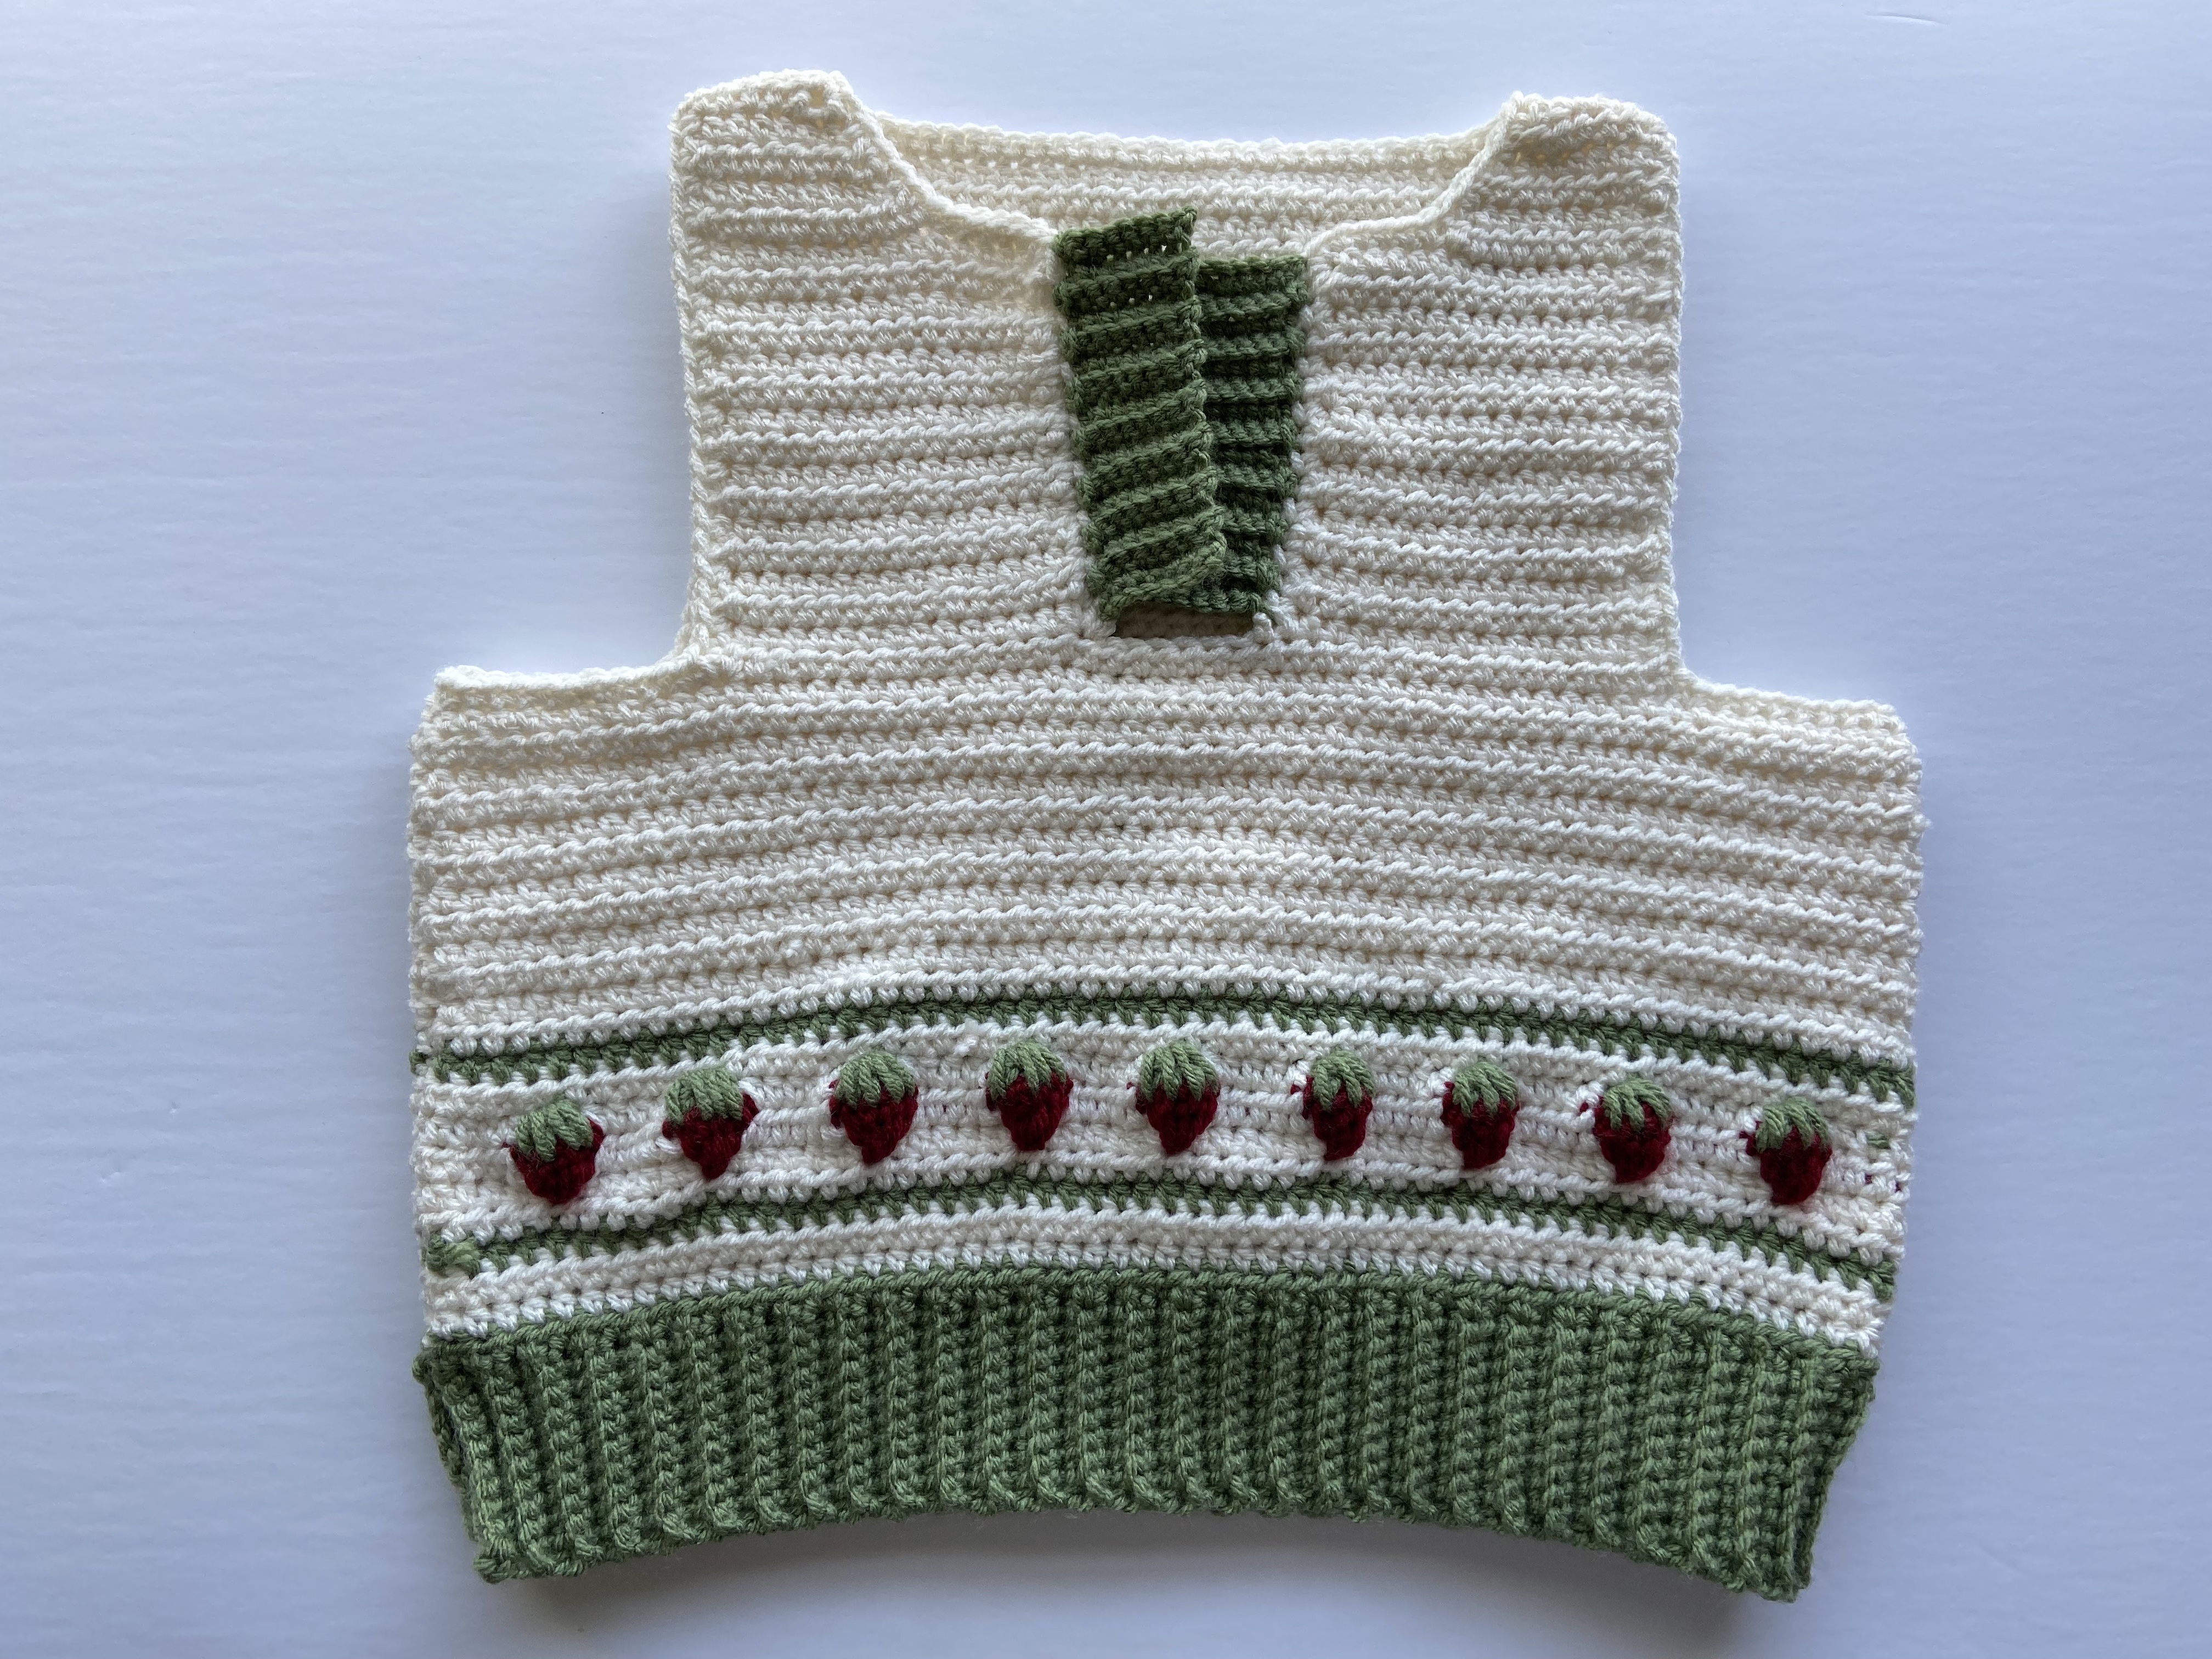
Collar
The collar is the only ribbing in this pattern that will be done in hdc instead of sc, like the rest of the ribbing used in this pattern. Similar as for the v-neck ribbing, it will be 15 sts wide x however long you need/want your collar to be
Row 1: With color A, ch 16, hdc in the second ch from the hook, hdc in the remaining 14 ch. Ch 1 and turn your work. <15>
Row 2-length you need for your size: Hdc blo in each st until the end of the row. Ch 1 and turn your work. <15>
Fasten off.
Sew ribbed piece to collar area.
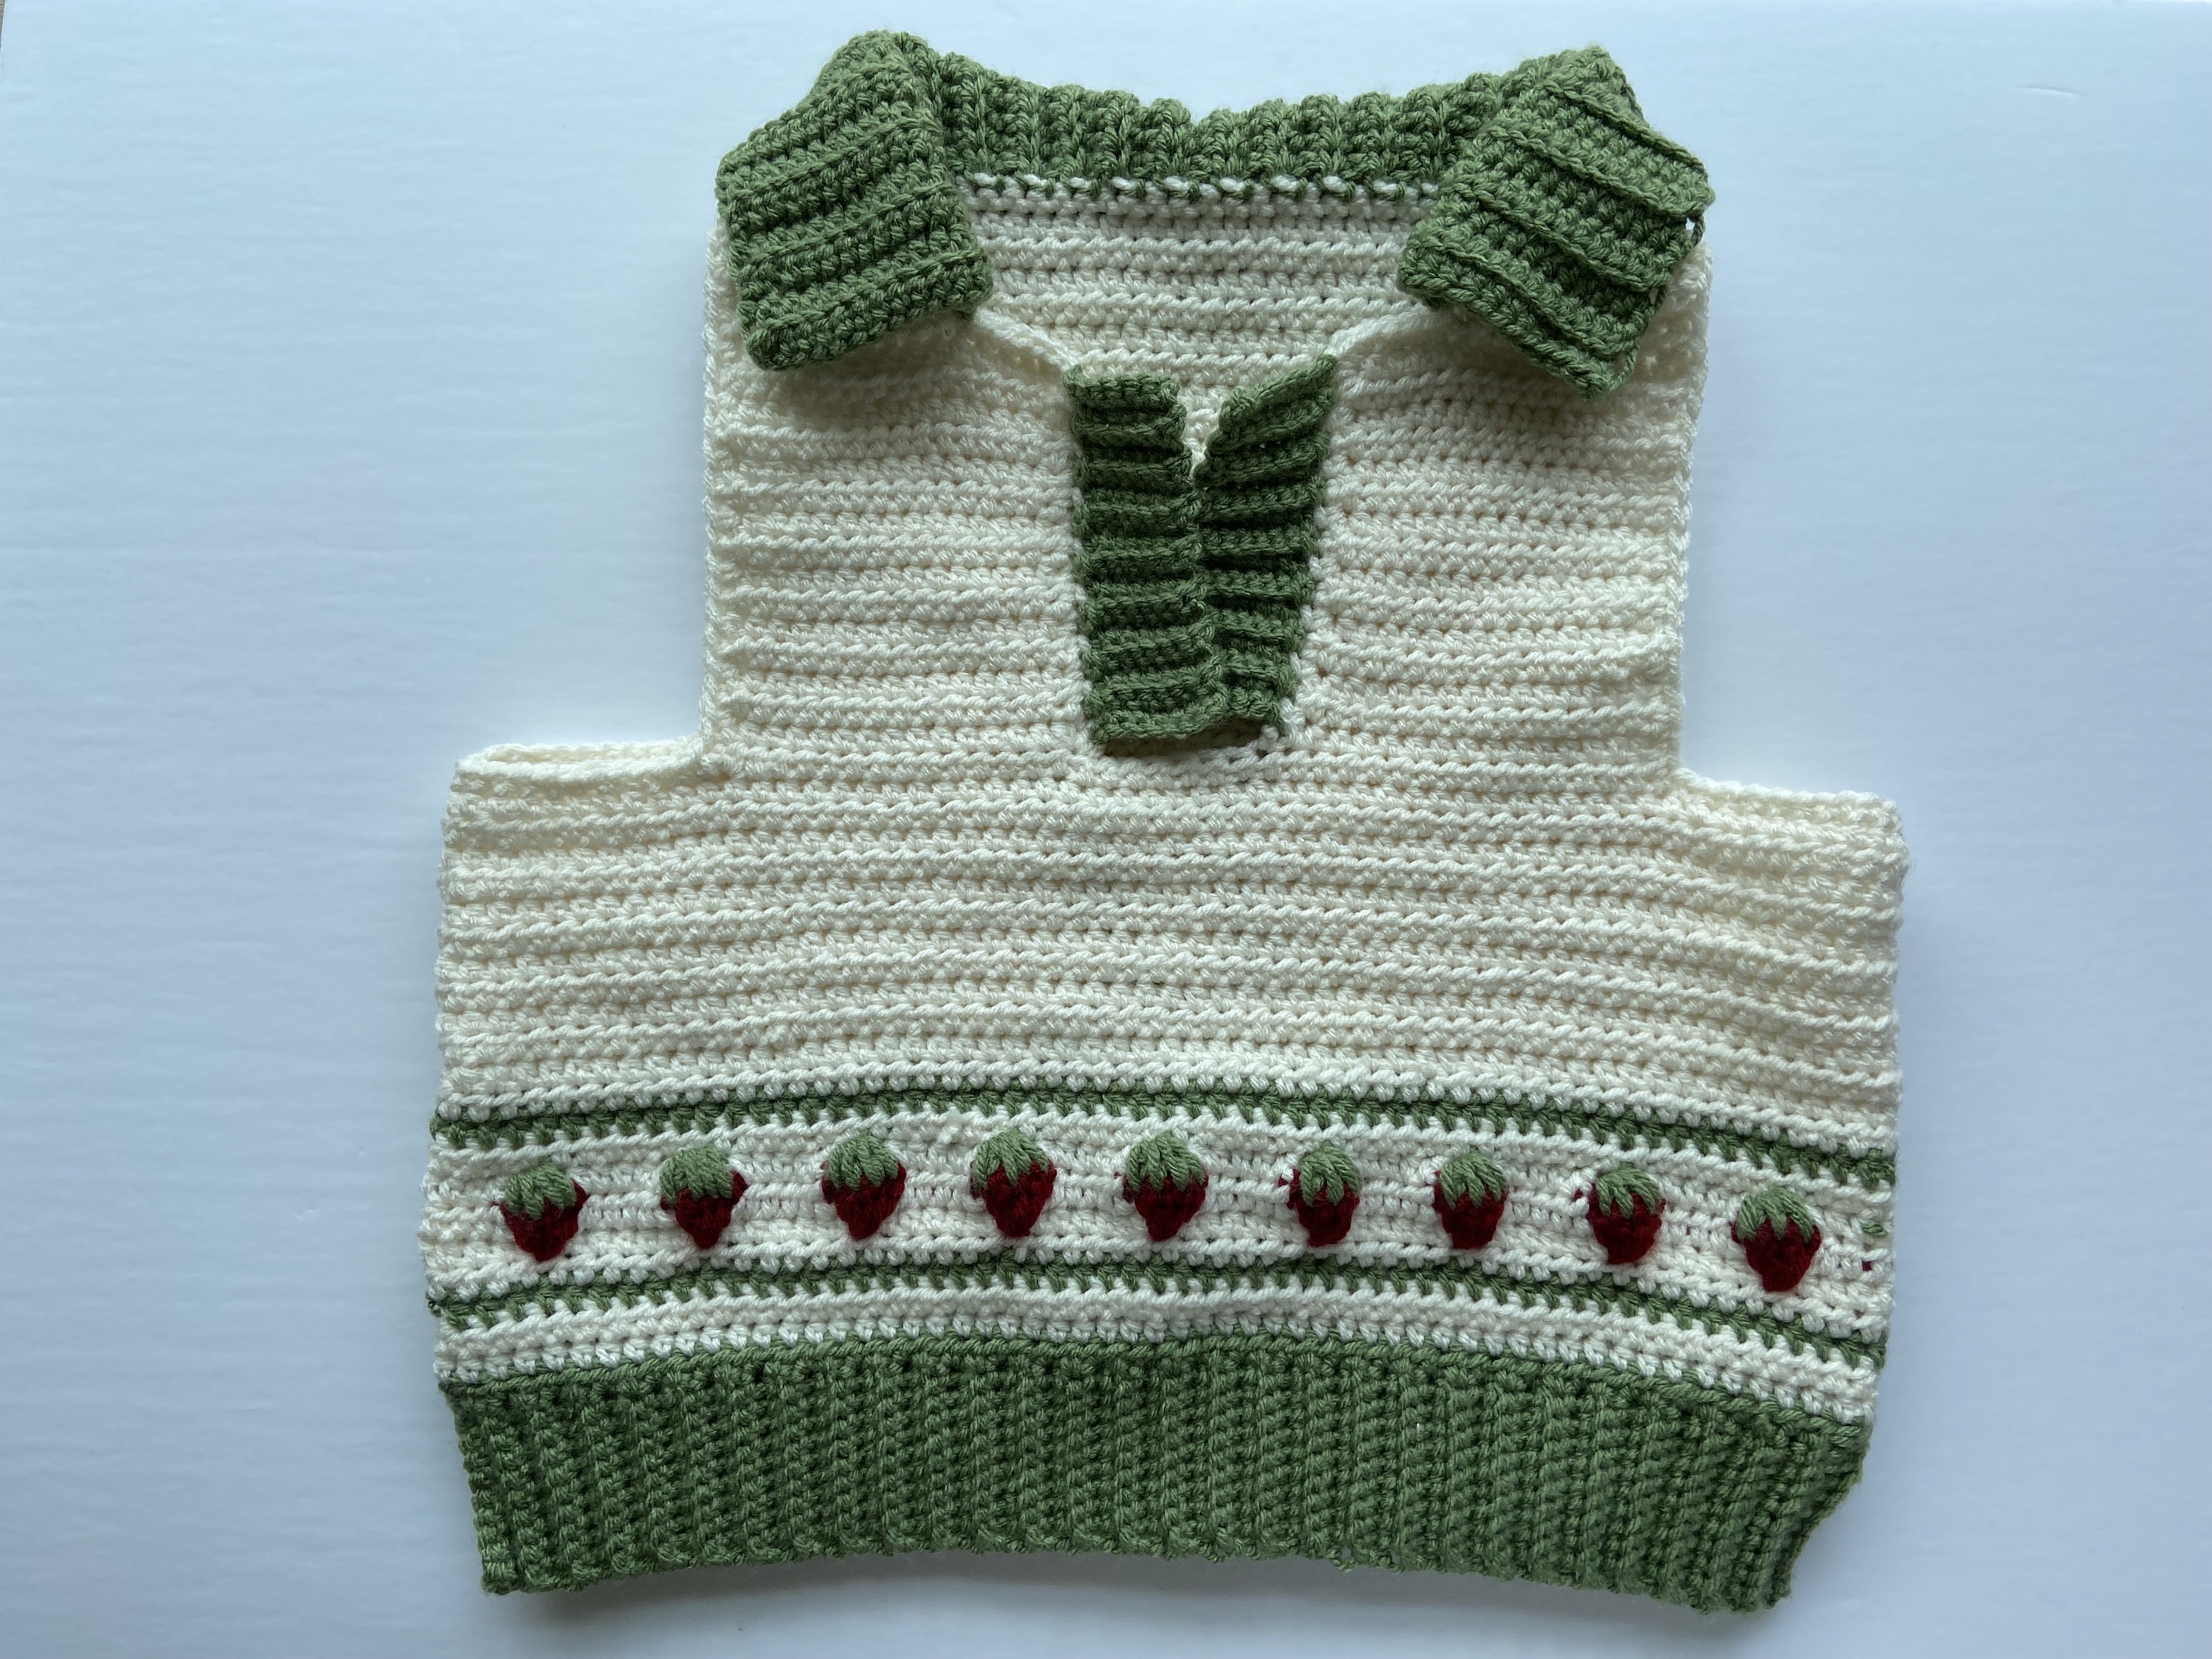
Armholes
Again, similar to the v-neck ribbing and collar ribbing, it will be 4 sts wide x the length you need for your armholes. Make sure both armhole ribbing is the same length!
Row 1: With color A, ch 5, sc in the second ch from the hook, sc in remaining 3 ch. Ch 1 and turn your work. <4>
Row 2-length you need for your size: Sc blo in each st until the end of the row. Ch 1 and turn your work. <4>
Fasten off.
Repeat for other armhole
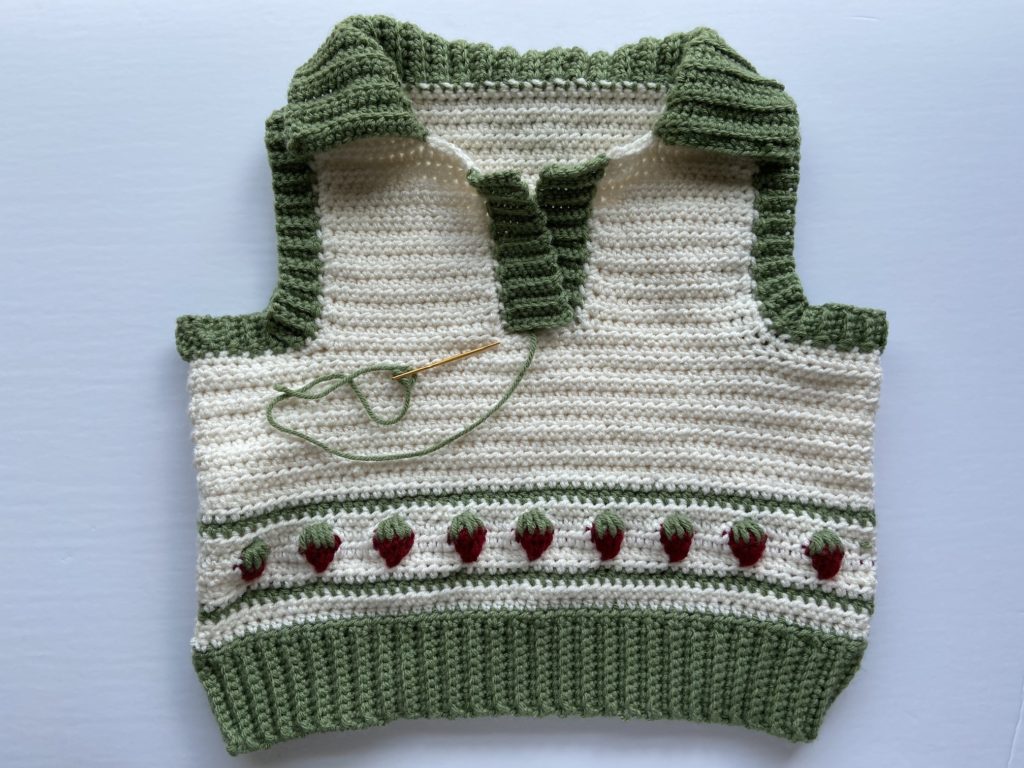
Sew the very bottom of your v-neck ribbing to the vest.
Weave in your ends and you’re done!
If you recreate this sweater vest, please tag or DM me @hayhaycrochet on Instagram or TikTok so I can see, like and share!
Happy Crocheting~!
love this pattern so much! so easy to follow and works up quickly, almost done with it!