
🤍WELCOME HERE🤍
This post may contain affiliate links.
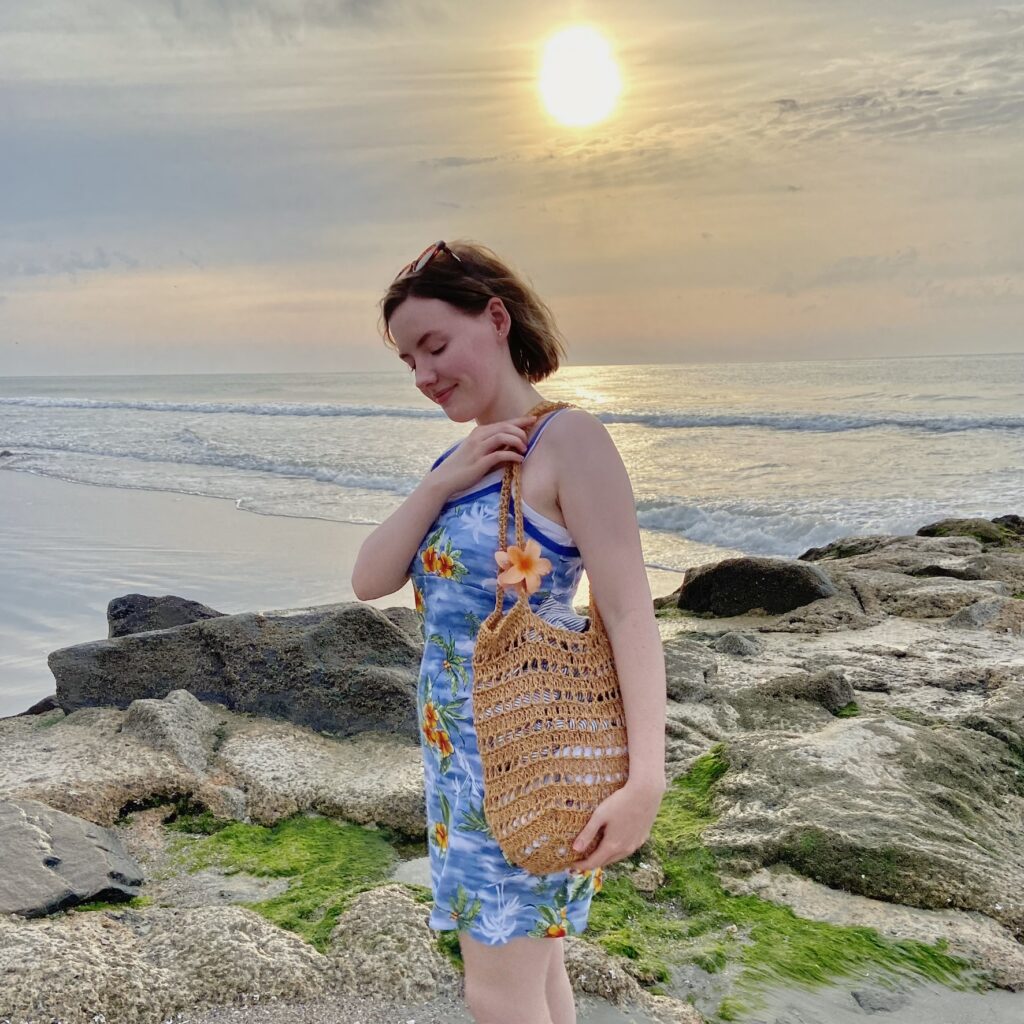
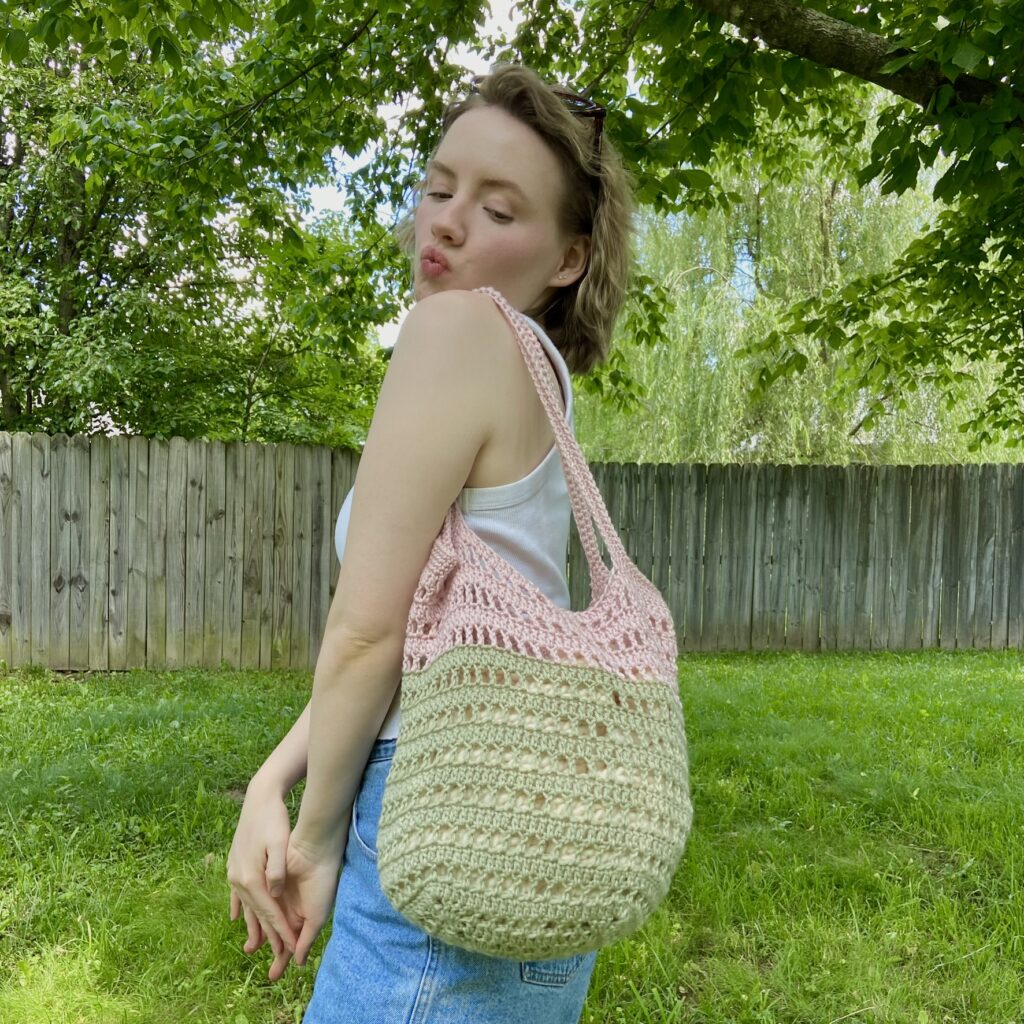
Hello! In todays pattern I am going to share with you my new favorite accessory I have crocheted recently and its the 🐚 Beach Baby Bag 🐚 (the triple B, as I also fondly call it).
It is such a fun and sweet little bag that works up very quickly! It’s the PERFECT beach or lake day bag, and I just love how it turned out.
Two things about this bag:
1) It’s all made up from a granny square
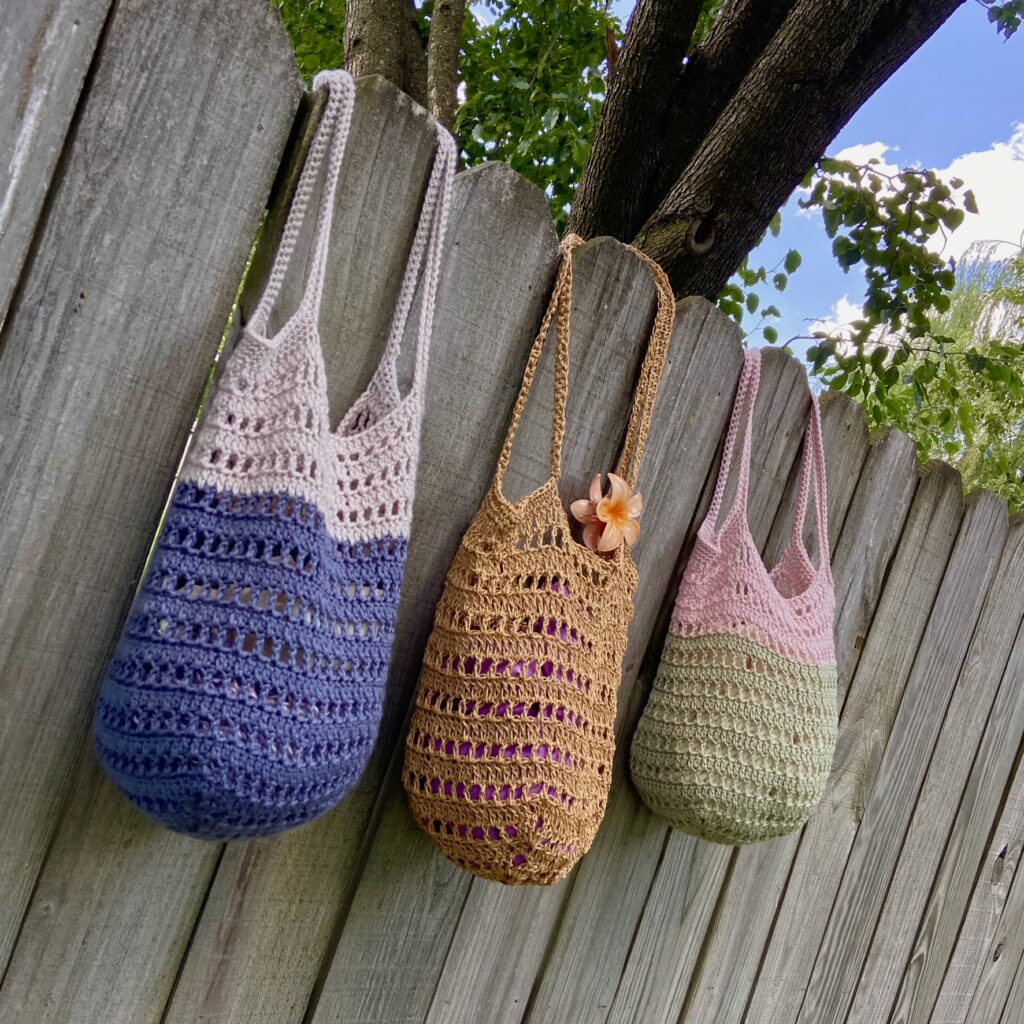
2) You can go two-toned* with it OR go completely soild, it up to you!
*Fun fact: When I was creating this pattern, I originally wanted my bag to be one color, but ran out of yarn and had to use another color to finish it. I was pretty bummed. BUT when I shared it online, my community was VERY kind and said it looked great and intentional, so seeing it through that lens, the two-toned has really grown on me!
Anywho, without further ado, LET’S GET STARTED!
Materials
YARN
You can use any DK (3) weight yarn you’d like; acrylic, cotton, raffia, etc. You can even use Worsted (4) weight yarn if that’s more your vibe! Just make sure whatever your use, it works with a 5.00mm Crochet Hook.
Blue & White bag was made with Premier Yarn Everyday DK in cadet blue and linen
Green & Pink bag was made with Premier Yarn Everyday DK in meadow and blush
How much yarn?
If you are making a two-toned bag with acrylic or cotton yarn you will need approx. 55 grams of yarn for the first color and 35 grams for the second color OR 90 grams a single colored bag.
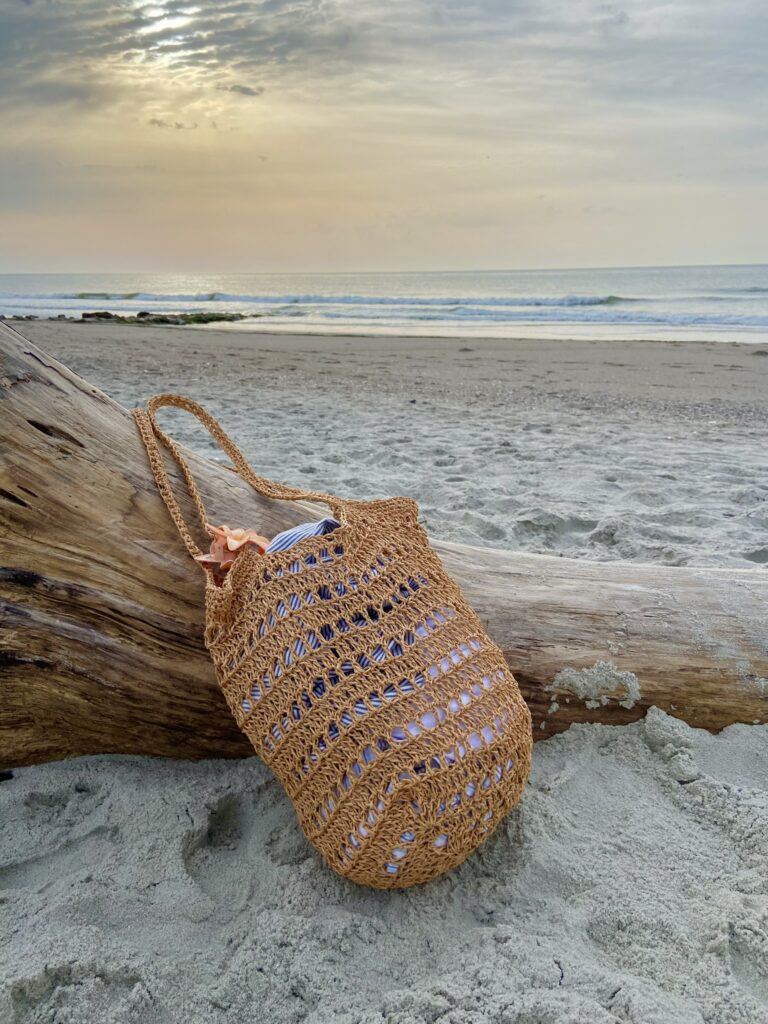
If you are making a bag with the Paper/Raffia Yarn you will need approx. 125 grams (this yarn weighs more than cotton and acrylic).
Darning Needle (my FAVES!! make seaming and weaving in ends so much easier because of the bent tip)
Stitch markers (The best! They stay in place, so you don’t have to worry about them falling out.)
Stitches + Abbreviations
St(s) = Stitch(es)
Ch = Chain
Sc = Single Crochet
FTC = * Foundation Turning Ch (tutorial linked)
*I used this in place of a Ch 2 at the beginning of every round, you do not have to do this, its just personal preference. If you are coming from my tutorial for this pattern, I refer to this as a “stacked sc”)
Dc = Double Crochet
Dc cluster = Double Crochet Cluster (where 3 dc are worked into the same space/st)
Sl st = Slip Stitch
Rep = Repeat
Pattern Notes
*This Pattern uses US crochet terms
*Ch 2/FTC ALWAYS counts as a stitch in this pattern.
*When increasing, there are ALWAYS two clusters in every corner, ALWAYS separated by a ‘ch 3‘
*The Raffia/Solid version of this bag I worked a little different than the two-toned, due to the stiffness of the yarn, I go into detail and explain exactly what I did different throughout the pattern.
Beach Baby Bag Pattern
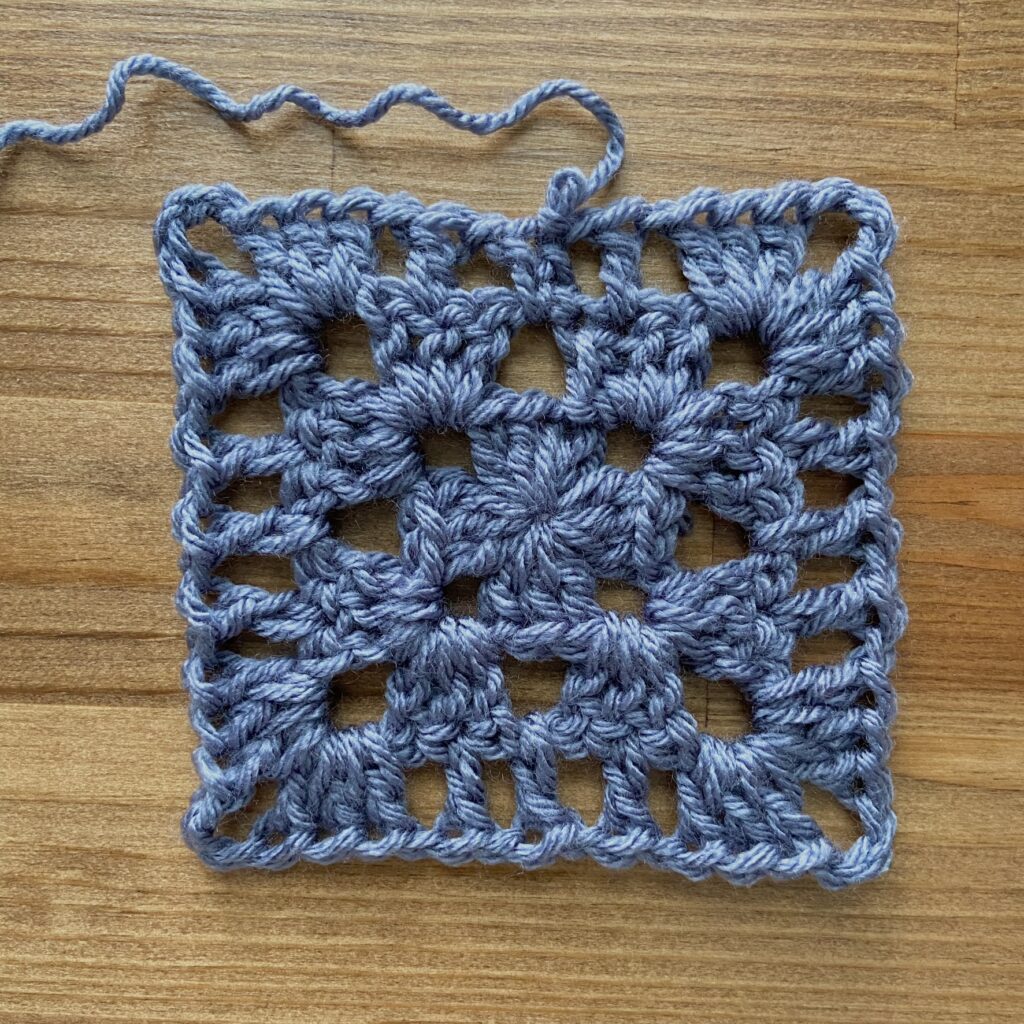
Body of bag
Make a Magic Ring (tutorial linked).
*The first ch 3/stacked sc/FTC of each round ALWAYS counts as the st/dc)
Rnd 1: Ch 2 (or FTC/stacked sc as I did for the first st of every row in my Video Tutorial), work 2 dc in MR (counts as 1 of the 4 dc clusters), ch 3, *work dc cluster in MR, ch 3, *rep 2 more times. Sl st into the first st of the round. <4 clusters total>
*3 dc worked into the same ch space is referred to as a “cluster”.
Rnd 2: Turn your work. Ch 2 (or FTC), work 2 dc in ch space, ch 3 and work 1 dc cluster into same ch space. ch 1, *work 1 dc cluster into the next ch space, ch 3, work dc cluster into same ch space. ch 1, *rep until the end of the round. Sl st into the first st of the round.
Rnd 3: Turn your work. Ch 2 (or FTC), ch 1 and sk st, work a dc. EVERYTIME When you come to the corner, work 2 dc clusters (separated by a ch 3). Continue working a dc in every other st/ch space (ch 1 when you sk a st). Sl st into the first st of the round.
Check out my YouTube Tutorial HERE if you are having trouble!
Rnd 4: Turn your work. Ch 2 (or FTC), work 1 dc into each st (and ch space) until the end of the rnd (work 3 dc/1 dc cluster into every corner you come across). Sl st into the first st of the round. <64 sts total>
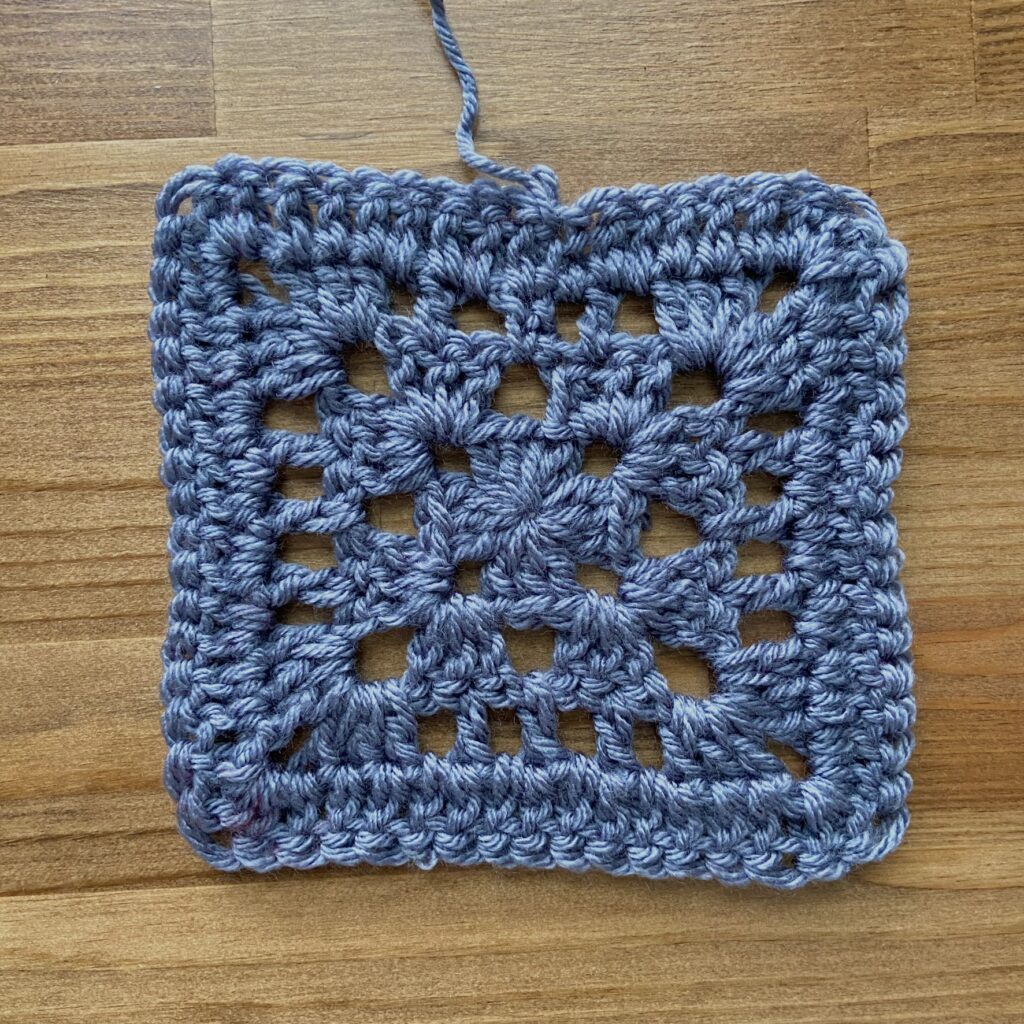
Rnd 5: Turn your work. Ch 2 (or FTC), *ch 1 and sk st, work a dc, *repeat. EVERYTIME When you come to the corner (the corner is now the middle st of the dc cluster worked in the previous rnd), work 2 dc clusters (separated by a ch 3). continue working a dc in every other st/ch space (ch 1 when you sk a st). Sl st into the first st of the round.
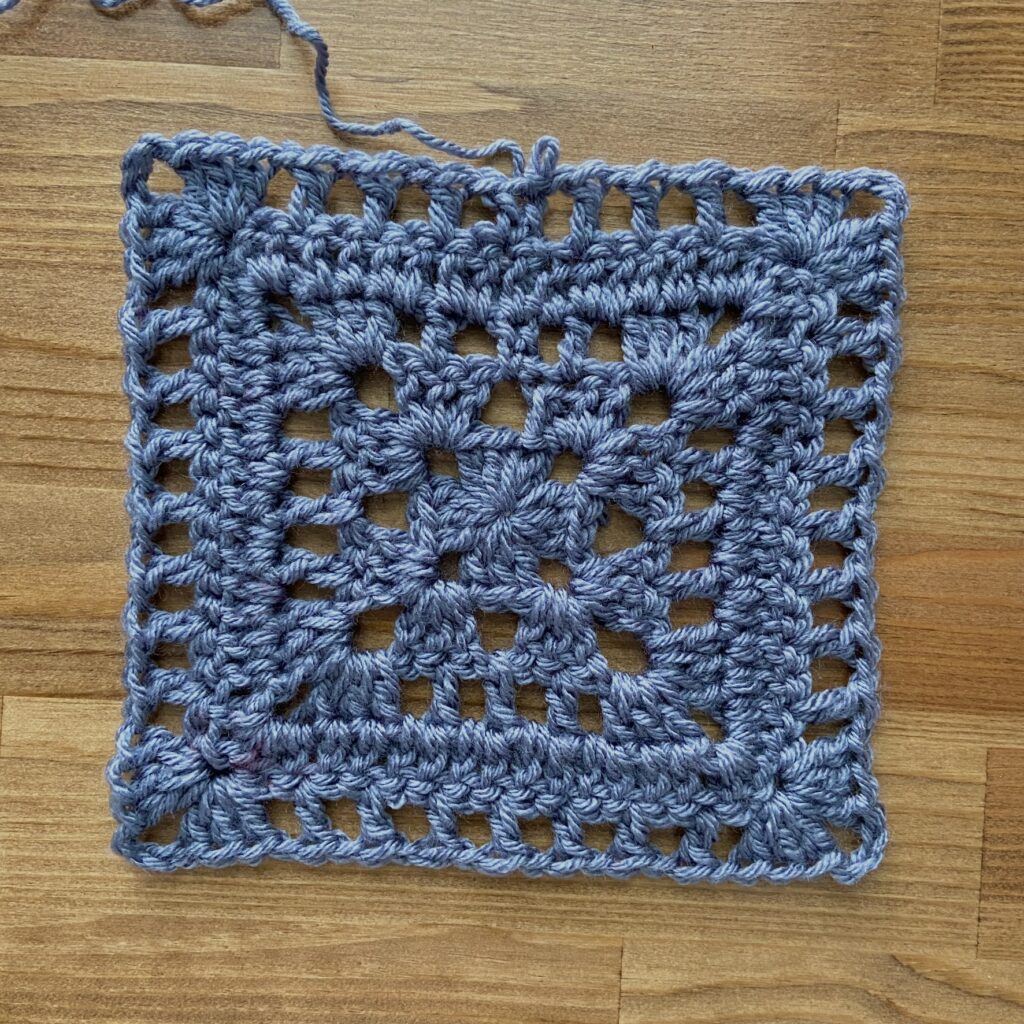
Rnd 6: Turn your work. Ch 2 (or FTC), work 1 dc into each st (and ch space) until the end of the rnd (work 3 dc/1 dc cluster into every corner you come across). Sl st into the first st of the round. <96 sts total>
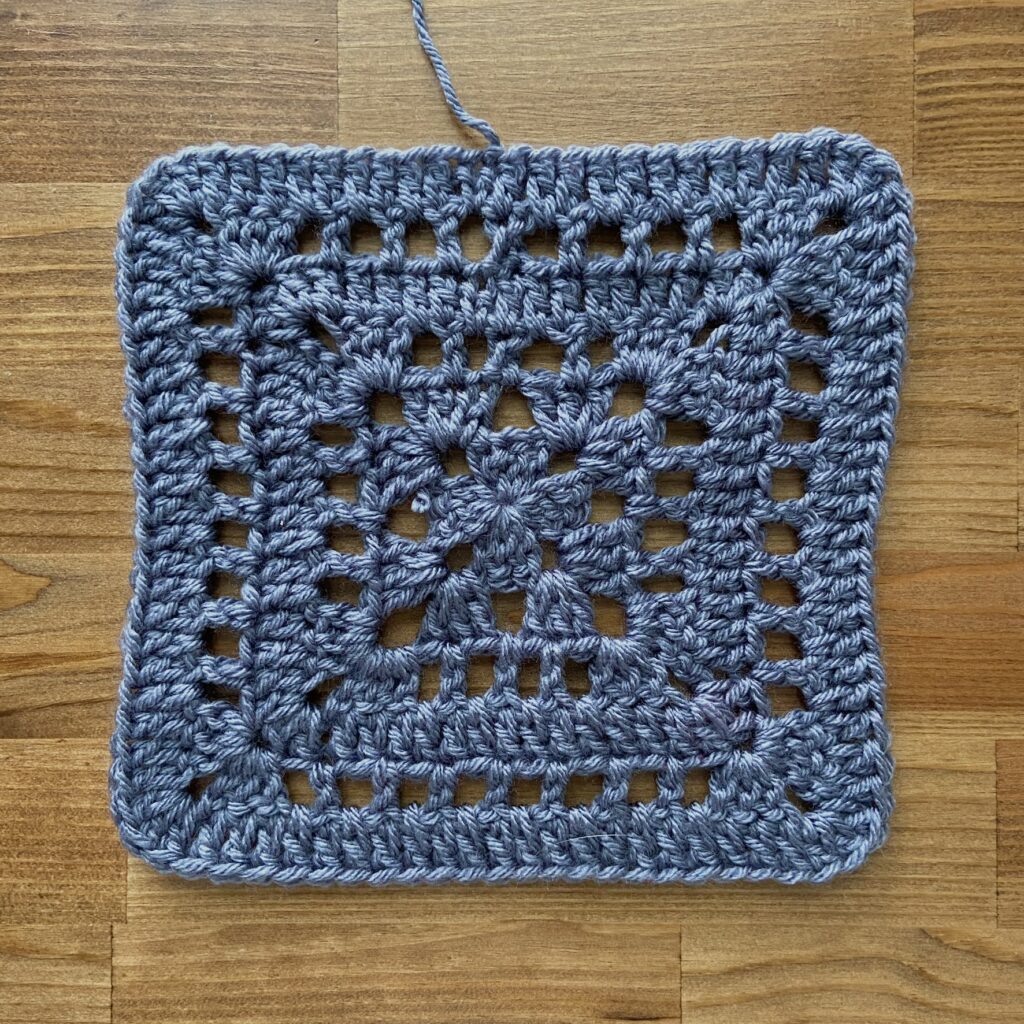
Rnd 7: Turn your work. Ch 2 (or FTC), *Ch 1 and sk st, work a dc, *repeat. Continue working a dc in every other st/ch space (ch 1 when you sk a st). NO INCREASES. Sl st into the first st of the rnd.
Rnd 8: Turn your work. Ch 2 (or FTC), work 1 dc into each st (and ch space) until the end of the round. NO INCREASES. Sl st into the first st of the round. <96 sts total>
if YOU ARE changing colors–
Rnds 9-18: repeat rounds 7 & 8
if you ARE NOT changing colors–
Rnds 9-24*: repeat rounds 7 & 8
*IF you are using the paper/raffia yarn for your bag (the only solid color bag pictured above), I only worked 20 rounds since the yarn was stiffer. In turn, it made my gauge bigger, overall giving me a slightly larger bag (same crochet size was used for all bags). But if you like bigger bags, then continue working the pattern as written.
If your are changing colors, before you finish off the slip stitch to join round 18, pull through your new color (creating a slip knot of the new color before pulling through) instead of the color you were previously using.
if YOU DID change colors–
Rnds 19-24: repeat rounds 7 & 8
Fasten off.
Straps
Now grab 4 stitch markers , 3 of one color, 1 of a different color from the rest (the color thats different from the rest will be your ‘beginning of round’ marker).
Count over 12 sts from where you joined your last round; where you worked your last sl st, place the different colored marker, count over 24 sts, place a marker, count over 24 sts, place a marker, count over 24 sts, place a marker.
Straps Rnd 1: Make a slip knot, pull slip knot through the st your beginning of marker is in, ch 1, sc into that same st, sc in each st until you come to the next marker, ch 70*, sk all sts in between the 2 markers and sc into where the very next marker is, sc in each st until you come to the next marker, ch 70, sk all sts in between the 2 markers and sc into the first st of the round.
*I worked only 60 ch for the paper/raffia yarn bag. But again, if you like bigger bags (or longer straps), you can ignore this and follow the pattern as written.
Straps Rnd 2: Sc in each st until you come to your first ch, work 1 sc into each ch until the end of the ch, sc in each st until you come to your next ch, work 1 sc into each ch until the end of the ch, sc into the first st of the round.
Straps Rnd 3-4*: Work 1 sc into each st until the end of the round. At the end of round 4, sl st into the first st of the round.
*I only worked 3 rounds for my straps for the paper/raffia yarn bag.
Fasten off.
Weave in all your ends and then…
…YOU’RE DONE!
If you recreate the Beach Baby Bag, please tag or DM @hayhaycrochet on Instagram so I can see, like and share!
Happy Crocheting~!
Lovely. The 2 colors look totally intentional. 🙂 All of them are really neat. It’s kinda amazing all the stuff that we can make with granny squares. 🙂 Have a great day.
Susannah
IG: @sjcragwickdesigns
http://www.susannahcragwick.com