🤍WELCOME HERE🤍
I am sharing a pattern I have been thinking about A LOT since I thought it up about 3 or so months ago and I am so excited to share it with y’all today!
This post may contain affiliate links.
UPDATE: I now have some brief instructions on how to create a light weight, warm weather, “mohair”/fluffy yarn version of this vest located near the bottom of this blog post!
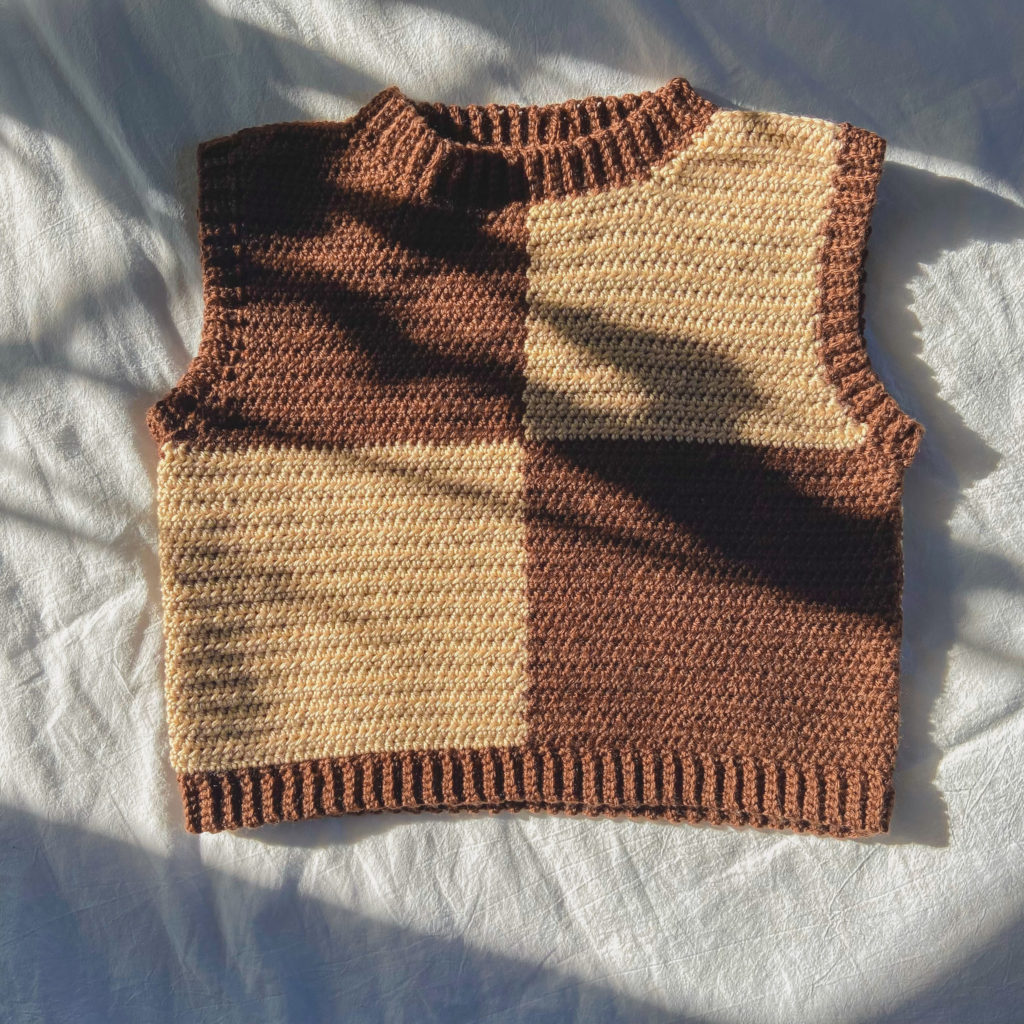
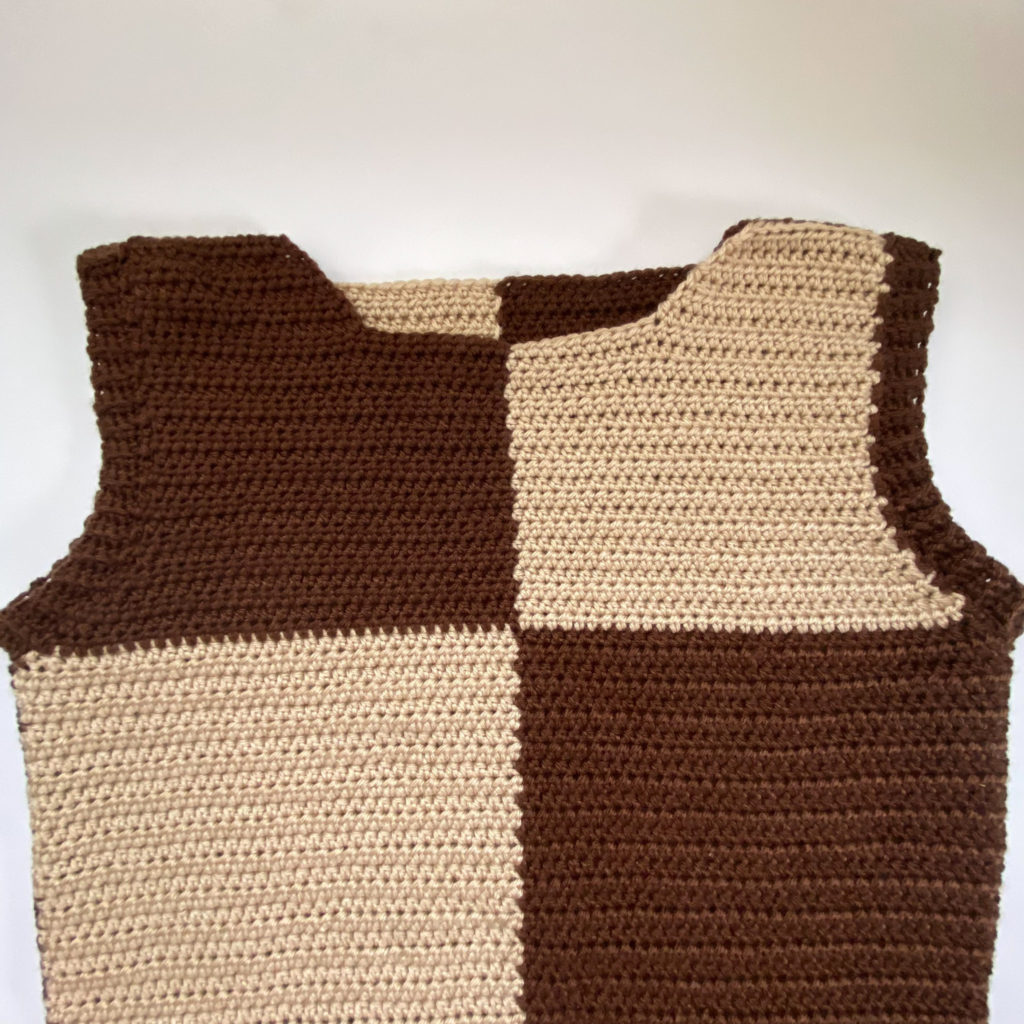
It’s the “Checkerboard Cookie” Sweater Vest! Until very recently, I never even knew what these cookies where called until one of my lovely followers informed me of their name 😂. Growing up I’ve only ever seen them anime, and I always thought they were the cutest little cookies!
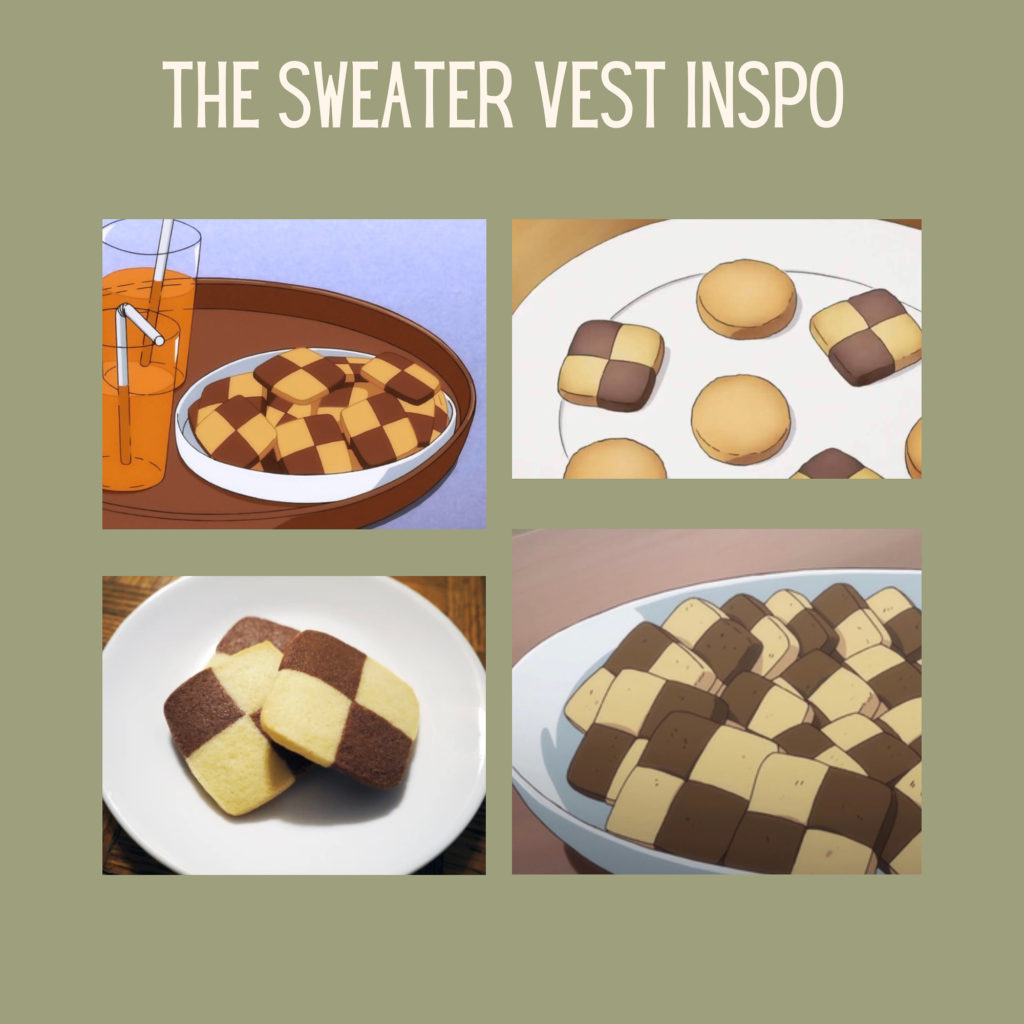
The checkered pattern is very on trend at the moment and since I’ve wanted to make a sweater vest inspired by this cookie for a while now, this timing worked out perfectly!

For the yarn, I’m using lion brand’s skein tones in “almond” and “cocoa” (even the names of the yarn colors I feel work so well for this vest 🥺) and I really enjoy am enjoying this yarn, it’s soft and easy to work with! I also used this same yarn for my “Grateful + Thankful Cardi” and “70’s Granny Square Vest”, so I highly recommend it!
SO, without further ado, LET’S GET STARTED!
MATERIALS
Medium Weight (4) Yarn – Lion Brand Skein Tones in “Almond” and “Cocoa” .
Number of skeins needed:
S/M – 4 (2 of each color) skeins
L/XL – 6 (3 of each color) skeins
2XL/3XL – 7 (3 of one color, 4 of the color used for vest AND ribbing) skeins
*Approximately 307 grams of yarn were used for the size S/M.
For the light weight version, I used 4 skeins of Drops Alpaca Silk in the shades “Sage Green” and “Off White” for a size S/M
4.5mm Crochet Hook (my FAVORITE crochet hooks)
Scissors
Stitch Markers (I personally don’t use a stitch marker for this pattern, but if you easily lose track of where you started or are a beginner, stitch markers are very helpful.)
STITCHES + ABBREVIATIONS
Ch = Chain
St(s) = Stitch(es)
Sc = Single Crochet
Hdc = Half Double Crochet
Hdc2tog = Half Double Crochet Two Together
Sc blo = Single crochet in the BACK LOOP ONLY
MEASUREMENTS
Gauge: 4″x4″ square = 16 stitches wide x 14 rows tall in half double crochet
*Measurements taken while garment was laid flat.
S/M – 17 inches wide x 16 1/2 inches tall
L/XL – 21 inches wide x 18 1/2 inches tall
2XL/3XL – 25 inches wide x 20 1/2 inches tall
PATTERN NOTES
*Sweater Vest is designed to be a bit of a boxy, slightly oversized fit
*The 2 colors used in this pattern will be referred to as “Color A” and “Color B”
*This Pattern follows size S/M, but has sizes S-3XL
*This Pattern follows US crochet terms
*Turning ch 1 does NOT count as a stitch in this pattern.
*Number of stitches (and rows) indicated between “<>” and “( )“. E.g. “<64 for S/M, 78 for L/XL, 94 for 2XL/3XL>” and “64 (78, 94)”
CHECKERBOARD ICEBOX COOKIE SWEATER VEST PATTERN
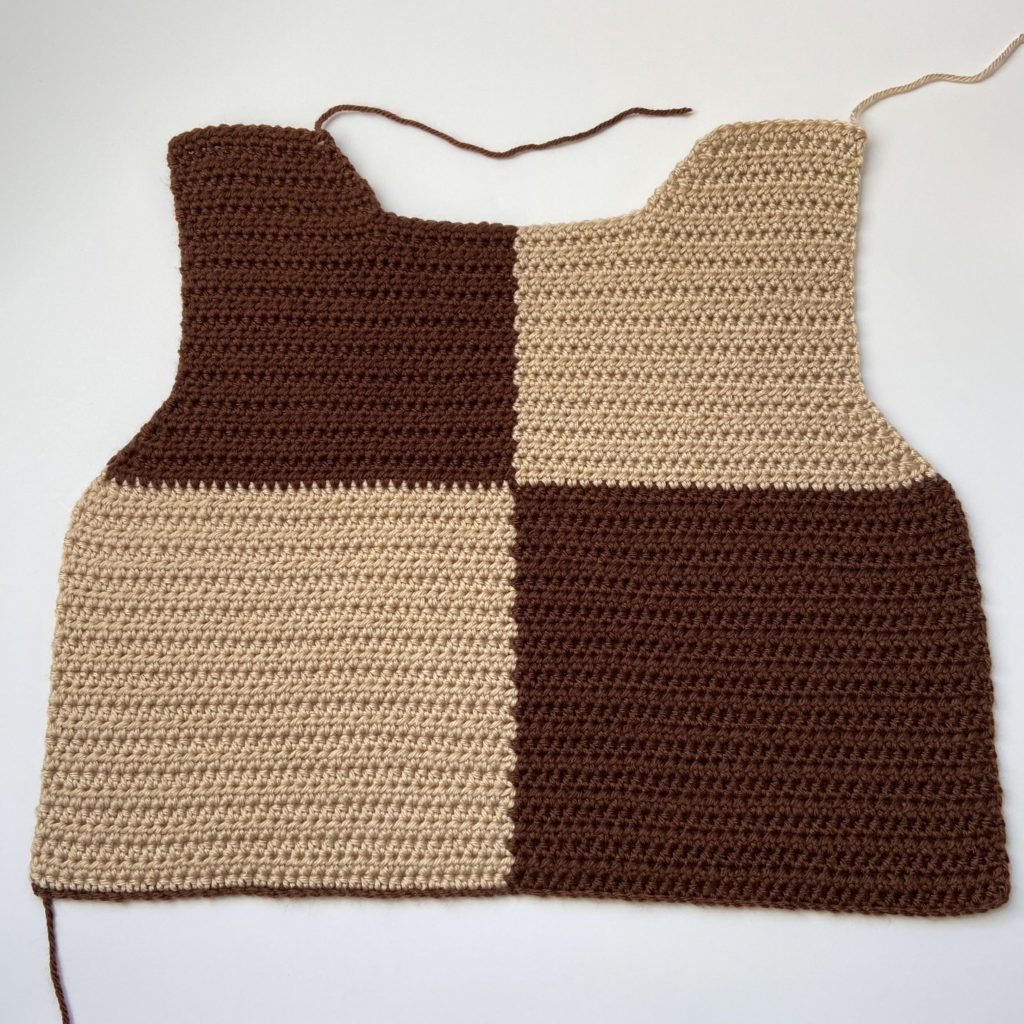
Front Panel
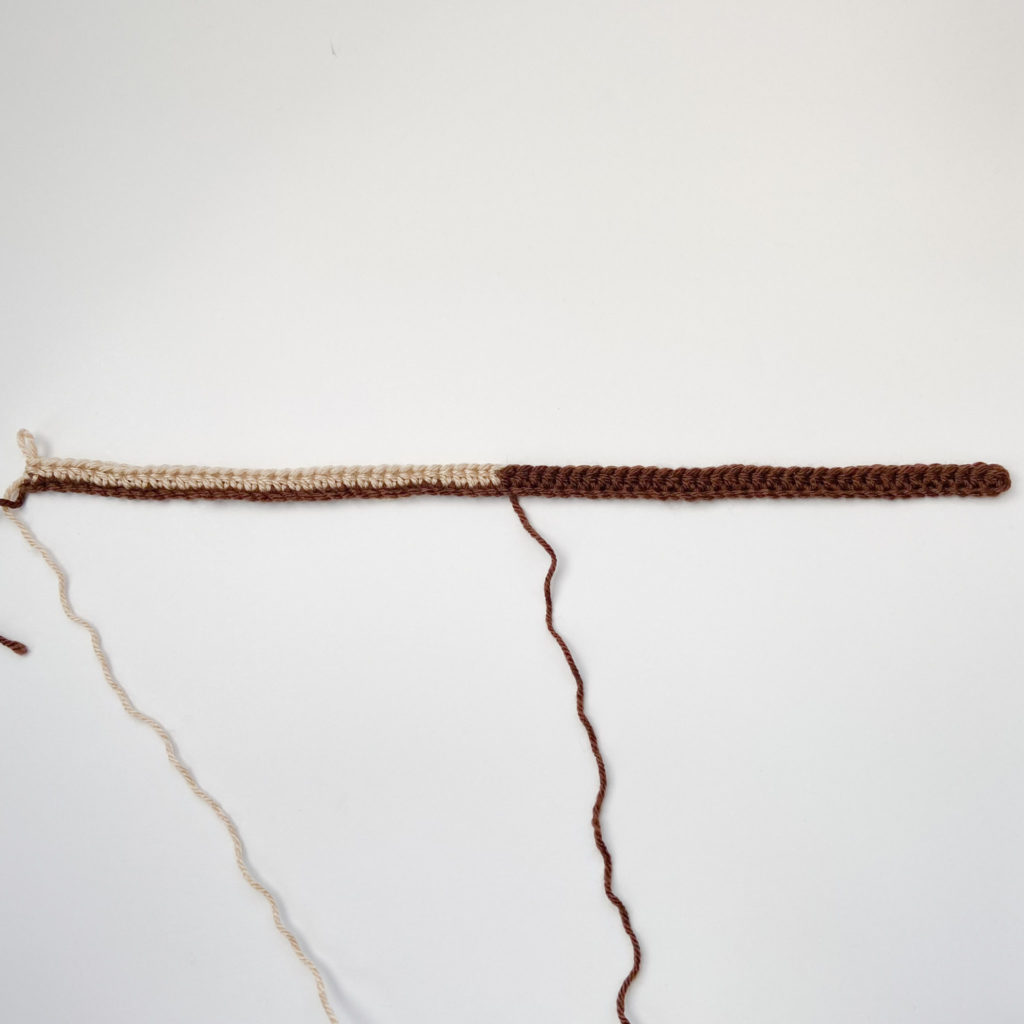
Foundation Chain: With Color A Ch 71 <87 for L/XL, 101 for 2XL/3XL>
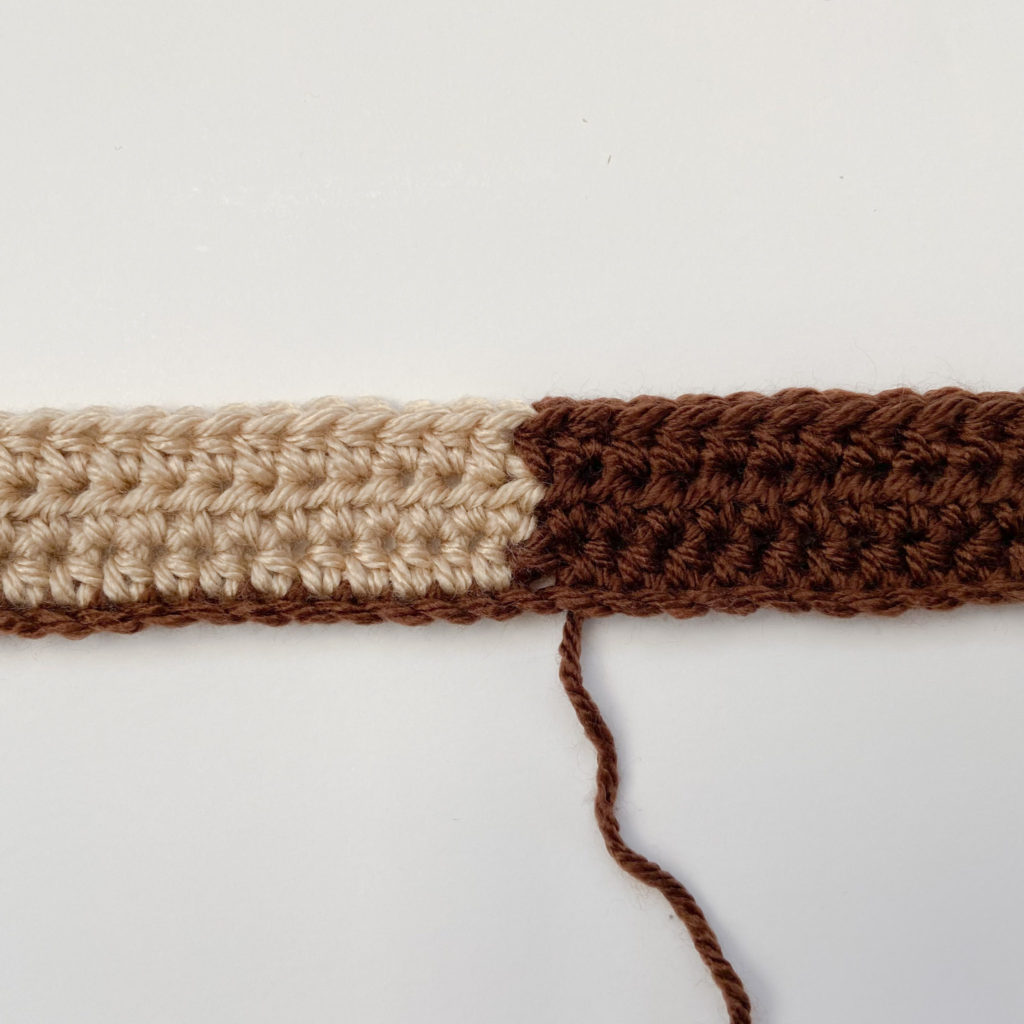
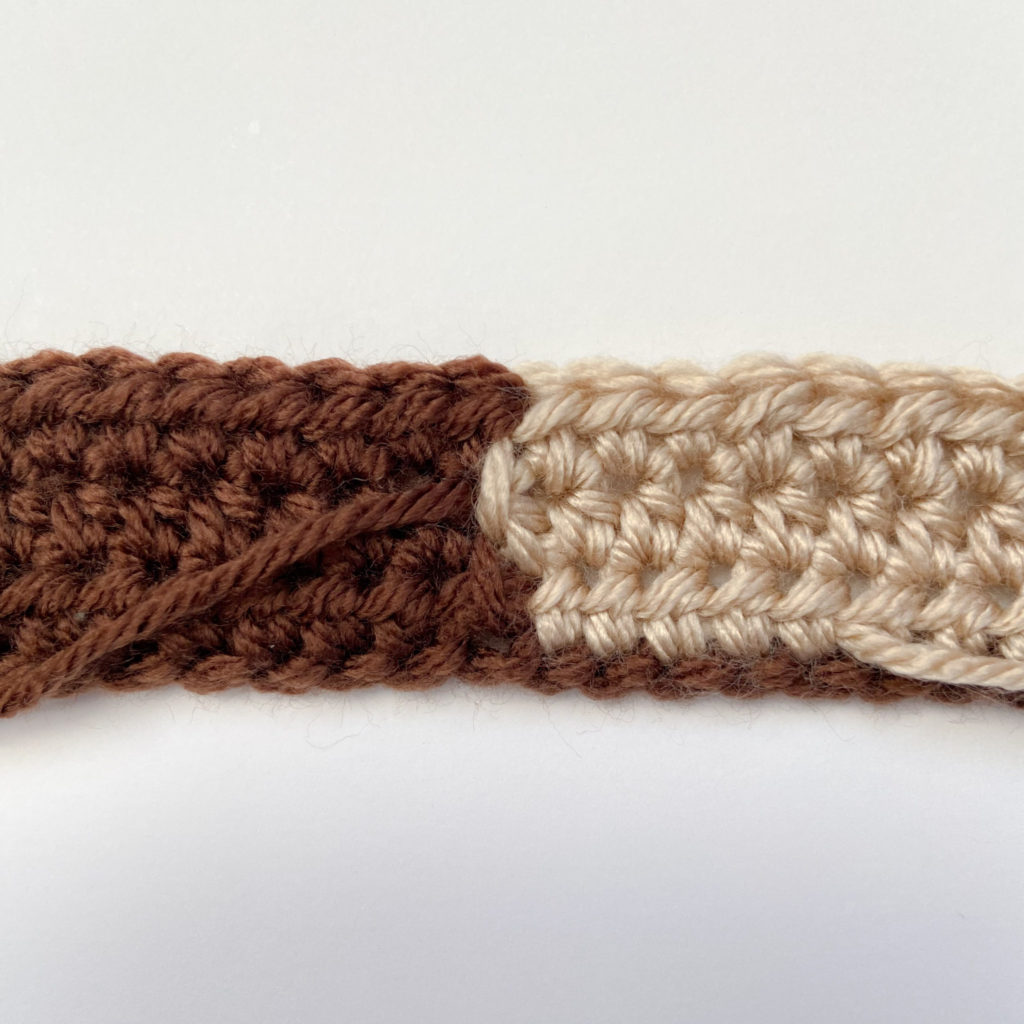
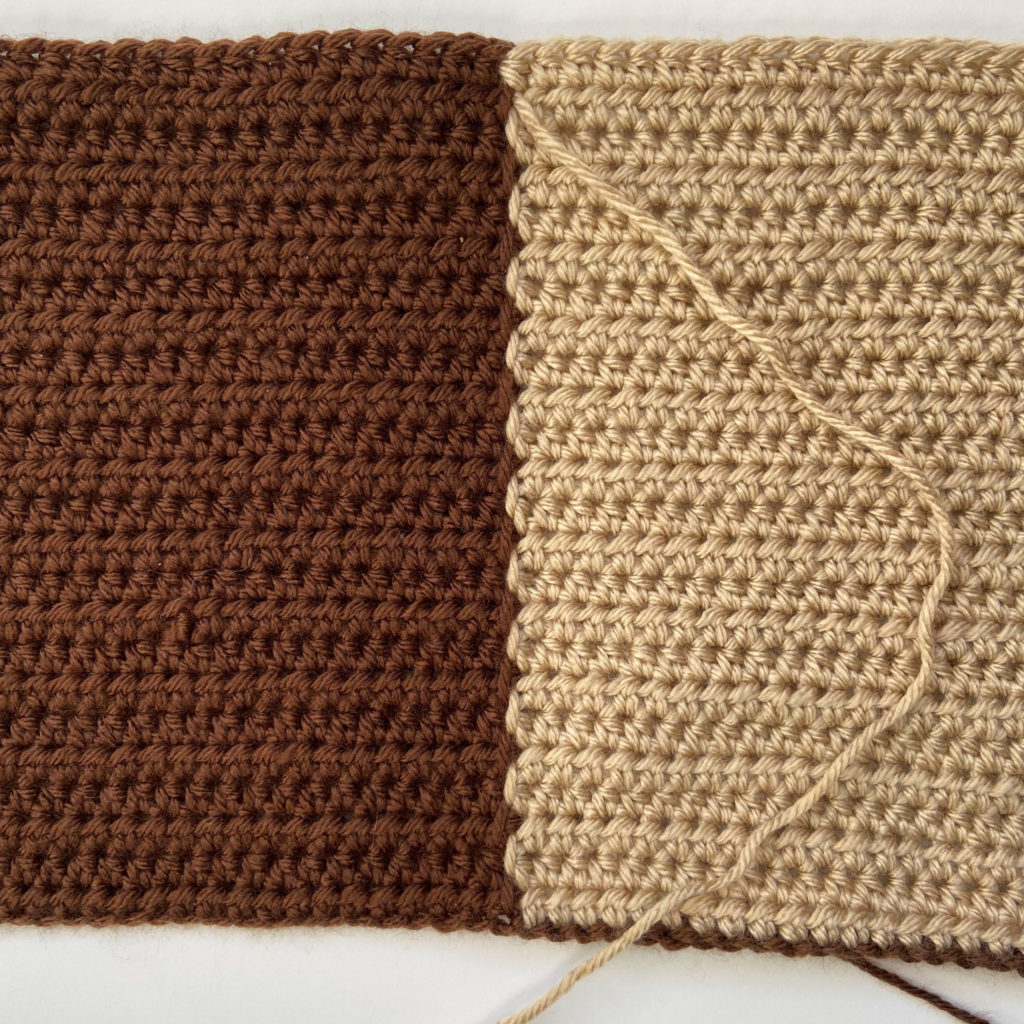
Row 1: Hdc in the 2nd ch from the hook, hdc in the next 34 ch (42 for L/XL, 49 for 2XL/3XL) and before you finish your 34st (42th, 49th) hdc pull color B through the last 3 loops on your hook*, (*choose what side will be the “front” and “back” of your work. You will leave the yarn color you are not using at the time in the middle “back” of your work. You will pick up and drop your yarn on the same side of your work every row, since we are turning our work every row you will alternate between facing the “wrong” and the “right” side. I will include photos below showing the wrong and right side) dropping and leaving color A in the middle where it lay (you will come back and pick it up and work with it again in the next row) hdc in the remaining 35 (43, 50) ch. <70 for S/M, 86 for L/XL, 100 for 2XL/3XL>
Row 2: Ch 1 and turn your work. Hdc 35 (43, 50) and before you finish your 35nd (43th, 50th) hdc pull color A through the last 3 loops on your hook, dropping and leaving color B where it lay, hdc in the remaining 35 (43, 50) sts. <70 for S/M, 86 for L/XL, 100 for 2XL/3XL>
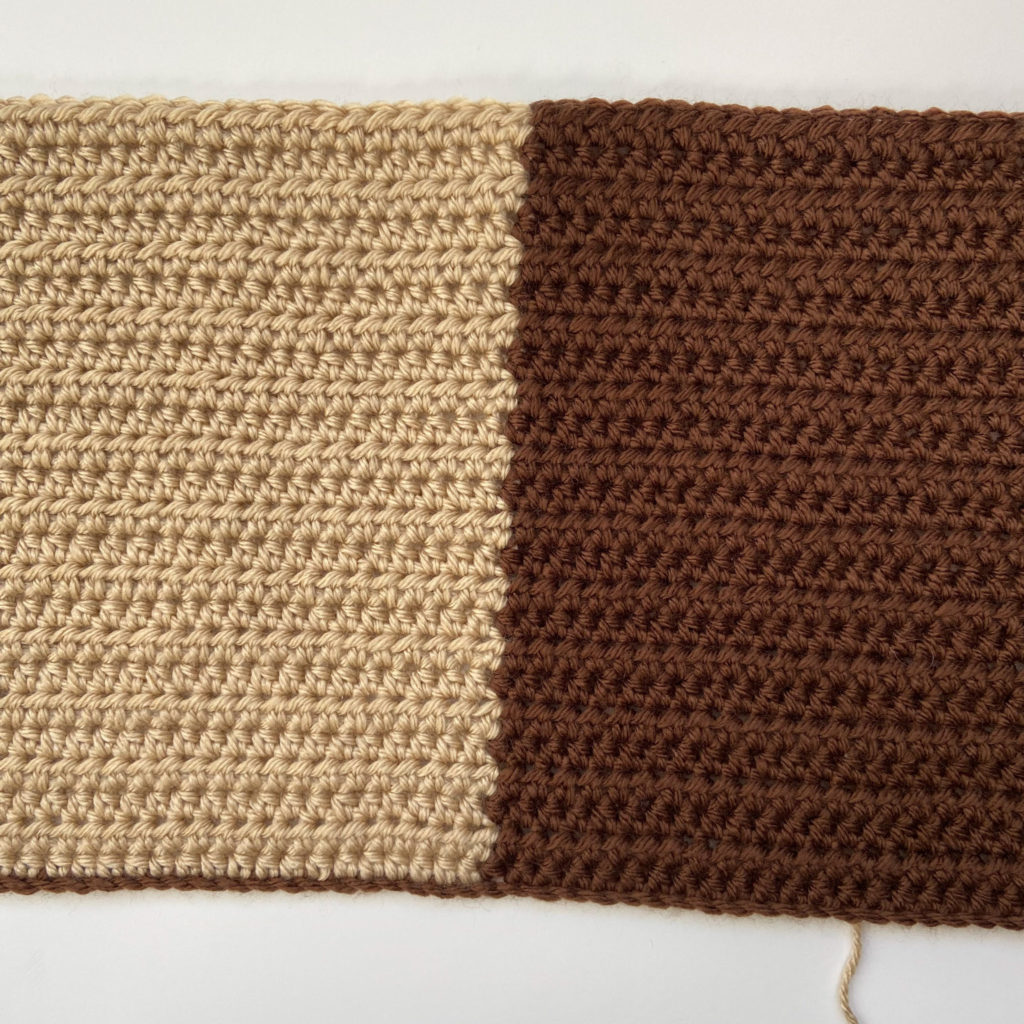
Row 3: Ch 1 and turn your work. Hdc 35 (43, 50) and before you finish your 35nd (43th, 50th) hdc pull color B through the last 3 loops on your hook, dropping and leaving color A where it lay, hdc in the remaining 35 (43, 50) sts. <70 for S/M, 86 for L/XL, 100 for 2XL/3XL>
Row 4: Ch 1 and turn your work. Hdc 35 (43, 50) and before you finish your 35nd (43th, 50th) hdc pull color A through the last 3 loops on your hook, dropping and leaving color B where it lay, hdc in the remaining 35 (43, 50) sts. <70 for S/M, 86 for L/XL, 100 for 2XL/3XL>

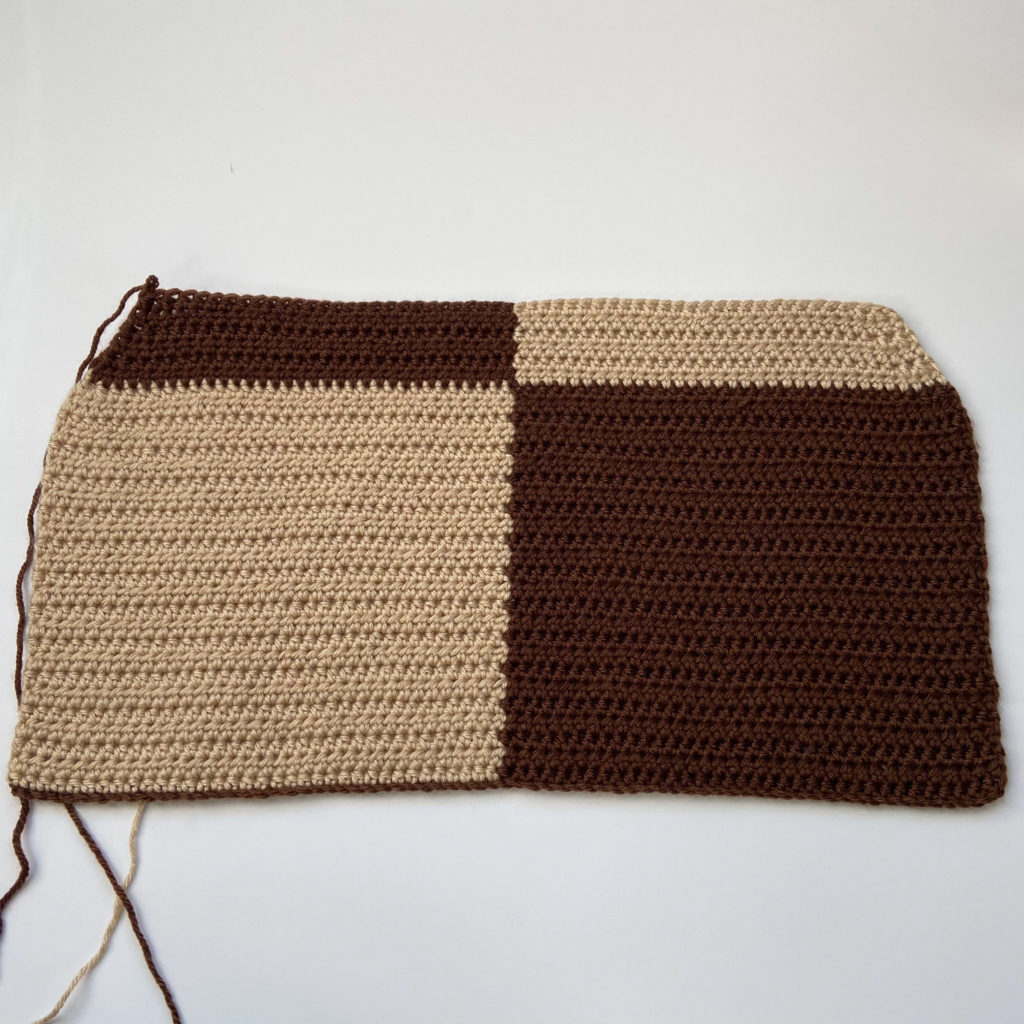
Repeat rows 3-4 until you have 24 (27, 30) rows (continuing to change your colors in the middle every row.)
Row 25 (28, 31): Ch 1 and turn your work. Hdc2tog 2 times (hdc2tog across a total of 4 sts), hdc 31 (39, 46) and before you finish your 31st (39th, 46th) hdc pull color B through the last 3 loops on your hook, dropping and leaving color A where it lay, hdc 31 (39, 46), hdc2tog 2 times in 4 remaining sts. <66 for S/M, 82 for L/XL, 96 for 2XL/3XL>
*Row 26 (29, 32) is where we will switch up the colors and stack the opposite colors on each “color block” to start creating the checkered pattern.
Row 26 (29, 32): Ch 1 with color B (cut and drop color A) and turn your work. Hdc 33 (41, 48) and before you finish your 33rd (41st, 48th) hdc pull color A through the last 3 loops on your hook, dropping and leaving color B where it lay, hdc in the remaining 33 (41, 48) sts. <66 for S/M, 82 for L/XL, 96 for 2XL/3XL>
Row 27 (30, 33): Ch 1 and turn your work. Hdc2tog 2 times (hdc2tog across a total of 4 sts), hdc 29 (37, 44) and before you finish your 29th (37th, 44th) hdc pull color B through the last 3 loops on your hook, dropping and leaving color A where it lay, hdc 29 (37, 44), hdc2tog 2 times in 4 remaining sts. <62 for S/M, 78 for L/XL, 92 for 2XL/3XL>
Row 28 (31, 34): Ch 1 and turn your work. Hdc 31 (39, 46) and before you finish your 31st (39th, 46th) hdc pull color A through the last 3 loops on your hook, dropping and leaving color B where it lay, hdc in remaining 31 (39, 46) sts. <62 for S/M, 78 for L/XL, 92 for 2XL/3XL>
Row 29 (32, 35): Ch 1 and turn your work. Hdc2tog 2 times, hdc 27 (35, 42) and before you finish your 27th (35th, 42nd) hdc pull color B through the last 3 loops on your hook, dropping and leaving color A where it lay, hdc 27 (35, 44), hdc2tog 2 times in 4 remaining sts. <58 for S/M, 74 for L/XL, 88 for 2XL/3XL>
Row 30 (33, 36): Ch 1 and turn your work. Hdc 29 (37, 44) and before you finish your 29th (37th, 44th) hdc pull color A through the last 3 loops on your hook, dropping and leaving color B where it lat, hdc in remaining 29 (37, 44) sts. <58 for S/M, 74 for L/XL, 88 for 2XL/3XL>
Row 31 (34, 37): Ch 1 and turn your work. Hdc2tog 2 times, hdc 25 (33, 40) and before you finish your 25th (33rd, 40th) hdc pull color B through the last 3 loops on your hook, dropping and leaving color A where it lay, hdc 25 (33, 40), hdc2tog 2 times in 4 remaining sts. <54 for S/M, 70 for L/XL, 84 for 2XL/3XL>
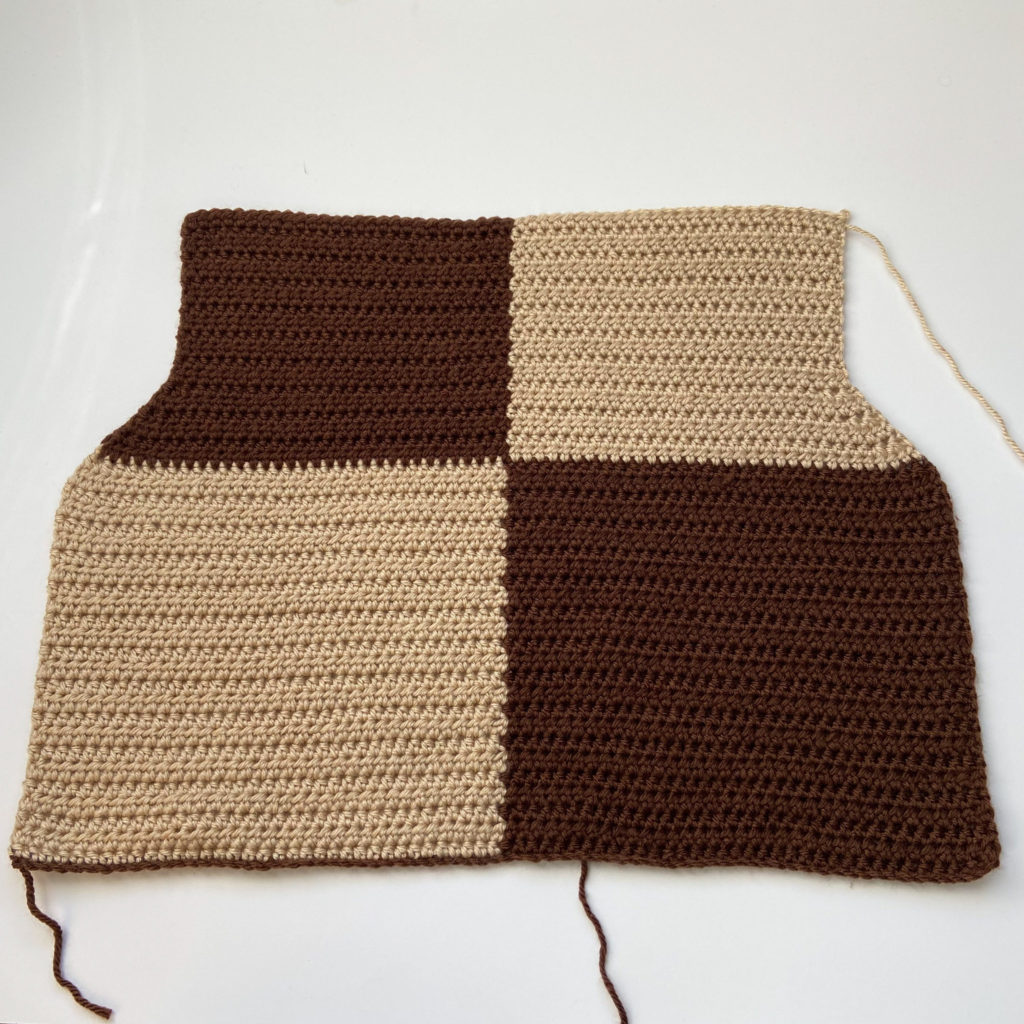
Row 32-44 (35-48, 38-52): Hdc in each st until the end of the row (continuing to change your colors in the middle every row.) <54 for S/M, 70 for L/XL, 84 for 2XL/3XL>
If you need some more help visually, here my YouTube Video Tutorial!
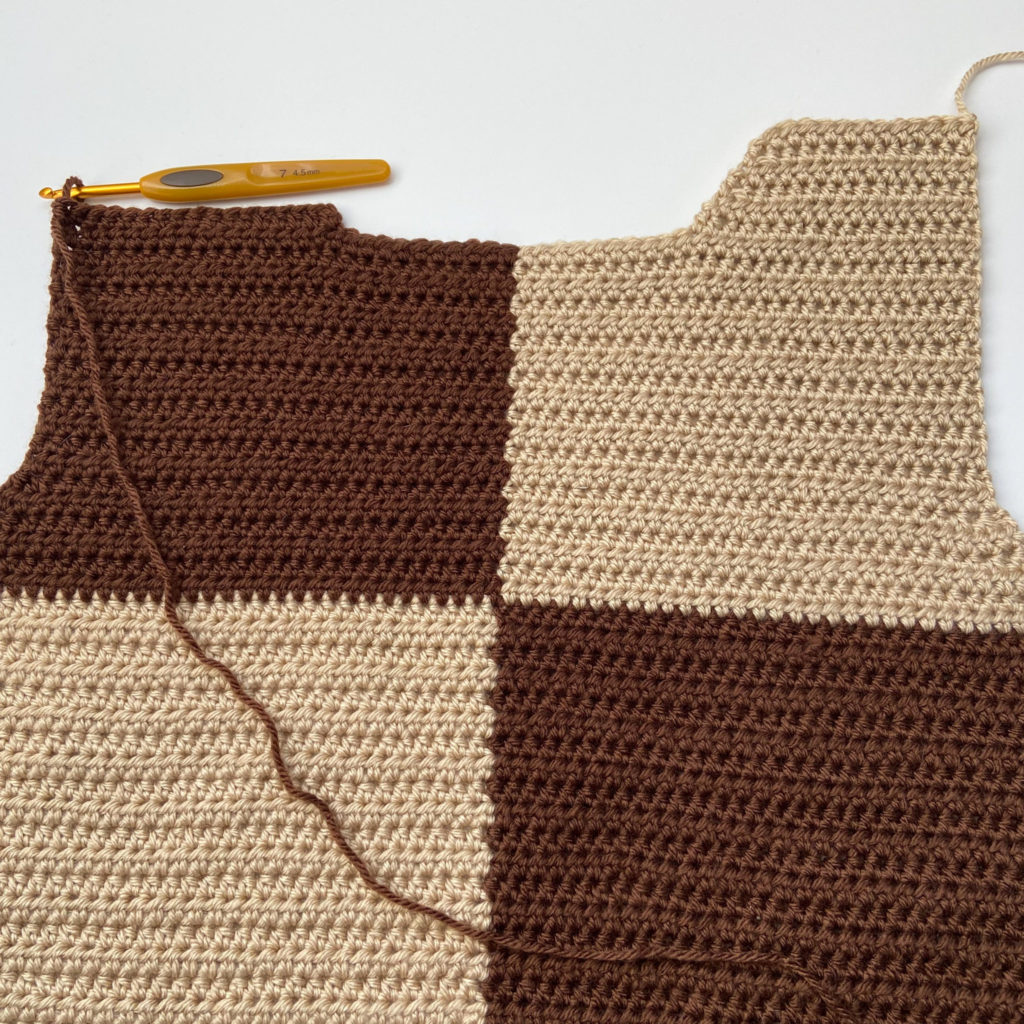
Left Strap
*don’t fasten off until instructed to.
Strap Row 1: Ch 1 and turn your work. Hdc in the next 16 (19, 22) sts. <16 for S/M, 19 for L/XL, 22 for 2XL/3XL>
Row 2: Ch 1 and turn your work. Skipping the first st hdc in the remaining 15 (18, 21) sts. <15 for S/M, 18 for L/XL, 21 for 2XL/3XL>
Row 3: Ch 1 and turn your work. Hdc in the next 13 (16, 19) sts, skip next st, hdc 1 in last st. <14 for S/M, 17 for L/XL, 20 for 2XL/3XL>
Row 4: Ch 1 and turn your work. Skipping the first st hdc in the remaining 13 (16, 19) sts. <13 for S/M, 16 for L/XL, 19 for 2XL/3XL>
Row 5: Ch 1 and turn your work. Hdc in next 11 (13, 15) sts, skip the next st, hdc 1 in the last st. <12 for S/M, 15 for L/XL, 18 for 2XL/3XL
Row 6: Ch 1 and turn your work. Skipping the first st hdc in the remaining 11 (14, 17) sts. <11 for S/M, 14 for L/XL, 17 for 2XL/3XL>
*Fasten off the strap here for size S/M.
Row 7: Ch 1 and turn your work. Hdc in the next 12 (15) sts, skip the next st, hdc 1 in the last st. <13 for L/XL, 16 for 2XL/3XL>
Row 8: Ch 1 and turn your work. Skipping the first st hdc in the remaining 12 (15) sts. <12 for L/XL, 15 for 2XL/3XL>
*Fasten off here for size L/XL.
Row 9: Ch 1 and turn your work. Hdc in the next 13 sts, skip the next st, hdc 1 in the last st. <14 for 2XL/3XL>
Row 10: Ch 1 and turn your work. Skipping the first st hdc in the remining 13 sts. <13 fro 2XL/3XL>
Fasten off here for size 2XL/3XL.
Right Strap
Strap Row 1: Count 16 (19, 22) sts in from the opposite end of your work and attach color A. Ch 1 and hdc in each st until the end of the row. <16 for S/M, 19 for L/XL, 22 for 2XL/3XL>
Row 2: Ch 1 and turn your work. Hdc in the next 14 (17, 20) sts, skip the next st, hdc 1 into the last st. <15 for S/M, 18 for L/XL, 21 for 2XL/3XL>
Row 3: Ch 1 and turn your work. Skipping the first st hdc in the remaining 14 (17, 20) sts. <14 for S/M, 17 for L/XL, 20 for 2XL/3XL
Row 4: Ch 1 and turn your work. Hdc in the next 12 (15, 18) sts, skip the next st, hdc 1 in the last st. <13 fro S/M, 16 for L/XL, 19 for 2XL/3XL>
Row 5: Ch 1 and turn your work. Skipping the first st hdc in the remaining 12 (15, 18) sts. <12 for S/M, 15 for L/XL, 18 for 2XL/3XL>
Row 6: Ch 1 and turn your work. Hdc in the next 10 (13, 16) sts, skip the next st, hdc 1 into the last st. <11 for S/M, 14 for L/XL, 17 for 2XL/3XL>
*Fasten off for size S/M.
Row 7: Ch 1 and turn your work. Skipping the first st hdc in the remaining 13 (16) sts. <13 for L/XL, 16 for 2XL/3XL>
Row 8: Ch 1 and turn your work. Hdc in the next 11 (14) sts, skip the next st, hdc 1 into the last st. <12 for L/XL, 15 for 2XL/3XL>
*Fasten off for size L/XL.
Row 9: Ch 1 and turn your work. Skipping the first st hdc in the remaining 14 sts. <14 for 2XL/3XL>
Row 10: Ch 1 and turn your work. Hdc in the next 12 sts, skip the next st, hdc 1 into the last st. <13 for 2XL/3XL>
Fasten off for size 2XL/3XL.
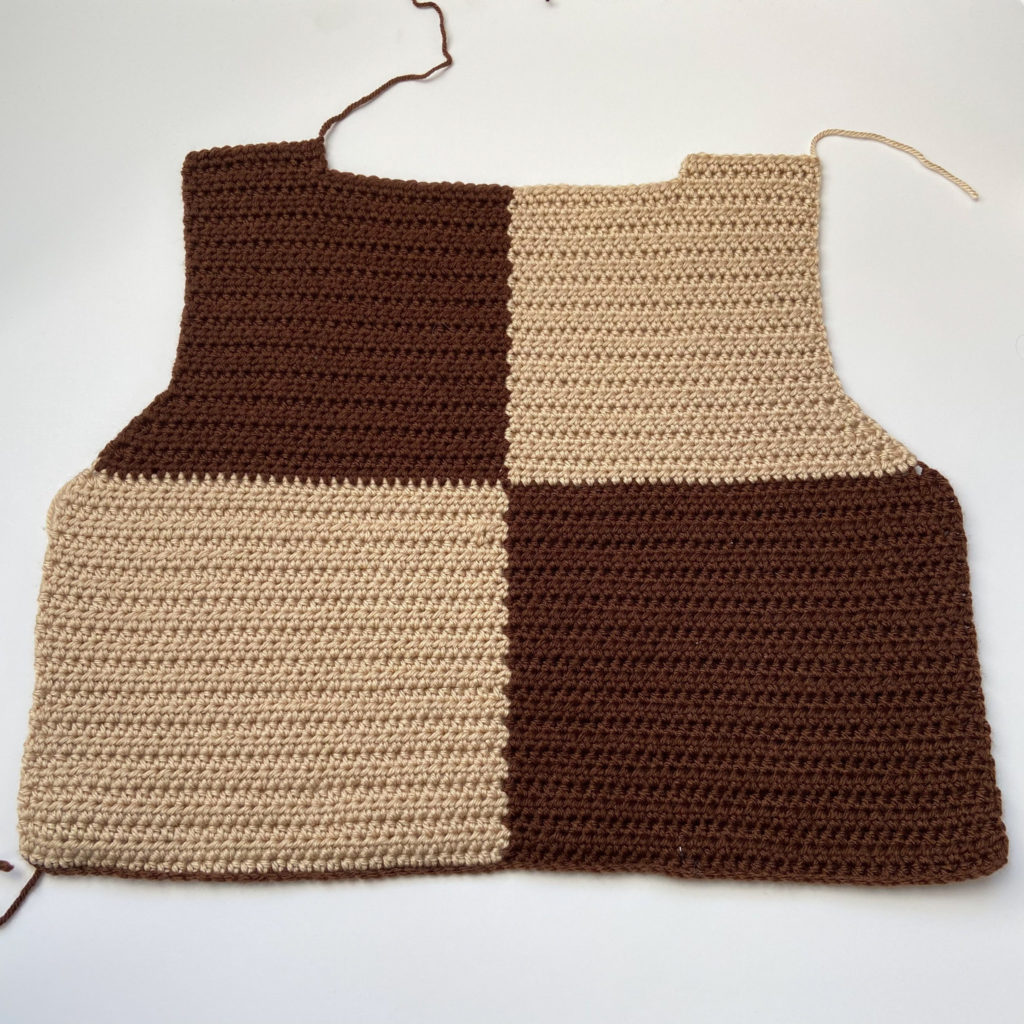
Back Panel
Repeat front panel rows 1-44 (1-48, 1-52)
Rows 45-48 (49-53, 53-58): Hdc in each st until the end of the row. <54 for S/M, 70 for L/XL, 84 for 2XL/3XL>
First back panel strap
Strap Row 1: Ch 1 and turn your work. Hdc in the next 11 (12, 13) sts. <11 for S/M, 12 for L/XL, 13 for 2XL/3XL>
Row 2: Ch 1 and turn your work. Hdc in each st until the end of the row. <11 for S/M, 12 for L/XL, 13 for 2XL/3XL>
Fasten off for first strap.
Second back panel strap
Strap row 1: Count 11 (12, 13) sts in from the opposite end of your work and attach color A. Ch 1 and hdc in each st until the end of the row.
Row 2: Ch 1 and turn your work. Hdc in each st until the end of the row. <11 for S/M, 12 for L/XL, 13 for 2XL/3XL>
Fasten off for second strap.
Face “right sides” toward each other and sew both panels together. Flip vest inside out.
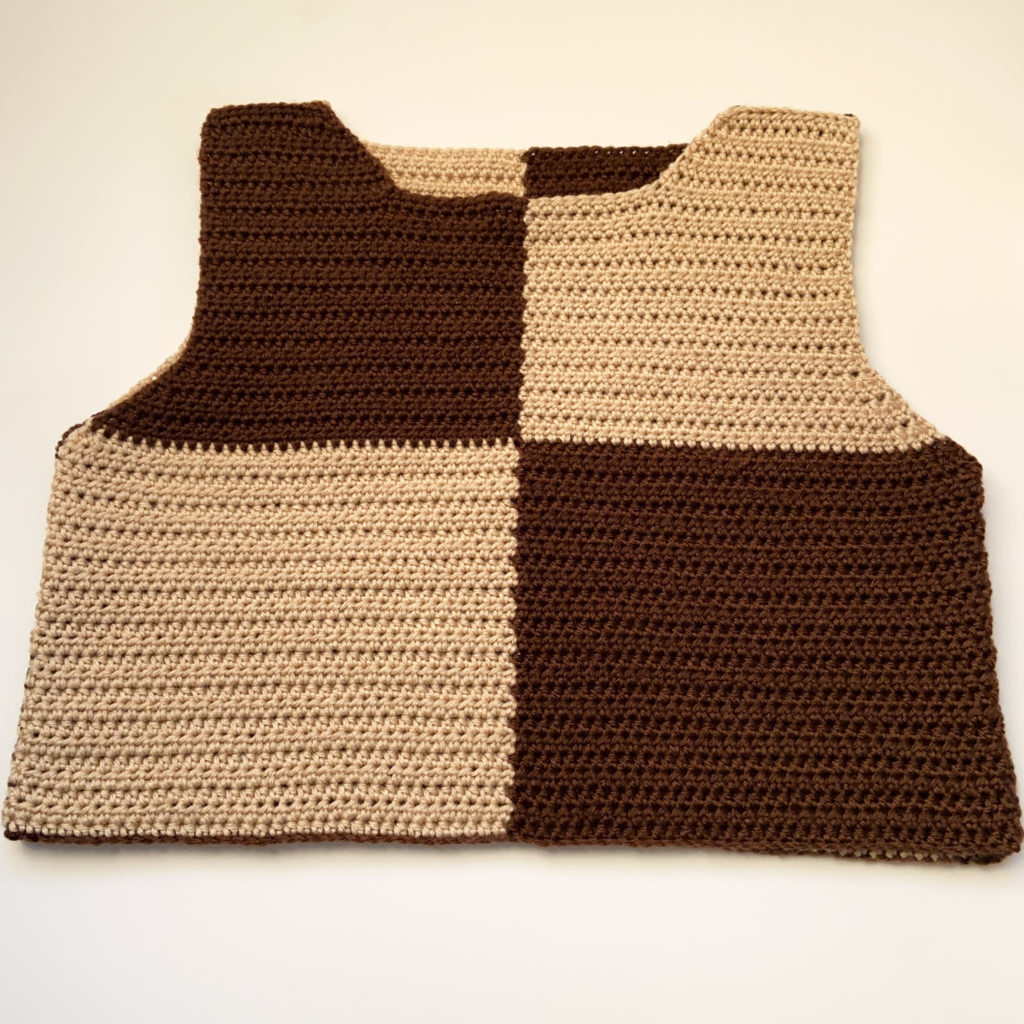
If you need more help visually, maybe my Video Tutorial can be of some help!
Ribbing
This ribbing it 100% optional! I was unsure if I was going to add ribbing at all because I really liked the look of the “no ribbing”. I asked my followers on my Instagram if they would prefer “ribbing” or “no ribbing” and it was pretty split down the middle, but a few of my followers suggested that I should do the ribbing anyways to show how its done and then let people who recreate the pattern choose for themselves whether they want the ribbing or not and I thought that was a wonderful idea!
In my Youtube video for this pattern, I show you how to crochet your ribbing straight to your vest but you don’t have to do it that way, you can just crochet 6 sts wide (for the bottom and neck of the vest and 4 sts wide for the armholes) by however many long you need for the length of the bottom (neck, or armholes) of your vest.
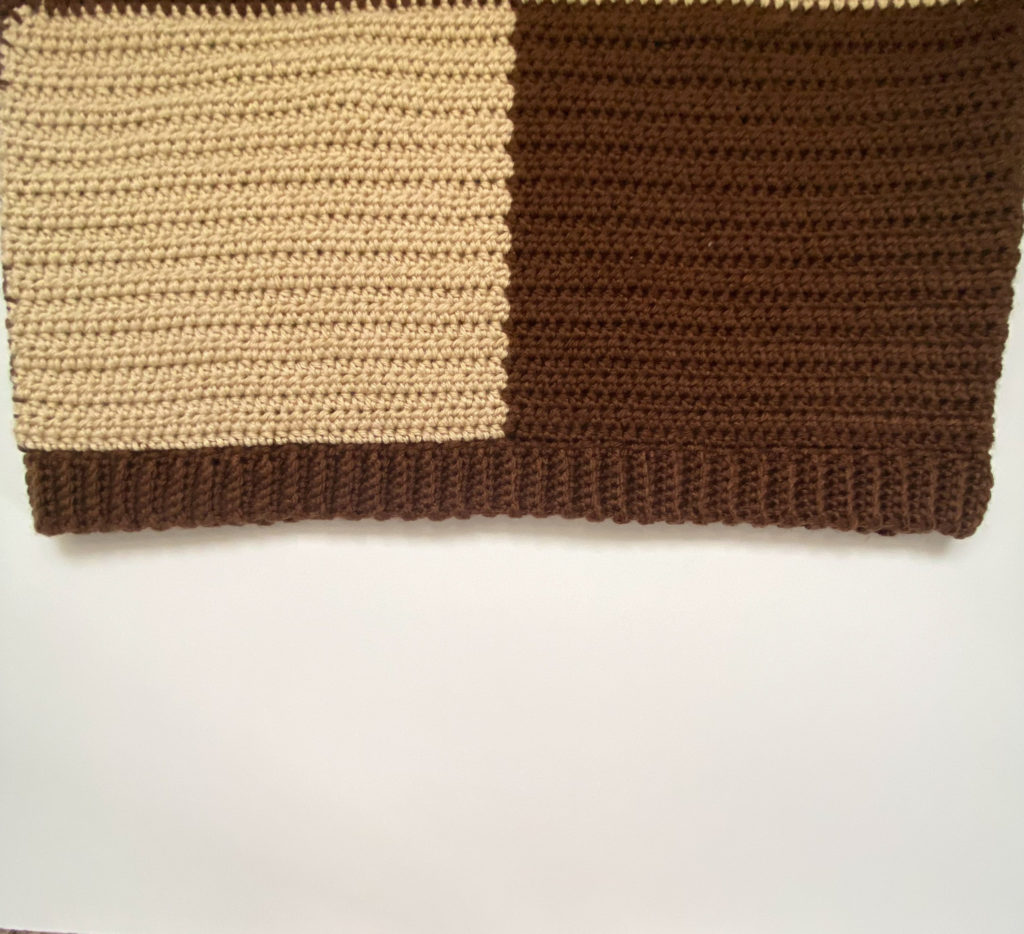
Bottom Ribbing
Attach yarn into any of the spaces/chains at the bottom of your vest and ch 7.
Sc into the 2nd ch from the hook, sc in remaining 5 ch, work 2 sl sts into 2 of the spaces/chains from the bottom of the vest, turn your work, skipping the sl sts you just made and *sc blo into the next 6 sts, turn your work, ch 1 and sc blo in to next 6 sts, work 2 sl sts into 2 of the spaces/chains, turn your work, *repeat until you make it around the whole bottom of your vest.
Fasten off and sew/connect ribbing ends together.
Armhole Ribbing
Attach yarn into any of rows around the armholes and ch 5.
*Since around the armholes there are not defined stitches, we will be working into each row as if it were a stitch.
Sc into the 2nd ch from the hook, sc in remaining 3 ch, work 2 sl sts into the next 2 rows, turn your work, skipping the sl sts you just made and *sc blo into the next 4 sts, turn your work, ch 1 and sc blo in to next 4 sts, work 2 sl sts into the next 2 rows, turn your work, *repeat until you make it around the whole armhole of your vest.
Repeat for 2nd armhole.
Fasten off and sew/connect ribbing ends together.
Neck Ribbing
Attach yarn into any of the spaces/chains at the bottom of your vest and ch 7.
*Around the neck you will be working in a combination of stitches and rows (due the the straps).
Sc into the 2nd ch from the hook, sc in remaining 5 ch, work 2 sl sts into 2 of the sts/rows, turn your work, skipping the sl sts you just made and *sc blo into the next 6 sts, turn your work, ch 1 and sc blo in to next 6 sts, work 2 sl sts into 2 of the sts/rows, turn your work, *repeat until you make it around the neck hole.
Fasten off and sew/connect ribbing ends together.
If you’re having some trouble, maybe my Video Tutorial can help!
For “Mohair”/Fluffy Yarn Version…
I followed almost all the same instruction as the original version, even the same hook size, but I took a few stitch off on each size of the vest and added a few extra rows to compensate for the “no ribbing” (You don’t have to do this, I just wanted it to be a bit more fitted and look like a tank instead of a vest).

For Size S/M…
Subtract 8 stitches from your foundation chain from 71 to 63 (31 stitches in each color block) and work 2 more rows before changing your block colors from 25 rows to 27 rows.
For Size L/XL…
Subtract 8 stitches from your foundation chain from 87 to 79 (39 stitches in each color block) and work 2 more rows before changing your block colors from 28 rows to 30 rows.
For Size 2XL/3XL…
Subtract 8 stitches from your foundation chain from 101 to 93 (46 stitches in each color block) and work 2 more rows before changing your block colors from 31 rows to 33 rows.
I finished up the top with single crocheting around the armholes and neck hole to give it a cleaner look, but again, you can skip this part.
Weave in all your ends and…
YOU’RE DONE!

If you recreate this vest, please tag or DM @hayhaycrochet on Instagram or TikTok so I can see, like and share!
Happy Crocheting~!