
🤍WELCOME HERE🤍

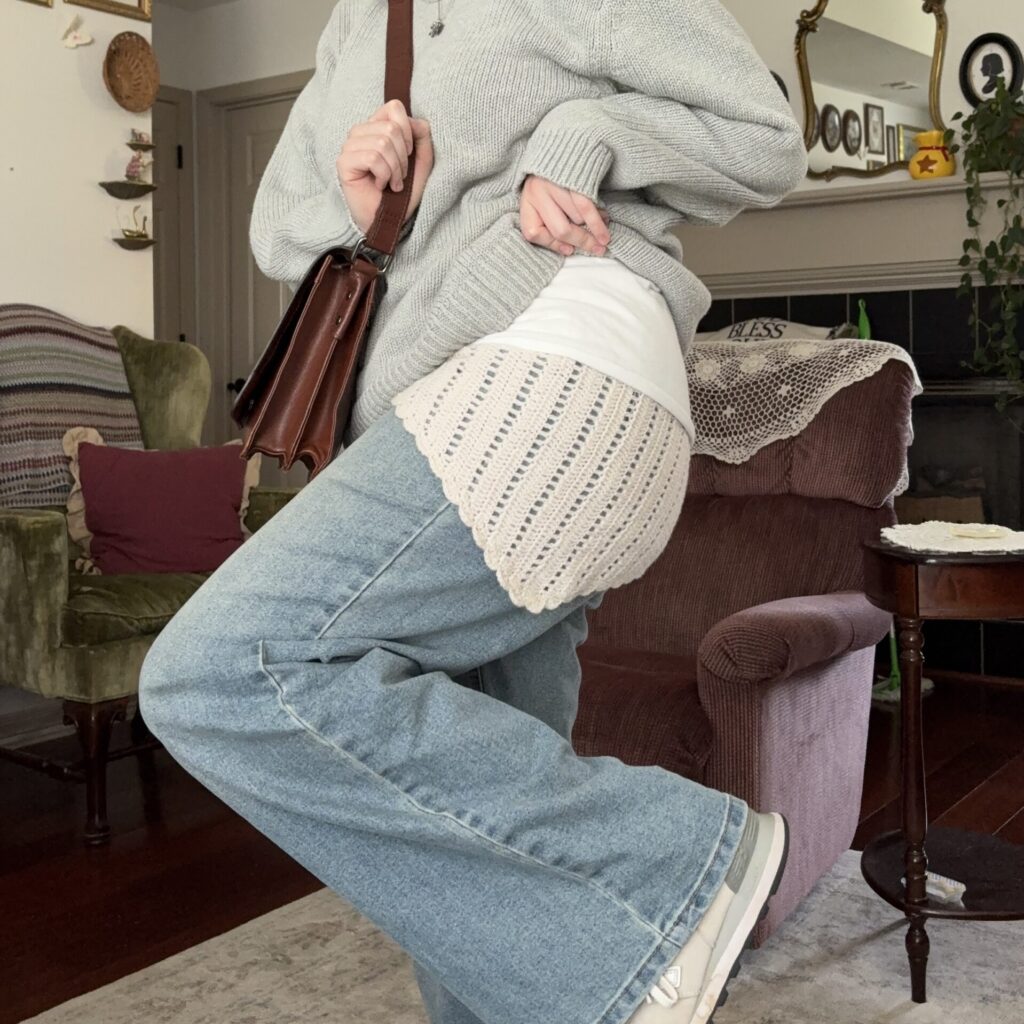
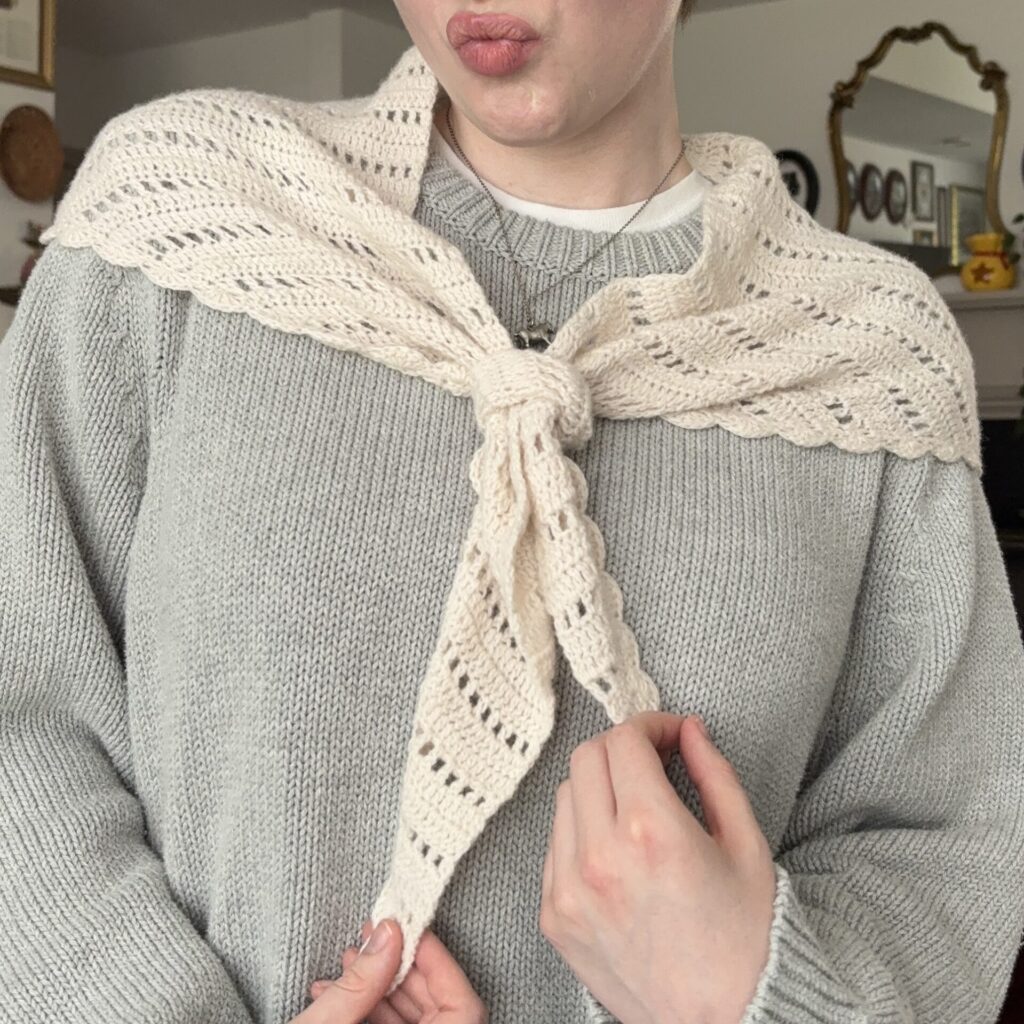
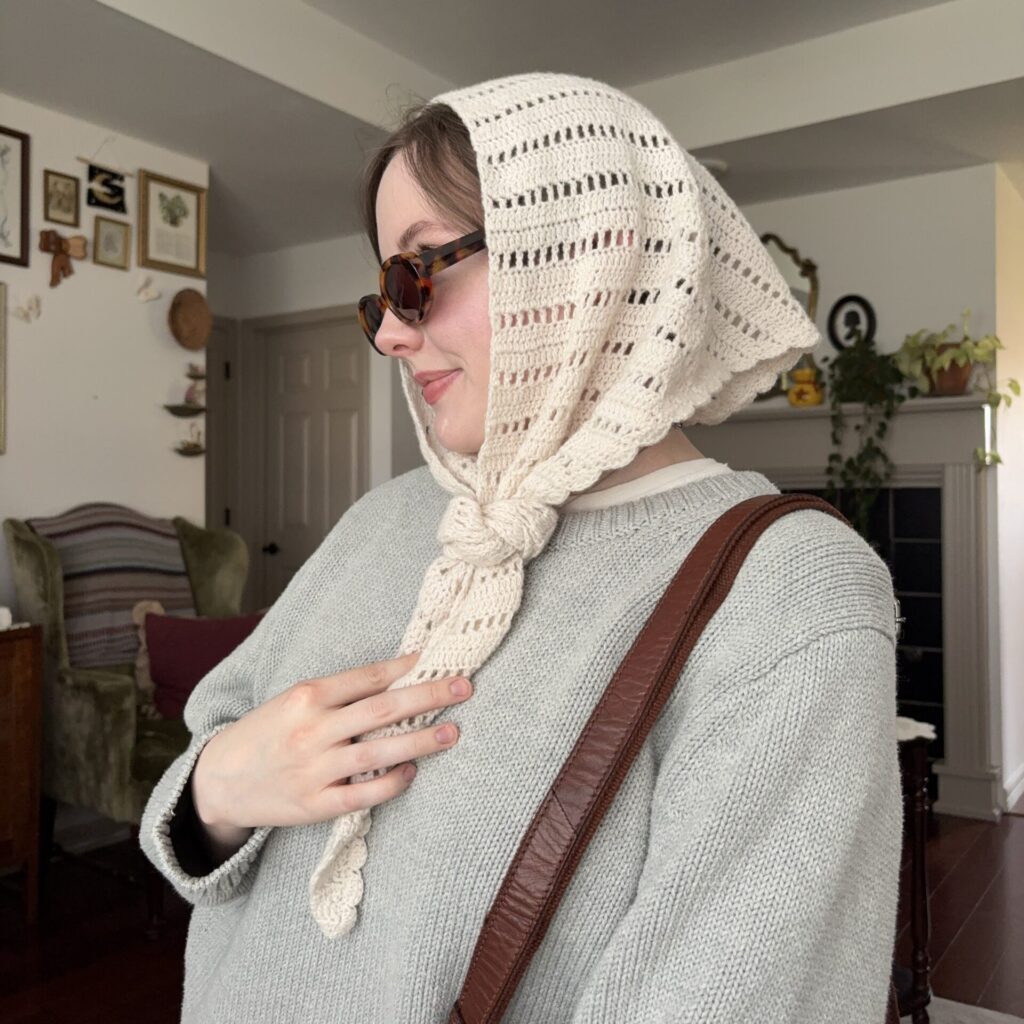
Hello there! In todays pattern I am going to share how to make another new favorite accessory of mine and its the ✨Everyday Scarf✨! I call it the “Everyday Scarf” because it can be worn pretty much everyday in just about everyway! It is SO versatile, can be worn on your head, neck OR hip/waist (that’s how to cool Pinterest girls like to wear it).
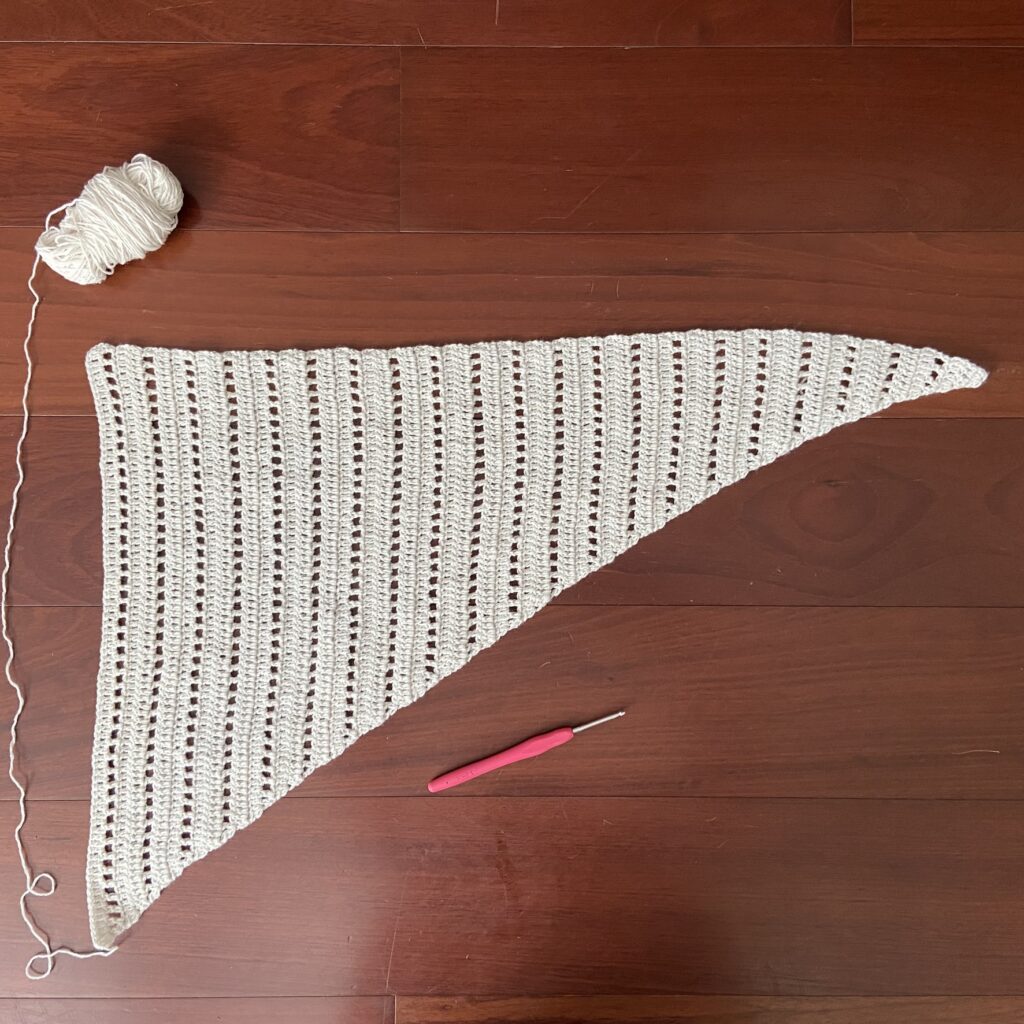
This simple triangle scarf is overall very easy to whip up. The pattern is repetitive, which that is something I much enjoyed when I was creating this pattern while in the NICU with my son because I wanted a very “mindless” project where I didn’t need to think too much.
Now that we are home from the hospital (PRAISE THE LORD🤲) I have been working on this scarf, pattern and tutorial every small chance I have. Making this pattern has proven to be quite the challenge; the challenge not in the complexity of the design (as I have already mentioned, it is very easy), but in finding the time with a newborn around 😅.
Anywho, without further ado, LET’S GET STARTED!
Materials
YARN
I used Knitting for Olive Merino in the color “Cloud”
This is a fingering weight yarn. But you can work this pattern with ANY weight yarn, it just all depends on the look your going for. Many different weights and types of yarn will give a similar outcome.
HOW MUCH YARN?
I used approx. 82 grams of yarn (about 1 and 1/2 skeins).
Scissors (nice and SHARP)
Darning Needle (my FAVES!! make seaming and weaving in ends so much easier because of the bent tip)
Stitches + Abbreviations
Ch = Chain
Dc = Double Crochet
St(s) = Stitch(es)
Sk St = Skip a Stitch
Inc = Increase
Rep = Repeat
Sc = Single Crochet
Dc2tog = Double Crochet 2 (stitches) Together
Dc3tog = Double Crochet 3 (stitches) Together
Pattern Notes
*This Pattern uses US crochet terms
The Everyday Scarf Pattern
Ch 3.
Row 1: Work 3 dc into the 3rd ch from the hook.
Row 2: Turn your work and ch 2. Work 1 dc into the next 2 sts, work a dc inc into the last st.
Row 3: Turn your work and ch 2. Work a dc inc into the first st, work 1 dc into the next 3 sts.
Row 4: Turn your work and ch 2. Work a dc into the first st, *ch 1, sk st, work a dc into the next st, *rep 1 more time. Ch 1 and work another dc into that same last st.
Row 5: Turn your work and ch 2. Work a dc inc into the first st, work 1 dc into each of the remaining sts (and ch spaces).
Row 6: Turn your work and ch 2. Work 1 dc into each st until the last st, work a dc inc into the last st.
Row 7: Turn your work and ch 2. Work a dc into the first st, ch 1 and work another dc into that same st, *ch 1, sk st, work a dc into the next st, *rep until the end of the row.
Row 8: Turn your work and ch 2. Work 1 dc into each st and ch space until the last st, work a dc inc into the last st.
Row 9: Turn your work and ch 2. Work a dc inc into the first st, then work 1 dc into each of the remaining sts.
Row 10: Turn your work and ch 2. Work a dc into the first st, *ch 1, sk st, work a dc into the next, *rep until last st. Ch 1 and work another dc into that same last st.

Repeat rows 5-10 until you have 65 rows total (you can make more or less rows, whatever you prefer for your scarf).
Decreasing
*Please refer to my YouTube Tutorial and skip ahead to the “decreasing” timestamp to better visualize the decrease on the mesh stitch rows.
Row 66: Turn your work and ch 2. Dc2tog, work 1 dc into each st until the end of the row.
Row 67: Turn your work and ch 2. Work a dc into the first st, *ch 1, sk st, work a dc into the next, *rep until there are 3 sts left*. Ch 1, sk st and dc2tog with a sk st/gap in-between decrease.
(*you may see 4 sts and be confused, but that st before your last 3 sts is a “sk st” from the ch 1 you just made. Only work with the 3 last stitches of the row.)
Row 68: Turn your work and ch 2. Dc2tog, work 1 dc into each st until the end of the row.
Row 69: Turn your work and ch 2. Work 1 dc into each st until the last 2 sts, dc2tog.
Row 70: Turn your work and ch 2. Dc2tog with a sk st/gap in-between decrease (refer to YouTube Tutorial if you have trouble visualizing mesh st decrease), *ch 1, sk st, work a dc into the next, *rep until the end of the row.
Row 71: Turn your work and ch 2. Work 1 dc into each st until the last 2 sts, dc2tog.
Row 72: Turn your work and ch 2.Dc2tog, work 1 dc into each st until the end of the row.
Row 73: Turn your work and ch 2. Work a dc into the first st, *ch 1, sk st, work a dc into the next, *rep until there are 3 sts left*. Ch 1,sk st and dc2tog with a sk st/gap in-between decrease.
Repeat rows 68-73 until you have 3 sts total remaining.
Row 130: Turn your work and ch 2. Dc3tog (refer to YouTube tutorial if you need help on how to dc3tog).
Scallop Edging
Working only on the side of the scarf with the pointed edge, not the flat edge.
Row 1: Ch 1. Work 2 sc into the side of every dc.
Row 2: Ch 1 and sl st into the first st of the row. Sk st, work 5 dc into the next st ,sk st, sl st into the next st, *sk st, work 5 dc into the next st, sk st, sl st into the next st, *rep until the end of the row.
Fasten off.
Weave in all your ends.
Optional: block your scarf (for a much better drape) and then…
…YOU’RE DONE!
If you recreate the Everyday Scarf, please tag or DM @hayhaycrochet on Instagram so I can see, like and share!

Just wanted to let you know how grateful I am for your tutorials and written patterns! I learned to crochet from your videos and the only items I’ve done are from your site since they’re so easy to follow.
The article is good and educational. The site is useful and valuable.
It is so cute