
🤍WELCOME HERE🤍
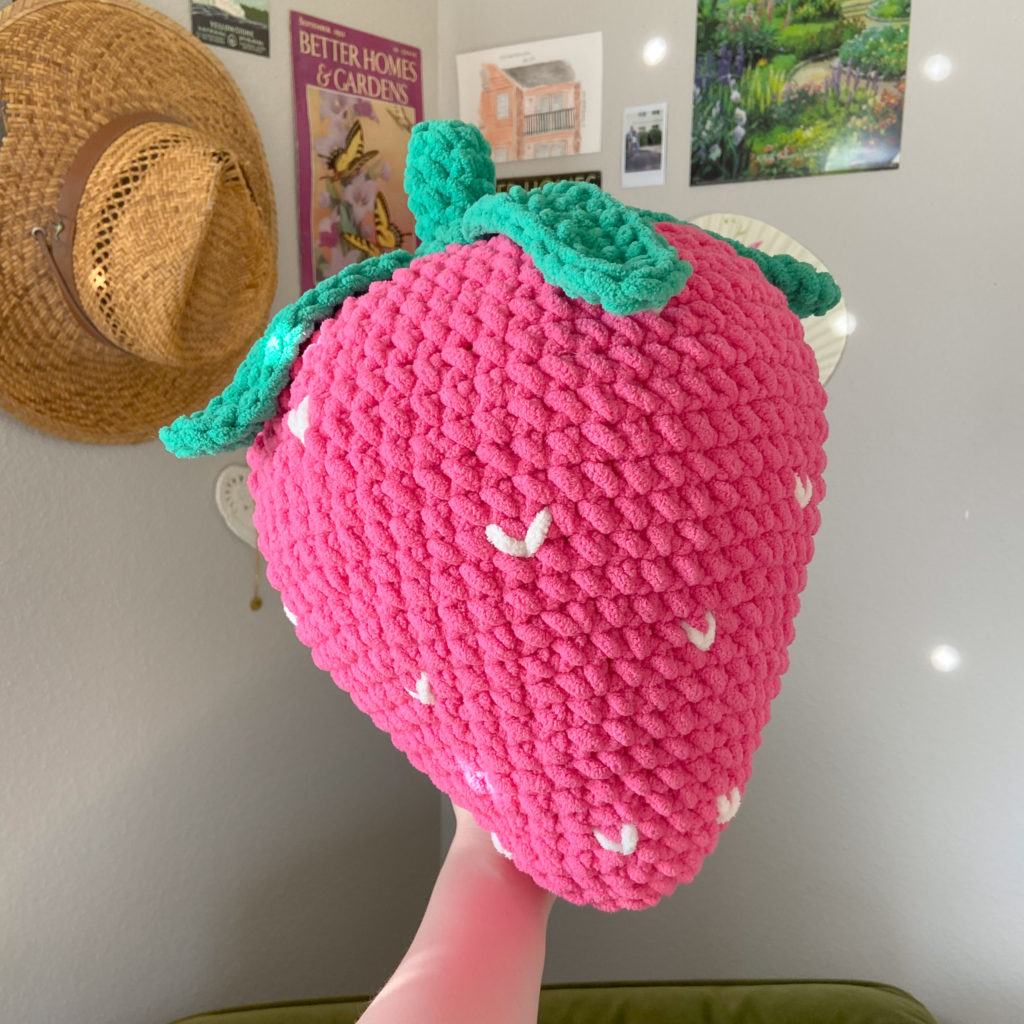
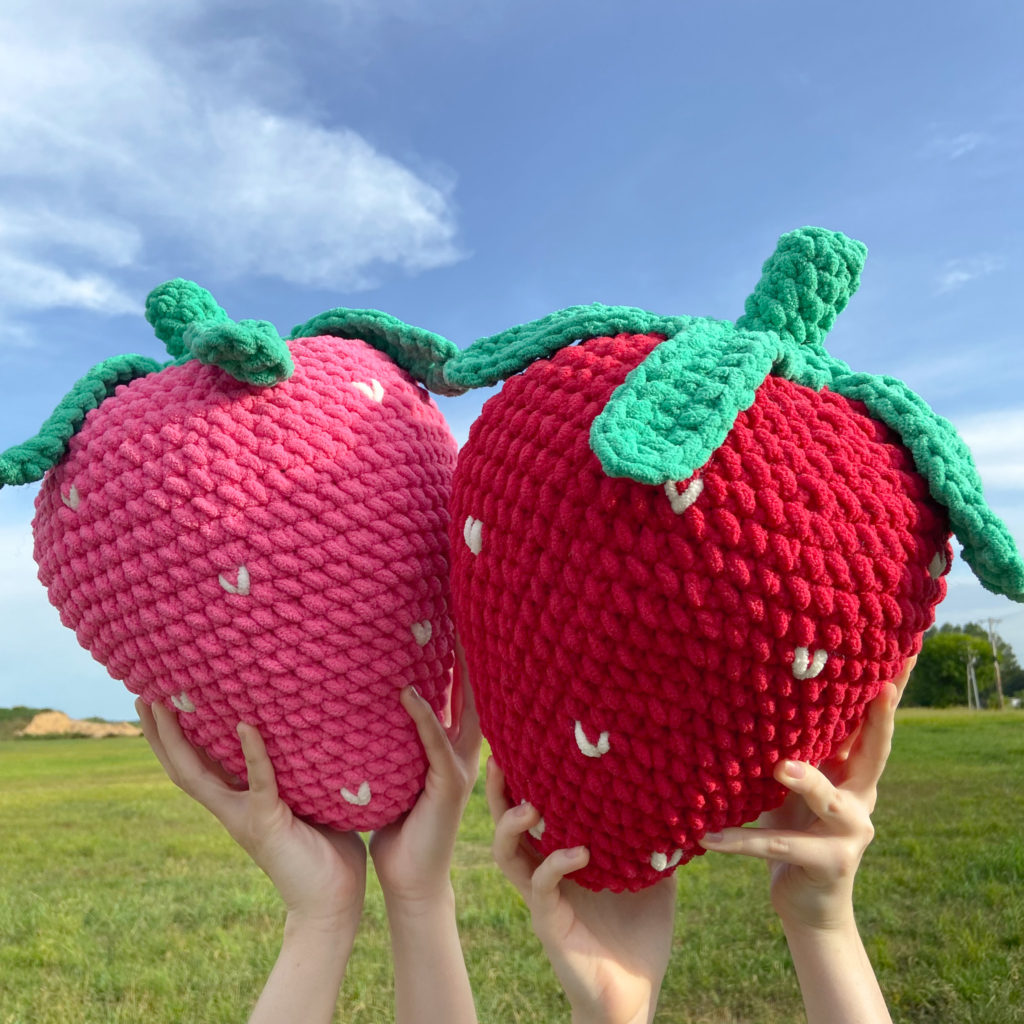
Hello There! Today I am sharing a HIGHLY requested pattern today and that’s the Giant Strawberry Plushie!🍓✨
This post may contains affiliate links.
Since showing this cutie plush on my Instagram and TikTok about a month ago, I have got TONS of questions every day since then about when I am going to release the pattern for it, and today is the day!
If you’re a long time follower here, you know that I mostly make patterns for clothing and not amigurumi/toys, so when working on this strawberry and trying to make it look exactly how I pictured it, it took a lot longer than I anticipated.
I love how it came out and am so excited to share it with all of you now! SO, without further ado, LET’S GET STARTED!
Video Tutorial
MATERIALS
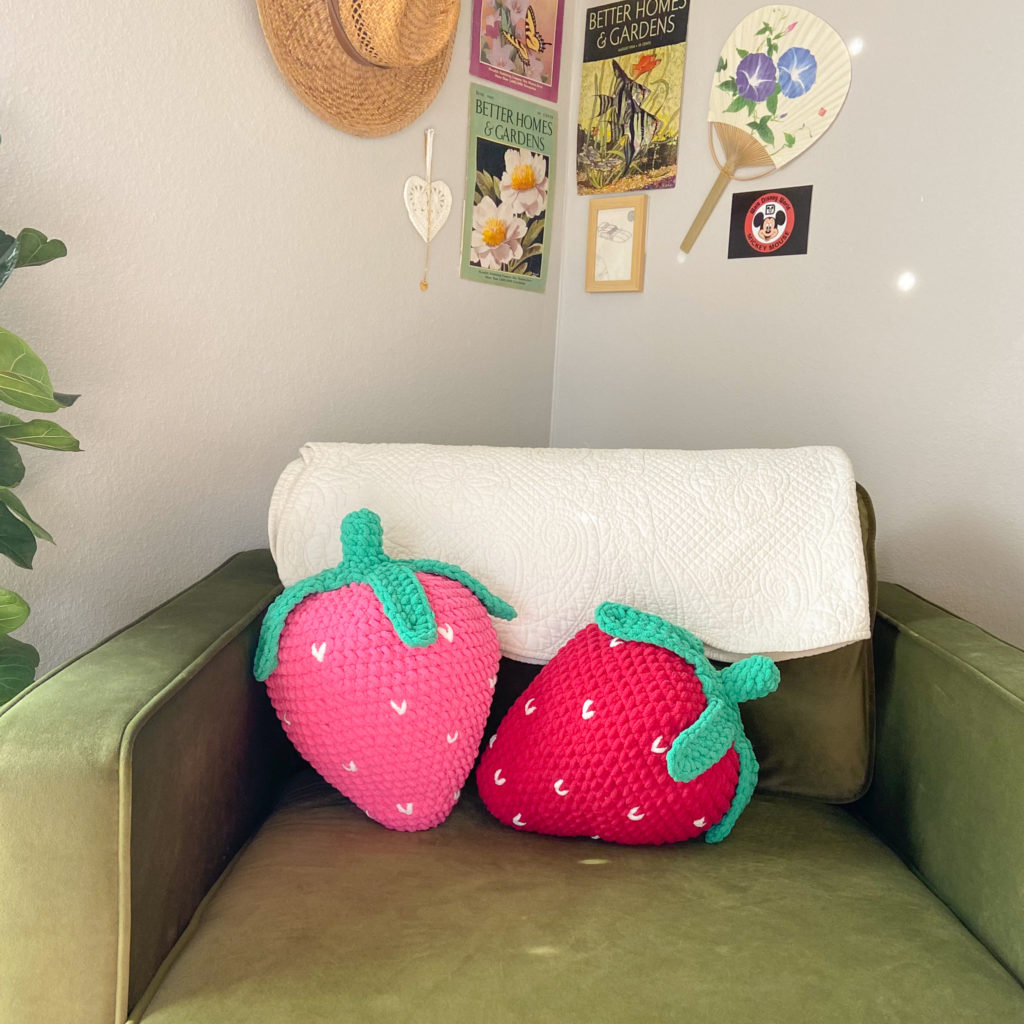
Weight 6 Yarn – I used Bernat Blanket Yarn in the colors “Race Car Red”, “Go Go Green”, “Pixie Pink” and “Vanilla.” I used less than an entire skein for each color, there should be enough left over to make a second strawberry from the same skeins.
Scissors – Small, cute and sharp!
Stitch Markers – Love these because they are secure and won’t fall out of your work.
Darning Needle – my FAVES 💕
STITCHES + ABBREVIATIONS
Ch = Chain
Sc = Single Crochet
St(s) = Stitch(es)
Rep = Repeat
Inc = Increase
Dec = Decrease
BLO – Back Loop Only
FLO = Front Loop Only
PATTERN NOTES
*This Pattern follows US crochet terms
*Number of stitches indicated between “<>”. E.g. “<64 stitches total>“.
Strawberry Plushie Pattern
Main Strawberry Body
Make a Magic Ring.
Round 1: Work 8 sc into the Magic Ring. <8>
Round 2: Work 2 sc into each st until the end of the round. <16>
Round 3: *Work 1 sc, work 1 inc, *rep until the end of the round. <24>
Round 4-5: Work 1 sc into each st until the end of the round. <24>
Round 6: *Work 1 sc into the next 2 sts, work 1 inc, *rep until the end of the round. <32>
Round 7: Work 1 sc into each st until the end of the round. <32>
Round 8: *Work 1 sc into the next 3 sts, work 1 inc, *rep until the end of the round. <40>
Round 9-10: Work 1 sc into each st until the end of the round. <40>
Round 11: *Work 1 sc into the next 4 sts, work 1 inc, *rep until the end of the round. <48>
Round 12: Work 1 sc into each st until the end of the round. <48>
Round 13: *Work 1 sc into the next 5 sts, work 1 inc, *rep until the end of the round. <56>
Round 14-15: Work 1 sc into each st until the end of the round. <56>
Round 16: Work 1 sc into the next 6 sts, work 1 inc, *rep until the end of the round. <64>
Round 17-21: Work 1 sc into each st until the end of the round. <64>
Round 22: *Work 1 sc into the next 6 sts, work 1 dec, *rep until the end of the round. <56>
Round 23: Work 1 sc into each st until the end of the round. <56>
Round 24: *Work 1 sc into the next 5 sts, work 1 dec, *rep until the end of the round. <48>
Round 25: *Work 1 sc into the next 4 sts, work 1 dec, *rep until the end of the round. <40>
Round 26: *Work 1 sc into the next 3 sts, work 1 dec, *rep until the end of the round. <32>
Round 27: *Work 1 sc into the next 2 sts, work 1 dec, *rep until the end of the round. <24>
Now is a good time to stuff your strawberry!
Round 28: *Work 1 sc into the next st, work 1 dec, *rep until the end of the round. <16>
Round 29: Work decreases in every st until you are able to close the remaining hole.
If theres still a small hole, close it up with a darning needle and yarn
Fasten off.
Check out my Video Tutorial to see how I make the “seeds” for the strawberry. I essentially just make “V’s/Heart” shaped stitches wherever I feel like I want seeds.
Stem and Leaves
Make a Magic Ring
Round 1: Work 8 sc into the magic ring. <8>
Round 2: Working into the BLO, work 1 sc into each st until the end of the round. <8>
Round 3-5: Working into the sts normally now, work 1 sc into each st until the end of the round. <8>
Round 6: Working into the FLO, work 2 sc into each st until the end of the round. <16>
Round 7: Work 1 sc into the next 2 sts, *ch 10, work 1 sc into the 2nd ch from the hook, work 1 sc in each ch until the end of the ch, sc 3, *rep until the end of the round.
Round 8: Sc all the way around your work. When you come to the top/middle of each leaf, work 5 sc into that same st.
Slip Stitch into the first st of the round.
Fasten off and sew to the top of your strawberry.
If you are having trouble with the leaf part or wanna see how to sew it to the strawberry, check out my Video Tutorial (linked below) for more help on how to create it!
Weave in your ends and… YOU’RE DONE!
If you recreate this strawberry, please tag or DM @hayhaycrochet on Instagram or TikTok so I can see, like and share!


Thank you for your great pattern, i love it!!!